Daring Bakers finally…..made MACARONS .
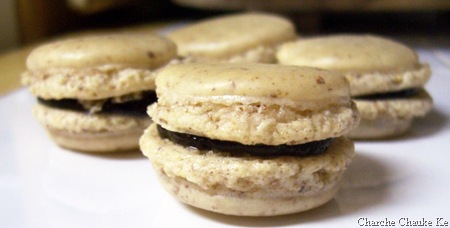
PLAIN but nevertheless ;-)…..Roasted almond macarons with chocolate ganache
If you have been reading even one food blog these days, you cannot escape macarons ( A good history lesson here 😉 ) I can speak for the food blogosphere , Macarons are a rage these days. I had been dreaming of eating these and dreading baking these myself. I kept reminding the husband what is a must eat…..whenever we visit Paris 🙂 . Mon Paree is a soft spot with me (as anyone who knows me is aware 😉 ). It’s one place I never want to visit on a budget 🙂 . David Lebovitz’s 10 Insanely Delicious things you shouldn’t miss in Paris will be a starting point 🙂 .
Anyway , moving on, Ami finally chose macarons for this month’s daring Bakers challenge, finally giving the weak hearted like me an incentive to try it out. The 2009 October Daring Bakers’ challenge was brought to us by Ami S. She chose macarons from Claudia Fleming’s The Last Course: The Desserts of Gramercy Tavern as the challenge recipe.
In Ami’s words “French macaroons are notorious for being difficult to master. Type in “macaroon,” “French macaroon” or “macaron” in your search engine of choice, and you will be inundated not only with bakeries offering these tasty little cookies, but scores and even hundreds of blogs all attempting to find the perfect recipe, the perfect technique. Which one is right? Which captures the perfect essence of macaroons? The answer is all of them and none of them. Macaroons are highly subjective, the subject of passionate, almost Talmudic study and debate. Chewy? Crisp? Age your egg whites? Ground the nuts or use nut meal or nut flour? Cooked sugar syrup, or confectioners’ sugar? In the words of a therapist, what do you think is the ideal macaroon? The answer lies within you.
Will French macaroon supplant the cupcake as the next sweet trend? There’s no way to know. I couldn’t have predicted the resurgence of leggings, yet here they are.”
I am sorry Ami , I did not use the recipe given. I read each and every post on the daring bakers forum and everybody seemed to be getting more success with Helen‘s recipe and so…….I decided to tread carefully on my first experiment.
Oh..I have come to know that these are often called macaroons in United States though they also refer to another coconut cookie as well.
Ok ….now to my “Hurrah” moment. I got it right the first time. Reason: I have made it a 100 times in my head. It was completely different when I actually made it yet I knew what I was doing. What I should be doing and what can lead to what. Two people require special mention and thanks as without them, I would not have been able to complete the challenge: 1. Helen of Tartelette and 2. Audax Artifex of Audax Artifex. The recipe and instructions I used to make my first macarons are Helen‘s. The explanations, clarifications, warnings and encouragement……..even conversions are from Audax. He provided so much information that I did not have to even use my brains for menial conversions.
Roasted Almond macarons: (Makes approx. 11 macarons and hence around 22 shells)
-
Egg White 1 (approx. 32 g …aged 4 days in the refrigerator) brought to room temperature before whipping
-
Icing Sugar 64 g
-
Granulated Sugar 16 g (3 1/2 tsp. )
-
Roasted almond meal 35 g
1. I measured these with my tipsy weighing scale (which my kids have fiddled with well) and the least count of which is 25 g …….so do not get deterred by the weighing scale (oh…only if you are like me ) and take the plunge. It was fun :-).
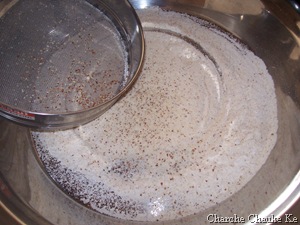
2. First I toasted the almonds under the broiler and kept checking every two minutes. When the almonds were browned uniformly, removed them for the oven and let them cool. Once the almonds were cool, I used my blender to grind them along with the icing sugar. This helps the almonds not clump up. Audax also mentions that the grinder should not get hot. Well! mine did…..I was scared but after sifting, the mix seemed fine to me.
Sifted Ground almonds and icing sugar
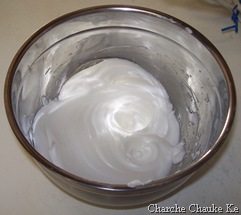
3. I whipped the egg white to a firm foam. Then added the granulated sugar till the egg whites were firm and glossy. I had heard that if the egg whites are whipped right, the bowl can be turned upside down and it won’t fall off. Well! I took the plunge with confidence and here we are:
Whipped Egg Whites…..without sugar and after addition of sugar
There is whipped egg in there….really……
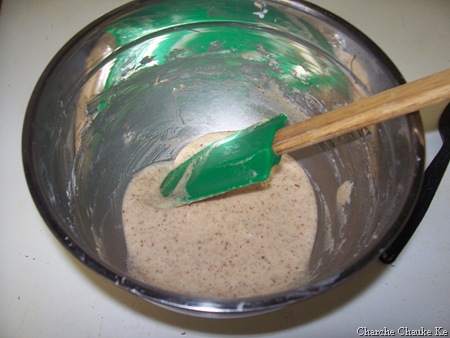
4. I then used this video to learn how to fold the almond mixture in the egg whites. I may have required 10-12 strokes to get it to magma like consistency. The key is that when the mix is dropped back in itself. It should mix with the mix soon and no trace should remain.
My final macaron batter
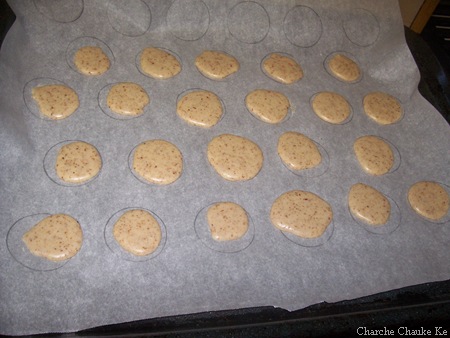
5. Then I piped it on marked parchment paper. Here was the problem. I did not have a big enough tip with my piping bag. Next time, I will just use a ziploc cut in a corner.
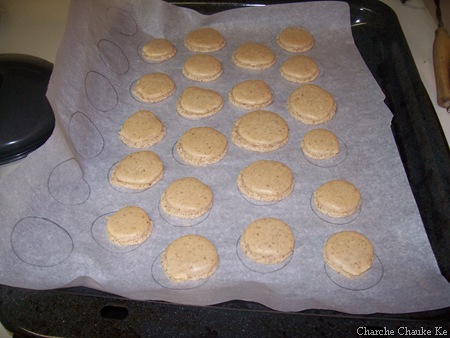
6. Left the piped macaron shells to dry out for half an hour. Up to an hour is fine I believe. Meanwhile preheat the oven to 300 F . When the shells have formed a skin on top, I used another baking tray under the piped one (another Audax tip…..to ensure even heating) and slid them in the oven. In spite of the fact that I had all kinds of sizes, baking for 10 minutes was good.
Please do not look at their amoebic shapes, they will be better next time……oh, this is after the skins have formed on top……….30 minutes after piping
7. When warm, the macarons like to stick well to the parchment paper. I used Helen’s tip and sprinkled/sprayed a few droplets of water under the parchment on the tray while still warm. Then I used a plastic knife to slide the macaron shells off the parchment. Worked very well for me.
Out of the oven… oh… what joy,
I was almost expecting flat grainy biscuits…..but I got this……..
and because I can do it………….U can too
Chocolate Ganache Recipe:
I used unsweetened chocolate cause I knew that the macaron shells are very sweet (yes I love licking all my cake batters 🙂 and by now know before hand , how the baked product will taste based on the batter)
-
Unsweetened chocolate 2 oz. grated or chopped fine
-
Sugar 1/4 cup
-
Butter 1 Tbsp.
-
Whipping Cream 1/4 cup
-
Vanilla extract 1/4 tsp.
1. Add chocolate , butter and whipping cream in a bowl.
2. Heat the whipping cream and sugar in a heavy bottomed pan on low heat. Do not let it boil or form a skin. Keep whisking to dissolve the sugar.
3. Add hot cream in the bowl with the chocolate and mix well. Whisk to achieve a smooth texture.
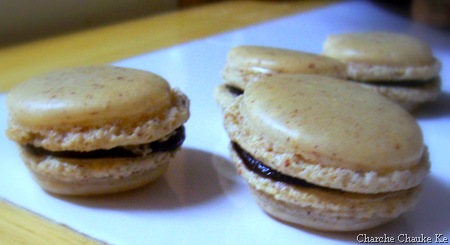
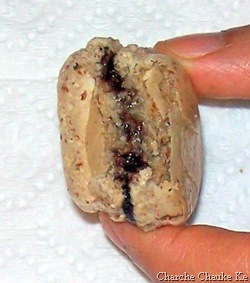
4. As it cools, the mixture thickens. Pipe it on top of half the shells. Cover the piped chocolate ones with plain shells and you are ready to munch.
Please do try one …………(These are all that were left by the time I could take pictures)
Bottom line is : Macarons are quite do-able. As Helen says…..” if you find a recipe that works for you, stick to it, no matter whose it is, especially if you are new to macarons and don’t make them that often.” I will stick with hers…….. 🙂 . My opinion is that one must not get intimidated by macarons and do try them at home unless you can afford Laduree‘s all the time :-). Some may find it too sweet but kids love it. Here we are in the sniffles season so kids taste buds are very difficult to please……macarons made my work easier as there were smiles all around. My son couldn’t say enough of “Thank you Mama” AND ‘I just want half more” . Well! if you have kids ….do make these………until we visit Paris ….that is……..I like to dream 🙂 .
Bad light……..but great taste
Before I close, I really must thank Ami for the challenge, Helen for such a foolproof recipe and Audax for the tremendous support. This has been a great challenge and I loved learning a great skill. I have 5 days aged 3 egg whites in he refrigerator. This time I will be playing as I am not that scared. Looking forward to the adventure. If I find the time, I will certainly update with better pictures.
Update Nov. 1 : I did forget the expenses; didn’t I ?
Expenditure :
Confectioner’s Sugar ……..$2.74 ……from Kroger (I am absolutely done with this store….too rude for me to handle)


