चर्चे चौके के Charche Chauke Ke

Hey! Join in the Kitchen Gossip!!

Archive for the ‘Baking Powder’ Category

Chinese Flower Steam Buns (Xiang Cong Hya Juan Bao)

Posted by vivnidhi on October 5, 2009

Trust me, I do not know what half the title says but these are delicious!

sep2_21

Bad picture …….once again, but these are good!!

Bread Baking Babes have been steaming this month. Trying to produce the best flower buns and each one’s a looker. Mine’s not a looker but was so good. Karen of Bake My Day steamed up a recipe from Global Baker by Dean Brettschneider.

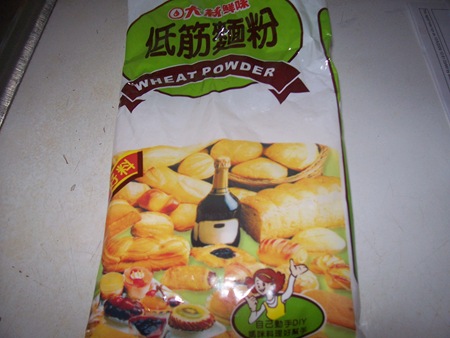
I read all the bread baking babes blogs before I went ahead with the recipe. This recipe calls for Chinese Flour which should be low gluten. I made a trip to our Chinese Store , got all the ingredients and that’s the best thing I did ;-). These came out perfect ……absolutely bread like……no chewiness……perfect soft breads. I was absolutely surprised….how could steaming create such fabulous buns……it was a transformation. Unfortunately, I do not have a cut shot, that would have said more than I can write. We were all so hungry, we just ate it up and forgot all about pictures :-). Anyway, bottom line, if you want to make these……get Chinese Flour :-).

oct_04

Low Gluten Chinese Flour……called “Weak Flour”

The Recipe:

makes 10 buns

Everywhere you go in China you see people eating steam buns, also known as mantong Typically Chinese, a sweet bread is combined with a savoury filling, such as red bean paste and barbecued pork, but take care and avoid using too much filling or the bun will fall apart during the rising and steaming stage. The baking powder helps to open up the texture and gives a little tenderness to the eating quality of the buns. If you can, use imported Chinese flour from a specialist Asian food market or store”.

Dough

300 g chinese flour (use low gluten flour such as cake flour)

15 g sugar

15 g butter

good pinch of salt

1/4 tsp baking powder

1/4 tsp active dry yeast

150 ml chilled water, placed in the refrigerator overnight ( I just put mine in  the freezer for 15 minutes )


Filling

rice bran oil, for brushing on dough (I used good old extra virgin olive oil 🙂 )

40 g finely chopped spring onions or chives

25 g finely chopped red chillies

salt to taste


To make the dough, place all the ingredients into a large mixing bowl and, using your hands, combine to form a very, very firm dough mass. Don’t be tempted to add any water or the steam buns will be flat after steaming.

Place the dough on a work surface and, using your rolling pin, roll out to a thin strip, fold this in half and roll again. Repeat this 10-15 times with a 30 second rest in between each time. This is a way of mixing a very firm dough, the dough will start to become smooth and elastic as a result of the rolling process.

Put the dough in a lightly oiled bowl and cover with plastic wrap. Leave in a warmish place (23-25C) for 15 minutes. Tip the dough onto a lightly floured surface. Using a rolling pin, roll out each piece to a 25cm square. {{this is strange…he never states that you divide the dough in this stage, so use and roll the one ball of dough you have}}

Brush the dough surface lightly with oil and sprinkle the chopped chives and chillies evenly over the dough. Season with salt.

Fold the dough in half and then cut into 2.5cm strips so that you end up with 10 folded strips. Stretch each strip and, starting at the folding edge, twist the two pieces of each strip over each other to form a rope.

Take the twisted rope and tie into a double knot, tucking the loose ends underneath. Place each bun with ends facing down on a 5cm square of non-stick baking paper** and cover loosely with plastic wrap. Prove for approximately 30-45 minutes in a warm place.

Bring a wok or saucepan of water to the boil with a bamboo steamer sitting on top. Remove the bamboo steamer lid and place the buns on the paper in the steamer 3-4 cm apart to allow for expansion during steaming. Replace the steamer lid and steam for 20 minutes. Repeat until all the buns have been steamed and are firm to the touch.

Karen‘s Notes: you might want to adjust the steaming time from 10-20 minutes, keeping the water at a low blub.

the paper: the pics in the book show him using paper circles, sort of perforated. (as in: paper circles with rather large holes in them). I’m using a regular steam pan with a metal insert and I preferred oiling the base of the metal insert not using any paper, re-oiling when needed. Another thing: I used a tea towel between the lid and the pan to catch any condensation.

I forgot all about the paper and just plain steamed mine. No problems ;-).

I am absolutely in love with garlic chives from Chinese store and so of course I got the authentic stuff.

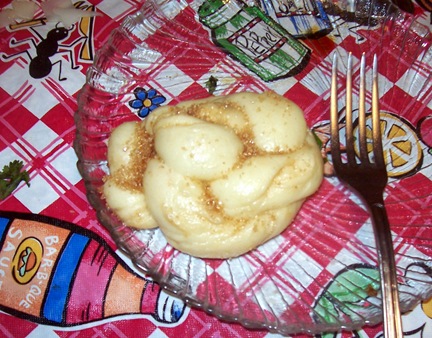
I also made a couple for the kids with turbinado sugar and they were gone in no time.

sep2_19

Chinese Flower Buns with Turbinado Sugar

I will certainly be making  these again. Thanks a lot Karen.  All I wish is that the recipe would at least not have butter and sugar in grams. It’s painful to measure such small quantities in my manual scale which has been even suffered in the hands of my kids 🙂 .

Expenditure:

Chinese Flour…….500 g……….. Chinese Store (Hua Xing)………….$ 2.39

Chives…………….1.03 lb……….Chinese Store (Hua Xing)………….$ 2.21

————————————————————————————————–

Total……………………………………………………………………..$ 4.60

Posted in --Extra virgin olive oil, -Chinese Flour (low gluten), -Garlic chives, -Olive Oil, -Red Chillies, -Turbinado Sugar, Baking Powder, Sugar, Yeast | Tagged: , , , | 1 Comment »

Black Bread

Posted by vivnidhi on September 7, 2009

100_3945

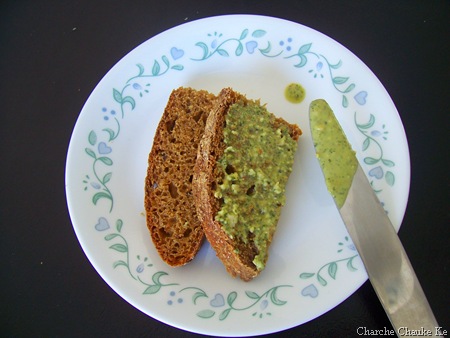
Russian Black Bread…We loved ours with pesto mayo sauce

The bread is black and I cheated too…….was that because I cheated………NO. Gorel of Grain Doe made a Russian Black bread this month for Bread Baking Babes. How she used a couple of recipes to invent this one is a very interesting read. I did not have any sourdough starter and used yeast….that’s my cheat ;-). Now, you think I would not buddy up those who bake bread?

It was such a different looking bread and I had never even heard of it, leave alone taste it.Result : We all loved it. Even when it started getting drier on the 4th day, the husband said ” I like it” :-). The recipe’s a keeper even if it requires more pre-planning than normal.

Black Bread – intermediate style

SOURDOUGH

  • Medium rye flour 300 g (10,6 oz)
  • Water 350 ml (1,5 cup)
  • Active sourdough culture* 2 Tbsp

SOAKER

  • Old bread**, toasted 100 g/3,5 oz
  • Coffee, ground 15 g/0,5 oz
  • Vegetable, neutral oil 25 g/0,9 oz
  • Molasses 60 ml/1/4 cup
  • Caraway seeds 2 tsp
  • Fennel seeds 1 tsp
  • Minced shallots 1 Tbsp

Water, hot 400 ml/1 2/3 cup

FINAL DOUGH

  • Medium rye flour 300 g/10,6 oz
  • High gluten bread flour 400 g/14,1 oz
  • Salt 20 g/0,7 oz (appr. 1 Tbsp)
  • Yeast
  • Fresh: 15 g/0,5 oz
  • Instant dry: 1,5 tsp (0,17 oz)

Soaker

  • All of the above
  • Sourdough
  • All of the above

* If you don’t have any active starter at hand, I think you can cheat by using a small amount (say 5 g fresh or 0,5 tsp instant dry yeast) instead.

**  Gorel used rye sourdough bread, but I guess any old unsweetened bread will do, or any old bread in general.

Sourdough

Mix the ingredients to the sourdough, cover the container with plastic and leave for 12–14 hours at room temperature.

Soaker

Toast the old bread in a toaster or in the oven. The bread should be browned, but absolutely not blackened. Dice the bread or just tear it in pieces and put it in a bowl. Add the rest of the soaker ingredients except the water. Heat the water to near boiling and pour over the soaker ingredients. Cover and leave for the same duration as the sourdough.

100_3937

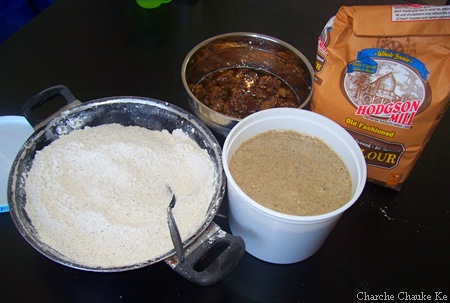
All set: Flour mix, Soaker and sourdough…and yes,  that’s my rye flour


Final dough

Mix the two flours in a separate bowl.

If using fresh yeast: Take a small amount of the soaker liquid and dissolve the yeast in it.

Add the yeast mixture OR the instant dry yeast, soaker, sourdough and salt to a mixing bowl.

Add half of the flour mixture and work the dough by hand or in machine. Continue to add about 100 ml or ½ cup of the flour mixture at a time and work until the flour is completely absorbed before you add the next round. The dough shall be firm but still quite sticky. You might not use all the flour, or you might need to add more flour, all depending on the flour used.

Place the dough in an oiled container, cover with plastic and leave for 2–3 hours or until doubled in size.

Shaping and proofing

Drizzle some rye flour on the table top and place the dough on top. If the dough is very sticky, pour just enough rye flour on top of it to make it possible to handle.

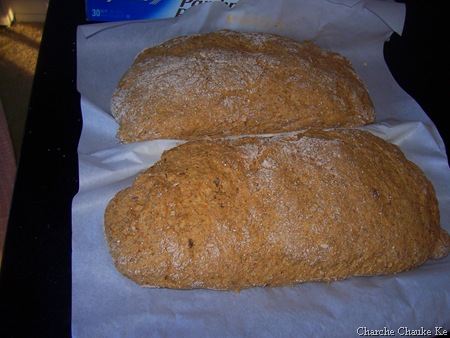
Divide the dough in two and shape the parts into oblong loaves. (I placed them on parchment paper to make it possible to just slide the loaves into the oven.) Stretch the surface using both hands to get a tight loaf. Use more rye if the dough is too sticky to handle.

Cover with a tea towel and leave for 60 minutes. Don’t over-proof! (Fire up the oven after 30 minutes to have it ready.)

100_3938

Sticky dough: After first proof

100_3940

Does this sticky dough proof quickly, this is after 55 minutes

Baking

Place an empty metal container in the bottom of the oven. Put in your baking stone or an empty baking sheet. Heat the oven to 225 °C/435 °F.

Put 3–4 ice cubes in the metal container.

Move the loaves to the hot stone or sheet. Bake for 10 minutes.

Open the oven door to vent out some moist. At the same time, lower the temp. to 200 °C/400 °F. Bake another 30-40 minutes or until they sound hollow when tapped underneath, or when the inner temperature has reached appr. 97 °C/207 °F.

Let the loaves cool down before you slice them. Eat with butter and maybe some sharp cheese, or why not cured salmon.

100_3941

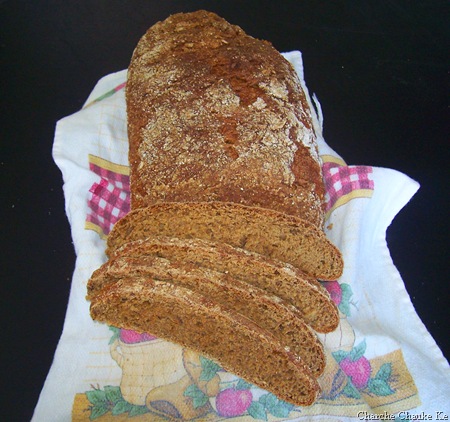
Russian Black Bread

This bread made some delicious veggie sandwiches for us with mayo and pesto. Thank you Gorel.

I’d like to send this to Susan of Wild Yeast as my first YeastSpotting entry.

Posted in - Bread Flour, -Caraway seeds, -Fennel seeds, -Rye Flour, -Vegetable Oil, Baking Powder, Coffee, Old Bread, Shallots, Sugar, Yeast | 7 Comments »

Daring Bakers July bring Cookies…….

Posted by vivnidhi on July 28, 2009

Vanilla at 180 x 180 (largest)brings…..

100_3688

The boy can’t stop himself 😉 Plum jam cookies and lots more…….

Jaana tha Japan , pahunch gaye Cheen…………Had to go to Japan , and I reached China…. You don’t get it……yeah…..oh well! the daring baker challenge this month was mallow cookies and milanos….long live Pepperidge Farm! I ended up making those and a fusion…..which we all absolutely loved.

These cookies pictured above are truly the best cookies I have ever made. If you liked and ate jam biscuits (called so in India) in your childhood, these cookies will bring those memories back. I surprised myself……..these tasted so good.

The July Daring Bakers’ challenge was hosted by Nicole at Sweet Tooth. She chose Chocolate Covered Marshmallow Cookies and Milan Cookies from pastry chef Gale Gand of the Food Network.

The mallow cookies were great, I would have never dreamt of making homemade marshmallows but homemade taste so………..good and you can flavor them just as you would want. Thanks a lot Nicole, for this challenge.The mallows biscuit was really delicious. The no. of cookies mentioned in the original recipe is all messed up….which actually worked in my favor 🙂 .  I loved it so much that I made some plum jam and filled them up and loved the result.

Milanos were quite a disappointment and I would certainly not want to make those again. The milanos dough was like tuiles batter yet not even that….I give up.

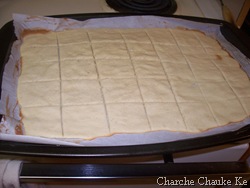
The husband was quite excited about Milano cookies and so I made them first, in fact packed a few for a friend, but it was a lot of effort in trying to make them the same size…..and the end result was not worth it… I just made about 2 dozen of them.After that I split the batter in half , spread on the parchment on the entire tray and baked for 5 minutes in the oven. Cut them with a pizza cutter in squares and back in oven for 5-7 minutes more. Same with the rest of the batter. Filled them up up with the chocolate ganache and anything with chocolate gets eaten here. I do not recommend this and will not be making them again 🙂 . I should mention the chocolate ganache tasted good and the husband even helped me zest the whole orange. What do you think…….I will need help again some other time too..I must not forget the dear husband 🙂

100_3679

Don’t they look cute…….

Milanos for friends…….hope they ate it up soon…..before they turned chewy…….oh no….boo hoo hoo

100_3682 100_3686

Rest of the Milanos……..:-)


Here come the mallows…..pretty good cookies , if one is fond of marshmallows. We are not too fond of them, yet no cookies left of the 28 I made.

The recipe:

Mallows(Chocolate Covered Marshmallow Cookies)
Recipe courtesy Gale Gand, from Food Network website

Prep Time: 10 min
Inactive Prep Time: 5 min
Cook Time: 10 min
Serves: about 2 dozen cookies

• 3 cups (375grams/13.23oz) all purpose flour
• 1/2 cup (112.5grams/3.97oz) white sugar
• 1/2 teaspoon salt
• 3/4 teaspoon baking powder
• 3/8 teaspoon baking soda
• 1/2 teaspoon ground cinnamon
• 12 tablespoons (170grams/ 6 oz) unsalted butter
• 3 eggs, whisked together
• Homemade marshmallows, recipe follows
• Chocolate glaze, recipe follows

1. In a mixer with the paddle attachment, blend the dry ingredients.
2. On low speed, add the butter and mix until sandy.
3. Add the eggs and mix until combine.
4. Form the dough into a disk, wrap with clingfilm or parchment and refrigerate at least 1 hour and up to 3 days.
5. When ready to bake, grease a cookie sheet or line it with parchment paper or a silicon mat.
6. Preheat the oven to 375 degrees F.
7. Roll out the dough to 1/8-inch thickness, on a lightly floured surface. Use a 1 to 1 1/2 inches cookie cutter to cut out small rounds of dough.
8. Transfer to the prepared pan and bake for 10 minutes or until light golden brown. Let cool to room temperature.
9. Pipe a “kiss” of marshmallow onto each cookie. Let set at room temperature for 2 hours.
10. Line a cookie sheet with parchment or silicon mat.
11. One at a time, gently drop the marshmallow-topped cookies into the hot chocolate glaze.
12. Lift out with a fork and let excess chocolate drip back into the bowl.
13. Place on the prepared pan and let set at room temperature until the coating is firm, about 1 to 2 hours.

Note: if you don’t want to make your own marshmallows, you can cut a large marshmallow in half and place on the cookie base. Heat in a preheated 350-degree oven to slump the marshmallow slightly, it will expand and brown a little. Let cool, then proceed with the chocolate dipping.

Homemade marshmallows:
• 1/4 cup water
• 1/4 cup light corn syrup
• 3/4 cup (168.76 grams/5.95oz) sugar
• 1 tablespoon powdered gelatin
• 2 tablespoons cold water
• 2 egg whites , room temperature
• 1/4 teaspoon pure vanilla extract

1. In a saucepan, combine the water, corn syrup, and sugar, bring to a boil until “soft-ball” stage, or 235 degrees on a candy thermometer.
2. Sprinkle the gelatin over the cold water and let dissolve.
3. Remove the syrup from the heat, add the gelatin, and mix.
4. Whip the whites until soft peaks form and pour the syrup into the whites.
5. Add the vanilla and continue whipping until stiff.
6. Transfer to a pastry bag.

Chocolate glaze:
• 12 ounces semisweet chocolate
• 2 ounces cocoa butter or vegetable oil

1. Melt the 2 ingredients together in the top of a double boiler or a bowl set over barely simmering water.

100_3674

Marshmallow cookies before the dip in chocolate

I got 28 cookies by using 1/4 of the cookie dough. Made 1/2 the amount of marshmallows and chocolate glaze. Since my glaze eventually bloomed, I covered them up in Milanos ganache…….the Milano cookie filling :-)………yeah that’s me!! Tasted good, nevertheless 😉

Chocolate Ganache:

• 1/2 cup heavy cream
• 8 ounces semisweet chocolate, chopped
• 1 orange, zested

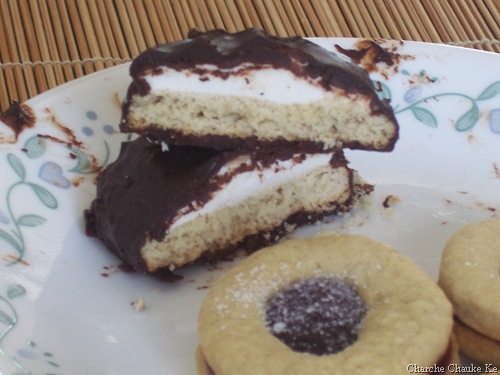
I also prepared some plum jam….just because I had some plums I had to use. Filled them up in the mallows crust, sprinkled with sugar and loved , loved it! Please do try if you are in the mood to make cookies, true labor of love , forming so many small bites but totally worth it ……..as you will see in pictures below 🙂

Plum Jam Recipe:

  • Plums 2 1/2 cups …..pitted, and chopped fine
  • Sugar 1 1/2 cups
  • Lemon juice  1 Tbsp

That’s it….I added all of this in a heavy bottomed saucepan with 2 Tbsp. water. Cooked it down till I could do the plate test. For the plate test, place a plate in the freezer or chill it well. Pour a big drop of jam on this cold plate and give it 30 seconds. If the jam has reached the right consistency, it will very slowly spread a little. More about jam making here. I made a small quantity, hence it went directly to the refrigerator.

100_3693

Pick one up……these are ready for a sprinkling of sugar

100_3709

Here are the mallows…..this is how they looked

100_3700

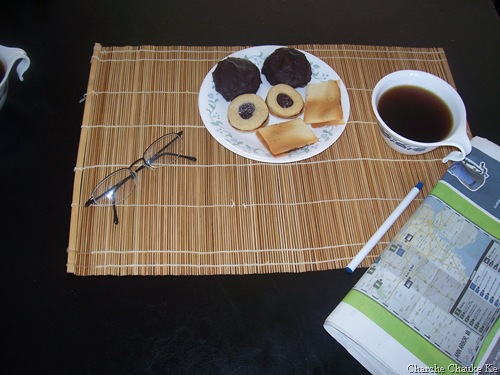
Perfect with coffee….for some great mornings………

I just took a picture as the husband had set the table

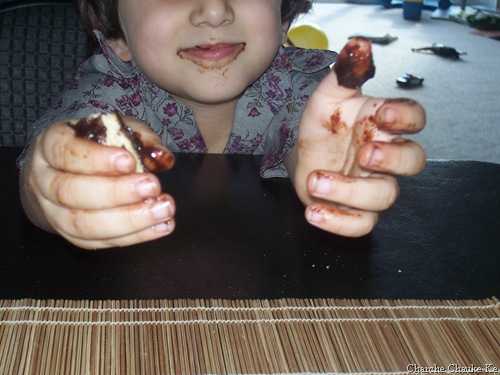
100_3711

Somebody else had a great time too……….

It’s been one whole year being a part of the Daring Bakers for me. I have come a long way…..I remember my first challenge Filbert Gateau….I remember my delight. Now I dare to experiment on my own…..Thank you Lis and Ivonne and the whole Daring Baker community which is the best resource of all.

Expenditure:

Unsalted Butter: ………………….$2.17……….from Walmart, some left

Corn syrup(16 oz.)…………………$1.67……….from Kroger, lots left

Heavy cream(1/2 pint)…………….$2.89…………from Kroger, lots left

Powdered sugar……………………$1.99…………from Kroger, lots left

Bakers Chocolate semisweet(8 oz):$ 3.29………….from Kroger, none left

Orange 1 :-)…………………………$0.64………….from Kroger, ate it up….

————————————————————————————————–

Total………………………………..$12.65

Posted in -All Purpose flour, -Butter, -Canola Oil, -Cinnamon, -Corn Syrup, -Cream, -Orange, -Plums, -Semisweet Chocolate, -Vanilla, Baking Powder, Baking Soda, Daring Bakers, Eggs, Gelatin, Sugar | Tagged: , , , , , | 14 Comments »