चर्चे चौके के Charche Chauke Ke

Hey! Join in the Kitchen Gossip!!

Archive for the ‘-Green Beans’ Category

Puff Pastry……..Just Chill!

Posted by vivnidhi on September 27, 2009

Puff pastry is the most delicious thing to eat….all the buttery goodness and crisp flaky layers…..I can always drool. I would not have imagined making those in this life if it wasn’t the Daring Bakers……..prompting, coaxing, luring, guiding and what not. This bunch is really out there to make you daring in life.

In India, puff pastry with spicy potato & mixed vegetable filling were called patties and they were the most delicious things you could lay your hands on. It would always be the first item to finish in a get-together. Even the soggy ones would be gone before the rest of the stuff. These are usually bought from either a canteen or a local bakery and I somehow associate it to my college days. For some strange reason (maybe the egg wash) I never remember eating it at home. Those are my memories associated with the puff. After coming to the US, a friend of mine told me how easy it was to get frozen puff pastry here and make patties. Well! when I got shopping, I bought phyllo dough :-). No matter how hard I tried …….I would not be able to make patties…..whatever I made was delicious but not THAT. I do not even remember if I made the real thing for my in-laws when they were here (or maybe I did on my last trip) …..they too are very fond of it like me… But some years back, I discovered the puff pastry in the grocery store and I attained the joy of finally making Patties at home. I have a killer filling recipe (Thanks to my Mother in law) who taught me the Samosa filling and I use a similar method for this filling. My Dad was really pleased when I made it for him and it’s no easy job pleasing him, he has a very keen sense of taste.

BUT I hardly ever make it……..all that butter…..I think my life is more precious than patties. OK, haven’t I been talking a bit too much of patties? Obviously doesn’t end here……the saga continues…….

The September 2009 Daring Bakers’ Challenge has been chosen by Steph of a whisk and a spoon. Steph chose Vols-au-Vent, which we are pretty sure in French means, “After one bite we could die and go to heaven!” 😉  These are pronounced “vo-o-voh” (Let me make use of High School French 🙂 )…….it’s ok to not pronounce “Hors-de-oeuvres” correctly for the longest time ;-). The September 2009 Daring Bakers’ challenge was hosted by Steph of A Whisk and a Spoon. She chose the French treat, Vols-au-Vent based on the Puff Pastry recipe by Michel Richard from the cookbook Baking With Julia by Dorie Greenspan.

No dessert vols-au vent here, masala filling as always 😉 .

sep_37

Spicy Vegetable filling Vols-au-vent

The Recipe:

Equipment:
-food processor (will make mixing dough easy, but I imagine this can be done by hand as well)
-rolling pin
-pastry brush
-metal bench scraper (optional, but recommended)
-plastic wrap
-baking sheet
-parchment paper
-silicone baking mat (optional, but recommended)
-set of round cutters (optional, but recommended)
-sharp chef’s knife
-fork
-oven
-cooling rack

Prep Times:
-about 4-5 hours to prepare the puff pastry dough (much of this time is inactive, while you wait for the dough to chill between turns…it can be stretched out over an even longer period of time if that better suits your schedule)
-about 1.5 hours to shape, chill and bake the vols-au-vent after your puff pastry dough is complete

Forming and Baking the Vols-au-Vent

Yield: 1/3 of the puff pastry recipe below will yield about 8-10 1.5” vols-au-vent or 4 4” vols-au-vent

In addition to the equipment listed above, you will need:
-well-chilled puff pastry dough (recipe below)
-egg wash (1 egg or yolk beaten with a small amount of water)
-your filling of choice

Line a baking sheet with parchment and set aside.

Using a knife or metal bench scraper, divided your chilled puff pastry dough into three equal pieces. Work with one piece of the dough, and leave the rest wrapped and chilled. (If you are looking to make more vols-au-vent than the yield stated above, you can roll and cut the remaining two pieces of dough as well…if not, then leave refrigerated for the time being or prepare it for longer-term freezer storage. See the “Tips” section below for more storage info.)

On a lightly floured surface, roll the piece of dough into a rectangle about 1/8 to 1/4-inch (3-6 mm) thick. Transfer it to the baking sheet and refrigerate for about 10 minutes before proceeding with the cutting.

(This assumes you will be using round cutters, but if you do not have them, it is possible to cut square vols-au-vents using a sharp chef’s knife.) For smaller, hors d’oeuvre sized vols-au-vent, use a 1.5” round cutter to cut out 8-10 circles. For larger sized vols-au-vent, fit for a main course or dessert, use a 4” cutter to cut out about 4 circles. Make clean, sharp cuts and try not to twist your cutters back and forth or drag your knife through the dough. Half of these rounds will be for the bases, and the other half will be for the sides. (Save any scrap by stacking—not wadding up—the pieces…they can be re-rolled and used if you need extra dough. If you do need to re-roll scrap to get enough disks, be sure to use any rounds cut from it for the bases, not the ring-shaped sides.)

Using a ¾-inch cutter for small vols-au-vent, or a 2- to 2.5-inch round cutter for large, cut centers from half of the rounds to make rings. These rings will become the sides of the vols-au-vent, while the solid disks will be the bottoms. You can either save the center cut-outs to bake off as little “caps” for you vols-au-vent, or put them in the scrap pile.

Dock the solid bottom rounds with a fork (prick them lightly, making sure not to go all the way through the pastry) and lightly brush them with egg wash. Place the rings directly on top of the bottom rounds and very lightly press them to adhere. Brush the top rings lightly with egg wash, trying not to drip any down the sides (which may inhibit rise). If you are using the little “caps,” dock and egg wash them as well.

Refrigerate the assembled vols-au-vent on the lined baking sheet while you pre-heat the oven to 400ºF (200ºC). (You could also cover and refrigerate them for a few hours at this point.)

Once the oven is heated, remove the sheet from the refrigerator and place a silicon baking mat (preferred because of its weight) or another sheet of parchment over top of the shells. This will help them rise evenly. Bake the shells until they have risen and begin to brown, about 10-15 minutes depending on their size. Reduce the oven temperature to 350ºF (180ºC), and remove the silicon mat or parchment sheet from the top of the vols-au-vent. If the centers have risen up inside the vols-au-vent, you can gently press them down. Continue baking (with no sheet on top) until the layers are golden, about 15-20 minutes more. (If you are baking the center “caps” they will likely be finished well ahead of the shells, so keep an eye on them and remove them from the oven when browned.)

Remove to a rack to cool. Cool to room temperature for cold fillings or to warm for hot fillings.

Fill and serve.

*For additional rise on the larger-sized vols-au-vents, you can stack one or two additional ring layers on top of each other (using egg wash to “glue”). This will give higher sides to larger vols-au-vents, but is not advisable for the smaller ones, whose bases may not be large enough to support the extra weight.

*Although they are at their best filled and eaten soon after baking, baked vols-au-vent shells can be stored airtight for a day.

*Shaped, unbaked vols-au-vent can be wrapped and frozen for up to a month (bake from frozen, egg-washing them first).

Michel Richard’s Puff Pastry Dough

From: Baking with Julia by Dorie Greenspan
Yield: 2-1/2 pounds dough

Steph’s note: This recipe makes more than you will need for the quantity of vols-au-vent stated above. While I encourage you to make the full recipe of puff pastry, as extra dough freezes well, you can halve it successfully if you’d rather not have much leftover.

There is a wonderful on-line video from the PBS show “Baking with Julia” that accompanies the book. In it, Michel Richard and Julia Child demonstrate making puff pastry dough (although they go on to use it in other applications). They do seem to give slightly different ingredient measurements verbally than the ones in the book…I listed the recipe as it appears printed in the book. http://video.pbs.org/video/1174110297/search/Pastry

Ingredients:
2-1/2 cups (12.2 oz/ 354 g) unbleached all-purpose flour
1-1/4 cups (5.0 oz/ 142 g) cake flour
1 tbsp. salt (you can cut this by half for a less salty dough or for sweet preparations)
1-1/4 cups (10 fl oz/ 300 ml) ice water
1 pound (16 oz/ 454 g) very cold unsalted butter

plus extra flour for dusting work surface

Mixing the Dough:

Check the capacity of your food processor before you start. If it cannot hold the full quantity of ingredients, make the dough into two batches and combine them.

Put the all-purpose flour, cake flour, and salt in the work bowl of a food processor fitted with a metal blade and pulse a couple of times just to mix. Add the water all at once, pulsing until the dough forms a ball on the blade. The dough will be very moist and pliable and will hold together when squeezed between your fingers. (Actually, it will feel like Play-Doh.)

Remove the dough from the machine, form it into a ball, with a small sharp knife, slash the top in a tic-tac-toe pattern. Wrap the dough in a damp towel and refrigerate for about 5 minutes.

Meanwhile, place the butter between 2 sheets of plastic wrap and beat it with a rolling pin until it flattens into a square that’s about 1″ thick. Take care that the butter remains cool and firm: if it has softened or become oily, chill it before continuing.

Incorporating the Butter:

Unwrap the dough and place it on a work surface dusted with all-purpose flour (A cool piece of marble is the ideal surface for puff pastry) with your rolling pin (preferably a French rolling pin without handles), press on the dough to flatten it and then roll it into a 10″ square. Keep the top and bottom of the dough well floured to prevent sticking and lift the dough and move it around frequently. Starting from the center of the square, roll out over each corner to create a thick center pad with “ears,” or flaps.

Place the cold butter in the middle of the dough and fold the ears over the butter, stretching them as needed so that they overlap slightly and encase the butter completely. (If you have to stretch the dough, stretch it from all over; don’t just pull the ends) you should now have a package that is 8″ square.

To make great puff pastry, it is important to keep the dough cold at all times. There are specified times for chilling the dough, but if your room is warm, or you work slowly, or you find that for no particular reason the butter starts to ooze out of the pastry, cover the dough with plastic wrap and refrigerate it . You can stop at any point in the process and continue at your convenience or when the dough is properly chilled.

Making the Turns:

Gently but firmly press the rolling pin against the top and bottom edges of the square (this will help keep it square). Then, keeping the work surface and the top of the dough well floured to prevent sticking, roll the dough into a rectangle that is three times as long as the square you started with, about 24″ (don’t worry about the width of the rectangle: if you get the 24″, everything else will work itself out.) With this first roll, it is particularly important that the butter be rolled evenly along the length and width of the rectangle; check when you start rolling that the butter is moving along well, and roll a bit harder or more evenly, if necessary, to get a smooth, even dough-butter sandwich (use your arm-strength!).

With a pastry brush, brush off the excess flour from the top of the dough, and fold the rectangle up from the bottom and down from the top in thirds, like a business letter, brushing off the excess flour. You have completed one turn.

Rotate the dough so that the closed fold is to your left, like the spine of a book. Repeat the rolling and folding process, rolling the dough to a length of 24″ and then folding it in thirds. This is the second turn.

Chilling the Dough:

If the dough is still cool and no butter is oozing out, you can give the dough another two turns now. If the condition of the dough is iffy, wrap it in plastic wrap and refrigerate it for at least 30 minutes. Each time you refrigerate the dough, mark the number of turns you’ve completed by indenting the dough with your fingertips. It is best to refrigerate the dough for 30 to 60 minutes between each set of two turns.

The total number of turns needed is six. If you prefer, you can give the dough just four turns now, chill it overnight, and do the last two turns the next day. Puff pastry is extremely flexible in this regard. However, no matter how you arrange your schedule, you should plan to chill the dough for at least an hour before cutting or shaping it.

sep_12 sep_26

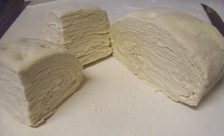
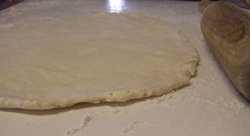
Puff Pastry dough……..before rolling out & 1/4 of the dough rolled out

Steph’s extra tips:

-While this is not included in the original recipe we are using (and I did not do this in my own trials), many puff pastry recipes use a teaspoon or two of white vinegar or lemon juice, added to the ice water, in the détrempe dough. This adds acidity, which relaxes the gluten in the dough by breaking down the proteins, making rolling easier. You are welcome to try this if you wish.

-Keep things cool by using the refrigerator as your friend! If you see any butter starting to leak through the dough during the turning process, rub a little flour on the exposed dough and chill straight away. Although you should certainly chill the dough for 30 to 60 minutes between each set of two turns, if you feel the dough getting to soft or hard to work with at any point, pop in the fridge for a rest.

-Not to sound contradictory, but if you chill your paton longer than the recommended time between turns, the butter can firm up too much. If this seems to be the case, I advise letting it sit at room temperature for 5-10 minutes to give it a chance to soften before proceeding to roll. You don’t want the hard butter to separate into chunks or break through the dough…you want it to roll evenly, in a continuous layer.

-Roll the puff pastry gently but firmly, and don’t roll your pin over the edges, which will prevent them from rising properly. Don’t roll your puff thinner than about about 1/8 to 1/4-inch (3-6 mm) thick, or you will not get the rise you are looking for.

-Try to keep “neat” edges and corners during the rolling and turning process, so the layers are properly aligned. Give the edges of the paton a scooch with your rolling pin or a bench scraper to keep straight edges and 90-degree corners.

-Brush off excess flour before turning dough and after rolling.

-Make clean cuts. Don’t drag your knife through the puff or twist your cutters too much, which can inhibit rise.

-When egg washing puff pastry, try not to let extra egg wash drip down the cut edges, which can also inhibit rise.

-Extra puff pastry dough freezes beautifully. It’s best to roll it into a sheet about 1/8 to 1/4-inch thick (similar to store-bought puff) and freeze firm on a lined baking sheet. Then you can easily wrap the sheet in plastic, then foil (and if you have a sealable plastic bag big enough, place the wrapped dough inside) and return to the freezer for up to a few months. Defrost in the refrigerator when ready to use.

-You can also freeze well-wrapped, unbaked cut and shaped puff pastry (i.e., unbaked vols-au-vent shells). Bake from frozen, without thawing first.

-Homemade puff pastry is precious stuff, so save any clean scraps. Stack or overlap them, rather than balling them up, to help keep the integrity of the layers. Then give them a singe “turn” and gently re-roll. Scrap puff can be used for applications where a super-high rise is not necessary (such as palmiers, cheese straws, napoleons, or even the bottom bases for your vols-au-vent).

You can find lots more general tips for making puff pastry on-line, including here:
http://www.baking911.com/pastry/puff.htm

I encourage everyone to watch the on-line video from the PBS show “Baking with Julia” that accompanies the book:
http://video.pbs.org/video/1174110297/search/Pastry

Spicy Filling Recipe:

  • Potatoes 1 or 2 (depends on your inclination) chopped in small cubes 
  • Mixed Vegetables (carrots, green beans, peas ..) 1 1/2 cups (I used frozen mix as I was in a rush)
  • Fresh Ginger washed, scrubbed and minced  2″ piece
  • Green chilli minced 1 (optional)
  • Canola Oil 2 Tbsp. (Vegetable oil is fine too)
  • Cumin seeds 1 tsp.
  • Asafoetida 1/4 tsp.
  • Red chilli powder 1/2 tsp.
  • Salt to taste
  • Coriander seeds dry roasted and ground coarse 2 Tbsp.
  • Amchur/Dry mango powder 1 Tbsp.
  • Garam Masala 1/2 tsp.
  • Cilantro leaves torn 1/4 cup (optional)

Heat oil in the wok. Add cumin seeds & asafoetida. When the spices seem to sizzle, add half the ginger and green chilli (if using). These do taste good when a little spicier than usual. Add the potatoes and mixed vegetables. Reduce the heat to medium low and cover the wok.

When the potatoes & the vegetables become tender, add all the remaining ingredients. Mix well and cover again for 2-3 minutes. Remove from heat and finally add the cilantro leaves and mix well. The filling’s ready!

The video is a must watch. I can’t call my tryst with puff pastry a complete success. You must check out the Daring Bakers Blogroll to see the real stuff. But this has tons of potential. I need some more practice and better butter 🙂 to make the perfect puff pastry. So, you can see I do not have high standards for myself on this one. I am quite pleased. I took some at my Son’s preschool potluck (oh yeah 😉 ) and they were very well received. I brought none back. I made a crude galette with spicy peas …of the leftover dough scraps for  friends…….again everything was gobbled leaving none for me..(everybody forgot :-)) ) Anyway, I couldn’t be happier…..not being able to taste the final product gave me the kind of joy that eating the whole thing wouldn’t have.

Expenditure is left for tomorrow …….I need to sleep.

Tomorrow is here already!!

Expenditure:

Cake Flour………From Kroger……………………….$ 3.14

Butter…………..From Walmart……………………..$ 1.98

———————————————————————————

Total…………………………………………………..$ 5.12

Posted in -All Purpose flour, -Asafoetida, -Butter, -Cake Flour, -Canola Oil, -Carrot, -Cilantro, -Coriander, -Cumin seeds, -Dry Mango Powder, -Garam Masala, -Ginger, -Green Beans, -Peas, -Red chili powder, Eggs | 13 Comments »

Daring Cooks # 3 Cod, traditional flavors powdered

Posted by vivnidhi on July 14, 2009

On time, first time………for the Daring Cooks. Oh well I had to be ….even tardiness has a limit and…….Sketchy from Sketchy’s Kitchen made all of us do something we never tried before. Really got us out of the comfort zone and try something absolutely new… 🙂 . He says ” If you’ve read my blog before -I have a minor obsession with molecular cuisine. I hopped between a MC dish and a classic rustic Italian dish (I know – two completely different worlds).

I opted to skip the 400 year old dish in favor of something that would be new and daring for most of you. ” This is a dish from Grant Achatz, found in the Alinea cookbook – page 230

So, here we are………

Definitely…Miss Measure….Miss Measure at 180 x 180 (largest)presents

July2_38

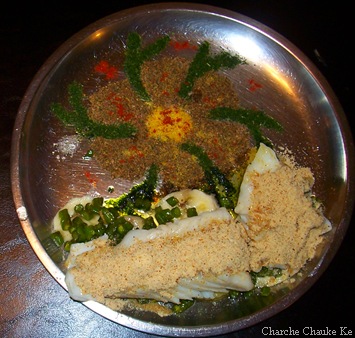
Cod with Traditional Flavors Powdered……the red is paprika

Skate, Traditional Flavors Powderedwith changes
  • 8 oz. Cod
  • * Beurre monte
  • * 150g fresh green beans
  • sea salt/kosher salt
  • 1 banana
  • 225g smart balance (substitute for butter)
  • 150g lemons ……1 lemon
  • 2.5g citric acid/vitamin c tablet ……1/4 tsp.
  • 75g cilantro
  • 75g parsley
  • 50g dried banana chips
  • 150g spray dried cream powder (or powdered milk)
  • 50g cup minced red onion ….1 small red onion
  • 100g capers (brined, not oil)

* For green beans, slice each beans into very thin rounds (2 mm)
* Beurre Monte – 225 g smart balance cubed and cold, 30g water. In a small saucepan, bring the water to a boil, remove from heat and whisk in the butter 1 cube at a time. This should from an emulsion. Keep this heated, but under 195 degrees. The emulsion will not break – this is your poaching liquid.

Powders – prepare ahead of time
caper / onion
lemon powder
cilantro/parsley powder
‘brown butter’ powder

July2_30

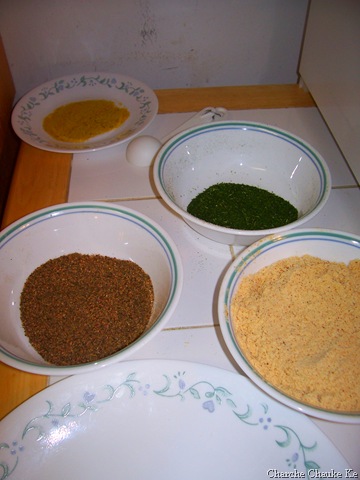
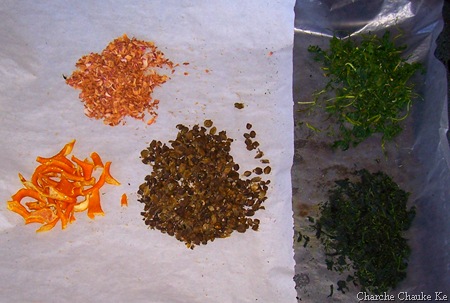
L to R from back……citrus, cilantro/parsley,capers/onion and brown butter powders

Powders
once dried, all powders should be pulsed in a coffee grinder/spice mill/mortar and pestle then passed through a chinois or fine mesh strainer.

citrus powder
150g lemons……1 lemon
500g simple syrup….I used 250 ml sugar and 250 ml water, seemed to work for me…..maybe wrong ratio but worked 😉
5g citric acid/vitamin c tablet

zest lemons , remove the pith from the zest and poach in the simple syrup three times. dry with paper towels and move to a dehydrating tray. 130 for 12 hours. pulse the zest in a coffee grinder, pass through chinois, and mix with citric acid/vitamin C powder.

If you do not have a dehydrator, place in microwave for 8 to 10 minutes at medium powder. Once dried, follow the other instructions.

cilantro/parsley powder
75g cilantro
75g parsley

blanch the parsley in boiling saltwater for 1 second, submerge the leaves in ice water for 3 minutes. Dry on paper towels and place on dehydrator tray. 130 for 12 hours. grind and pass through chinois.

If you do not have a dehydrator, place in microwave for 30 seconds, turn over leaves and microwave for another thirty seconds. They should be dry by now, pulse in coffee grinder, pass through chinois and reserve.

onion powder
50g cup minced red onions

dehydrator – 130 for 12 hours
microwave at medium power for 20 minutes.

pulse in grinder, pass through chinois

Caper powder
100g capers (get the ones packed in brine/vinegar)

run the capers under cold water for two minutes to remove some of the brine.
dry on paper towels and dehydrate for 12 hours at 130 degrees.
microwave instructions are unclear. Dry them as much a possible with paper towels, the microwave on medium for 1 minute. Check the moisture content and stir them. repeat for 30 second intervals until they are dry. If you use this method, pleas post the time needed to dry the capers.

Once dry, pulse and sift the powder. Mix it with the onion powder.

Brown Butter powder

50g Dried banana chips (unsweetened if possible – many are coated in honey – the freeze dried ones would be brilliant)
150g spray dried cream powder

If you cannot find the cream powder, you can substitute Bob’s red mill non fat dry milk powder, or even carnation instant milk powder. The substitutions will alter the flavor a little, but you will still get the general idea.

preheat the oven to 350 degrees, sift the cream powder into a fine layer on a silpat or on parchment. bake for 4 minutes, then remove for heat. If it bakes for too long, it will burn. Be very cautious with all powders in the oven. They all go from browned to burnt in a few seconds.

grind the banana chips in a coffee grinder and mix with the toasted cream powder. Pass this through a chinois and reserve.

July2_21 July2_22

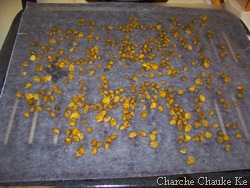
Red Onion and capers before going in the oven

July2_24

This is what became of it :-)…from back, L to R….onion, parsley, lemon zest, capers and cilantro……dried

I made half the recipe. Actual recipe calls for double the ingredients and skate wings instead of cod fish. I used the oven to dry the powder ingredients.

Onion/capers……3 hrs at 150 F

Cilantro /parsley…2 hrs at 150 F

lemon zest…….4 hrs at 150 F

And………those banana chips gave me a hard time. I got freeze dried whole banana(that’s what I got unsweetened)……which wouldn’t powder at all…all gluey. So,….I chopped it fine in my blender and spread as well as possible on baking tray……..2 hours at 200 F and finally it powdered well . Let me tell you it was a relief.


Cod

Prepare the cod – 50G v shaped cuts are recommended
Bring 50g water, 50g beurre monte, and green bean rounds to a boil over high heat. Cook until the water has evaporated (about 3 minutes), when the pan is almost dry, remove it from heat and season with 3g salt

bring 150g water and 150g beurre monte to simmer over medium heat, add skate wings and simmer for 2 minutes. Remove the pan from heat and flip the wing over and let rest in pan for two more minutes. Transfer to warming tray lined with parchment and season with 2.5 grams of fine sea salt.

Plating

Take the tip of a small spoon and make a small mound of the citrus powder, the onion-caper powder, and the cilantro parsley-powder. Swirl these around in a hurricane type pattern. I found that it is easier, and you get finer lines if you lightly shake the plate to flatten out the mounds, then swirl the spoon through it to get the pattern.

peel the remaining banana into very think slices (3mm) fan three slices on the plate, place green beans on top and place skate wing portion on top. On the tall edge, sprinkle the brown butter powder.

July2_31 July2_33

July2_35 July2_36

Sequence of plating…..banana , green beans, cod and finally brown butter powder


Substitutions
The Skate can be replaced with flounder or cod.
If you can get skate that is not ‘prepared’ IE – Skinned- get the fish monger to prepare it for you.

The powdered cream can be omitted completely, just replace it with more banana powder, or pineapple powder. Possibly non dairy creamer, but I have NO idea what would happen if you tried to brown it.

The poaching liquid is pretty much butter – it could be replaced with other poaching methods. Water, wine, bay leaf, garlic clove, pepper, etc. Try to go easy on the salt in the liquid if you use a replacement.

Disclaimer – the sample dish was made with cod because Skate was not available at the time in Richmond. Whole Foods usually carries it. Check your fish markets before you head out to buy some.

July2_42

The next day….:-)

Verdict: Husband (since I do not eat meat) found it very very interesting and liked the flavors but wondered if the effort is worth the result. But it’s quite easy to make if the powders are kept ready beforehand as we found out the next day. The dish was good ( I believe ) but pictures are all bleak because it was night by the time I finished…..and I rely solely on natural light :-). Shall try taking better pics next time.

Expenditure:

Cod…………….from Whole Foods……1/2 lb……….$ 6.48…….finished

Green Beans…..from Kroger…………..1/2 lb……….$ 0.69…….finished

Cilantro………..from Farmers Market…1 bunch……..$ 1.00…….some left

Banana freeze dried ..Peoples Food Co-op……………$ 2.00…….very little left (we ate some and burnt some;-) )

Powdered Milk….from Walmart………………………..$ 4.30…….lots left

Capers ………..from Meijer………….100 g…………..$ 3.69…..all gone


Total……………………………………………………..$ 18.16

My only grouse has been measuring everything on the scale…..that must have slowed me down by an hour or so ;-).

Posted in - Cod, - Milk Powder, - Red onion, - Smart Balance, -Banana, -Cilantro, -Green Beans, -lemon, -Parsley, Capers, Daring Cooks | Tagged: , , , , , | 6 Comments »

American Chop Suey

Posted by vivnidhi on July 14, 2008

2July_68

The “AMERICAN CHOP SUEY”

Almost all restaurants serving Chinese food in India boast of the “American Chop Suey”.

American Chop Suey (also American Goulash, Chili-Macaroni, Chili-Mac, Mac ‘n Beef, Macaroni and Beef, or simply Macaroni) is an American pasta dish. The preferred name and recipe varies by region, for example, the name American chop suey is most prevalent in New England. Commercial preparations of this dish are commonly marketed as Macaroni and Beef. Classic American chop suey consists of elbow macaroni and bits of cooked ground beef with sautéed onions and green peppers in a thick tomato-based sauce. Though this decidedly American comfort food is clearly influenced by Italian-American cuisine, it is known as a chop suey because it is a sometimes-haphazard hodgepodge of meat and vegetables.………….source Wikipedia

Food historians generally agree that chop suey as we know it was invented in the United States in the mid-1800’s, possibly by one of the Cantonese immigrants who flooded California searching for work. Constrained by the lack of Asian vegetables, and trying to produce a Chinese dish palatable to westerners, a Cantonese cook stir-fried whatever vegetables were handy, added some meat or chicken, and served the finished product on a plate of steamed rice. He christened his creation, chop suey, which is the English pronunciation of the Cantonese words “tsap seui” (“tsa-sui” in Mandarin) which means “mixed pieces”. …………source Chinesefood.about.com

Anyway, American chop suey is quite a favorite of a lot of people and its quite wholesome and delicious too.  Here is a recipe that I learnt from a professional cook Mrs. Minocha in Aurangabad , India.

The recipe:  (4 servings)

For the Noodles:

  • Maggi/Ramen/Mama noodles  2 Packs (200 grams)

For the Sauce:

  • Garlic 7 cloves (minced)
  • Tomato sauce/Ketchup 1 cup
  • Soya Sauce 1 tsp.
  • Red chilli powder 1/2 tsp.
  • Sugar 1 1/2 Tbsp.
  • oil 1 tsp.
  • Corn starch 1 Tbsp. (called corn flour in India)
  • salt to taste

For the Vegetables:

  • Onion 1 sliced lengthwise
  • Green Bell Pepper/Capsicum 1 sliced thin
  • Cauliflower 3 Flowerets chopped
  • Carrots 2 sliced like matchsticks
  • Green Beans 7-8 french cut(lengthwise)
  • Soya sauce 1 Tbsp.
  • Crushed Black Pepper 1/2 tsp.
  • Oil 1 Tbsp.
  • Salt to taste

The actual recipe called for Mama noodles first boiled in salted water and then deep fried. I used Maggi masala Atta (whole wheat) noodles (available in Indian grocery stores) . Ramen noodles can easily be substituted. I did not use the masala sachet i.e. the seasoning. I sprayed the noodles with oil spray and put them in a preheated oven. 400 degrees F for 10 minutes. Make sure to keep moving them every 3-4 minutes to avoid them getting burnt.

July_66

Noodles on the baking tray

For the Sauce: Heat the oil and fry the garlic for 1 minute.  Add tomato sauce, red chilli powder, salt , soya sauce and sugar. Add 1- 1/2 cups water. Let the whole thing come to a boil. Mix the corn starch with 1 Tbsp. cold water and add it to the sauce. Reduce heat to low and cook for 1 more minute. Orange color is added in Indian restaurants but I have never felt the need to do so.

For the vegetables: First par boil cauliflower in a little salted water. I used the microwave for 1 minute. Heat oil in a wok and fry onion for a minute. I use high flame for the vegetables. Next add the capsicum and cabbage. Next add carrot, green beans and cauliflower. Mix well. Next add salt, soya sauce and crushed black pepper . Mix well and turn off the heat. The key is to keep the vegetables quite crunchy.

July_67

Baked noodles, sweet & sour sauce and Chop Suey Vegetables

To assemble: First make a layer of the vegetables. Add fried noodles on top and pour the hot sauce on top of the noodles. Indianized American Chop Suey is Ready!!

July_68

Dinner’s ready. The crunchy noodles had to be hidden cause the son couldn’t keep his hands off them!

This Indian-Chinese “American Chop Suey” (Shouldn’t we be thankful it does not involve more countries;) ) is headed to DK of DK’s Culinary Bazaar for AWED Chinese. This is the main course……….a complete meal in itself. Hence it is also headed to Archana of Archana’s Kitchen for Monthly One dish Meal event. Enjoy!!

Preparation time for this would be about 20 minutes and cooking time would be 25 minutes.

Posted in -Cauliflower, -Garlic, -Green Beans, -Green Bell Pepper, -Onion, -Tomato Sauce, -Whole wheat flour | Tagged: , | 25 Comments »

Choode Matar ki Tehri (Beaten rice, peas pilaf)

Posted by vivnidhi on June 30, 2008

100_2008

Choode Matar ki Tehri

Chooda or poha in Hindi or beaten rice, flattened rice is eaten all over India. It is widely available at Indian stores in the US. It comes in two varieties..thick and thin. Kande pohe (onion beaten rice) is a very popular snack in Maharashtra, India. Choode matar ki tehri is more like a delicacy eaten in Uttar Pradesh(Benares or Varanasi region to be more specific) when the fresh peas are harvested. It is similar to poha yet has a very distinct Uttar Pradeshi stamp on it:). One should use thick poha to make the Maharashtrian version. In Uttar Pradesh, the thinner kind was more widely available, hence even thin beaten rice can be used to make this but one has to be very careful with the thinner ones as they tend to stick to each other. So, anybody trying this for the first time should go for the thicker poha.

The Recipe:

  • Beaten Rice/Poha/chooda : 2 cups
  • Milk 1 cup
  • oil 1 Tbsp.
  • Asafoetida/ Heeng powdered 1/2 tsp.
  • Cumin seeds/ Jeera 1 tsp.
  • Turmeric powder 2 tsp.
  • Red Chili powder 1/2 tsp.
  • Rai / mustard seeds 1/2 tsp.
  • Ginger 2″ piece minced or grated
  • Green chilies 2 minced (can be adjusted as per taste)
  • Green peas 1-1/2 cups
  • salt to taste
  • Garam masala 2 tsps.
  • Fresh Cilantro leaves/ Dhaniya 1/2 cup chopped
  • Lime juice 2 tsps.

Soak the beaten rice in 3/4 cup of milk for 10 minutes. Keep fluffing every 2-3 minutes to avoid them sticking together.

Heat oil in a saucepan and add asafoetida, cumin seeds and mustard seeds. When you hear the mustard seeds popping and cumin seeds sizzling, add half the ginger and the green chillies.

Saute briefly and then add the green peas.  Cover the pan and lower the heat. Add half the salt. Frozen peas are ideal as they tend to be really fresh. Contrary to popular belief, frozen peas are actually better than supermarket peas in the pod. If you grow your own or buy fresh from a farmer, its a different story. But, in general, peas tend to lose the fresh flavor quite quickly , the companies which freeze the peas, do it quite quickly to retain the flavor. Hence, the frozen peas are quite fresh, in general. So, stop feeling guilty when opening the freezer pack:).

When the peas have turned to a fresh green color, add the soaked beaten rice and sprinkle turmeric, red chili powder and rest of the salt on top. Mix well, with a light hand, making sure that not a lot of beaten rice is broken. If the mixture looks too dry, sprinkle some milk on it and cover again. Work on a low flame. In about 5 minutes, the tehri is ready.

Garnish with cilantro leaves and half the ginger that we saved. Sprinkle the garam masala on top. I like to cover the pan again for 5 minutes after putting the gas off for the flavors to mingle. The ginger added in the end and the cilantro adds a lot of flavor to the dish.

This is distinct from the regular poha we make cause 1) it is soaked in milk instead of water. 2) Traditionally it does not use onion or potato. 3) The main flavors are that of asafoetida and garam masala and a lot of peas are used. 4) no curry leaves are used.

Do try this version. Even though I love the quick regular poha, this is a delicious change and loved by all at home. When you would want to reheat (if there are any leftovers) use 2-3 tsps. of milk before heating so that it doesn’t taste dry.

100_2006

Enjoy!

I couldn’t miss the SWC- Uttar Pradesh, hence, here’s my entry on the final day. This is also my entry to WBB -Express Breakfasts……heading to Raaga in an express…………

Posted in -Beaten Rice, -Cilantro, -Green Beans, -Peas, Milk | Tagged: , , , | 7 Comments »

Baked Rice Wrapper Rolls with Peanut Wasabi Sauce

Posted by vivnidhi on June 24, 2008

100_1940

Baked Rice Wrapper Rolls with Peanut Wasabi Sauce

No, I have not told you the entire recipe in the title:). More to it;) , I am telling you…..you will have to read the whole post for the recipe. OK, on to the topic, fresh spring roll wrappers are widely available at Oriental stores. These are predominantly Vietnamese & Thai, I believe. These use the rice based wrapper (Banh Trang: Vietnamese) and it is served fresh and generally not fried. There is a tapioca variety as well and well! I ended up with one which had both rice and tapioca starch:). So these rice wrappers do not need a lot of cooking , just slip in hot water and they are ready. 2 good recipes I found for them are Vegetarian and with shrimp. BUT, in our house, the husband is not particularly fond of the fresh ones.

So, now I had rice wrappers AND Wasabi paste ( about to expire in August, cause I got it at Thanksgiving;) ) and I had to make something before all of this went waste…………I KNOW. Then Kay announced Think Spice, think Wasabi event, brainchild of Sunita. I knew I was going to make something sooner than later. My first stint with wasabi were the wasabi peas which I fell in love with. Then I first used them in these won tons…………of course mine were filled with Tofu and the Husband’s were imitation crabmeat.

I have not had the courage to make sushi yet……..looking forward to some great ideas at the Think spice event. So, to make full use of the stock in my pantry, I baked the rice wrapper rolls and made a sauce with wasabi.They turned out deliciously crunchy , heavenly with the peanut wasabi sauce.

The Recipe:

For the Rice Wrapper Rolls:

  • Rice wrappers 25 sheets
  • Nutrela granules 1 cup, soaked in salted water and drained
  • Garlic 2 cloves minced
  • Ginger 1″ piece minced
  • Green beans 1/2 cup french cut or julienned
  • Carrot 1 cut lengthwise matchsticks
  • Red bell pepper 1 julienned
  • Napa cabbage 1/4 cup sliced thin
  • Cilantro/ coriander leaves 1/4 cup
  • Oil 2 tsp.
  • Soya sauce 1 Tbsp.
  • Rice Wine Vinegar 1 Tbsp.
  • Black pepper powder 1 tsp.
  • Salt to taste

For the Wasabi Peanut Sauce:

  • Garlic 2 cloves minced
  • Peanut butter 2 Tbsp.
  • Soya Sauce 3 Tbsp.
  • Sugar 1 tsp.
  • Wasabi 2 tsp.
  • Sambal Oelek/ red chili paste 1 tsp.
  • Water 2 Tbsp.

Since I made this recipe up, the vegetables can be varied as per one’s liking.  Heat the oil in a wok and add ginger and garlic. Saute for 30 seconds and then add the carrot, green beans and bell pepper. Saute further for a couple of minutes and then add cabbage. Stir fry further for a minute and then add the rest of the ingredients. Mix well. Preheat the oven to  400 degrees F.

Heat 2 cups of water in  pan and put off the heat. When the water temperature becomes tolerable, dip each rice wrapper in it , turn and dip the side you were holding and spread it on a plate.

100_1936 100_1937

Then put  about 1 Tbsp of filling and fold and roll as shown below.

100_1938 100_1939

Spray a little oil on aluminum foil and place the rolls on them. Spray some oil on the rolls as well and they all go in the oven. Bake for about 15 minutes and then broil for another 2-3 minutes. When they are crisp all over , take them out of the oven.

Mix all the sauce ingredients and the peanut wasabi sauce is ready. Tastes great with the rolls. In fact, the sauce is so good, tastes great on plain rice noodles or even boiled eggs.

This recipe is on its way to Sangeeth for the eat healthy….. protein rich event as well. Rice vermicelli could also be used in  the rolls but I chose nutrela cause it’s full of protein and delicious too.

Posted in -Cabbage, -Carrot, -Cilantro, -Garlic, -Ginger, -Green Beans, -Red Bell Pepper, -Wasabi, Rice | Tagged: , , | 7 Comments »

Here’s Hot and Sour Soup

Posted by vivnidhi on May 31, 2008

100_1762

This is a big favorite in  the house with “Indian Chinese” food. So, here’s a soup- Chinese but completely Desi. Credit for this recipe goes to Mrs. Minocha of Aurangabad, India who taught us to cook Indian Chinese food. A lot of my friends and I have learnt some good cooking from her.

The Recipe:

  • Green Bell Pepper 1 chopped coarse
  • Cabbage 1/2 cup chopped thin
  • carrots 2 cut into cubes
  • Green Beans chopped into 2 ” lengths 1/2 cup
  • cauliflower 2 flowerets broken into smaller pieces
  • garlic 6-8 cloves minced
  • Soya Sauce 4 Tbsp.
  • Vinegar 1 Tbsp.
  • sugar 1 tsp.
  • Black pepper powder 1/2 tsp.
  • Red chilli powder 1/2 tsp.
  • Cornstarch 3 Tbsp.
  • Vegetable Oil 1 tsp.
  • Spring onions 1 bunch chopped fine
  • Boiled egg whites 2 chopped (optional)
  • Salt to taste

100_1754

Getting ready for the soup

Heat the oil and fry garlic for a minute.

Add cauliflower, french beans and carrots. Fry a little more till they soften a wee bit.

Add red chili powder and 6 cups of water. Let the water come to a boil and then add soya sauce, sugar, vinegar, bell peppers and cabbage. Boil the soup for a couple of minutes more.

Lastly add spring onion and black pepper powder. Make a paste of cornstarch in cold water and and add to the soup. Taste for salt and vinegar. Add more if desired and serve hot.

Bow when you are praised;)

100_1763

The soup’s hot!!

I would like to send this as an entry to Eat Healthy – Fiber Rich, an event hosted by Sangeeth.

And yes, this is also my entry to Fortune Cooking Contest hosted by Nithu & Shriya. It is dedicated to my mother whose sun sign is cancer, hence she qualifies with the cauliflower entry and she loves the soup too.

Now, are there any other events missing my entries??

Posted in -Cabbage, -Carrot, -Cauliflower, -Garlic, -Green Beans, -Green Bell Pepper, -Spring Onions, -Tofu, Eggs | Tagged: , , | 5 Comments »