चर्चे चौके के Charche Chauke Ke

Hey! Join in the Kitchen Gossip!!

Archive for the ‘Fruits’ Category

Daring Bakers 2010 : Nanaimo Bars

Posted by vivnidhi on January 27, 2010

jan_66

Nanaimo Bars

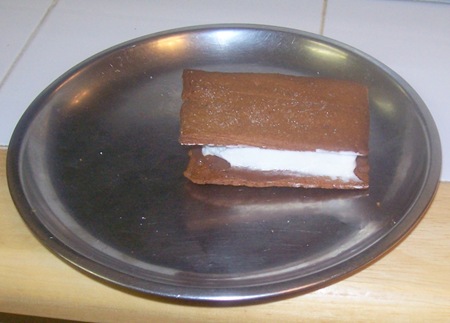
This is the only picture I was able to take…..took them to a friend’s potluck and forgot to take photos

All the Daring Bakers are headed to Canada for winter Olympics. Of course, I can’t fool you….no……we are not going….just celebrating 😉 by making nanaimo bars. OK, I also had never heard of these until………..”The January 2010 Daring Bakers’ challenge was hosted by Lauren of Celiac Teen. Lauren chose Gluten-Free Graham Wafers and Nanaimo Bars as the challenge for the month.”

Nanaimo Bars are a classic Canadian dessert created in none other than Nanaimo, British Colombia. In case you were wondering, it’s pronounced Nah-nye-Moh. These bars have 3 layers: a base containing graham crackers, cocoa, coconut and nuts, a middle custard layer, and a topping of chocolate. They are extremely rich and available almost everywhere across the country.

Lauren wanted us to bake the Graham Crackers gluten free. I used all  whole wheat pastry flour (atta) instead of the gluten free flours as I am too lazy. These are absolutely divine. You will not want to buy store bought after trying these out. Superlative praises for these graham crackers. I stopped buying Indian Glucose biscuits long long back because of Trans fats. These graham crackers will certainly fill that craving. Please visit Celiac Teen or the other daring bakers this month for some great gluten free versions.

Recipe Source: Graham Wafers — 101 Cookbooks (http://www.101cookbooks.com/archives/000126.html) I adapted it to be gluten-free. The adapted recipe is below.
Nanaimo Bars — City of Nanaimo (http://www.nanaimo.ca/EN/main/visitors/NanaimoBars.html)

The Recipe:

Preparation time:
• Graham Wafers: 30 to 45 minutes total active prep, 2 ½ hours to overnight and 45 minutes inactive prep.
• Nanaimo Bars: 30 minutes.

Equipment required:
• Food Processor
• Bowls
• Parchment paper or silpats
• Cookie sheets
• Double boiler or pot and heatproof bowl
• 8 by 8 inch square pan
• Hand mixer or stand mixer (You may use a wooden spoon, but this makes it much easier!)
• Saucepan

  • For  Graham Wafers
    Ingredients
    2 1/2 cups + 2 Tbsp. Whole wheat pastry flour (atta)
    1 cup (200 g) (7.1 ounces) Dark Brown Sugar, Lightly packed
    1 teaspoon (5 mL) Baking soda
    3/4 teaspoon (4 mL ) Kosher Salt
    7 tablespoons (100 g) (3 ½ ounces) Unsalted Butter (Cut into 1-inch cubes and frozen)
    2 Tbsp. Honey, Mild-flavored such as clover.
  • 3 Tbsp. Molasses
    5 tablespoons (75 mL) Whole Milk
    2 tablespoons (30 mL) Pure Vanilla Extract

Directions:
1. In the bowl of a food processor fitted with a steel blade, combine the flours, brown sugar, baking soda, and salt. Pulse on low to incorporate. Add the butter and pulse on and off, until the mixture is the consistency of a coarse meal. If making by hand, combine aforementioned dry ingredients with a whisk, then cut in butter until you have a coarse meal. No chunks of butter should be visible.
2. In a small bowl or liquid measuring cup, whisk together the honey, molasses, milk and vanilla. Add to the flour mixture until the dough barely comes together. It will be very soft and sticky.
3. Turn the dough onto a surface well-floured with atta and pat the dough into a rectangle about 1 inch thick. Wrap in plastic and chill until firm, about 2 hours, or overnight.
4. Divide the dough in half and return one half to the refrigerator. Sift an even layer of whole wheat pastry flour onto the work surface and roll the dough into a long rectangle, about 1/8 inch thick. The dough will be quite sticky, so flour as necessary. Cut into 4 by 4 inch squares. Gather the scraps together and set aside. Place wafers on one or two parchment-lined baking sheets. Chill until firm, about 30 to 45 minutes. Repeat with the second batch of dough.
5. Adjust the rack to the upper and lower positions and preheat oven to 350 degrees Fahrenheit (180 degrees Celsius).
6. Gather the scraps together into a ball, chill until firm, and reroll. Dust the surface with more flour and roll out the dough to get a couple more wafers.
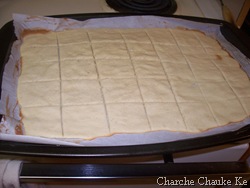
7. Prick the wafers with toothpick or fork, not all the way through, in two or more rows.
8. Bake for 25 minutes, until browned and slightly firm to the touch, rotating sheets halfway through to ensure even baking. Might take less, and the starting location of each sheet may determine its required time. The ones that started on the bottom browned faster.
9. When cooled completely, place enough wafers in food processor to make 1 ¼ cups (300 mL) of crumbs. Another way to do this is to place in a large ziplock bag, force all air out and smash with a rolling pin until wafers are crumbs.

jan_70

Graham Crackers

jan_74

We loved our graham crackers with some nutella and whipped topping……….Husband can’t have enough of it 🙂

Nanaimo Bars
Ingredients:

For Nanaimo Bars — Bottom Layer
1/2 cup (115 g) (4 ounces) Unsalted Butter
1/4 cup (50 g) (1.8 ounces) Granulated Sugar
5 tablespoons (75 mL) Unsweetened Cocoa
1 Large Egg, Beaten
1 1/4 cups (300 mL) (160 g) (5.6 ounces) Graham Wafer Crumbs (See previous recipe)
1/2 cup (55 g) (1.9 ounces) Almonds (Any type, Finely chopped)
1 cup (130 g) (4.5 ounces) Coconut  unsweetened

For Nanaimo Bars — Middle Layer
1/2 cup (115 g) (4 ounces) Unsalted Butter
2 tablespoons and 2 teaspoons (40 mL) Heavy Cream
2 tablespoons (30 mL) Vanilla Custard Powder (Such as Bird’s. Vanilla pudding mix may be substituted.)
2 cups (254 g) (8.9 ounces) Icing Sugar

For Nanaimo Bars — Top Layer
4 ounces (115 g) Semi-sweet chocolate
2 tablespoons (28 g) (1 ounce) Unsalted Butter

Directions:
1. For bottom Layer: Melt unsalted butter, sugar and cocoa in top of a double boiler. Add egg and stir to cook and thicken. Remove from heat. Stir in crumbs, nuts and coconut. Press firmly into an ungreased 8 by 8 inch pan.
2. For Middle Layer: Cream butter, cream, custard powder, and icing sugar together well. Beat until light in colour. Spread over bottom layer.
3. For Top Layer: Melt chocolate and unsalted butter over low heat. Cool. Once cool, pour over middle layer and chill.

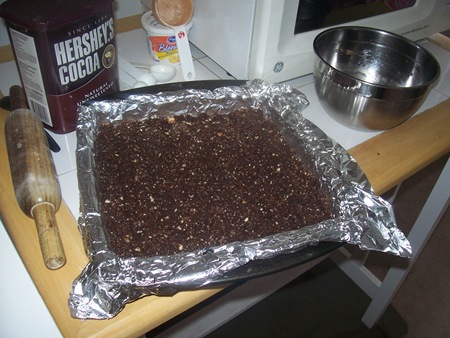
jan_64

Making of the Nanaimo Bar………bottom layer

(This is the only photograph I have :-)) )

——————————-

My Tweaks to the recipe:

  1. Used whole wheat pastry flour (atta) for the crackers.
  2. Substituted molasses for some  honey as I was out of honey.
  3. I made double the middle layer (mistake..) and double the chocolate (bring on more 🙂 )

Additional Information:

These bars freeze very well, so don’t be afraid to pop some into the freezer.

The graham wafers may be kept in an airtight container for up to 2 weeks. Mine lasted about that long.

If making the graham crackers with wheat, replace the gluten-free flours (tapioca starch, sweet rice flour, and sorghum flour) with 2 ½ cups plus 2 tbsp of all-purpose wheat flour, or wheat pastry flour. Watch the wheat-based graham wafers very closely in the oven, as they bake faster than the gluten-free ones, sometimes only 12 minutes OR even 10.

For the Nanaimo Bars, if making with wheat, replace the gluten-free graham wafer crumbs with equal parts wheat graham wafer crumbs!

Information on Celiac Disease: http://www.mayoclinic.com/health/celiac-disease/DS00319

Information on Vancouver 2010: http://www.vancouver2010.com/

City of Nanaimo: http://www.nanaimo.ca/EN/index.html

Gluten Free Flour Information: http://glutenfreemommy.com/gluten-free-grains-101-the-best-flour-blend/

Video on making Nanaimo bars: http://www.youtube.com/watch?v=x5aqa6R1jIM&feature=fvsr

Recipe and video for Vegan Nanaimo Bars (you didn’t think I’d leave you guys out?): http://www.everydaydish.tv/index.php?page=recipe&recipe=159

Recipe for gluten-free and vegan Graham Wafers: http://www.thesensitivepantry.com/the-sensitive-pantry/2009/8/3/grahams-…


Nanaimo bars disappointed me because of the middle layer. A bit too sweet. I will try other buttercreams or some custard as filling the next time. The husband was pretty impressed with the texture of the middle layer though and wanted me to just follow the recipe and make the amount of filling given.

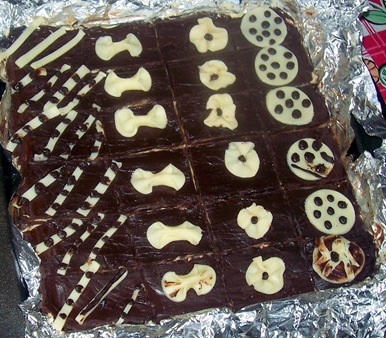
For the funny attempts at decorating. I used plastic chocolate. I will post the plastic chocolate recipe separately later.

It’s after ages I am posting a daring baker challenge on time. I also hope that I shall continue to do so in the coming months and blog a little more….I have dozens of posts half written which have not yet made it to the blog.

Expenditure:

Heavy Whipping Cream 1/2 pint ……….$1.99………….from Meijer

———————————————————————————————

Total………………………………………$1.99

IMG_1344

I just received this photo…..it certainly looks better than the first

Posted in - Confectioner's Sugar, -Almonds, -Butter, -Coconut, -Cream, -Dark Brown sugar, -Honey, -Molasses, -Semisweet Chocolate, -Vanilla, -Whole Wheat Pastry flour, Baking Soda, Daring Bakers, Eggs, Milk, Sugar, Vanilla Pudding mix | Tagged: , , , | 4 Comments »

Daring Cooks make Sushi 寿司…….I make it Vegetarian

Posted by vivnidhi on November 18, 2009

nov_75

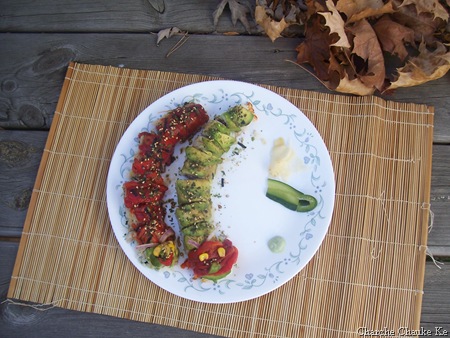
Top: Caterpillar Rolls , Bottom L: Nigiri Sushi and Bottom R : Spiral Roll

I have not been able to post earlier about the fabulous sushi Daring Cooks made this month. I love sushi and really had my fill making vegetarian sushi. I couldn’t say enough of ” This is so much better than store bought and I made so much so cheap” I found this month’s Daring Cook challenge the best so far. The instructions are quite precise so no chatter in this post.  I was supposed to post on the 14th, ah well here I am …………

The November 2009 Daring Cooks challenge was brought to you by Audax of Audax Artifex and Rose of The Bite Me Kitchen. They chose sushi as the challenge.

Sushi (寿司 or 鮨 or 鮓) is much appreciated for its delicate taste and exquisite appearance. Sushi actually means vinegared rice, which is the essential ingredient in every sushi recipe. Sushi is simple and cheap to make at home, needs no special equipment and is an excellent way to use left overs.

Although sushi in various forms has been around for fourteen centuries, the modern version was invented in Japan in the 1800’s where a ‘hand-formed’ sliced fresh fish and vinegared rice ball was eaten as a snack food. Nowadays, sushi is made with various seafood, meats and vegetables, raw and cooked.

PART 1 : SUSHI RICE (makes about 7 cups of cooked sushi rice)

Preparation time: 1¾ hours consisting of :-
Rinsing and draining rice: 35 minutes
Soaking rice: 30 minutes (includes 5 minutes making the vinegar dressing)
Cooking and steaming time: 25 minutes
Finishing the rice: 15 minutes

INGREDIENTS:

  • 2½ cups uncooked short grain rice
  • 2½ cups water
  • For superior results use equal volumes of rice and water
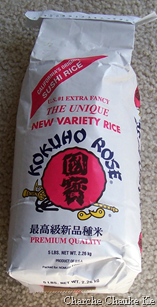
nov_41 nov_47

Sushi Rice

Optional Ingredients

  • 3 inch (75mm or 15 grams) square dashi konbu (or kombu) (dried kelp seaweed) wipe with a damp cloth to remove white powder & cut a few slits in the sides of the kelp to help release its flavors  (I used Shimaya Instant Dashi Konbu powder …..I used only 1 tsp. in the water given……that’s what I got)
  • 2½ teaspoons (12.5 mls) of sake (Japanese rice wine)

Sushi vinegar dressing

  • 5 Tablespoons (75 mls) rice vinegar
  • 5 Teaspoons (25 mls or 21 grams) sugar
  • 1¼ Teaspoons (6.25 mls or 4.5 grams) salt

DIRECTIONS:
Rinsing and draining the rice

  1. Swirl rice gently in a bowl of water, drain, repeat 3-4 times until water is nearly clear. Don’t crush the rice in your hands or against the side of the bowl since dry rice is very brittle.
  2. Gently place rice into a strainer and drain well for 30 minutes.

Soaking the rice

  1. Gently place the rice into a heavy medium pot with a tight fitting lid (if you have a loose fitting lid use a piece of aluminum foil to make the seal tight).
  2. Add 2½ cups of water and the dashi konbu. (I used 1 tsp. instant powder)
  3. Set the rice aside to soak for 30 minutes, during this time prepare the sushi rice dressing.

Preparing the Rice Vinegar Dressing

  1. Combine the rice vinegar, sugar and salt in a small bowl.
  2. Heat on low setting.
  3. Stir until the mixture goes clear and the sugar and salt have dissolved.
  4. Set aside at room temperature until the rice is cooked.

Cooking the rice

  1. After 30 minutes of soaking add sake (if using) to the rice.
  2. Bring rinsed and soaked rice to the boil.
  3. Reduce heat to the lowest setting and simmer, covered, until all the water is absorbed, 12-15 minutes. Do not remove the lid during this process. Turn off heat.
  4. Let stand with the lid on, 10-15 minutes. Do not peek inside the pot or remove the lid. During this time the rice is steaming which completes the cooking process.

Finishing the rice

  • Turning out the rice

  1. Moisten lightly a flat thin wooden spatula or spoon and a large shallow flat-bottomed non-metallic (plastic, glass or wood) bowl. Do not use metallic objects since the vinegar will react with it and produce sour and bitter sushi rice.
  2. Remove the dashi konbu (kelp) from the cooked rice.
  3. Use the spatula to loosen gently the rice and invert the rice pot over the bowl, gently causing the cooked rice to fall into the bowl in one central heap. Do this gently so as not to cause the rice grains to become damaged.

  • Dressing the rice with vinegar

  1. Slowly pour the cooled sushi vinegar over the spatula onto the hot rice.
  2. Using the spatula gently spread the rice into a thin, even layer using a 45° cutting action to break up any lumps and to separate the rice. Don’t stir or mash rice.
  3. After the rice is spread out, start turning it over gently, in small portions, using a cutting action, allowing steam to escape, for about a minute.

  • Fanning & Tossing the rice

  1. Continue turning over the rice, but now start fanning (using a piece of stiff cardboard) the rice vigorously as you do so. Don’t flip the rice into the air but continue to gently slice, lift and turn the rice occasionally, for 10 minutes. Cooling the rice using a fan gives good flavor, texture and a high-gloss sheen to the rice. The vinegar dressing will be absorbed by the hot rice. Using a small electric fan on the lowest speed setting is highly recommended.
  2. Stop fanning when there’s no more visible steam, and all the vinegar dressing has been adsorbed and the rice is shiny. Your sushi rice is ready to be used.

  • Keeping the rice moist

  1. Cover with a damp, lint free cloth to prevent the rice from drying out while preparing your sushi meal. Do not store sushi rice in the refrigerator leave on the counter covered at room temperature. Sushi rice is best used when it is at room temperature.

* Tip: To make sushi rice: for each cup of rice use 1 cup of water, 2 Tbs rice vinegar, 2 tsp sugar, ½ tsp salt and 1 tsp sake. For superior results use equal volumes of rice and water when cooking the sushi rice since the weight of rice can vary. Weight of 2½ cups of uncooked rice is about 525 grams or 18½ ounces.

* Tip: While the rice is draining, soaking and cooking prepare your rice vinegar dressing, sushi fillings and toppings.

* Tip: Photo series on How to Cook Rice with a Pot
http://www.sushiencyclopedia.com/how_to_make_sushi/how_to_cook_rice_with…

* Tip: Photo series on How to Make Sushi Rice with Tools You Already Own
http://www.sushiencyclopedia.com/how_to_make_sushi/how_to_make_sushi_ric…

NOTES:
Sushi Rice – choose a short or medium grain rice. Do not use Arborio, long-grain, or parboiled white rice. Medium-grained calrose is a suitable rice. Rice expands (about 3 times) when cooked so make sure your pot is large enough. Washing the rice removes the rice flour that coats the rice and gives a fresh flavor and scent to the cooked rice. Look for rice that is labeled ‘sushi’ rice. Cooked sushi rice can be placed in plastic bags and frozen for 3 months, microwave when needed. Cooked sushi rice should be sticky, shiny and the individual grains of rice can been see. Price: AUS $4/KG.

Dashi konbu – or ( dashi kombu) – dried kelp, it looks like broad, leathery, wrinkly greenish ribbon often coated with a white powder. The darker green the leaves, the better the quality of kelp. Dashi konbu adds a refreshing light ocean taste to sushi rice. Price: AUS $1.50 for ten 3”(75mm) squares.

Rice Vinegar – this gives prepared sushi rice its unique clean, crisp taste. Do not use bottled “sushi vinegar” as it is too harsh and has a bitter after-taste. Look carefully at the label of the rice vinegar it should have NO SALT and NO SUGAR in the product. Apple cider vinegar is a good substitute if rice vinegar is not available. You can use mild white wine vinegar or mild red wine vinegar if you cannot find rice vinegar or apple cider vinegar. DO NOT USE NORMAL WHITE VINEGAR it is too harsh. Price: AUS $4 /500ml bottle.

Sake – Japanese rice wine. Do not use cooking sake or Chinese cooking rice wine, look for a reasonably priced drinkable sake. Refrigerate opened sake & use within two months. You can use vodka or a mild tasting gin if sake is not available. Price: AUS $10/500ml bottle.

Sugar – you can use mild honey or any other vegan substitute to give the equivalent sweetness.


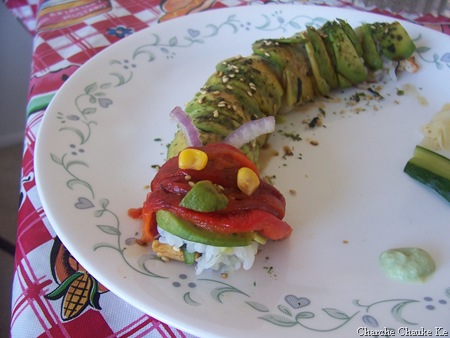
PART 2 : Dragon Rolls (also called Caterpillar Rolls)

Preparation time: 30 minutes, plus 1¾ hours to make the sushi rice
Cooking time: about 5 minutes (grilling the eel)

Yield: 2 inside-out (uramaki) sushi rolls

INGREDIENTS:

  • 1 sheet 7”x8” (17.5cmx20cm) of toasted nori (dried seaweed sheets), cut into halves
  • 1/2 Japanese cucumber
  • 2 cups of prepared sushi rice
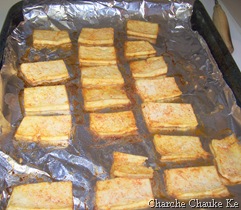
  • 3 slabs tofu (sliced, seasoned with salt & paprika and baked at 400 F for 20 minutes) 
  • 1 Avocado
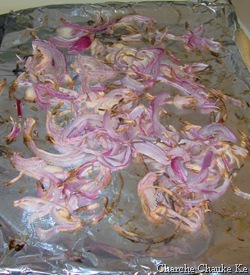
  • 1 Red onion thinly sliced and broiled for 7-8 minutes
  • Vinegared Water – ½ cup of water combined with a dash of rice vinegar
  • Various small amounts of sauces to use as the flames of the dragon (or legs of a caterpillar)

Optional

  • A mix of crumbled toasted nori, toasted sesame seeds and sugar and salt

nov_52 nov_51

Japanese Cucumber and salt paprika seasoned baked tofu
nov_50

Oiled & Broiled thinly sliced red onions

DIRECTIONS:
1.Cut cucumber into strips ¼ inch (6mm) x 7” (175mm) long, then salt, rinse & dry the strips.
2.Grill (broil) the red onions for about 2-5 minutes until bubbling. Bake sliced seasoned tofu. Apply or spray some oil before baking.

3.Halve, pit and peel the avocado. Cut the avocado halves into thin even 1/8 inch (3 mm) slices. Fan out the cut avocado into a 7 inch (175 mm) overlapping pattern.
4.Cover bamboo mat with plastic wrap. Place a sheet of nori shiny side down, lengthwise, on the edge the mat.
5.Moisten lightly your hands in the bowl of vinegared water.
6.Place one cup of rice on the nori and gently rake your fingertips across grains to spread rice evenly. Do not mash or squash the rice onto the nori, the rice should appear loosely packed and be evenly distributed over the entire sheet, you should be able to see the nori sheet in a few places.
7.Flip the rice-covered nori over (so the bare nori is now on top) and place on the edge of the mat closest to you.
8.Slice tofu again in slices. Arrange sliced baked tofu across the length of the nori, not quite centred on it but a little closer to you. Place half the cucumber sticks & grilled onions next to the tofu.
9.Lift the edge of the mat closest to you with both hands, keeping your fingertips over the fillings, and roll the mat and its contents until the edge of the mat touches straight down on the nori, enclosing the fillings completely. Lift up the edge of the mat you’re holding, and continue rolling the inside-out roll away from you until it’s sealed. Tug at the mat to tighten the seal. If the rice doesn’t quite close the roll add more rice in the gap and re-roll using the mat to completely cover the inside-out roll. Place the roll on a damp, clean smooth surface.
10.Spread about 1 tablespoon of the optional sesame mix along the entire top of the rice-covered roll. Using the plastic covered mat gently press the fish roe so it adheres to the rice.
11.Slide a knife under one fan of avocado and transfer it onto the top of an inside-out roll. Gently spread out the avocado layer to cover the entire roll. Lay the plastic wrapped mat over the avocado-covered roll. Squeeze very gently to shape the roll.
12. Lay a sheet of plastic wrap over the roll. Slice the roll into 6-8 equal, bite-sized pieces, wiping your knife with a damp towel before each slice. Discard the plastic wrap. Repeat the above to make one more roll.
13.Arrange the cut pieces on a serving plate with the sauces so the finished dish appears as a dragon breathing fire and flames (or a caterpillar with many legs).

* Tip: The most common mistake is having too much filling the golden rule is less is more when it comes to making sushi it is easier to roll an under-filled roll than an over-filled roll.

* Tip: Dampen your knife with a moist lint-free towel before every cut – this prevents the sushi rice from sticking to your knife.

* Tip: Excellent videos on making Dragon Rolls
http://www.youtube.com/watch?v=pQZGRohVNFQ
http://www.youtube.com/watch?v=fo55iBN9FQs&feature=related
nov_62

Caterpillar roll

nov_64

Caterpillar rolls with pickled ginger and wasabi

NOTES:
Bamboo mat (makisu) – A 10 inch (25cm) square mat made of thin slates of bamboo tied together with string.
Substitutes: a thin magazine cut to size wrapped in plastic wrap or a few layers of parchment paper cut to size about 10 inch (25cm) square.

Nori – Sheets of seaweed (laver) processed into thin sheets about 7 inches x 8 inches (17.5cm x 20cm) in size. Always re-toast the nori sheet over a gas stove on low flame for 5 to 10 seconds, or place nori on a clean oven rack and bake it in a preheated 350F-degree (180C) oven for 30 seconds. Nori should be sealed tightly in a plastic bag and used within a few months. It can be stored in the freezer. Nori will deteriorate if left out of its sealed package so use quickly.
Substitutes: Thin cooked egg omelette cut to same size as a nori sheet (7 inches by 8 inches or 17.5cm x 20cm). Also soya bean wrappers, rice paper, tofu wrappers, dosas, crepes or an overlapping layer of thinly sliced cooked vegetables.

Japanese Cucumber – Japanese cucumbers are thin-skinned, seedless and contain much less water than normal cucumber.
Substitutes: English or hothouse cucumbers which have been peeled, de-seeded and salted as above. If not available try matchsticks of your favorite crisp vegetable.

Avocado
Substitutes: If not available use slices of roasted capsicum (bell pepper), slices of roasted tomatoes, lightly cooked whole snap (snow) peas, slices of Japanese daikon radish or other cooked thinly sliced vegetables, or slices of ‘sushi’ grade fish such as tuna, yellow tail and red snapper; smoked salmon, pastrami, salami, various colour’s of fish roe, or various colour’s of sesame seeds.

PART 3 : Spiral Sushi Roll
This is easiest ‘decorative’ sushi roll.

Preparation time: 15 minutes, plus 1¾ hours to make the sushi rice

Yield: One Roll, cut into 8 pieces

INGREDIENTS:

  • 2½ cups prepared sushi rice
  • 2 sheets of toasted nori, each sized 7”x8” (17.5cmx20cm)
  • Six assorted fillings, each filling should be the size of a pencil (see note below)

DIRECTIONS:
1.Join 2 sheets of nori by moistening the adjacent edges and overlapping them about ½ inch (12mm).
2.Place this double sheet shiny side down on a rolling mat, part of the nori will extend beyond the mat.
3.Using moist fingers place 2½ cups of rice on the nori and gently rake your fingertips across grains to spread rice evenly, leaving ¼ inch (6mm) nori showing on the both ends of the sheet. Do not mash or squash the rice onto the nori, the rice should appear loosely packed and be evenly distributed over the entire sheet, you should be able to see the nori sheet in a few places.
4.Using your fingers form six grooves (in the same direction that you will be rolling the mat) at even intervals across the bed of rice. Make the first groove about 2 inches (50 mm) from the edge of the nori sheet. Form the grooves by pushing the rice away, do not mash or squash the rice, leave a loose one grain layer of rice in the bottom of the grooves. Level the areas between the grooves where you have pushed the rice.
5.Place your fillings in the grooves. Fill the grooves a little higher than the surrounding rice bed.
6.Then roll the sushi up from the edge closest to you, this will form a spiral pattern of nori, rice and fillings inside the roll.
7.Slice into 8 pieces with a very sharp wet knife, wiping the blade with a damp cloth after each cut.
8.Place the pieces on a platter and garnish.

NOTE:
Make each groove about a finger-width wide they will hold about 1-2 tablespoons of filling. Use fillings that compliment each other and are highly colored. Use parboiled vegetables cut into strips, seafood, left over eel, smoked fish or chicken, whole cooked beans, edible flowers etc….

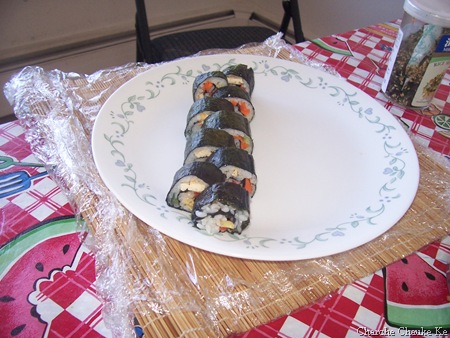
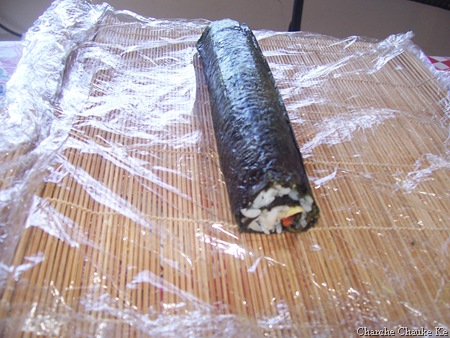
I used baked seasoned tofu, roasted red bell pepper, carrots, salted and drained Japanese cucumbers, omelette and grilled onions. Grilled vegetables in sushi is absolutely fabulous. Take my word and try it.
nov_65 

Spiral Roll

nov_67

Spiral Roll


PART 4 : Nigiri Sushi
Nigiri sushi is the type of sushi most often made in sushi bars. In Japanese, nigiri means “squeeze”.

Preparation time: 30 minutes, plus 1¾ hours to make the sushi rice

Yield: 14-16 pieces of sushi

INGREDIENTS:

  • 2 cups prepared sushi rice
  • 8 pairs of assorted toppings, 200 gms/7 ozs total of fish, meat or vegetables (see note below)
  • 1 tablespoon Wasabi (paste, reconstituted powder) or any other paste to adhere topping to rice

Optional

  • Garnishes such as Ginger (pickled), chilli strips, vegetables flowers etc
  • Thin strips of nori or vegetables (for tying topping on)

DIRECTIONS:
1.When handling sushi rice, make certain your hands are very clean. To keep the rice from sticking to our hands moisten your hands with vinegared water.
2.Form nigiri sushi by scooping up a small amount (about 2 tablespoons) of rice with your forefinger and second finger of your right hand and placing it in your cupped left palm.
3.Use the fingers and thumb of your right hand to form it into a long, narrow mound (about 2 inches x 1 inch wide or 50mm x 25mm) in your cupped palm.
4.Press enough to make the rice hold firmly together. Place the nigiri on a damp cutting board flat side down. Don’t let sushi touch or they’ll stick to each other. At this point, you can cover the sushi with plastic wrap, and they’ll keep at room temperature (not the refrigerator) for several hours.
5.Smear a thin line of wasabi on top of the rice and place the topping piece on it. You may need to press the topping down lightly with your fingers and adjust the shape of the rice accordingly to form an attractive piece of nigiri sushi. If your topping is very loose like fish roe you can place a strip of nori (higher than the rice) around the nigiri and form ‘battleship’ sushi. The cavity that the nori forms holds the topping so it does not fall off.
6.Garnish as desired and use strips of nori (or vegetable) to tie the topping to the nigiri if needed.
7.It is customary to make nigiri sushi in pairs, so make two of each variety.

* Tips: A great video on making nigiri sushi
http://www.howcast.com/videos/270-How-To-Make-Sushi
A great web page on slicing fish for nigiri
http://www.sushilinks.com/sushi-recipes/how-to-buy-fish/index.html
nov_73

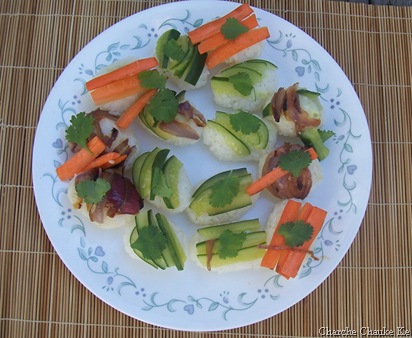
Nigiri Sushi topped with vegetables

NOTES:
Seafood nigiri must use sushi grade (sashimi grade) fish. Try tuna, red sea bream (red snapper), yellowtail or salmon. Cooked shrimp, cooked crab, cooked meat can also be used! You can use any vegetable you wish try asparagus, pumpkin, carrot, avocado, cucumber, shiitake mushroom, tofu, thin sliced egg omelette, etc… Thinly slice or julienne vegetables, parboiling if necessary tie on with a thin (1/4” or 6mm) strip of nori or vegetable strip wrapped around the whole sushi if needed..

*MOST IMPORTANT ADVICE YOU MUST READ THIS* – If you are using raw fish or raw meat it must be ‘sushi’ grade (sashimi grade) ask your fishmonger or butcher for advice and if in doubt don’t use. Find your local Japanese market and ask them where the best sushi (sashimi) fish is. Maybe you can buy sushi grade fish at your local sushi bar. Purchase flash-frozen sashimi grade fish which is guaranteed to be free of all parasites. Only salt-water fish and shellfish should be consumed raw. Crab and prawn (shrimp) should always be cooked. Sashimi grade fish should have a clean cool smell if it smells fishy it is a sign that the fish is old and cannot be used. If you are pregnant or have a weakened immune system only use cooked ingredients. There is no need to use raw fish or raw meat in sushi.

Resources
Written instructions on making various forms of sushi can be found here http://homepage3.nifty.com/maryy/eng/sushi_roll.htm
http://www.sushiencyclopedia.com/index.html


Expenditure:

Sushi Rice………………………….$6.49 for 5 lb……………….HuaXing Asia Store ……….plenty left

Sake……………………………….$2.32 for 300 ml…………….HuaXing Asia Store………..plenty left

Instant seaweed powder……………$2.59 for 64 g……………….HuaXing Asia Store……….plenty left

Japanese Cucumber………………..$0.5 for 2 ………………….HuaXing Asia Store………..gone

Tofu……………………………….$2.49 for 2.65 lb……………HuaXing Asia Store………..plenty left

Sesame,nori mix……………………$2.49………………………HuaXing Asia Store………..half left

Wasabi powder…………………….$1.69………………………HuaXing Asia Store………..half left

Pickled Ginger……………………..$2.99 for 12 oz…………….HuaXing Asia Store…………half left

—————————————————————————————————–

Total………………………………$21.56

Now you know why sushi is so expensive. Anyway this much money will make many many servings till you really get your fill of sushi like me. And yes, this was not all, I bumped into another car on my way out of the store and so this sushi turned out really really expensive.

Daring Cooks Blogroll

Posted in - Red onion, --Pickled Ginger, -Avocado, -Carrot, -Cilantro, -Corn, -Dashi Konbu Instant powder, -Japanese Cucumber, -Nori Sheets, -Red Bell Pepper, -Rice Vinegar, -Sake, -Sesame seeds, -Sushi Rice, -Tofu, -Wasabi, Eggs | Tagged: , , , , , | 11 Comments »

Last of the oldies: Daring Bakers June Challenge : Bakewell Tart….er…Pudding

Posted by vivnidhi on August 10, 2009

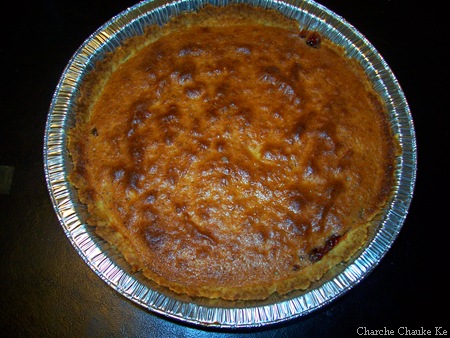
Perhaps the pictures I took were so bad that I never felt like posting. But, nevertheless, I must say that I made this delicious dessert in the month of June when I was supposed to, I don’t know why I did not post it. It was my first time making frangipane……..”it was lovely indeed” ……….as the English would say 😉

It’s easy and quite delicious. The June Daring Bakers’ challenge was hosted by Jasmine of Confessions of a Cardamom Addict and Annemarie of Ambrosia and Nectar. They chose a Traditional (UK) Bakewell Tart… er… pudding that was inspired by a rich baking history dating back to the 1800’s in England.  You can read all about the bakewell tart on these blogs and it is a very interesting read. I am just on one of my “too tired to write sessions” today.

The Mighty Flame at 180 x 180 (largest)presents:

July1_44

Bakewell Tart ….er pudding

Looks plain but trust me ….tastes delicious

The recipe:

Makes one 23cm (9” tart)
Prep time: less than 10 minutes (plus time for the individual elements)
Resting time: 15 minutes
Baking time: 30 minutes
Equipment needed: 23cm (9”) tart pan or pie tin (preferably with ridged edges), rolling pin

One quantity sweet shortcrust pastry (recipe follows)
Bench flour
250ml (1cup (8 US fl. oz)) jam or curd, warmed for spreadability
One quantity frangipane (recipe follows)
One handful blanched, flaked almonds

Assembling the tart
Place the chilled dough disc on a lightly floured surface. If it’s overly cold, you will need to let it become acclimatised for about 15 minutes before you roll it out. Flour the rolling pin and roll the pastry to 5mm (1/4”) thickness, by rolling in one direction only (start from the centre and roll away from you), and turning the disc a quarter turn after each roll. When the pastry is to the desired size and thickness, transfer it to the tart pan, press in and trim the excess dough. Patch any holes, fissures or tears with trimmed bits. Chill in the freezer for 15 minutes.

Preheat oven to 200C/400F.

Remove shell from freezer, spread as even a layer as you can of jam onto the pastry base. Top with frangipane, spreading to cover the entire surface of the tart. Smooth the top and pop into the oven for 30 minutes. Five minutes before the tart is done, the top will be poofy and brownish. Remove from oven and strew flaked almonds on top and return to the heat for the last five minutes of baking.

The finished tart will have a golden crust and the frangipane will be tanned, poofy and a bit spongy-looking. Remove from the oven and cool on the counter. Serve warm, with crème fraîche, whipped cream or custard sauce if you wish.

When you slice into the tart, the almond paste will be firm, but slightly squidgy and the crust should be crisp but not tough.

Jasmine’s notes:
• If you cannot have nuts, you can try substituting Victoria sponge for the frangipane. It’s a pretty popular popular cake, so you shouldn’t have any troubles finding one in one of your cookbooks or through a Google search.
• You can use whichever jam you wish, but if you choose something with a lot of seeds, such as raspberry or blackberry, you should sieve them out.
• The jam quantity can be anywhere from 60ml (1/4 cup) to 250ml (1cup), depending upon how “damp” and strongly flavored your preserves are. I made it with the lesser quantity of home made strawberry jam, while Annemarie made it with the greater quantity of cherry jam; we both had fabulous results. If in doubt, just split the difference and spread 150ml (2/3cup) on the crust.
Annemarie’s notes:
• The excess shortcrust can be rolled out and cut into cookie-shapes (heck, it’s pretty darned close to a shortbread dough).

Sweet shortcrust pastry

Prep time: 15-20 minutes
Resting time: 30 minutes (minimum)
Equipment needed: bowls, box grater, cling film

  • 225g (8oz) all purpose flour
    30g (1oz) sugar
    2.5ml (½ tsp) salt
    110g (4oz) unsalted butter, cold (frozen is better)
    2 (2) egg yolks
    2.5ml (½ tsp) almond extract (optional)
    15-30ml (1-2 Tbsp) cold water

Sift together flour, sugar and salt. Grate butter into the flour mixture, using the large hole-side of a box grater. Using your finger tips only, and working very quickly, rub the fat into the flour until the mixture resembles bread crumbs. Set aside.

Lightly beat the egg yolks with the almond extract (if using) and quickly mix into the flour mixture. Keep mixing while dribbling in the water, only adding enough to form a cohesive and slightly sticky dough.

Form the dough into a disc, wrap in cling and refrigerate for at least 30 minutes

Jasmine’s notes:
• I make this using vanilla salt and vanilla sugar.
• If you wish, you can substitute the seeds of one vanilla bean, one teaspoon of vanilla paste or one teaspoon of vanilla extract for the almond extract

Frangipane

Prep time: 10-15 minutes
Equipment needed: bowls, hand mixer, rubber spatula

  • 125g (4.5oz) unsalted butter, softened
    125g (4.5oz) icing sugar
    3 (3) eggs
    2.5ml (½ tsp) almond extract
    125g (4.5oz) ground almonds
    30g (1oz) all purpose flour

Cream butter and sugar together for about a minute or until the mixture is primrose in colour and very fluffy. Scrape down the side of the bowl and add the eggs, one at a time, beating well after each addition. The batter may appear to curdle. In the words of Douglas Adams: Don’t panic. Really. It’ll be fine. After all three are in, pour in the almond extract and mix for about another 30 seconds and scrape down the sides again. With the beaters on, spoon in the ground nuts and the flour. Mix well. The mixture will be soft, keep its slightly curdled look (mostly from the almonds) and retain its pallid yellow colour.

We had gone strawberry picking that weekend and so of course I prepared some quick strawberry jam. No pectin, nothing but strawberries, sugar and lemon juice….that’s it and folks at home could not have enough of it…..actually there wasn’t t enough of it as I used it up in the tart 🙂 .

Optional element: Home made jam or curd
We know several amongst us are rather jammy with making their own jams and preserves. Go ahead get wild and creative or simply showcase whatever’s local and in season. If you haven’t jammed before and want some hints or recipes, take a look at Bernardin’s homecanning.ca. If you want to just make some jam for this challenge and not go through sterilizing jars and snap lids, you can try a pan jam, similar to Jasmine’s Blackberry Pan Jam. If you do use homemade jam, please include your recipe or the link to the one you used in your post.

Quick Strawberry Pan Jam (similar to Jasmine‘s pan jam)

  • Strawberries 2 cups cleaned and quartered (measured after cutting)
  • sugar 1 1/2 cups
  • Lemon Juice 1 Tbsp.

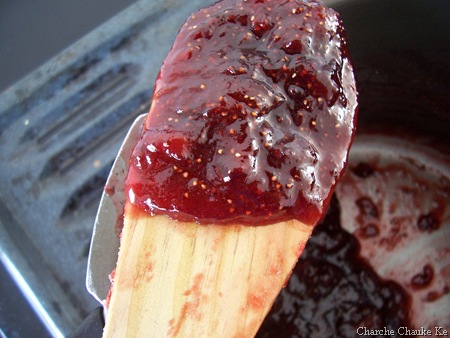
On a heavy bottomed pan, heat the strawberries till they boil and add the sugar and lemon juice. Let this cook on medium heat till a  successful plate test can be done. For the plate test, place a plate in the freezer or chill it well. Pour a big drop of jam on this cold plate and give it 30 seconds. If the jam has reached the right consistency, it will very slowly spread a little. More about jam making here.

July1_39

Strawberry Pan Jam

I also made some strawberry leather ( I mentioned we went strawberry picking, so, yeah I had a bounty)  for “decoration” which looked good but bad pictures…. Anyway, the boy is nuts about this fruit leather and I prefer making it at home to avoid preservatives and less sugar compared to store bought. Very simple to make, patience is the only virtue required in making fruit leather. Most types of fruits can be used to prepare fruit leather. Please leave melons :-)). I have made fruit leather out of strawberries and kiwi fruit so far. It’s basically like aam papad that we would eat just with other fruits….kids love it. Unfortunately, I have no pictures…next time.

Strawberry Leather:

The Recipe:

  • Strawberries 2 cups cleaned, hulled and pureed
  • sugar  1/4 cup
  • Lemon juice 1 tsp.

1. The same ingredients as jam but tastes quite different. Lemon juice is required both here and in jam to reduce crystallization of sugar. I remember jam bottles which would have rims covered in sugar. Anyway, so far I have only made in small quantities which lasts me about 3-4 weeks in the refrigerator and no sugar crystallization so far. Anyway, puree the strawberries and strain them. I just add the strawberry seeds to the jam….I like the crunch in it .

July1_31 July1_32

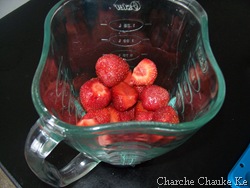
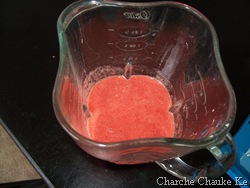
Strawberries for strawberry leather

2. In a heavy bottomed pan, add sugar, strained puree and lemon juice and heat on medium heat. Stop after about 20 minutes or until the mixture has thickened considerably yet should be of pouring and spreading consistency. Try your hand at it……..the result will be delicious anyway 🙂 .

3. Cover a baking sheet with parchment paper. Parchment paper is a necessity for making fruit leather. Spread the mix as thinly and uniformly as possible. We don’t want to spread very thin as it will get crisp or worse burn but too thick will take an eternity. About 1/4 inch is good enough.

4. Preheat the oven to 200 F. Keep the baking sheet in the oven and forget for at least an hour. After the first hour (for a small batch) I like to check every half hour. The mixture keeps drying and when it’s ready, there won’t be any soft portion left & will also not be very sticky.

5. Let it cool completely and store wrapped in parchment. Can be cut as desired. The result is worth the effort.

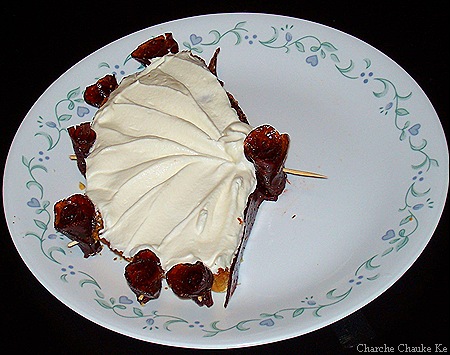
July2_07

Bad attempt really……bakewell tart was delicious with some whipped topping

The red stuff is strawberry leather roses…..bet it didn’t look as bad as here 🙂

We all thoroughly enjoyed this bakewell tart…..er..pudding. It’s a great & easy make ahead dessert. We liked it better the next day. 

Did not cost me anything as I made half the quantity and had everything at home.

Posted in - Confectioner's Sugar, -All Purpose flour, -Almond extract, -Almonds, -Butter, -lemon, -Strawberry, Eggs, Sugar | Tagged: , , | 3 Comments »

Daring Bakers July bring Cookies…….

Posted by vivnidhi on July 28, 2009

Vanilla at 180 x 180 (largest)brings…..

100_3688

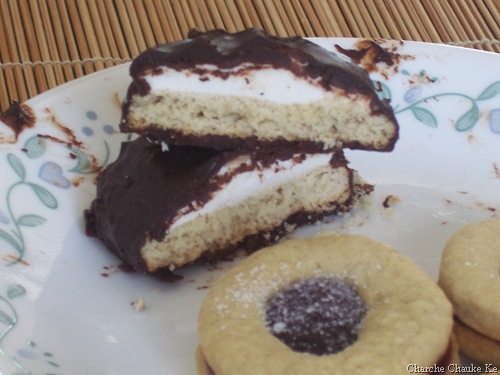
The boy can’t stop himself 😉 Plum jam cookies and lots more…….

Jaana tha Japan , pahunch gaye Cheen…………Had to go to Japan , and I reached China…. You don’t get it……yeah…..oh well! the daring baker challenge this month was mallow cookies and milanos….long live Pepperidge Farm! I ended up making those and a fusion…..which we all absolutely loved.

These cookies pictured above are truly the best cookies I have ever made. If you liked and ate jam biscuits (called so in India) in your childhood, these cookies will bring those memories back. I surprised myself……..these tasted so good.

The July Daring Bakers’ challenge was hosted by Nicole at Sweet Tooth. She chose Chocolate Covered Marshmallow Cookies and Milan Cookies from pastry chef Gale Gand of the Food Network.

The mallow cookies were great, I would have never dreamt of making homemade marshmallows but homemade taste so………..good and you can flavor them just as you would want. Thanks a lot Nicole, for this challenge.The mallows biscuit was really delicious. The no. of cookies mentioned in the original recipe is all messed up….which actually worked in my favor 🙂 .  I loved it so much that I made some plum jam and filled them up and loved the result.

Milanos were quite a disappointment and I would certainly not want to make those again. The milanos dough was like tuiles batter yet not even that….I give up.

The husband was quite excited about Milano cookies and so I made them first, in fact packed a few for a friend, but it was a lot of effort in trying to make them the same size…..and the end result was not worth it… I just made about 2 dozen of them.After that I split the batter in half , spread on the parchment on the entire tray and baked for 5 minutes in the oven. Cut them with a pizza cutter in squares and back in oven for 5-7 minutes more. Same with the rest of the batter. Filled them up up with the chocolate ganache and anything with chocolate gets eaten here. I do not recommend this and will not be making them again 🙂 . I should mention the chocolate ganache tasted good and the husband even helped me zest the whole orange. What do you think…….I will need help again some other time too..I must not forget the dear husband 🙂

100_3679

Don’t they look cute…….

Milanos for friends…….hope they ate it up soon…..before they turned chewy…….oh no….boo hoo hoo

100_3682 100_3686

Rest of the Milanos……..:-)


Here come the mallows…..pretty good cookies , if one is fond of marshmallows. We are not too fond of them, yet no cookies left of the 28 I made.

The recipe:

Mallows(Chocolate Covered Marshmallow Cookies)
Recipe courtesy Gale Gand, from Food Network website

Prep Time: 10 min
Inactive Prep Time: 5 min
Cook Time: 10 min
Serves: about 2 dozen cookies

• 3 cups (375grams/13.23oz) all purpose flour
• 1/2 cup (112.5grams/3.97oz) white sugar
• 1/2 teaspoon salt
• 3/4 teaspoon baking powder
• 3/8 teaspoon baking soda
• 1/2 teaspoon ground cinnamon
• 12 tablespoons (170grams/ 6 oz) unsalted butter
• 3 eggs, whisked together
• Homemade marshmallows, recipe follows
• Chocolate glaze, recipe follows

1. In a mixer with the paddle attachment, blend the dry ingredients.
2. On low speed, add the butter and mix until sandy.
3. Add the eggs and mix until combine.
4. Form the dough into a disk, wrap with clingfilm or parchment and refrigerate at least 1 hour and up to 3 days.
5. When ready to bake, grease a cookie sheet or line it with parchment paper or a silicon mat.
6. Preheat the oven to 375 degrees F.
7. Roll out the dough to 1/8-inch thickness, on a lightly floured surface. Use a 1 to 1 1/2 inches cookie cutter to cut out small rounds of dough.
8. Transfer to the prepared pan and bake for 10 minutes or until light golden brown. Let cool to room temperature.
9. Pipe a “kiss” of marshmallow onto each cookie. Let set at room temperature for 2 hours.
10. Line a cookie sheet with parchment or silicon mat.
11. One at a time, gently drop the marshmallow-topped cookies into the hot chocolate glaze.
12. Lift out with a fork and let excess chocolate drip back into the bowl.
13. Place on the prepared pan and let set at room temperature until the coating is firm, about 1 to 2 hours.

Note: if you don’t want to make your own marshmallows, you can cut a large marshmallow in half and place on the cookie base. Heat in a preheated 350-degree oven to slump the marshmallow slightly, it will expand and brown a little. Let cool, then proceed with the chocolate dipping.

Homemade marshmallows:
• 1/4 cup water
• 1/4 cup light corn syrup
• 3/4 cup (168.76 grams/5.95oz) sugar
• 1 tablespoon powdered gelatin
• 2 tablespoons cold water
• 2 egg whites , room temperature
• 1/4 teaspoon pure vanilla extract

1. In a saucepan, combine the water, corn syrup, and sugar, bring to a boil until “soft-ball” stage, or 235 degrees on a candy thermometer.
2. Sprinkle the gelatin over the cold water and let dissolve.
3. Remove the syrup from the heat, add the gelatin, and mix.
4. Whip the whites until soft peaks form and pour the syrup into the whites.
5. Add the vanilla and continue whipping until stiff.
6. Transfer to a pastry bag.

Chocolate glaze:
• 12 ounces semisweet chocolate
• 2 ounces cocoa butter or vegetable oil

1. Melt the 2 ingredients together in the top of a double boiler or a bowl set over barely simmering water.

100_3674

Marshmallow cookies before the dip in chocolate

I got 28 cookies by using 1/4 of the cookie dough. Made 1/2 the amount of marshmallows and chocolate glaze. Since my glaze eventually bloomed, I covered them up in Milanos ganache…….the Milano cookie filling :-)………yeah that’s me!! Tasted good, nevertheless 😉

Chocolate Ganache:

• 1/2 cup heavy cream
• 8 ounces semisweet chocolate, chopped
• 1 orange, zested

I also prepared some plum jam….just because I had some plums I had to use. Filled them up in the mallows crust, sprinkled with sugar and loved , loved it! Please do try if you are in the mood to make cookies, true labor of love , forming so many small bites but totally worth it ……..as you will see in pictures below 🙂

Plum Jam Recipe:

  • Plums 2 1/2 cups …..pitted, and chopped fine
  • Sugar 1 1/2 cups
  • Lemon juice  1 Tbsp

That’s it….I added all of this in a heavy bottomed saucepan with 2 Tbsp. water. Cooked it down till I could do the plate test. For the plate test, place a plate in the freezer or chill it well. Pour a big drop of jam on this cold plate and give it 30 seconds. If the jam has reached the right consistency, it will very slowly spread a little. More about jam making here. I made a small quantity, hence it went directly to the refrigerator.

100_3693

Pick one up……these are ready for a sprinkling of sugar

100_3709

Here are the mallows…..this is how they looked

100_3700

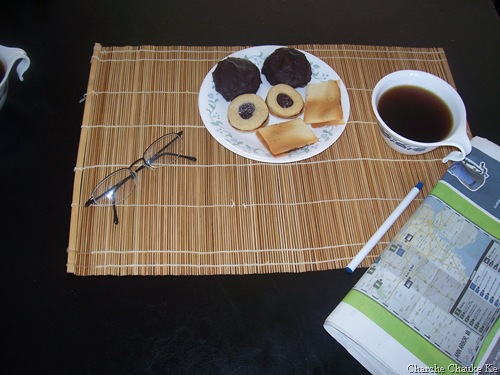
Perfect with coffee….for some great mornings………

I just took a picture as the husband had set the table

100_3711

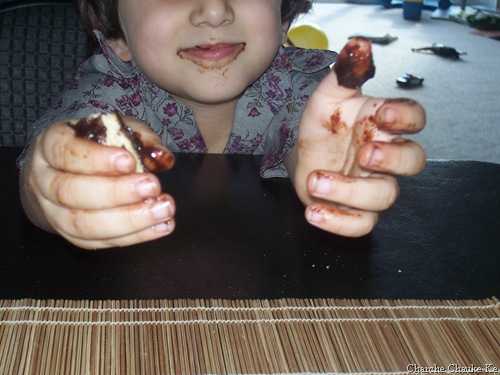
Somebody else had a great time too……….

It’s been one whole year being a part of the Daring Bakers for me. I have come a long way…..I remember my first challenge Filbert Gateau….I remember my delight. Now I dare to experiment on my own…..Thank you Lis and Ivonne and the whole Daring Baker community which is the best resource of all.

Expenditure:

Unsalted Butter: ………………….$2.17……….from Walmart, some left

Corn syrup(16 oz.)…………………$1.67……….from Kroger, lots left

Heavy cream(1/2 pint)…………….$2.89…………from Kroger, lots left

Powdered sugar……………………$1.99…………from Kroger, lots left

Bakers Chocolate semisweet(8 oz):$ 3.29………….from Kroger, none left

Orange 1 :-)…………………………$0.64………….from Kroger, ate it up….

————————————————————————————————–

Total………………………………..$12.65

Posted in -All Purpose flour, -Butter, -Canola Oil, -Cinnamon, -Corn Syrup, -Cream, -Orange, -Plums, -Semisweet Chocolate, -Vanilla, Baking Powder, Baking Soda, Daring Bakers, Eggs, Gelatin, Sugar | Tagged: , , , , , | 14 Comments »

More than a month late : Daring Bakers May: Apple Strudel

Posted by vivnidhi on July 5, 2009

This was the May’s Daring Baker Challenge. No, its not a case of dementia……..just pure procrastination. Its been strange strange past months, I would make Daring Bakers & Cooks challenges with a lot  of enthusiasm and then not post them. Everybody in the house seems to be suffering from a severe case of Writer’s Block. I really hope Lis and Ivonne don’t kick me out of the group. This month (whole of June), I sat and pondered and planned what I would do with the recipe……..but the truth is : I haven’t made it yet.

Anyway, often in life I have gone in my self-created shells and each time emerged stronger. So, I am hoping that the same would happen this time too. Cooking and baking has kept me sane all these years when I have not paid any particular attention to my career. I remember hearing somewhere (blame the radio for all my weird stories) that the happiest workers are those who work in creative fields. You bet, the only creativity I have is in the kitchen:-). This is the very thread that keeps me excited about the next day. When my mother was here a year back, she was surprised beyond belief to hear my then 2 year old son tell her all about Indian spices, where his Mom kept them, which utensils she used for what purpose.

Oh , now that I have blabbered about everything else, let’s get on with the strudel. I found it to be delicious and a perfect spring-summery light dessert.

Vanilla at 180 x 180 (largest)presents:

May_58

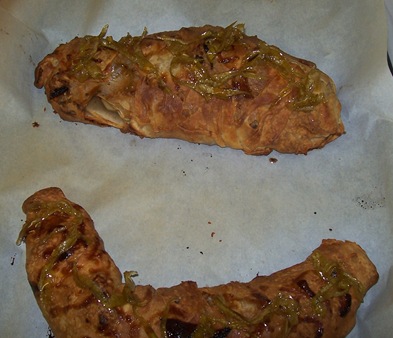
Mini Apple Strudel topped with candied apple peels and caramel sauce

The May Daring Bakers’ challenge was hosted by Linda of make life sweeter! and Courtney of Coco Cooks. They chose Apple Strudel from the recipe book Kaffeehaus: Exquisite Desserts from the Classic Cafés of Vienna, Budapest and Prague by Rick Rodgers.

Preparation time
Total: 2 hours 15 minutes – 3 hours 30 minutes

15-20 min to make dough
30-90 min to let dough rest/to prepare the filling
20-30 min to roll out and stretch dough
10 min to fill and roll dough
30 min to bake
30 min to cool

Apple strudel
from “Kaffeehaus – Exquisite Desserts from the Classic Cafés of Vienna, Budapest and Prague” by Rick Rodgers

2 tablespoons (30 ml) golden rum
3 tablespoons (45 ml) raisins
1/4 teaspoon ground cinnamon
1/3 cup plus 1 tablespoon (80 g) sugar
1/2 cup (1 stick / 115 g) unsalted butter, melted, divided
1 1/2 cups (350 ml) fresh bread crumbs
strudel dough (recipe below)
1/2 cup (120 ml, about 60 g) coarsely chopped walnuts
2 pounds (900 g) tart cooking apples, peeled, cored and cut into ¼ inch-thick slices (use apples that hold their shape during baking)

1. Mix the rum and raisins in a bowl. Mix the cinnamon and sugar in another bowl.

2. Heat 3 tablespoons of the butter in a large skillet over medium-high. Add the breadcrumbs and cook whilst stirring until golden and toasted. This will take about 3 minutes. Let it cool completely.

3. Put the rack in the upper third of the oven and preheat the oven to 400°F (200°C). Line a large baking sheet with baking paper (parchment paper). Make the strudel dough as described below. Spread about 3 tablespoons of the remaining melted butter over the dough using your hands (a bristle brush could tear the dough, you could use a special feather pastry brush instead of your hands). Sprinkle the buttered dough with the bread crumbs. Spread the walnuts about 3 inches (8 cm) from the short edge of the dough in a 6-inch-(15cm)-wide strip. Mix the apples with the raisins (including the rum), and the cinnamon sugar. Spread the mixture over the walnuts.

4. Fold the short end of the dough onto the filling. Lift the tablecloth at the short end of the dough so that the strudel rolls onto itself. Transfer the strudel to the prepared baking sheet by lifting it. Curve it into a horseshoe to fit. Tuck the ends under the strudel. Brush the top with the remaining melted butter.

5. Bake the strudel for about 30 minutes or until it is deep golden brown. Cool for at least 30 minutes before slicing. Use a serrated knife and serve either warm or at room temperature. It is best on the day it is baked.

Strudel dough
from “Kaffeehaus – Exquisite Desserts from the Classic Cafés of Vienna, Budapest and Prague” by Rick Rodgers

1 1/3 cups (200 g) unbleached flour
1/8 teaspoon salt
7 tablespoons (105 ml) water, plus more if needed
2 tablespoons (30 ml) vegetable oil, plus additional for coating the dough
1/2 teaspoon cider vinegar

1. Combine the flour and salt in a stand-mixer fitted with the paddle attachment. Mix the water, oil and vinegar in a measuring cup. Add the water/oil mixture to the flour with the mixer on low speed. You will get a soft dough. Make sure it is not too dry, add a little more water if necessary.
Take the dough out of the mixer. Change to the dough hook. Put the dough ball back in the mixer. Let the dough knead on medium until you get a soft dough ball with a somewhat rough surface.

2. Take the dough out of the mixer and continue kneading by hand on an unfloured work surface. Knead for about 2 minutes. Pick up the dough and throw it down hard onto your working surface occasionally.
Shape the dough into a ball and transfer it to a plate. Oil the top of the dough ball lightly. Cover the ball tightly with plastic wrap. Allow to stand for 30-90 minutes (longer is better).

3. It would be best if you have a work area that you can walk around on all sides like a 36 inch (90 cm) round table or a work surface of 23 x 38 inches (60 x 100 cm). Cover your working area with table cloth, dust it with flour and rub it into the fabric. Put your dough ball in the middle and roll it out as much as you can.
Pick the dough up by holding it by an edge. This way the weight of the dough and gravity can help stretching it as it hangs. Using the back of your hands to gently stretch and pull the dough. You can use your forearms to support it.

4. The dough will become too large to hold. Put it on your work surface. Leave the thicker edge of the dough to hang over the edge of the table. Place your hands underneath the dough and stretch and pull the dough thinner using the backs of your hands. Stretch and pull the dough until it’s about 2 feet (60 cm) wide and 3 feet (90 cm) long, it will be tissue-thin by this time. Cut away the thick dough around the edges with scissors. The dough is now ready to be filled.

Tips
– Ingredients are cheap so we would recommend making a double batch of the dough, that way you can practice the pulling and stretching of the dough with the first batch and if it doesn’t come out like it should you can use the second batch to give it another try;
– The tablecloth can be cotton or polyster;
– Before pulling and stretching the dough, remove your jewelry from hands and wrists, and wear short-sleeves;
– To make it easier to pull the dough, you can use your hip to secure the dough against the edge of the table;
– Few small holes in the dough is not a problem as the dough will be rolled, making (most of) the holes invisible.

May_67 

Milk Bread for bread crumbs

May_19

This is what happened to the bread

May_20

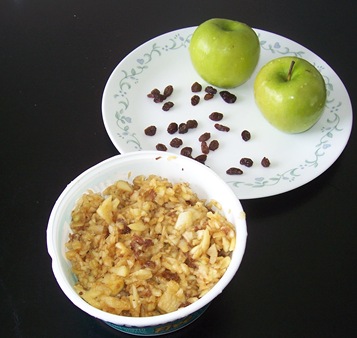
Sliced apples, flour, bread crumbs and chopped nuts

May_25

Here’s  the dough

May_27

This is what I could do with it

May_30

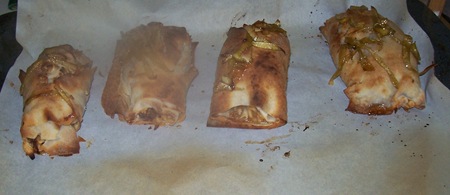
And, here’s  the result……yeah at least some of it

May_53

Decided that I do not like sliced apples, minced them up with the rest of the stuff and it stayed marinated in rum for a good 3-4 days…………:-)

May_54

Here’s the result …hot out from the oven

May_26

Oh..this is what I did with the apple peels………candied them 🙂 ………..sliced the peels, blanched them in boiling water for a bit, threw the water and then reduced them with sugar, spread them on parchment and let them dry. Topped them on the strudels in the last 5 minutes of baking. (My son could not stop eating these 🙂 )

May_63

Loved these mini strudels topped with candied apple peels and caramel sauce

Have a bite……

It’s a shame I did not post this scrumptious strudel on time even though I made and took pictures way before the challenge date. Yet I am posting it now:-). Hopefully I will post on time henceforth( don’t apply this to the June challenge for which I am late already:-) ). Thank you Linda and Courtney for a delicious challenge.

Expenditure: Zilch

I had everything at home, specially the big box of granny smith apples(approx. 20 lb for $2) I picked up at Joe’s Randazzo on my early morning finds.

Posted in - Bread Flour, -All Purpose flour, -Bread crumbs, -Butter, -Cider Vinegar, -Cinnamon, -Granny Smith, -Raisins, -Vegetable Oil, Alcohol, Daring Bakers, Sugar | Tagged: , , | Leave a Comment »

Daring Baker’s February Challenge : Chocolate Valentino cake

Posted by vivnidhi on February 28, 2009

Feb_44

Chocolate Valentino Cake

Here is a flourless cake that is a breeze to make. Surprise Surprise! this month’s Daring Bakers’ Challenge was the easiest I have seen. Ready in 45 minutes total. This is one cake anyone can make ……..easy and sinfully rich and delicious. Just pair it with an ice cream, and you are done. Yes, this definitely needs some ice cream or whipped cream to cut some of the richness of the cake. My cake did not sink in the middle at all because I was careful while beating the eggs.

It was my first time making Ice cream, I have been to lazy to make ice cream at home before. Since the husband loved it, I now have reason to try some more this summer. I made it without any ice cream maker. I would make a lot of ice creams in India in my summer vacations. I wanted to try one of my old recipes but decided to just try David Lebovitz’s plain vanilla ice cream made with vanilla extract. I made a cherry caramel sauce to pair with the cake and ice cream. Result: This cake’s a fabulous dessert!

The February 2009 challenge is hosted by Wendy of WMPE’s blog and Dharm of Dad ~ Baker & Chef.
We have chosen a Chocolate Valentino cake by Chef Wan; a Vanilla Ice Cream recipe from Dharm and a Vanilla Ice Cream recipe from Wendy as the challenge.

February’s challenge is a Flourless Chocolate Cake, Chocolate Valentino, inspired by Malaysia’s “most flamboyant food ambassador”, Chef Wan. Recipe comes from Sweet Treats by Chef Wan.

Serve with – The original recipe calls for the cake to be served with whipping cream.  BUT we decided to make this more of a challenge and ask you to make your own Ice Cream – a first for the DBrs. You can choose any flavor you want and any recipe although we provided two vanilla ice cream recipes. But we are giving you a little freedom here and will allow whipped cream as a topping as well or of course non-dairy whip. Be as creative as you want with your topping. Any fruit puree or sauce would be lovely with this cake.
– Use your favorite chocolate – the finished cake will taste exactly like the chocolate you use. Be creative with your chocolate, if you like a sweeter cake use milk chocolate or a combination of the semisweet and milk chocolate. If you like bittersweet chocolate use that and add sweetness by mixing the semi sweet with bittersweet. If you are daring, try white chocolate. (Dharm used all bittersweet and Wendy used a half bitter/half semi sweet chocolate).
– A higher cocoa percentage increases the bitterness of the chocolate.
-Equipment – it is optional to use a heart shaped pan. For a real Valentino, bake it in a heart shaped pan or cut it out into a heart shape. You may use any shape pan that gives you an area of 50” – 6×8 or 7×7.  An 8” spring form pan works with great results as do smaller pans or ramekins.
-An instant read thermometer highly recommended.
Note on recipeThe recipe consists of 3 simple ingredients and how you interpret them is part of the challenge.

Chocolate Valentino
Preparation Time:  20 minutes

 
16 ounces (1 pound) (454 grams) of semisweet chocolate, roughly chopped
½ cup (1 stick) plus 2 tablespoons (146 grams total) of unsalted butter
5 large eggs separated

1. Put chocolate and butter in a heatproof bowl and set over a pan of simmering water (the bottom of the bowl should not touch the water) and melt, stirring often.
2. While your chocolate butter mixture is cooling. Butter your pan and line with a parchment circle then butter the parchment.
3. Separate the egg yolks from the egg whites and put into two medium/large bowls.
4. Whip the egg whites in a medium/large grease free bowl until stiff peaks are formed (do not over-whip or the cake will be dry).
5. With the same beater beat the egg yolks together.
6. Add the egg yolks to the cooled chocolate.
7. Fold in 1/3 of the egg whites into the chocolate mixture and follow with remaining 2/3rds. Fold until no white remains without deflating the batter. {link of folding demonstration}
8. Pour batter into prepared pan, the batter should fill the pan 3/4 of the way full, and bake at 375F/190C
9. Bake for 25 minutes until an instant read thermometer reads 140F/60C.
Note – If you do not have an instant read thermometer, the top of the cake will look similar to a brownie and a cake tester will appear wet.
10. Cool cake on a rack for 10 minutes then unmold.

Feb_39Feb_38

Microwave melted Chocolate & 8″ spring form pan

Feb_40

Ready for the oven

I used all semisweet chocolate and that was absolutely right for us. We couldn’t have liked it a bit more bitter than that. Milk chocolate would be good too cause the chocolate taste gets a little more intense in the cake.

David Lebovitz link for making ice cream if you do not have an ice cream freezer.
Links to helpful tips:
Folding video demonstration.
Egg Whipping video demonstration.

I used David Lebovitz’ vanilla ice cream recipe.

For the cherry caramel sauce, I heated up a cup of cherries with 1/2 a tsp. of sugar till they got tender. Then they went in a blender and pureed. I mixed it up with caramel sauce made from the earlier daring baker challenge and Voila…..Cherry Caramel sauce is ready.

Feb_37 Feb_74

Pitted fresh cherries and the making of cherry caramel sauce

Finally……

Feb_78

My chocolate cake sunflower with Tuiles

This is a cake that everyone (who is a fan of chocolate) should definitely try.

Expenditure:

Chocolate 1 lb ………$ 5.00 ………from Kroger……none left

Heavy cream 1 pint….$ 3.25……….from Kroger……none left

————————————————————————–

Total………………..$ 8.25


Posted in - Cherry, -Butter, -Cream, -Golden Syrup, -Semisweet Chocolate, -Vanilla, Chocolate, Eggs, Milk, Sugar | Tagged: , , | 12 Comments »

Sailing the Pink Seas

Posted by vivnidhi on January 29, 2009

j_97

Tuile Boats with whipped cream and strawberry cream

This month’s Daring Bakers challenge was French Tuiles. Light and fragile as can be. I can definitely not call this month a success cause we were a part of several mishaps as we waded our way in making these fragile bits. First my one year old chanced upon the chocolate sauce bottle as I was playing with refrigerating tuile dough and baking tray. Next thing we had a delicious choco-baby and chocolate floor (right when I was using the tuile stencils). Thank God for my 3 year old(who loves to keep an eye on such situations and raises the alarm only when the deed is done;-) )………otherwise I would not even have noticed and continued my play. Next, when I thought I had learnt how to roll these exactly as I wanted to……….kept the last batch in the oven ………………………………….and ………….forgot to take it out ………until it turned into crisp , dark brown ………..yes, burnt.

Anyway, in spite of all this , as usual with daring bakers, the tuiles were delicious and very fragile. They paired beautifully with the strawberry cream I made. I learnt a fabulous way to garnish in future. I will certainly use these in my desserts.

I paired these with Light and easy strawberry Cream. The strawberries were courtesy of Locavorious. I must say that they were better than store bought frozen ones and my son just loves to snack on them plain. A very big thank you to Rena Basch who gave these to us free of cost. I joined a fabulous group of Michigan Lady Food Bloggers and through them I came to know of locavores. I will try and join them next season.

j_81

Local Strawberries

Light & Easy Strawberry Cream

The Recipe:

  • Strawberries 1 cup (fresh /frozen)
  • Sugar 1 tsp.
  • Sugar Free Strawberry gelatin 6 oz (1 pack)
  • Water 1/2 cup
  • Fat free Whipped Topping 2 cups thawed

This is an extremely simple recipe. Dissolve the gelatin in 1/2 cup hot water. Puree the strawberries in the blender with 1 tsp. sugar. No need to thaw the strawberries. Add the strawberry puree to the gelatin and mix well. Put  this in the refrigerator for half an hour. When it has started to set a little, add the whipped topping and fold it in the gelatin mixture carefully. Back it goes in the refrigerator for at least 4-6 hours. Ready!! Pair it with tuiles and a sprinkle of best aged balsamic vinegar and we have a classic dessert ready.

j_91

Light & Easy Strawberry Cream

For a little shaping up after the holidays, we’re adapting an air of lightness, adding a touch of crisp and maybe even go nuts. A challenge that’s more about technique than about baking a recipe. With the choices given, we think you’ve got plenty of options to chose something that’s individually challenging. You are allowed every flavor in the universe, you may go round or square, roll or fold but you need to shape up!
So here we go; January – something light… Tuiles – what could be lighter?? big_smile
Traditionally, tuiles are thin, crisp almond cookies that are gently molded over a rolling pin or arched form while they are still warm. Once set, their shape resembles the curved French roofing tiles for which they’re named. The Dutch angle: traditionally this batter was used to bake flat round cookies on 31st December, representing the year unfold. On New Years day however, the same batter was used but this day they were presented to well-wishers shaped as cigars and filled with whipped cream, symbolizing the New Year that’s about to roll on. And of course the batter is sometimes called tulip-paste….

This month’s challenge is brought to us by Karen of Bake My Day and Zorra of 1x umruehren bitte aka Kochtopf. They have chosen Tuiles from The Chocolate Book by Angélique Schmeink and Nougatine and Chocolate Tuiles from Michel Roux.

About the shaping: you don’t need to buy anything especially for this challenge, I made the stencils I used for the butterflies myself out of thick plastic sheet and cut out the desired shape. You can use anything you have handy in your kitchen/house like broomsticks, knitting needles, cups, cones.. use your imagination.

Following is a recipe taken from a book called “The Chocolate Book”, written by female Dutch Master chef Angélique Schmeinck.
Recipe:

Yields: 20 small butterflies/6 large (butterflies are just an example)

Preparation time batter 10 minutes, waiting time 30 minutes, baking time: 5-10 minutes per batch

65 grams / ¼ cup / 2.3 ounces softened butter (not melted but soft)
60 grams / ½ cup / 2.1 ounces sifted confectioner’s sugar
1 sachet vanilla sugar (7 grams or substitute with a dash of vanilla extract)
2 large egg whites (slightly whisked with a fork)
65 grams / 1/2 cup / 2.3 ounces sifted all purpose flour
1 table spoon cocoa powder/or food coloring of choice
Butter/spray to grease baking sheet

Oven: 180 C / 350F
Using a hand whisk or a stand mixer fitted with the paddle (low speed) and cream butter, sugar and vanilla to a paste. Keep stirring while you gradually add the egg whites. Continue to add the flour in small batches and stir to achieve a homogeneous and smooth batter/paste. Be careful to not overmix.
Cover the bowl with plastic wrap and chill in the fridge for at least 30 minutes to firm up. (This batter will keep in the fridge for up to a week, take it out 30 minutes before you plan to use it).
Line a baking sheet with parchment paper or grease with either butter/spray and chill in the fridge for at least 15 minutes. This will help spread the batter more easily if using a stencil/cardboard template such as the butterfly. Press the stencil on the bakingsheet and use an off sided spatula to spread batter. Leave some room in between your shapes. Mix a small part of the batter with the cocoa and a few drops of warm water until evenly colored. Use this colored batter in a paper piping bag and proceed to pipe decorations on the wings and body of the butterfly.
Bake butterflies in a preheated oven (180 C/350F) for about 5-10 minutes or until the edges turn golden brown. Immediately release from bakingsheet and proceed to shape/bend the cookies in the desired shape. These cookies have to be shaped when still warm, you might want to bake a small amount at a time or maybe put them in the oven to warm them up again. (Haven’t tried that). Or: place a bakingsheet toward the front of the warm oven, leaving the door half open. The warmth will keep the cookies malleable.
If you don’t want to do stencil shapes, you might want to transfer the batter into a piping bag fitted with a small plain tip. Pipe the desired shapes and bake. Shape immediately after baking using for instance a rolling pin, a broom handle, cups, cones….

Anything you’d like to know and more: http://www.pastrysampler.com/Questions_ … /tuile.htm

There are more alternative recipes too  Nougatine, Chocolate Tuiles, Savory tuile/cornet recipe. These recipes can be found at host’s blogs here. To check out who has made what , check out the Daring Bakers’ blogroll.

Wish I had done the savory…..the husband wanted me to but I couldn’t some other time:-) Not a great start to 2009 but then there’s hope………I see it just behind the snow 🙂

Expenditure:

Parchment paper : $ 2.84 from Walmart lots left

And a huge big thank you to Rena for the strawberries!

Posted in - Bread Flour, - Confectioner's Sugar, -Balsamic Vinegar, -Butter, -Cocoa Powder, -Cream, -Strawberry, Eggs, Gelatin, Sugar | Tagged: , , | 14 Comments »

I am a Daring Baker too!

Posted by vivnidhi on July 30, 2008

This post is long.

c100_2114

Filbert Gateau with Praline Buttercream

You bet, I am a Daring Baker too! Otherwise why would anybody with such limited skills and equipment attempt this…………:). I am so glad I am a part of Daring Bakers now……..because I learnt a lot from one challenge itself and learning  is a lot of fun. So, this month’s challenge was hosted by  Chris of Melle Cotte and the challenge was : Filbert Gateau with Praline Buttercream. I was really glad that my first challenge turned out to be a cake. I love cakes, so I was really excited about making it.

Even though a little expensive, I wanted to try the recipe as is with hazelnuts. The husband remarked ” Didn’t we stop buying mixed nuts cause they have hazelnuts in them” Yeah! but nutella has plenty of hazelnuts. I had made my mind so we bought a pound:). Thankfully, the husband had dark rum and orange Curacao in his bar otherwise that would have added to my expenditure too……

Filbert Gateau with Praline Buttercream
From Great Cakes by Carol Walter

  1. 1 Hazelnut Filbert Genoise
  2. 1 recipe sugar syrup, flavored with dark rum
  3. 1 recipe Praline Buttercream, flavored with dark rum and Orange Curacao
  4. ½ cup heavy cream, whipped to soft peaks
  5. 1 recipe Strawberry Glaze
  6. 1 recipe Ganache Glaze, prepared just before using, flavored with Orange Curacao
  7. 3 tablespoons filberts (hazelnuts), toasted and coarsely chopped

The 1st day I prepared the sugar syrup, toasted and tried to skin the hazelnuts as much as I could and coarsely chopped the few I could. So item no. 2 & 7 were done. I toasted the hazelnuts in a preheated oven at 350 degrees F for 15 minutes. Removed and immediately put them in a wet towel and rubbed to remove as much as I could. Not a lot of success there. Earned a blister too trying to take the hazelnuts skins off. What is with cakes and my blisters?

Day 2  Tried to skin more hazelnuts and I succeeded!! Thanks to a fellow Daring Baker who wrote about boiling them with Baking soda, skinning and toasting again. That worked, Phew!! So prepared the praline. Mine got darker than it should but it was so…….. good with the buttercream. Guess the praline flavor came out well because of the darkness.  Prepared the strawberry glaze.

Day 3 : The genoise day. Everything was fine until I dropped the butter I was trying to clarify. Not a lot fell but some did. So 2 Tbsp was the clarified butter and 2 Tbsp. was ghee I had at home. The cake took longer to come off the pan but thankfully it did, without breaking. Made the buttercream. Chilled the bowl in which I made the Swiss buttercream. This is the star!! The best buttercream I have ever made. Mixed with praline, its heavenly.

Day 4 : Finally, assembled the cake. Could not slice the layers uniformly. Used floss to cut the cake.  Whipped heavy cream, prepared the ganache. And yes, I got to pipe anything seriously for the first time. Not impressive but good for me:) . All is fun, that is fun when done, right ??

Here goes the detailed recipe with my comments in black:

Filbert Genoise
Because of the amount of nuts in the recipe, this preparation is different from a classic genoise.
1 ½ cups hazelnuts, toasted/skinned
2/3 cup cake flour, unsifted
2 Tbsp. cornstarch
7 large egg yolks
1 cup sugar, divided ¼ & ¾ cups
1 tsp. vanilla extract
½ tsp. grated lemon rind
5 large egg whites
¼ cup warm, clarified butter (100 – 110 degrees)

Position rack in the lower 3rd of the oven and preheat to 350 degrees.  Grease and flour a 10” X 2” inch round cake pan.
Using a food processor, process nuts, cake flour, and cornstarch for about 30 seconds.  Then, pulse the mixture about 10 times to get a fine, powdery mixture.  You’ll know the nuts are ready when they begin to gather together around the sides of the bowl. While you want to make sure there aren’t any large pieces, don’t over-process.  Set aside.
Put the yolks in the bowl of an electric mixer, with the whisk attachment, and beat until thick and light in color, about 3-4 minutes on med-high speed. Slowly, add ¾ cup of sugar.  It is best to do so by adding a tablespoon at a time, taking about 3 minutes for this step.  When finished, the mixture should be ribbony.  Blend in the vanilla and grated lemon rind.  Remove and set aside.
Place egg whites in a large, clean bowl of the electric mixer with the whisk attachment and beat on medium speed, until soft peaks. Increase to med-high speed and slowly add the remaining ¼ cup of sugar, over 15-20 seconds or so.  Continue to beat for another ½ minute.
Add the yolk mixture to the whites and whisk for 1 minute.
Pour the warm butter in a liquid measure cup (or a spouted container). * It must be a deep bottom bowl and work must be fast.*  Put the nut meal in a mesh strainer (or use your hand – working quickly) and sprinkle it in about 2 tablespoons at a time – folding it carefully for about 40 folds.   Be sure to exclude any large chunks/pieces of nuts. Again, work quickly and carefully as to not deflate the mixture. When all but about 2 Tbsp. of nut meal remain, quickly and steadily pour the warm butter over the batter.  Then, with the remaining nut meal, fold the batter to incorporate, about 13 or so folds.
With a rubber spatula, transfer the batter into the prepared pan, smoothing the surface with the spatula or back of a spoon.  **If collected butter remains at the bottom of the bowl, do not add it to the batter!  It will impede the cake rising while baking.
Tap the pan on the counter to remove air bubbles and bake in the preheated oven for 30-35 minutes. You’ll know the cake is done when it is springy to the touch and it separates itself from the side of the pan.  Remove from oven and allow to stand for 5 minutes.  Invert onto a cake rack sprayed with nonstick coating, removing the pan.  Cool the cake completely.
*If not using the cake right away, wrap thoroughly in plastic wrap, then in a plastic bag, then in the refrigerator for up to 3 days. If freezing, wrap in foil, then the bag and use within 2-3 months.

100_2112

Genoise:Straight out of the oven: surface becomes uniform as it cools

This Recipetips link is a very good help in understanding how eggs should be beaten for the cake. It would be a good idea to use parchment paper under the cake as it was difficult to take it out. I used a 9″ pan to bake the genoise.

Sugar Syrup
Makes 1 cup, good for one 10-inch cake – split into 3 layers
1 cup water
¼ cup sugar
2 Tbsp. dark rum or orange flavored liqueur

In a small, yet heavy saucepan, bring the water and sugar to a boil and simmer for 5 minutes. Remove from heat, add the liqueur. Cool slightly before using on the cake.  *Can be made in advance.

Praline Buttercream
1 recipe Swiss Buttercream
1/3 cup praline paste
1 ½ – 2 Tbsp. Jamaican rum (optional)

Blend ½ cup buttercream into the paste, then add to the remaining buttercream.  Whip briefly on med-low speed to combine.  Blend in rum.

Swiss Buttercream
4 large. egg whites
¾ cup sugar
1 ½ cups (3 sticks) unsalted butter, slightly firm
1 ½ -2 Tbsp. Grand Marnier or liqueur of your choice
1 tsp. vanilla

Place the egg whites in a large/ bowl of a electric mixer and beat with the whisk attachment until the whites are foamy and they begin to thicken (just before the soft peak stage). Set the bowl over a saucepan filled with about 2 inches of simmering water, making sure the bowl is not touching the water. Then, whisk in the sugar by adding 1-2 tablespoon of sugar at a time over a minutes time. Continue beating 2-3 minutes or until the whites are warm (about 120 degrees) and the sugar is dissolved.  The mixture should look thick and like whipped marshmallows.
Remove from pan and with either the paddle or whisk attachment, beat the egg whites and sugar on med-high until its a thick, cool meringue – about 5-7 minutes. *Do not overbeat*. Set aside.
Place the butter in a separate clean mixing bowl and, using the paddle attachment, cream the butter at medium speed for 40-60 seconds, or until smooth and creamy. *Do not overbeat or the butter will become toooooo soft.*
On med-low speed, blend the meringue into the butter, about 1-2 Tbsp. at a time, over 1 minute.  Add the liqueur and vanilla and mix for 30-45 seconds longer, until thick and creamy.
Refrigerate 10-15 minutes before using.
Wait! My  buttercream won’t come together! Reheat the buttercream briefly over simmering water for about 5 seconds, stirring with a wooden spoon. Be careful and do not overbeat. The mixture will look broken with some liquid at the bottom of the bowl. Return the bowl to the mixer and whip on medium speed just until the cream comes back together.
Wait! My buttercream is too soft! Chill the buttercream in the refrigerator for about 10 minutes and rewhip. If that doesn’t work, cream an additional 2-4 Tbsp. of butter in a small bowl– making sure the butter is not as soft as the original amount, so make sure is cool and smooth. On low speed, quickly add the creamed  butter to the buttercream, 1 Tbsp. at a time.
Refrigerate in an airtight container for up to 5 days, or can be frozen for up to 6 months. If freezing, store in 2 16-oz. plastic containers and thaw in the refrigerator overnight or at room temperature for several hours.

It helps to have the bowl chilled in which you make the buttercream.
Praline Paste
1 cup (4 ½ oz.) Hazelnuts, toasted/skinless
2/3 cup Sugar

Line a jelly roll pan with parchment and lightly butter.
Put the sugar in a heavy 10-inch skillet.  Heat on low flame for about 10-20 min until the sugar melts around the edges. Do not stir the sugar. Swirl the pan if necessary to prevent the melted sugar from burning. Brush the sides of the pan with water to remove sugar crystals.  If the sugar in the center does not melt, stir briefly. When the sugar is completely melted and caramel in color, remove from heat. Stir in the nuts with a wooden spoon and separate the clusters. Return to low heat and stir to coat the nuts on all sides.  Cook until the mixture starts to bubble.  **Remember – extremely hot mixture.** Then onto the parchment lined sheet and spread as evenly as possible. As it cools, it will harden into brittle. Break the candied nuts into pieces and place them in the food processor.  Pulse into a medium-fine crunch or process until the brittle turns into a powder. To make paste, process for several minutes. Store in an airtight container and store in a cook dry place.  Do not refrigerate.

Praline is easy to make, as long as you are patient. It gets burnt easily, thankfully mine didn’t even though it got darker than it should. The consistency of the praline paste becomes like peanut butter when processed. This is necessary so that there are no pieces in the buttercream and it is smooth enough to pipe with.

Strawberry Glaze
Good for one 10-inch cake
2/3 cup thick strawberry preserves
1 Tbsp. water

In a small, yet heavy saucepan, bring the water and preserves to a slow boil and simmer for 2-3 minutes. If the mixture begins to stick to the bottom of the saucepan, add water as needed.
Remove from heat and, using a strainer, press the mixture through the mesh and discard any remnants. With a pastry brush, apply the glaze onto the cake while the cake is still warm.  If the glaze is too thick, thin to a preferred consistency with drops of water.

Ganache Glaze
Makes about 1 cup, enough to cover the top and sides of a 9 or 10 inch layer or tube cake
**Ganache can take on many forms.  While warm – great fudge sauce.  While cool or lukewarm – semisweet glaze. Slightly chilled – can be whipped into a filling/frosting. Cold & solid – the base of candied chocolate truffles.
6 oz. (good) semisweet or bittersweet chocolate, like Lindt
6 oz. (¾ cup heavy cream
1 Tbsp. light corn syrup
1 Tbsp. Grand Marnier, Cointreay, or dark Jamaican rum (optional)
¾ tsp. vanilla
½ – 1 tsp. hot water, if needed

Blend vanilla and liqueur/rum together and set aside.
Break the chocolate into 1-inch pieces and place in the basket of a food processor and pulse until finely chopped.  Transfer into a medium sized bowl and set aside.
Heat the cream and corn syrup in a saucepan, on low, until it reached a gentle boil.  Once to the gently boil, immediately and carefully pour over the chocolate.  Leave it alone for one minute, then slowly stir and mix the chocolate and cream together until the chocolate is melted and incorporated into the cream. Carefully blend in vanilla mixture. If the surface seems oily, add ½ – 1 tsp hot water. The glaze will thicken, but should still be pourable. If it doesn’t thicken, refrigerate for about 5 minutes, but make sure it doesn’t get too cold!

Assembling Cake

Cut a cardboard disk slightly smaller than the cake.  Divide the cake into 3 layers and place the first layer top-side down on the disk. Using a pastry brush, moisten the layer with 3-4 Tbsp. of warm sugar syrup. Measure out 1 cup of praline buttercream and set aside.
Spread the bottom layer with a ¼-inch thickness of the remaining buttercream.  Cover with ½ of the whipped cream, leaving ¼-inch border around the edge of the cake.  Place the middle layer over the first, brush with sugar syrup, spreading with buttercream. Cover with the remaining whipped cream.
Moisten the cut side of the third layer with additional sugar syrup and place cut side down on the cake.  Gently, press the sides of the cake to align the layers. Refrigerate to chill for at least 30 minutes.
Lift the cake by sliding your palm under the cardboard. Holding a serrated or very sharp night with an 8-inch blade held parallel to the sides of the cake, trim the sides so that they are perfectly straight. Cut a slight bevel at the top to help the glaze drip over the edge. Brush the top and sides of the cake with warm apricot glaze, sealing the cut areas completely.  Chill while you prepare the ganache.
Place a rack over a large shallow pan to catch the ganache drippings.  Remove the gateau from the refrigerator and put it the rack. With a metal spatula in hand, and holding the saucepan about 10 inches above the cake, pour the ganache onto the cake’s center.  Move the spatula over the top of the ganache about 4 times to get a smooth and mirror-like appearance.  The ganache should cover the top and run down the sides of the cake. When the ganache has been poured and is coating the cake, lift one side of the rack and bang it once on the counter to help spread the ganache evenly and break any air bubbles. (Work fast before setting starts.) Patch any bare spots on the sides with a smaller spatula, but do not touch the top after the “bang”.  Let the cake stand at least 15 minutes to set after glazing.
To garnish the cake, fit a 12 – 14-inch pastry bag with a #114 large leaf tip. Fill the bag with the reserved praline cream.  Stating ½ inch from the outer edge of the cake, position the pastry tube at a 90 degree angle with the top almost touching the top of the cake. Apply pressure to the pastry bag, moving it slightly toward the center of the cake.  As the buttercream flows on the cake, reverse the movement backward toward the edge of the cake and finish by pulling the bag again to the center. Stop applying pressure and press the bag downward, then quickly pull the tip up to break the flow of frosting.  Repeat, making 12 leaves evenly spaced around the surface of the cake.
Make a second row of leaves on the top of the first row, moving the pastry bag about ¾ inch closer to the center.  The leaves should overlap.  Make a 3rd row, moving closer and closer to the center. Add a 4th row if you have the room. But, leave a 2-inch space in the center for a chopped filbert garnish. Refrigerate uncovered for 3-4 hours to allow the cake to set. Remove the cake from the refrigerator at least 3 hours before serving.
Leftover cake can be covered with foil and kept in the refrigerator for up to 5 days.

100_2118 100_2117

The last layer : Thinning out in the middle:)

100_2115

One last look, not too bad, eh!

Expenditure:

  • Hazelnuts- 1 lb $6.69 from Trader Joe’s (about 1/2 a cup left)
  • Cake Flour – $3.19 from Kroger Lots left
  • Unsalted Butter-$3.09 from Kroger half a stick left
  • Semisweet Chocolate 8 oz  $3.30 from Kroger 2 oz. left
  • Heavy Cream-$1.50 from Kroger
  • Lite Corn Syrup-$1.99 from Kroger lots left

Total: 19.76……not too bad.

Before I forget , this cake is dedicated to my mother whose birthday was on  the 18th and who loves cakes flavored with Rum. It just incidentally so happened that this cake had rum in it.

Even though I didn’t like the nutty texture of the cake initially, it matured on us and we liked it more after a day. It took us 11 days to finish the cake between the 3 of us and it was great till the last day. I know, sounds weird but it took us that long to eat it. I am glad I tried it.

Check out Daring Bakers’ blogroll for much more beautiful pictures and cakes.

Posted in -Butter, -Cake Flour, -Cream, -Hazelnuts, -Strawberry, Alcohol, Chocolate, Daring Bakers, Eggs | Tagged: , , , | 27 Comments »

Amuse Bouche: Apple Peanut Canapé

Posted by vivnidhi on June 30, 2008

100_1985

A moniker in my name for a city
A phrase with me will make you cherished
I am so good for you in my utter simplicity
In Medical dictionary the fact so furnished

I am so famous in the world of bytes
Known for many aspects of usage
I am fat and rotund and make crunchy bites
My fame known from many religious traditions – right from the old age

Am, I forbidden? Or mystical ?
or the eternal giver of Youth
I consists of five internal carpels
Am good for good health of your mouth

I am as basic a fruit as you can think of
Or as hard if you don’t try enough
If You eat me on a day to day basis
Then you don’t have worry about anything – be it cold or dry cough

Answer to Open Sesame 2: The Apple

Ever since my high school days when I meddled, a little, into French, I was captivated by their food and , of course , mon Paris:)). After marriage, in the US, I have eaten a few fine French meals, each of which I can recall accurately…..when and where, I ate what. It’s a different matter that my choice is quite limited being a vegetarian:). A restaurant ,rather, a Creperie which is a big favorite near Detroit is Josephine. Excellent food and that is where I came across the term ‘Amuse Bouche’ .

Amuse Bouche (French: amuse mouth) is/are small one bite morsels served before the first course. In restaurants, it is the signature dish of the chef, and which is not charged for. I can still recollect the cucumber slice served with a creamy topping with minty undertones served at Josephine. That was sheer  perfection:). Amuse bouche is different from hors d’œuvre, in that it is only one or two bites. . Amuse Bouche is something that will leave you feeling “Aw, I wish the chef had sent me a couple more slurp, slurp, slurp:) ” . So, this home chef, that is me, tried my hand at amuse bouche too. Keeping the same tradition at home also, I prepared only 3 bites, one for each.

A canapé or canape (French for couch and known in Italy as tartina) is a small, prepared and usually decorative food, held in the fingers and often eaten in one bite. Source: Wikipedia. It is in general salty but I think mine fits the bill too. Yes the name was learnt at Josephine as well:).

I chose a tart, firm, granny smith apple.I love eating apples just the way they are WITH the peal:). So, I created this for Open Sesame 2. This is a very simple and elegant way of enjoying the fruit. Guess what, the husband, after eating my apple peanut canapé said ” I could have eaten a couple more” and Aaaaaaaaaaeeeeeeeeeee was smiling cheek to cheek:).

The Recipe: (4 servings:)

  • Lite cream 1 Tbsp.
  • Chunky Peanut butter 1 Tbsp.
  • Sugar 3/4 tsp.
  • Butter half a pinch
  • Honey 1 tsp.
  • Lemon juice 2 drops
  • saffron a pinch

Whisk together lite cream, peanut butter and sugar till it blends well and gets a little airy. In a separate cup, first mix the tiny speck of butter with saffron. Add honey and lemon juice and whip. Even this small amount can be whipped:).

To assemble, cut the apple longitudinally into 4 thin slices, so that you avoid the seed portion completely. Spread approximately 2 tsps. of the cream and peanut butter mixture on top of  the apple slice. Top it with 3 drops of the honey mixture and swirl ever so slightly, with a sharp edge, like an end of a fork.

100_1997

Voila………here it is

It can be prepared and refrigerated. Just make sure it covered airtight so that the apple doesn’t oxidize.

100_2002

Tingle your taste buds with Apple Peanut Canapé

This is my simple entry for Open Sesame -2 hosted by Siri and Dhivya . Don’t make a lot, just make a little, leaving people asking for more;)

I would like to send this to Sweetnick’s ARF/5-A-Day a day too as it has the antioxidant rich granny smith apple.

Posted in -Apple, -Cream, -Peanuts, -Saffron | Tagged: , , | 8 Comments »

YELLOW Ice Cream Shake

Posted by vivnidhi on June 23, 2008

sharpA_147

Mangoes

I have been wanting to post since a long time ( as usual) but I couldn’t. Since I started writing this blog, I have been wondering that why do I blog about food? Instant gratification if somebody praises is Great! And, on the other hand, its a lot of fun to be talking about the stuff that you are passionate about and discussing it with people having similar interests. Why do we read other food blogs? Because we love sharing and reading about food!! I have been stating the obvious so far but what I am getting at is the wonderful community we have created in the process!  We are making so many friends as we go about our own ramblings! Somebody unknown……..but there to listen to us!!

The Jugalbandi team has this month organized a special edition of CLICK in which they are fundraising for Briana Brownlow of Figs with Bri.   There are raffle prizes as well.

Briana was diagnosed with breast cancer two and half years ago. A mastectomy, chemotherapy and two years of relatively good health later, the cancer is back. It has metastasized to other parts of her body. This  fundraiser will help Bri and her family meet her out-of-pocket medical costs for ONE YEAR.  I think  Briana is an extremely brave girl and needs all the support that we can provide. So many more good wishes on your way girl!! Just keep up that spirit!!

What is amazing is that 92% of the $12000 has been collected as I write this post. Only $907 left!  I wondered what would really be the point of my writing all this when so much has been done by bloggers more widely read than me. But the reason I am writing is that even if one more person comes to know   of this through me……….my job is done. Kudos to Briana Brownlow & to the Jugalbandi team!!

Next comes the mango ice cream shake.I can barely make anything with fruit in my house! I am definitely not a better creator than nature!! Fruits are mostly eaten raw here………..and mangoes!!!! I will not be allowed to touch them but to remove the peel! “We don’t own a mango orchard………..don’t cook with them!” (Do you think my husband & son dislike my cooking so much, they don’t let me cook with mangoes?)  Anyway’s, we ended up with a box of mangoes that did not taste very good:(. It is very difficult to please people coming from

the land of Langda, Dashehri & Aphonso (names of Indian mangoes). But , the box in my house really wasn’t good enough to eat raw. So, I substituted tomatoes with mangoes in all my salads! Worked fabulous with the tomato scare around that you should not be eating raw these days! And one day I made the Mango ice cream shake. Now why??? Oh cause I absolutely love Cold stone ice cream shakes!! Just don’t look at their nutrition content!! So, I made mine up with the fabulous mango flavor (something even they don’t have;))

Make a speedy ice cream in a ziploc bag. This is so much fun with kids! My son thought he really made a great ice cream for Dad on Father’s day ! And then Mom blended it and made a shake out of it! Am I glad he is only 2 and a half:).

Here is my quick recipe for Mango Ice cream shake.

The Recipe:

  • Half & Half 2 cups

  • Sugar 1/2 cup
  • Crushed ice 6 cups
  • Salt 1 1/2 cups
  • Mangoes (the small ones) 5 seeds removed and chopped
  • Skim milk 2-4 Tbsp.
  • Rose essence 1-2 drops (no more!!)

So, make the speedy ice cream as given here if you want to make the shake in 30 minutes. Or if you have time, put half & half, sugar and mangoes in the freezer to set. You would not need the salt and ice if using the freezer method.

Once the ice cream has set (don’t let it set too hard). A soft ice cream is good. Remove it and put in a blender with 2 Tbsp. milk and 1 or 2 drops of rose essence,just to give it some underlying fragrance. Blend , and the shake’s ready! You can add a little more milk if need be. I absolutely love it cause its rich and creamy, with a faint rosy undertone and not watery at all, cause I don’t even add ice. Its delicious , do try it, when in the mood to indulge!

A_138

YELLOW, My entry to CLICK

A_157

I like mine with a spoon……….Mango Ice Cream Shake!

And , don’t mind the yellow pictures scattered throughout the post, its ok !!:)

Oh! I would like to send my ice cream shake to Meeta who writes the beautiful blog What’s for lunch, Honey for Mango Mania. Cheers!!

Update: Just cleared up the photographs cluttering the post. I couldn’t stand them, even though I asked you all too. Thanks for your patience…….:) .

Posted in -Mango, Milk | Tagged: , , , | 7 Comments »

Quince Jam’s spicy nuance

Posted by vivnidhi on December 20, 2007

100_1140

100_1143

Quince

The sweetest aroma fills my house as I write this post. “This is Quince”, said the friendly cashier at ZZ’s produce market in Ann Arbor. I usually shop for fruits and vegetables at ZZ’s and he now recognizes me. He was making sure that I knew what I was buying. He said most people get drawn to the sweet smell of quince and are just not prepared for the hidden tart taste. Quince (Cydonia oblonga) is related to apples and pears, looks like a cross between them and has a sweeter smell than both. It is said that this is a very tart fruit and just can’t be eaten raw. As luck would have it, I have bought it twice now and found that my quinces have a woody , very agreeable taste. Less tart than granny smith apples. So, I went ahead and tried to read as much literature was available about this fruit on the internet. Came to know that the sweetness of quince varies from year to year or tree to tree.

Quince is also supposed to be found all over deciduous forests in India but I had never heard of the fruit until I came to the U.S. It has been traditionally used as a medicine and flavoring agent. It is used in colisting diarrhea, dysentery, constipation and diarrhea. It is aromatic, astringent, cooling, febrifuge and also acts as tonic for heart and brain. The gel from the quince seed provides essential vitamins and minerals to nourish the skin. I had never heard of any of this. Quince tree is a valued dwarfing rootstock for pear which produces more fruit-bearing branches and has accelerated fruit maturity when used in this way. Sources of this information are quince seed, Indian-herbs and quince disease report.

I had been thinking of cinnamon subconsciously because of Sunita Bhuyan’s “Think Spice” event as she wants food bloggers to think, think. Cinnamon or Dalchini was a favorite of mine when I was a child. I would eat cinnamon sticks or quills raw cause I loved the sweet taste. My conclusions about its use in my kitchen is that, it is either used to flavor sugar cause it enhances the sweet flavor so well OR in Indian cooking, it is used along with other very strong spices (whole or powdered) to give a sweet tinge to the sharpness of other spices. Then came my regular RealAge food bites email, which said that this natural germ fighter also helps lower blood sugar, triglycerides, and cholesterol levels — one-quarter teaspoon a day is a healthy goal. Now anything that helps maintain blood sugar levels and and lowers triglycerides is a must in my kitchen.

Somehow, quince and cinnamon paired up well for me. The regular quince jam was flavored with cinnamon and ah! the result was impressive. Cinnamon’s subtle sweetness perfectly complements the quince’s sweet aroma. The following recipe is my adaptation of this Quince Jam recipe. Also, “Marmalade” comes from the Portuguese word marmalada, meaning “quince jam”, most marmalade today is made from citrus fruits, especially oranges.

The Recipe:

  • Quince 2
  • Sugar  1/2 cup
  • Water
  • Cinnamon 1/8 tsp.

Scrub the quinces well as the peel enhances the flavor. Slice the quince in quarters and remove the seeds.  Do not remove the core and add enough water to cover the slices.

100_1145

Quince slices ready to be heated

Cover the pan and let it boil on medium heat for about 35 minutes. Remove the cores now and strain and save the leftover water. Puree the boiled slices in a blender. I needed to add all the saved water when pureeing the quince pieces. Two quinces produced exactly 2 cups of puree. I added only 1/2 cup of sugar to the total puree as my quinces were quite sweet. Heat the quince puree and sugar on high heat while stirring constantly. Bring it to a rolling boil and then reduce the heat to medium high. Keep stirring all along. Very long back in India , I had taken a course on Jam and jelly making. Even though I have forgotten most of what I learnt, I know that a plate test is done to test if the jam is done. Pour a tsp. of the jam on a cold plate.If it spreads a little, not leaving water around it, then the jam is done.Put the heat off. Add cinnamon to it and fill it in a sterilized, dry bottle. I did not find any need to add extra pectin as quince has enough natural pectin in it. And, since I made a very small amount,no preservative was used.

100_1146

Spicy Quince Jam

Not a great picture, but you get it, right? :). On tasting the jam, my two year old tester immediately responded with “Bahut Achha Hai” (meaning:its very good) and the slice of bread was eaten up after a meal. This is rare!!  So, if you come across this sweet smelling, tart fruit, please don’t shy away, it is delicious. It would be great in a chutney too……..now lets think about that later!

Posted in -Quince | Tagged: , | 3 Comments »