चर्चे चौके के Charche Chauke Ke

Hey! Join in the Kitchen Gossip!!

Posts Tagged ‘Cookies’

Daring Bakers 2010 : Nanaimo Bars

Posted by vivnidhi on January 27, 2010

jan_66

Nanaimo Bars

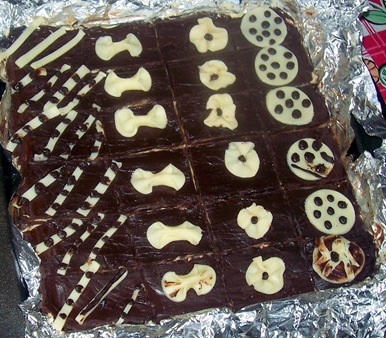
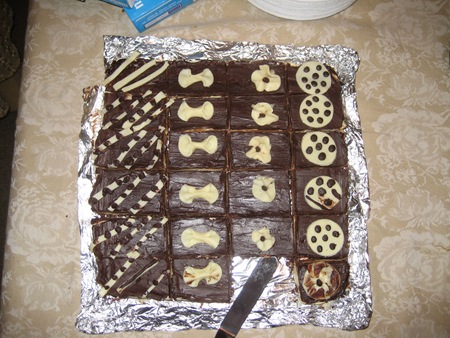
This is the only picture I was able to take…..took them to a friend’s potluck and forgot to take photos

All the Daring Bakers are headed to Canada for winter Olympics. Of course, I can’t fool you….no……we are not going….just celebrating 😉 by making nanaimo bars. OK, I also had never heard of these until………..”The January 2010 Daring Bakers’ challenge was hosted by Lauren of Celiac Teen. Lauren chose Gluten-Free Graham Wafers and Nanaimo Bars as the challenge for the month.”

Nanaimo Bars are a classic Canadian dessert created in none other than Nanaimo, British Colombia. In case you were wondering, it’s pronounced Nah-nye-Moh. These bars have 3 layers: a base containing graham crackers, cocoa, coconut and nuts, a middle custard layer, and a topping of chocolate. They are extremely rich and available almost everywhere across the country.

Lauren wanted us to bake the Graham Crackers gluten free. I used all  whole wheat pastry flour (atta) instead of the gluten free flours as I am too lazy. These are absolutely divine. You will not want to buy store bought after trying these out. Superlative praises for these graham crackers. I stopped buying Indian Glucose biscuits long long back because of Trans fats. These graham crackers will certainly fill that craving. Please visit Celiac Teen or the other daring bakers this month for some great gluten free versions.

Recipe Source: Graham Wafers — 101 Cookbooks (http://www.101cookbooks.com/archives/000126.html) I adapted it to be gluten-free. The adapted recipe is below.
Nanaimo Bars — City of Nanaimo (http://www.nanaimo.ca/EN/main/visitors/NanaimoBars.html)

The Recipe:

Preparation time:
• Graham Wafers: 30 to 45 minutes total active prep, 2 ½ hours to overnight and 45 minutes inactive prep.
• Nanaimo Bars: 30 minutes.

Equipment required:
• Food Processor
• Bowls
• Parchment paper or silpats
• Cookie sheets
• Double boiler or pot and heatproof bowl
• 8 by 8 inch square pan
• Hand mixer or stand mixer (You may use a wooden spoon, but this makes it much easier!)
• Saucepan

  • For  Graham Wafers
    Ingredients
    2 1/2 cups + 2 Tbsp. Whole wheat pastry flour (atta)
    1 cup (200 g) (7.1 ounces) Dark Brown Sugar, Lightly packed
    1 teaspoon (5 mL) Baking soda
    3/4 teaspoon (4 mL ) Kosher Salt
    7 tablespoons (100 g) (3 ½ ounces) Unsalted Butter (Cut into 1-inch cubes and frozen)
    2 Tbsp. Honey, Mild-flavored such as clover.
  • 3 Tbsp. Molasses
    5 tablespoons (75 mL) Whole Milk
    2 tablespoons (30 mL) Pure Vanilla Extract

Directions:
1. In the bowl of a food processor fitted with a steel blade, combine the flours, brown sugar, baking soda, and salt. Pulse on low to incorporate. Add the butter and pulse on and off, until the mixture is the consistency of a coarse meal. If making by hand, combine aforementioned dry ingredients with a whisk, then cut in butter until you have a coarse meal. No chunks of butter should be visible.
2. In a small bowl or liquid measuring cup, whisk together the honey, molasses, milk and vanilla. Add to the flour mixture until the dough barely comes together. It will be very soft and sticky.
3. Turn the dough onto a surface well-floured with atta and pat the dough into a rectangle about 1 inch thick. Wrap in plastic and chill until firm, about 2 hours, or overnight.
4. Divide the dough in half and return one half to the refrigerator. Sift an even layer of whole wheat pastry flour onto the work surface and roll the dough into a long rectangle, about 1/8 inch thick. The dough will be quite sticky, so flour as necessary. Cut into 4 by 4 inch squares. Gather the scraps together and set aside. Place wafers on one or two parchment-lined baking sheets. Chill until firm, about 30 to 45 minutes. Repeat with the second batch of dough.
5. Adjust the rack to the upper and lower positions and preheat oven to 350 degrees Fahrenheit (180 degrees Celsius).
6. Gather the scraps together into a ball, chill until firm, and reroll. Dust the surface with more flour and roll out the dough to get a couple more wafers.
7. Prick the wafers with toothpick or fork, not all the way through, in two or more rows.
8. Bake for 25 minutes, until browned and slightly firm to the touch, rotating sheets halfway through to ensure even baking. Might take less, and the starting location of each sheet may determine its required time. The ones that started on the bottom browned faster.
9. When cooled completely, place enough wafers in food processor to make 1 ¼ cups (300 mL) of crumbs. Another way to do this is to place in a large ziplock bag, force all air out and smash with a rolling pin until wafers are crumbs.

jan_70

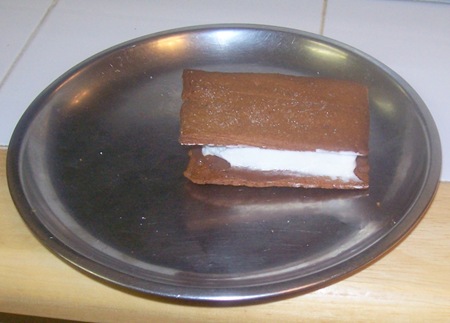
Graham Crackers

jan_74

We loved our graham crackers with some nutella and whipped topping……….Husband can’t have enough of it 🙂

Nanaimo Bars
Ingredients:

For Nanaimo Bars — Bottom Layer
1/2 cup (115 g) (4 ounces) Unsalted Butter
1/4 cup (50 g) (1.8 ounces) Granulated Sugar
5 tablespoons (75 mL) Unsweetened Cocoa
1 Large Egg, Beaten
1 1/4 cups (300 mL) (160 g) (5.6 ounces) Graham Wafer Crumbs (See previous recipe)
1/2 cup (55 g) (1.9 ounces) Almonds (Any type, Finely chopped)
1 cup (130 g) (4.5 ounces) Coconut  unsweetened

For Nanaimo Bars — Middle Layer
1/2 cup (115 g) (4 ounces) Unsalted Butter
2 tablespoons and 2 teaspoons (40 mL) Heavy Cream
2 tablespoons (30 mL) Vanilla Custard Powder (Such as Bird’s. Vanilla pudding mix may be substituted.)
2 cups (254 g) (8.9 ounces) Icing Sugar

For Nanaimo Bars — Top Layer
4 ounces (115 g) Semi-sweet chocolate
2 tablespoons (28 g) (1 ounce) Unsalted Butter

Directions:
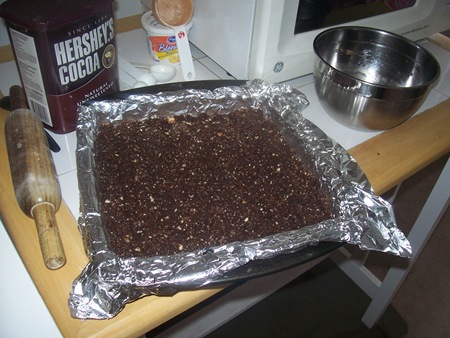
1. For bottom Layer: Melt unsalted butter, sugar and cocoa in top of a double boiler. Add egg and stir to cook and thicken. Remove from heat. Stir in crumbs, nuts and coconut. Press firmly into an ungreased 8 by 8 inch pan.
2. For Middle Layer: Cream butter, cream, custard powder, and icing sugar together well. Beat until light in colour. Spread over bottom layer.
3. For Top Layer: Melt chocolate and unsalted butter over low heat. Cool. Once cool, pour over middle layer and chill.

jan_64

Making of the Nanaimo Bar………bottom layer

(This is the only photograph I have :-)) )

——————————-

My Tweaks to the recipe:

  1. Used whole wheat pastry flour (atta) for the crackers.
  2. Substituted molasses for some  honey as I was out of honey.
  3. I made double the middle layer (mistake..) and double the chocolate (bring on more 🙂 )

Additional Information:

These bars freeze very well, so don’t be afraid to pop some into the freezer.

The graham wafers may be kept in an airtight container for up to 2 weeks. Mine lasted about that long.

If making the graham crackers with wheat, replace the gluten-free flours (tapioca starch, sweet rice flour, and sorghum flour) with 2 ½ cups plus 2 tbsp of all-purpose wheat flour, or wheat pastry flour. Watch the wheat-based graham wafers very closely in the oven, as they bake faster than the gluten-free ones, sometimes only 12 minutes OR even 10.

For the Nanaimo Bars, if making with wheat, replace the gluten-free graham wafer crumbs with equal parts wheat graham wafer crumbs!

Information on Celiac Disease: http://www.mayoclinic.com/health/celiac-disease/DS00319

Information on Vancouver 2010: http://www.vancouver2010.com/

City of Nanaimo: http://www.nanaimo.ca/EN/index.html

Gluten Free Flour Information: http://glutenfreemommy.com/gluten-free-grains-101-the-best-flour-blend/

Video on making Nanaimo bars: http://www.youtube.com/watch?v=x5aqa6R1jIM&feature=fvsr

Recipe and video for Vegan Nanaimo Bars (you didn’t think I’d leave you guys out?): http://www.everydaydish.tv/index.php?page=recipe&recipe=159

Recipe for gluten-free and vegan Graham Wafers: http://www.thesensitivepantry.com/the-sensitive-pantry/2009/8/3/grahams-…


Nanaimo bars disappointed me because of the middle layer. A bit too sweet. I will try other buttercreams or some custard as filling the next time. The husband was pretty impressed with the texture of the middle layer though and wanted me to just follow the recipe and make the amount of filling given.

For the funny attempts at decorating. I used plastic chocolate. I will post the plastic chocolate recipe separately later.

It’s after ages I am posting a daring baker challenge on time. I also hope that I shall continue to do so in the coming months and blog a little more….I have dozens of posts half written which have not yet made it to the blog.

Expenditure:

Heavy Whipping Cream 1/2 pint ……….$1.99………….from Meijer

———————————————————————————————

Total………………………………………$1.99

IMG_1344

I just received this photo…..it certainly looks better than the first

Posted in - Confectioner's Sugar, -Almonds, -Butter, -Coconut, -Cream, -Dark Brown sugar, -Honey, -Molasses, -Semisweet Chocolate, -Vanilla, -Whole Wheat Pastry flour, Baking Soda, Daring Bakers, Eggs, Milk, Sugar, Vanilla Pudding mix | Tagged: , , , | 4 Comments »

Macarons………..

Posted by vivnidhi on October 27, 2009

Daring Bakers finally…..made MACARONS .

measure_w180x180 presents…..

100_4145

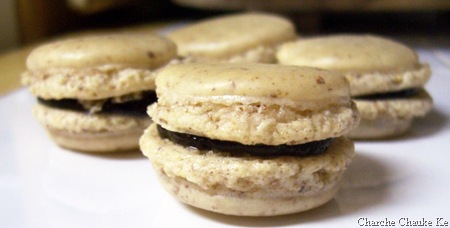
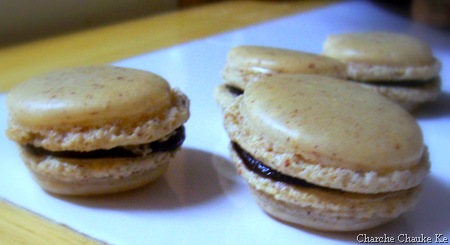
PLAIN but nevertheless ;-)…..Roasted almond macarons with chocolate ganache

If you have been reading even one food blog these days, you cannot escape macarons ( A good history lesson here 😉 ) I  can speak for the food blogosphere , Macarons are a rage these days. I had been dreaming of eating these and dreading baking these myself. I kept reminding the husband what is a must eat…..whenever we visit Paris 🙂 . Mon Paree is a soft spot with me (as anyone who knows me is aware 😉 ). It’s one place I never want to visit on a budget 🙂 . David Lebovitz’s 10 Insanely Delicious things you shouldn’t miss in Paris will be a starting point 🙂 .

Anyway , moving on, Ami finally chose macarons for this month’s daring Bakers challenge, finally giving the weak hearted like me an incentive to try it out. The 2009 October Daring Bakers’ challenge was brought to us by Ami S. She chose macarons from Claudia Fleming’s The Last Course: The Desserts of Gramercy Tavern as the challenge recipe.

In Ami’s words “French macaroons are notorious for being difficult to master. Type in “macaroon,” “French macaroon” or “macaron” in your search engine of choice, and you will be inundated not only with bakeries offering these tasty little cookies, but scores and even hundreds of blogs all attempting to find the perfect recipe, the perfect technique. Which one is right? Which captures the perfect essence of macaroons? The answer is all of them and none of them. Macaroons are highly subjective, the subject of passionate, almost Talmudic study and debate. Chewy? Crisp? Age your egg whites? Ground the nuts or use nut meal or nut flour? Cooked sugar syrup, or confectioners’ sugar? In the words of a therapist, what do you think is the ideal macaroon? The answer lies within you.

Will French macaroon supplant the cupcake as the next sweet trend? There’s no way to know. I couldn’t have predicted the resurgence of leggings, yet here they are.”

I am sorry Ami , I did not use the recipe given. I read each and every post on the daring bakers forum and everybody seemed to be getting more success with Helen‘s recipe and so…….I decided to tread carefully on my first experiment.

Oh..I have come to know that these are often called macaroons in United States though they also refer to another coconut cookie as well.

Ok ….now to my “Hurrah” moment. I got it right the first time. Reason: I have made it a 100 times in my head. It was completely different when I actually made it yet I knew what I was doing. What I should be doing and what can lead to what. Two people require special mention and thanks as without them, I would not have been able to complete the challenge: 1. Helen of Tartelette and 2. Audax Artifex of Audax Artifex.  The recipe and instructions I used to make my first macarons are Helen‘s. The explanations, clarifications, warnings and encouragement……..even conversions are from Audax. He provided so much information that I did not have to even use my brains for menial conversions.

Roasted Almond macarons: (Makes approx. 11 macarons and hence around 22 shells)

  • Egg White 1 (approx. 32 g …aged 4 days in the refrigerator) brought to room temperature before whipping
  • Icing Sugar 64 g
  • Granulated Sugar 16 g (3 1/2 tsp. )
  • Roasted almond meal 35 g

1. I measured these with my tipsy weighing scale (which my kids have fiddled with well) and the least count of which is 25 g …….so do not get deterred by the weighing scale (oh…only if you are like me ) and take the plunge. It was fun :-).

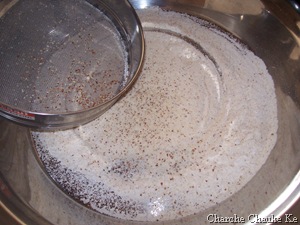
2. First I toasted the almonds under the broiler and kept checking every two minutes. When the almonds were browned uniformly, removed them for the oven and let them cool. Once the almonds were cool, I used my blender to grind them along with the icing sugar. This helps the almonds not clump up. Audax also mentions that the grinder should not get  hot. Well! mine did…..I was scared but after sifting, the mix seemed fine to me.

100_4121

Sifted Ground almonds and icing sugar

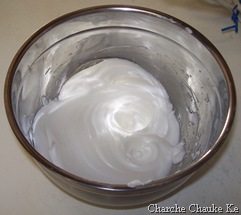
3. I whipped the egg white to a firm foam. Then added the granulated sugar till the egg whites were firm and glossy. I had heard that if the egg whites are whipped right, the bowl can be turned upside down and it won’t fall off. Well! I took  the plunge with confidence and here we are:

100_4123 100_4124

Whipped Egg Whites…..without sugar and after addition of sugar

100_4126

There is whipped egg in there….really……

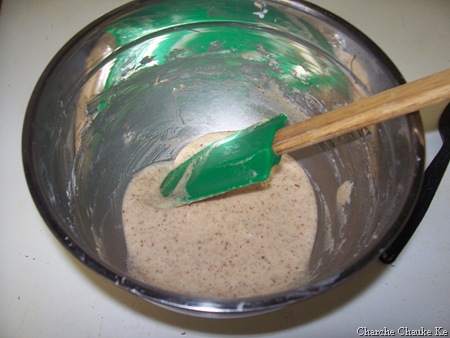
4. I then used this video to learn how to fold the almond mixture in the egg whites. I may have required 10-12 strokes to get it to magma like consistency. The key is that when the mix is dropped back in itself. It should mix with the mix soon and no trace should remain.

100_4127

My final macaron batter

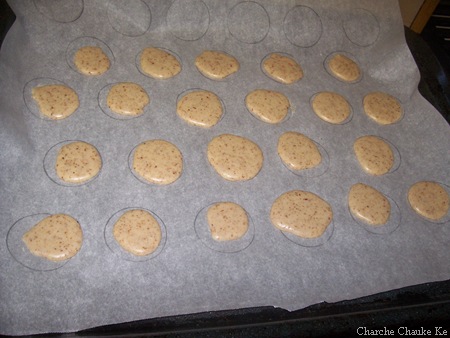
5. Then I piped it on marked parchment paper. Here was the problem. I did not have a big enough tip with my piping bag. Next time, I will just use a ziploc cut in a corner. 

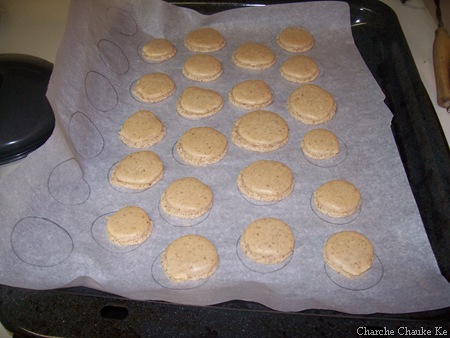
6. Left the piped macaron shells to dry out for half an hour. Up to an hour is fine I believe. Meanwhile preheat the oven to 300 F . When the shells have formed a skin on top, I used another baking tray under the piped one (another Audax tip…..to ensure even heating) and slid them in the oven. In spite of the fact that I had all kinds of sizes, baking for 10 minutes was good.

100_4128

Please do not look at their amoebic shapes, they will be better next time……oh, this is after the skins have formed on top……….30 minutes after piping

7. When warm, the macarons like to stick well to the parchment paper. I used Helen’s tip and sprinkled/sprayed a few droplets of water under the parchment on the tray while still warm. Then I used a plastic knife to slide the macaron shells off the parchment. Worked very well for me.

100_4129

Out of the oven… oh… what joy,

I was almost expecting flat grainy biscuits…..but I got this……..

and because I can do it………….U can too

Chocolate Ganache Recipe:

I used unsweetened chocolate cause I knew that the macaron shells are very sweet (yes I love licking all my cake batters 🙂 and by now know before hand , how the baked product will taste based on the batter)

  • Unsweetened chocolate 2 oz. grated or chopped fine
  • Sugar 1/4 cup
  • Butter 1 Tbsp.
  • Whipping Cream 1/4 cup
  • Vanilla extract 1/4 tsp.

1. Add chocolate , butter and whipping cream in a bowl.

2. Heat the whipping cream and sugar in a heavy bottomed pan on low heat. Do not let it boil or form a skin. Keep whisking to dissolve the sugar.

3. Add hot cream in the bowl with the chocolate and mix well. Whisk to achieve a smooth texture.

4. As it cools, the mixture thickens. Pipe it on top of half the shells. Cover the piped chocolate ones with plain shells and you are ready to munch.

100_4158

Please do try one …………(These are all that were left by the time I could take pictures)

Bottom line is : Macarons are quite do-able. As Helen says…..” if you find a recipe that works for you, stick to it, no matter whose it is, especially if you are new to macarons and don’t make them that often.” I will stick with hers…….. 🙂 . My opinion is that one must not get intimidated by macarons and do try them at home unless you can afford Laduree‘s all the time :-).  Some may find it too sweet but kids love it. Here we are in the sniffles season so kids taste buds are very difficult to please……macarons made my work easier as there were smiles all around. My son couldn’t say enough of “Thank you Mama” AND ‘I just want half more” . Well! if you have kids ….do make these………until we visit Paris ….that is……..I like to dream 🙂 .

100_4135

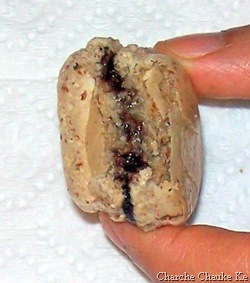
Bad light……..but great taste

Before I close, I really must thank Ami for the challenge, Helen for  such a foolproof recipe and Audax for the tremendous support. This has been a great challenge and I loved learning a great skill. I have 5 days aged 3 egg whites in he refrigerator. This time I will be playing as I am not that scared. Looking forward to the adventure. If I find the time, I will certainly update with better pictures.

Update Nov. 1 : I did forget the expenses; didn’t I ?

Expenditure :

Confectioner’s Sugar ……..$2.74 ……from Kroger (I am absolutely done with this store….too rude for me to handle)

Posted in - Confectioner's Sugar, -Almonds, -Butter, -Cream, -Egg Whites, -Unsweetened Chocolate, -Vanilla, Eggs, Sugar | Tagged: , , , , | 8 Comments »

Daring Bakers July bring Cookies…….

Posted by vivnidhi on July 28, 2009

Vanilla at 180 x 180 (largest)brings…..

100_3688

The boy can’t stop himself 😉 Plum jam cookies and lots more…….

Jaana tha Japan , pahunch gaye Cheen…………Had to go to Japan , and I reached China…. You don’t get it……yeah…..oh well! the daring baker challenge this month was mallow cookies and milanos….long live Pepperidge Farm! I ended up making those and a fusion…..which we all absolutely loved.

These cookies pictured above are truly the best cookies I have ever made. If you liked and ate jam biscuits (called so in India) in your childhood, these cookies will bring those memories back. I surprised myself……..these tasted so good.

The July Daring Bakers’ challenge was hosted by Nicole at Sweet Tooth. She chose Chocolate Covered Marshmallow Cookies and Milan Cookies from pastry chef Gale Gand of the Food Network.

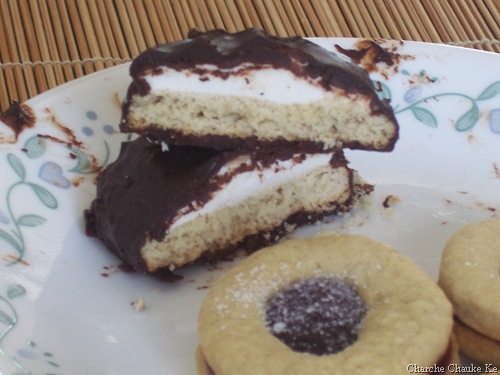
The mallow cookies were great, I would have never dreamt of making homemade marshmallows but homemade taste so………..good and you can flavor them just as you would want. Thanks a lot Nicole, for this challenge.The mallows biscuit was really delicious. The no. of cookies mentioned in the original recipe is all messed up….which actually worked in my favor 🙂 .  I loved it so much that I made some plum jam and filled them up and loved the result.

Milanos were quite a disappointment and I would certainly not want to make those again. The milanos dough was like tuiles batter yet not even that….I give up.

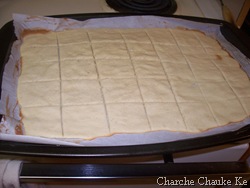
The husband was quite excited about Milano cookies and so I made them first, in fact packed a few for a friend, but it was a lot of effort in trying to make them the same size…..and the end result was not worth it… I just made about 2 dozen of them.After that I split the batter in half , spread on the parchment on the entire tray and baked for 5 minutes in the oven. Cut them with a pizza cutter in squares and back in oven for 5-7 minutes more. Same with the rest of the batter. Filled them up up with the chocolate ganache and anything with chocolate gets eaten here. I do not recommend this and will not be making them again 🙂 . I should mention the chocolate ganache tasted good and the husband even helped me zest the whole orange. What do you think…….I will need help again some other time too..I must not forget the dear husband 🙂

100_3679

Don’t they look cute…….

Milanos for friends…….hope they ate it up soon…..before they turned chewy…….oh no….boo hoo hoo

100_3682 100_3686

Rest of the Milanos……..:-)


Here come the mallows…..pretty good cookies , if one is fond of marshmallows. We are not too fond of them, yet no cookies left of the 28 I made.

The recipe:

Mallows(Chocolate Covered Marshmallow Cookies)
Recipe courtesy Gale Gand, from Food Network website

Prep Time: 10 min
Inactive Prep Time: 5 min
Cook Time: 10 min
Serves: about 2 dozen cookies

• 3 cups (375grams/13.23oz) all purpose flour
• 1/2 cup (112.5grams/3.97oz) white sugar
• 1/2 teaspoon salt
• 3/4 teaspoon baking powder
• 3/8 teaspoon baking soda
• 1/2 teaspoon ground cinnamon
• 12 tablespoons (170grams/ 6 oz) unsalted butter
• 3 eggs, whisked together
• Homemade marshmallows, recipe follows
• Chocolate glaze, recipe follows

1. In a mixer with the paddle attachment, blend the dry ingredients.
2. On low speed, add the butter and mix until sandy.
3. Add the eggs and mix until combine.
4. Form the dough into a disk, wrap with clingfilm or parchment and refrigerate at least 1 hour and up to 3 days.
5. When ready to bake, grease a cookie sheet or line it with parchment paper or a silicon mat.
6. Preheat the oven to 375 degrees F.
7. Roll out the dough to 1/8-inch thickness, on a lightly floured surface. Use a 1 to 1 1/2 inches cookie cutter to cut out small rounds of dough.
8. Transfer to the prepared pan and bake for 10 minutes or until light golden brown. Let cool to room temperature.
9. Pipe a “kiss” of marshmallow onto each cookie. Let set at room temperature for 2 hours.
10. Line a cookie sheet with parchment or silicon mat.
11. One at a time, gently drop the marshmallow-topped cookies into the hot chocolate glaze.
12. Lift out with a fork and let excess chocolate drip back into the bowl.
13. Place on the prepared pan and let set at room temperature until the coating is firm, about 1 to 2 hours.

Note: if you don’t want to make your own marshmallows, you can cut a large marshmallow in half and place on the cookie base. Heat in a preheated 350-degree oven to slump the marshmallow slightly, it will expand and brown a little. Let cool, then proceed with the chocolate dipping.

Homemade marshmallows:
• 1/4 cup water
• 1/4 cup light corn syrup
• 3/4 cup (168.76 grams/5.95oz) sugar
• 1 tablespoon powdered gelatin
• 2 tablespoons cold water
• 2 egg whites , room temperature
• 1/4 teaspoon pure vanilla extract

1. In a saucepan, combine the water, corn syrup, and sugar, bring to a boil until “soft-ball” stage, or 235 degrees on a candy thermometer.
2. Sprinkle the gelatin over the cold water and let dissolve.
3. Remove the syrup from the heat, add the gelatin, and mix.
4. Whip the whites until soft peaks form and pour the syrup into the whites.
5. Add the vanilla and continue whipping until stiff.
6. Transfer to a pastry bag.

Chocolate glaze:
• 12 ounces semisweet chocolate
• 2 ounces cocoa butter or vegetable oil

1. Melt the 2 ingredients together in the top of a double boiler or a bowl set over barely simmering water.

100_3674

Marshmallow cookies before the dip in chocolate

I got 28 cookies by using 1/4 of the cookie dough. Made 1/2 the amount of marshmallows and chocolate glaze. Since my glaze eventually bloomed, I covered them up in Milanos ganache…….the Milano cookie filling :-)………yeah that’s me!! Tasted good, nevertheless 😉

Chocolate Ganache:

• 1/2 cup heavy cream
• 8 ounces semisweet chocolate, chopped
• 1 orange, zested

I also prepared some plum jam….just because I had some plums I had to use. Filled them up in the mallows crust, sprinkled with sugar and loved , loved it! Please do try if you are in the mood to make cookies, true labor of love , forming so many small bites but totally worth it ……..as you will see in pictures below 🙂

Plum Jam Recipe:

  • Plums 2 1/2 cups …..pitted, and chopped fine
  • Sugar 1 1/2 cups
  • Lemon juice  1 Tbsp

That’s it….I added all of this in a heavy bottomed saucepan with 2 Tbsp. water. Cooked it down till I could do the plate test. For the plate test, place a plate in the freezer or chill it well. Pour a big drop of jam on this cold plate and give it 30 seconds. If the jam has reached the right consistency, it will very slowly spread a little. More about jam making here. I made a small quantity, hence it went directly to the refrigerator.

100_3693

Pick one up……these are ready for a sprinkling of sugar

100_3709

Here are the mallows…..this is how they looked

100_3700

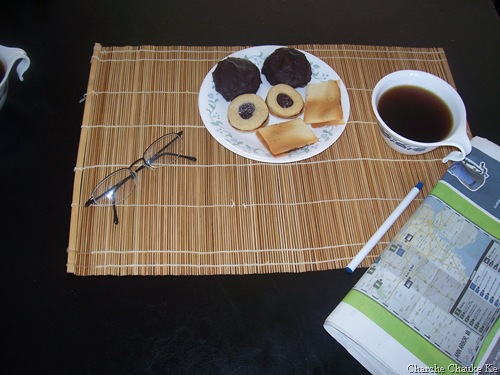
Perfect with coffee….for some great mornings………

I just took a picture as the husband had set the table

100_3711

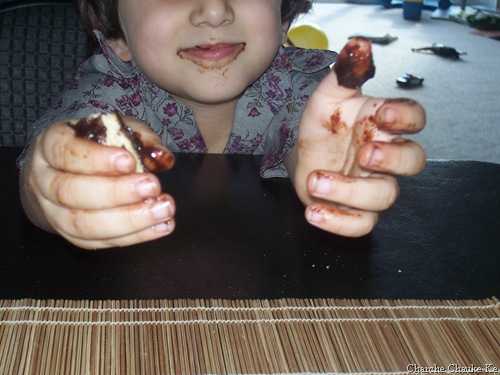
Somebody else had a great time too……….

It’s been one whole year being a part of the Daring Bakers for me. I have come a long way…..I remember my first challenge Filbert Gateau….I remember my delight. Now I dare to experiment on my own…..Thank you Lis and Ivonne and the whole Daring Baker community which is the best resource of all.

Expenditure:

Unsalted Butter: ………………….$2.17……….from Walmart, some left

Corn syrup(16 oz.)…………………$1.67……….from Kroger, lots left

Heavy cream(1/2 pint)…………….$2.89…………from Kroger, lots left

Powdered sugar……………………$1.99…………from Kroger, lots left

Bakers Chocolate semisweet(8 oz):$ 3.29………….from Kroger, none left

Orange 1 :-)…………………………$0.64………….from Kroger, ate it up….

————————————————————————————————–

Total………………………………..$12.65

Posted in -All Purpose flour, -Butter, -Canola Oil, -Cinnamon, -Corn Syrup, -Cream, -Orange, -Plums, -Semisweet Chocolate, -Vanilla, Baking Powder, Baking Soda, Daring Bakers, Eggs, Gelatin, Sugar | Tagged: , , , , , | 14 Comments »