चर्चे चौके के Charche Chauke Ke

Hey! Join in the Kitchen Gossip!!

Posts Tagged ‘Snack’

Chinese Flower Steam Buns (Xiang Cong Hya Juan Bao)

Posted by vivnidhi on October 5, 2009

Trust me, I do not know what half the title says but these are delicious!

sep2_21

Bad picture …….once again, but these are good!!

Bread Baking Babes have been steaming this month. Trying to produce the best flower buns and each one’s a looker. Mine’s not a looker but was so good. Karen of Bake My Day steamed up a recipe from Global Baker by Dean Brettschneider.

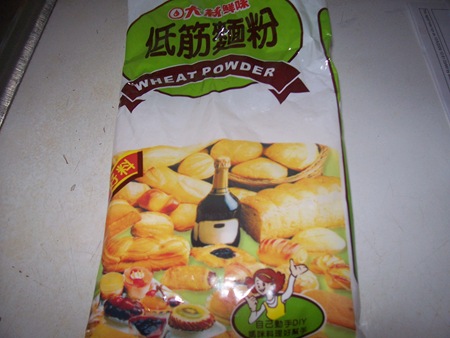
I read all the bread baking babes blogs before I went ahead with the recipe. This recipe calls for Chinese Flour which should be low gluten. I made a trip to our Chinese Store , got all the ingredients and that’s the best thing I did ;-). These came out perfect ……absolutely bread like……no chewiness……perfect soft breads. I was absolutely surprised….how could steaming create such fabulous buns……it was a transformation. Unfortunately, I do not have a cut shot, that would have said more than I can write. We were all so hungry, we just ate it up and forgot all about pictures :-). Anyway, bottom line, if you want to make these……get Chinese Flour :-).

oct_04

Low Gluten Chinese Flour……called “Weak Flour”

The Recipe:

makes 10 buns

Everywhere you go in China you see people eating steam buns, also known as mantong Typically Chinese, a sweet bread is combined with a savoury filling, such as red bean paste and barbecued pork, but take care and avoid using too much filling or the bun will fall apart during the rising and steaming stage. The baking powder helps to open up the texture and gives a little tenderness to the eating quality of the buns. If you can, use imported Chinese flour from a specialist Asian food market or store”.

Dough

300 g chinese flour (use low gluten flour such as cake flour)

15 g sugar

15 g butter

good pinch of salt

1/4 tsp baking powder

1/4 tsp active dry yeast

150 ml chilled water, placed in the refrigerator overnight ( I just put mine in  the freezer for 15 minutes )


Filling

rice bran oil, for brushing on dough (I used good old extra virgin olive oil 🙂 )

40 g finely chopped spring onions or chives

25 g finely chopped red chillies

salt to taste


To make the dough, place all the ingredients into a large mixing bowl and, using your hands, combine to form a very, very firm dough mass. Don’t be tempted to add any water or the steam buns will be flat after steaming.

Place the dough on a work surface and, using your rolling pin, roll out to a thin strip, fold this in half and roll again. Repeat this 10-15 times with a 30 second rest in between each time. This is a way of mixing a very firm dough, the dough will start to become smooth and elastic as a result of the rolling process.

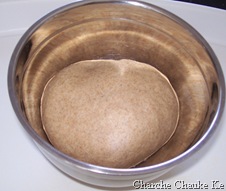
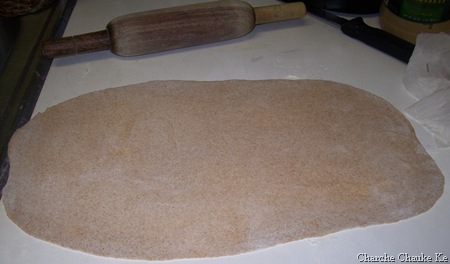
Put the dough in a lightly oiled bowl and cover with plastic wrap. Leave in a warmish place (23-25C) for 15 minutes. Tip the dough onto a lightly floured surface. Using a rolling pin, roll out each piece to a 25cm square. {{this is strange…he never states that you divide the dough in this stage, so use and roll the one ball of dough you have}}

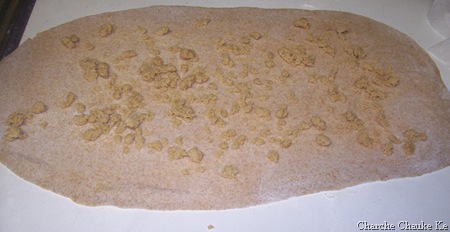
Brush the dough surface lightly with oil and sprinkle the chopped chives and chillies evenly over the dough. Season with salt.

Fold the dough in half and then cut into 2.5cm strips so that you end up with 10 folded strips. Stretch each strip and, starting at the folding edge, twist the two pieces of each strip over each other to form a rope.

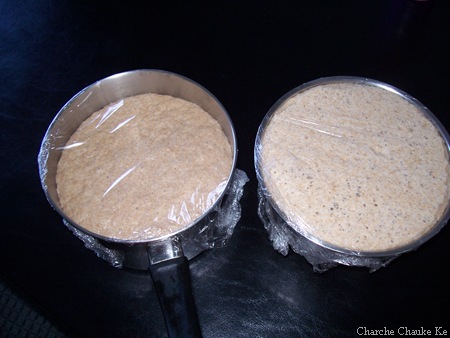
Take the twisted rope and tie into a double knot, tucking the loose ends underneath. Place each bun with ends facing down on a 5cm square of non-stick baking paper** and cover loosely with plastic wrap. Prove for approximately 30-45 minutes in a warm place.

Bring a wok or saucepan of water to the boil with a bamboo steamer sitting on top. Remove the bamboo steamer lid and place the buns on the paper in the steamer 3-4 cm apart to allow for expansion during steaming. Replace the steamer lid and steam for 20 minutes. Repeat until all the buns have been steamed and are firm to the touch.

Karen‘s Notes: you might want to adjust the steaming time from 10-20 minutes, keeping the water at a low blub.

the paper: the pics in the book show him using paper circles, sort of perforated. (as in: paper circles with rather large holes in them). I’m using a regular steam pan with a metal insert and I preferred oiling the base of the metal insert not using any paper, re-oiling when needed. Another thing: I used a tea towel between the lid and the pan to catch any condensation.

I forgot all about the paper and just plain steamed mine. No problems ;-).

I am absolutely in love with garlic chives from Chinese store and so of course I got the authentic stuff.

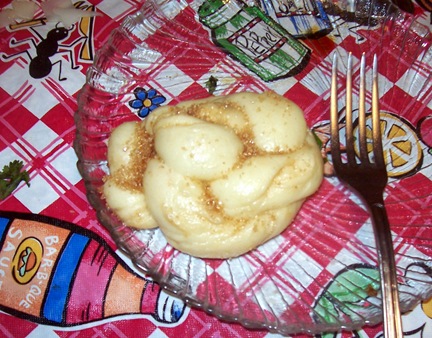
I also made a couple for the kids with turbinado sugar and they were gone in no time.

sep2_19

Chinese Flower Buns with Turbinado Sugar

I will certainly be making  these again. Thanks a lot Karen.  All I wish is that the recipe would at least not have butter and sugar in grams. It’s painful to measure such small quantities in my manual scale which has been even suffered in the hands of my kids 🙂 .

Expenditure:

Chinese Flour…….500 g……….. Chinese Store (Hua Xing)………….$ 2.39

Chives…………….1.03 lb……….Chinese Store (Hua Xing)………….$ 2.21

————————————————————————————————–

Total……………………………………………………………………..$ 4.60

Posted in --Extra virgin olive oil, -Chinese Flour (low gluten), -Garlic chives, -Olive Oil, -Red Chillies, -Turbinado Sugar, Baking Powder, Sugar, Yeast | Tagged: , , , | 1 Comment »

Beirut Tahini Swirls…….Sukkar Bi Tahin

Posted by vivnidhi on July 29, 2009

Bread Baking Babes make Sukkar bi Tahin.

1100_3665

Sukkar bi Tahin

100_3678  100_3673

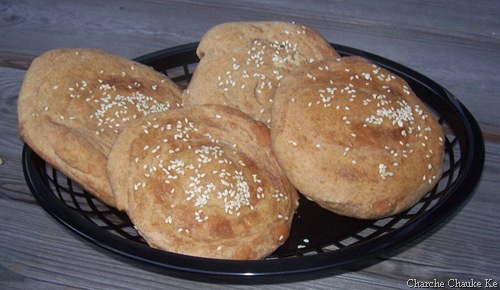
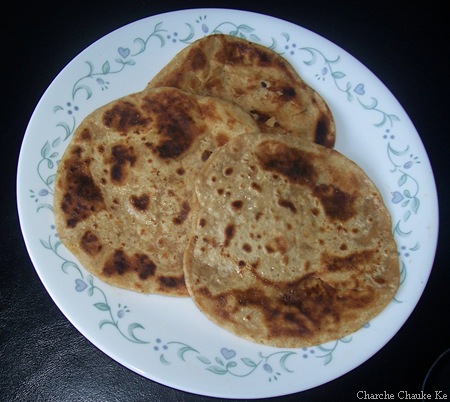
Here’s my savory …garbanzo filled swirls and sweet Tahini paranthas

As soon it was approaching the middle of the month, I was frantically searching for bread baking babes….what are they baking this month, I hope I don’t miss it……….I did not 😉 . I made 2 batches at least and mix and match here and there ;-). This month’s host babe was Natashya of Living in the Kitchen with Puppies.

The recipe she chose is for Beirut Tahini Swirls, Sukkar bi Tahin. It is a cross between a flatbread and a yeasted pastry, only mildly sweet. It is street food in Beirut, and very addictive!
“Beirut has a lot of good food at every level, from fancy restaurants to local eateries, from home cooking to quality market shopping. And for a curbside snacker like me, it’s paradise. There are sesame-covered flatbreads, grilled meats, and sweet and not so sweet cookies; there’s always something nearby to eat.” “These tahini swirls, called sukkar bi tahin in Arabic, are flattened flaky rounds flavored with tahini and sugar, not too sweet, not too strong tasting. Serve them warm or at room temperature-they’re just right either way.”
Alford and Duguid, Home Baking .

The recipe:

Sukkar bi Tahin – Beirut Tahini Swirls

Home Baking, The Artful Mix of Flour and Tradition Around the World

Jeffrey Alford and Naomi Duguid

Makes 6 golden brown, flaky textured coiled rounds, about 6 inches wide, filled with sesame paste and sugar.


Ingredients


Dough

  • 1/2 tsp. active dry yeast
  • 1 cup lukewarm water
  • 1 cup all purpose flour
  • 1 cup whole wheat flour
  • about 1/2 cup all purpose flour for dusting
  • 2 tsp sugar
  • 1 tbsp olive oil

Filling

  • 3/4 cup tahini
  • 3/4 cup sugar


Garbanzo Bean Filling

  • 1/2 cup Garbanzo beans soaked for at least 4 hours and boiled…mashed lightly
  • 4 sun dried tomatoes soaked in water and drained
  • 1/2 cup Tahini
  • 2 cloves garlic minced
  • 1/4 Cilantro chopped
  • 1 Tbsp. lemon juice
  • salt to taste


Directions

In a medium bowl, dissolve the yeast in the lukewarm water.

Stir in one cup of the flour, then add the sugar and oil and stir in.

Incorporate a second cup of flour, then turn the dough out onto a well floured surface and knead for 5 minutes, or until smooth.

Cover the dough with plastic wrap and let rise for 2 to 3 hours, until doubled in volume.

Meanwhile, place a baking stone or unglazed quarry tiles, if you have them, (or a baking sheet) on the middle oven rack and preheat the oven to 375 F.

Mix together the tahini and sugar and stir until smooth. Set aside.
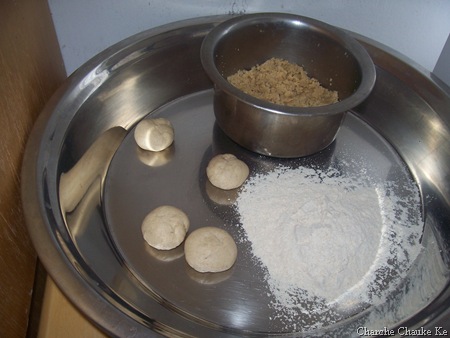
Cut the dough into 6 equal pieces.

Work with 3 at a time, keeping the others covered.

Flatten each out on a lightly floured surface, then roll each out to a rectangle about 5 inches by 10 inches.

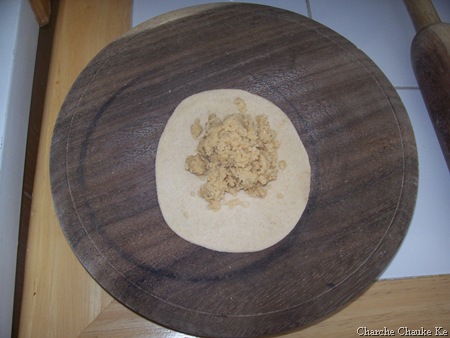
Spread the top surface with 2 1/2 tablespoons of the filling mixture, spreading it almost to the edges.

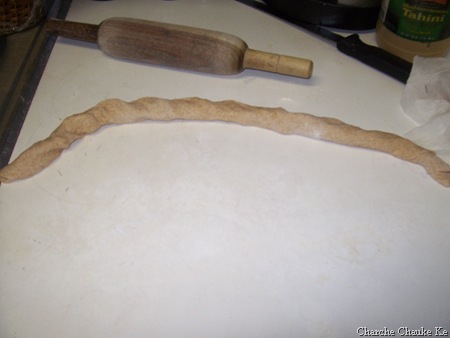
Roll up the rectangle from a long side into a cylinder, which will stretch as you roll to about 20 inches long.

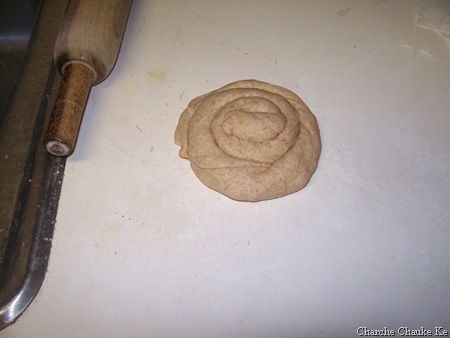
Anchor one end and coil the bread around itself, then tuck the end in.

Flatten with the palm of your hand, then set aside, covered, while you fill and shape the other 2 rectangles.

Return to the first coil and roll out gently with a rolling pin.

Roll the other 2 out a little and then return to the first one and roll it out a little more thinly, and so on, until you have rolled each to a round about 6 to 7 inches in diameter.

A little filling may leak out—don’t worry, just leave it.

I brushed the top with a wee bit of oil and sprinkled some sesame seeds before baking. (optional)

Place the breads on the hot baking stone or tiles (or baking sheet) and bake for 15 to 20 minutes, until golden brown and flaky.

Transfer to a rack to cool.

Shape and bake the remaining 3 pieces of dough.

Serve warm or at room temperature.


*Tahini is a paste of ground sesame seeds. It can be found in health food stores, Middle Eastern markets and some grocery stores. It is a common ingredient in hummus, and is gaining in popularity in most parts of the world. It must be refrigerated after opening.

Natashya says: “The swirls should end up like puffy pita. If they are very thin they will be crispy, if they are not rolled enough, they will puff up like cinnamon rolls. We are striving for a flatbread pastry that puffs a little. Try them a couple of times, experiment. They are fun to bake.”  You bet they are ……I had a ton of fun……as usual 😉 .

I used half whole wheat flour and half all purpose flour for sweet tahini filling ones and all whole wheat flour for the savory garbanzo beans ones. Original recipe uses all purpose flour only.

 100_3642 100_3650 

Left: 1/2 whole wheat with 1/2 all purpose flour dough Right: Whole wheat flour dough

100_3651 

We have risen..the 1/2-1/2 dough was a little behind, but it did catch on

 100_3652

Dough cut in 6 pieces ..sweet tahini filling behind

100_3653

1 piece rolled

100_3654

Filled up

100_3659 

Rolled up again

100_3663

Ready to be baked

100_3665

Sukkar bi Tahin

100_3666

Had some leftover sweet tahini filling…..what did I do with that

100_3667

Made sweet paranthas of course…..dough details here and here

100_3668

Filled up and closed

100_3669

rolled …

100_3671

On the griddle…ready to be turned and oiled

100_3670

The other side…..

100_3673

Quick , delicious sweet treat…….kids will thank you…..this tastes best warm, will harden as it cools cause the flour cover is thin….does not taste bad even then 😉

You bet I enjoy taking pictures and posting huge ones on the blog 😉 . I dare say I loved making these. Thank you Natashya and Bread Baking Babes.

Posted in -All Purpose flour, -Cilantro, -Garlic, -lemon, -Olive Oil, -Sesame seeds, -Sun dried tomatoes, -Tahini, -Whole wheat flour, Sugar, Yeast | Tagged: , , , | 2 Comments »

Choco-Makhana for Jihva for Chocolate

Posted by vivnidhi on January 4, 2008

100_1200

Choco-Makhana

I was determined that I will not participate in jihva this time around. No more indulging in sweets….and that too just because I want to blog about it. Yes, I can’t come up with a recipe with chocolate that does not have sugar in it. But blogging is too tempting……..wonder what the motivation is …….No, my idea is not to impress and wow. I just want to participate. It just tingles the creative nerve and forces me to think out of the box. That’s where all the satisfaction comes from. So, here I am, finally with a recipe for Jihva for Chocolate hosted by Deepz. Jihva for ingredients was started by Indira of Mahanandi fame and since I am a big fan of hers, that is another reason to participate;).

Makhanas are a big favorite of mine. Specially since my Mother in Law brought some really huge, puffed up ones from India. You can get them in Indian grocery stores here in the US but the ones from India are really bigger and without blemish. Makhana/Phool Makhana /(Euryale ferox)/Gordon nut is relished in Bihar and also in Uttar Pradesh. I always remember my Mother getting these packed from her mother’s place to enjoy year round. Some really informative sites on makhanas is nifindia.org and makhanawet.com. After reading these, did I realize what a difficult job it is to get makhanas on our plate and so the high price is justified.

100_1199

Makhanas

So, let me tell you of  this heavenly choco-makhana recipe I came up with which needs 2-3 basic ingredients and 10 minutes maximum to make. My favorite baking chocolate is Ghiradelli semisweet chocolate baking bar. It really is smooth and rich. If one really is indulging, ghiradelli is quite a favorite. Please do not use chocolate morsels for this as they do melt well because of lesser fat content.

The Recipe:

  • Makhana 1 cup
  • Baking Chocolate 1 oz.
  • Golden raisins 1/4 cup

Makhanas need to be made crisp. The traditional method is to fry it in pure ghee or stir fry in a little ghee. I have found that microwaving it makes it quite crisp without any added fat. I like to microwave it 1 minute at a time and then check. Wouldn’t want them burnt in any way. These choco-makhanas would taste good only if the makhanas are quite crisp.

Spread a parchment paper sheet or even aluminum foil works fine for this on a baking sheet.

Melt the chocolate squares in a microwave proof bowl. I do it 30 seconds at a time and then stir cause it melts quite quickly.  That’s it, we are done:). Add the makhanas to the melted chocolate, mix well and spread on the prepared baking sheet. Try to separate the makhanas after they get coated well with the chocolate. I like to clean the melted chocolate with raisins and spread it as well in the plate. Leave them for an hour or so and then choco-makhanas can be scraped off and filled in an airtight container. This way, these should stay crisp for at least a week. Makes a great gift as well. The picture does not do justice but the taste is superb!

100_1200

Enjoy: Choco-Makhana

Posted in -Raisins, Chocolate, Lotus seeds | Tagged: , , | 6 Comments »

Corn Flakes Bhelpuri

Posted by vivnidhi on December 24, 2007

100_1154

I am almost always late to enter the kitchen on Sunday mornings. And , I also like breakfast to be something else but whole wheat slices, sprouts and coffee. It was easier for my Mom , I think, our Sunday breakfasts were always great………samosas, kachoris, fresh mathris……….I can’t keep frying something great each weekend:(.

So, this Sunday morning I wondered what to make and saw Cornflakes. Had no time to waste, chopped a lot of stuff, mixed with masalas, in went chutneys and lo……..cornflakes bhelpuri was ready! Added a piping hot cuppa coffee, and there couldn’t have been a better breakfast on this cold snowy morning.

The Recipe:

  • Cornflakes 2 cups
  • Puffed rice 1 cup
  • Onion 1
  • Tomato 1/2 (as I just had half a tomato left, you could add more,if you want)
  • Tomatillos 2
  • Cucumber 1/2 (of a large one )
  • Cilantro/ Coriander leaves 1/2 cup
  • Potato 1 (scrubbed well & boiled)
  • Peanuts 3/4 cup
  • Salt 2 tsp.
  • Red chili powder 1 tsp.
  • Chaat Masala 1 Tbsp.
  • Green Chutney (cilantro/mint/tomatillo……..any would do as long as its tart and fiery) 2 Tbsp.
  • Sweet Tamarind chutney (sonth in Hindi) 2 Tbsp. (These are available readymade in Indian stores or can  be made as I explain in the note and kept for months in the refrigerator.)

Again the list is long here, but the recipe is really versatile. One can adjust as per what one has on hand. The real quick method of making is here:

1. First fork a well scrubbed potato, wet it well or place it in a microwave container with 2 Tbsp. of water and put it in the microwave for 2 minutes. Microwave times may vary but this is real quick.

2. Meanwhile chop fine all the rest of the veges…..tomato, tomatillo, cucumber, cilantro. Take the potato out and chop it as well. Add to a large container cause these tend to take more space.

3. Peanuts are roasted in the microwave as well. Keep microwaving for a minute at a time and checking continuously till you get them brown per your preference.

4. Puffed rice also goes in the microwave for a minute or more if you need but a minute at a time is the best idea. Its good to have it spread in a plate where you can check it easier. When it gets really crisp, its ready.

5. Let the puffed rice cool for a minute and then add it to the chopped vegetables. Add salt, red chili powder, chaat masala, green chutney and sweet tamarind chutney to the vegetables.  Add the cornflakes and peanuts. Mix really well. Check salt and spice level and adjust according to your taste. You may add lime juice, I didn’t find the need.

And you are ready to serve!! Its difficult for anyone to NOT like this sweet and spicy chaat.

100_1155

Note: Sweet Tamarind Chutney/ Imli ki meethi Chutney/ Sonth is quite easy to make with tamarind concentrates available in Indian grocery stores in the U.S.

Mix 4 Tbsp. tamarind concentrate with with about 1/2 cup water and add 1/2 cup sugar to it. Mix it well and check if the sugar level is as desired. It actually is quite sweet in taste. It should also be quite thick like honey. Heat a Tbsp. of oil and add 1/4 tsp. asafetida, 1 tsp. red chili powder and 2 Tbsp. cumin powder. You could also add a handful of golden raisins. Put it in a bottle and keeps well in the refrigerator for months. If using fresh, you could also add finely chopped banana to it but do not add it and refrigerate. Lip smacking meethi chutney is ready which can be used on almost all kinds of chaat.

Posted in -Cucumber, -Green Chutney, -Onion, -Peanuts, -Potatoes, -Puffed Rice, -Sweet Tamarind Chutney, -Tomatillo, -Tomato, Corn Flakes | Tagged: , , | Leave a Comment »

Baked Guna

Posted by vivnidhi on December 10, 2007

100_1086.jpg

Baked Gunas with a cup of milk and thekuas

Its fun participating in the various events going on this season. That was part of the reason why I wanted to write a foodblog; to be able to participate and chronicle my recipes. So, I have been really excited about participating in the Eat Christmas Cookies event hosted by http://foodblogga.blogspot.com. And, I got a surprising go-ahead from my Doctor when it seems like I am not going to get gestational diabetes this time around. This news definitely called for a celebration!

I have never seen my mother bake a lot except cakes and nan khatai……..the only Indian cookie that could be made at home. But I have seen my mother deep fry a lot of snacks.  As I wanted to try something authentic, I decided to try one of her standard recipes and bake it instead of frying. The result was fabulous, delicious like fried yet healthier.  I also wanted to use a recipe which had whole wheat flour instead of all purpose flour and oil instead of ghee which is almost entirely saturated fat.

Though not a regular everyday snack, Guna is certainly made on Hartalika teej in Uttar Pradesh. It is  accompanied by “mathi” which is plain, unsalted form of Guna made using all purpose flour.  Hartalika teej is a 3 day festival which takes place on the onset of monsoon, the third day of first fortnight of ‘Bhadra’ month based on lunar calendar. Its a festival very dear to the womenfolk cause it celebrates them in a way. Rural parts have fairs and make shift swings seem to spring up on every tree. Women adorn themselves with jewellery, new clothes and its basically fun time.  Mythology states that Goddess Parvati had penanced for a 100 years to be able to unite with Lord Shiv. Goddess Parvati is worshipped on Hartalika teej  as her blessings would lead to marital bliss. The difficult part for married women is that they have to fast, without water on the second day. The next day, fasting women break their fast with guna and mathi. As I do not celebrate teej anymore here in  the US, I can certainly make it as a sweet treat for Christmas. The festive spirit’s the same!!

The recipe:
(Makes 50-60 gunas)

Whole wheat flour 2 cups
Almonds 1/4 cup
Walnuts 1/4 cup
Jaggery 1 cup
Green Cardamom 2
Vegetable Oil 1/4 cup + 2 Tbsp.

I have used jaggery in this recipe cause it gives a very distinct taste to the gunas. First wet the jaggery in as little water as possible, just to make it pliable enough to be mixed with flour. Alternatively you can put small pieces of jaggery in a food processor and mix the sticky jaggery with flour. Soaking the processor container in water for 10 mins will clean it without a hassle. Grind the almonds and walnuts along with cardamom to flour like consistency. A few bigger pieces remaining would be fine. Mix all ingredients really well. This is the most difficult and important part: mix everything really well.

100_1072.jpg

Flour, oil and grinded nuts

100_1073.jpg

Mix the ingredients well

If you need to add any water, just keep adding by fistfuls, till you are able to make a hard dough.

100_1074.jpg

Guna Dough

Make 3 parts of the big dough and roll it with hands till you have a thinner, longer dough piece. There will be oil on your hands as well as the rolling board. Having enough oil is the key to making crisp yet not hard gunas. Break it with hands along the cross section into smaller pieces or use a knife to cut. Heat the oven to 350° F. Flatten the small rounds now using a rolling pin. Line a cookie sheet with aluminum foil and keep putting the flattened rounds on it.  Bake it in the oven for 8-10 minutes. The gunas get crisper as they cool.

100_1083.jpg

The gunas are ready!

Another sweet called thekuas can be made from the same dough.

100_1076.jpg

Small rounds are made of the dough. The colander imprint is made by pressing on the colander.

100_1077.jpg

These are baked at 350° F for about 15-20 minutes.
My personal choice are the gunas. Hope you like them too!

Posted in -Almonds, -Walnuts, -Whole wheat flour, Sweets | Tagged: , , , | 5 Comments »