चर्चे चौके के Charche Chauke Ke

Hey! Join in the Kitchen Gossip!!

Archive for the ‘-Whole wheat flour’ Category

Gehun ka Aata

Daring Bakers 2010 : Nanaimo Bars

Posted by vivnidhi on January 27, 2010

jan_66

Nanaimo Bars

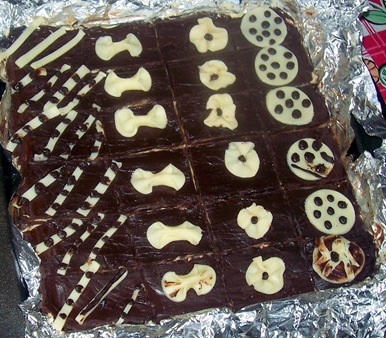
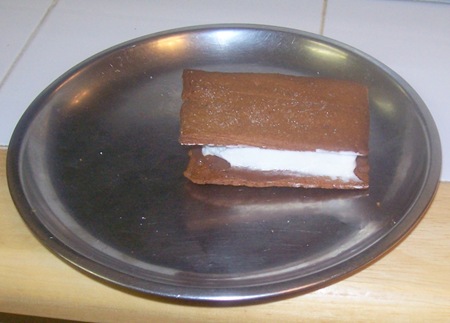
This is the only picture I was able to take…..took them to a friend’s potluck and forgot to take photos

All the Daring Bakers are headed to Canada for winter Olympics. Of course, I can’t fool you….no……we are not going….just celebrating 😉 by making nanaimo bars. OK, I also had never heard of these until………..”The January 2010 Daring Bakers’ challenge was hosted by Lauren of Celiac Teen. Lauren chose Gluten-Free Graham Wafers and Nanaimo Bars as the challenge for the month.”

Nanaimo Bars are a classic Canadian dessert created in none other than Nanaimo, British Colombia. In case you were wondering, it’s pronounced Nah-nye-Moh. These bars have 3 layers: a base containing graham crackers, cocoa, coconut and nuts, a middle custard layer, and a topping of chocolate. They are extremely rich and available almost everywhere across the country.

Lauren wanted us to bake the Graham Crackers gluten free. I used all  whole wheat pastry flour (atta) instead of the gluten free flours as I am too lazy. These are absolutely divine. You will not want to buy store bought after trying these out. Superlative praises for these graham crackers. I stopped buying Indian Glucose biscuits long long back because of Trans fats. These graham crackers will certainly fill that craving. Please visit Celiac Teen or the other daring bakers this month for some great gluten free versions.

Recipe Source: Graham Wafers — 101 Cookbooks (http://www.101cookbooks.com/archives/000126.html) I adapted it to be gluten-free. The adapted recipe is below.
Nanaimo Bars — City of Nanaimo (http://www.nanaimo.ca/EN/main/visitors/NanaimoBars.html)

The Recipe:

Preparation time:
• Graham Wafers: 30 to 45 minutes total active prep, 2 ½ hours to overnight and 45 minutes inactive prep.
• Nanaimo Bars: 30 minutes.

Equipment required:
• Food Processor
• Bowls
• Parchment paper or silpats
• Cookie sheets
• Double boiler or pot and heatproof bowl
• 8 by 8 inch square pan
• Hand mixer or stand mixer (You may use a wooden spoon, but this makes it much easier!)
• Saucepan

  • For  Graham Wafers
    Ingredients
    2 1/2 cups + 2 Tbsp. Whole wheat pastry flour (atta)
    1 cup (200 g) (7.1 ounces) Dark Brown Sugar, Lightly packed
    1 teaspoon (5 mL) Baking soda
    3/4 teaspoon (4 mL ) Kosher Salt
    7 tablespoons (100 g) (3 ½ ounces) Unsalted Butter (Cut into 1-inch cubes and frozen)
    2 Tbsp. Honey, Mild-flavored such as clover.
  • 3 Tbsp. Molasses
    5 tablespoons (75 mL) Whole Milk
    2 tablespoons (30 mL) Pure Vanilla Extract

Directions:
1. In the bowl of a food processor fitted with a steel blade, combine the flours, brown sugar, baking soda, and salt. Pulse on low to incorporate. Add the butter and pulse on and off, until the mixture is the consistency of a coarse meal. If making by hand, combine aforementioned dry ingredients with a whisk, then cut in butter until you have a coarse meal. No chunks of butter should be visible.
2. In a small bowl or liquid measuring cup, whisk together the honey, molasses, milk and vanilla. Add to the flour mixture until the dough barely comes together. It will be very soft and sticky.
3. Turn the dough onto a surface well-floured with atta and pat the dough into a rectangle about 1 inch thick. Wrap in plastic and chill until firm, about 2 hours, or overnight.
4. Divide the dough in half and return one half to the refrigerator. Sift an even layer of whole wheat pastry flour onto the work surface and roll the dough into a long rectangle, about 1/8 inch thick. The dough will be quite sticky, so flour as necessary. Cut into 4 by 4 inch squares. Gather the scraps together and set aside. Place wafers on one or two parchment-lined baking sheets. Chill until firm, about 30 to 45 minutes. Repeat with the second batch of dough.
5. Adjust the rack to the upper and lower positions and preheat oven to 350 degrees Fahrenheit (180 degrees Celsius).
6. Gather the scraps together into a ball, chill until firm, and reroll. Dust the surface with more flour and roll out the dough to get a couple more wafers.
7. Prick the wafers with toothpick or fork, not all the way through, in two or more rows.
8. Bake for 25 minutes, until browned and slightly firm to the touch, rotating sheets halfway through to ensure even baking. Might take less, and the starting location of each sheet may determine its required time. The ones that started on the bottom browned faster.
9. When cooled completely, place enough wafers in food processor to make 1 ¼ cups (300 mL) of crumbs. Another way to do this is to place in a large ziplock bag, force all air out and smash with a rolling pin until wafers are crumbs.

jan_70

Graham Crackers

jan_74

We loved our graham crackers with some nutella and whipped topping……….Husband can’t have enough of it 🙂

Nanaimo Bars
Ingredients:

For Nanaimo Bars — Bottom Layer
1/2 cup (115 g) (4 ounces) Unsalted Butter
1/4 cup (50 g) (1.8 ounces) Granulated Sugar
5 tablespoons (75 mL) Unsweetened Cocoa
1 Large Egg, Beaten
1 1/4 cups (300 mL) (160 g) (5.6 ounces) Graham Wafer Crumbs (See previous recipe)
1/2 cup (55 g) (1.9 ounces) Almonds (Any type, Finely chopped)
1 cup (130 g) (4.5 ounces) Coconut  unsweetened

For Nanaimo Bars — Middle Layer
1/2 cup (115 g) (4 ounces) Unsalted Butter
2 tablespoons and 2 teaspoons (40 mL) Heavy Cream
2 tablespoons (30 mL) Vanilla Custard Powder (Such as Bird’s. Vanilla pudding mix may be substituted.)
2 cups (254 g) (8.9 ounces) Icing Sugar

For Nanaimo Bars — Top Layer
4 ounces (115 g) Semi-sweet chocolate
2 tablespoons (28 g) (1 ounce) Unsalted Butter

Directions:
1. For bottom Layer: Melt unsalted butter, sugar and cocoa in top of a double boiler. Add egg and stir to cook and thicken. Remove from heat. Stir in crumbs, nuts and coconut. Press firmly into an ungreased 8 by 8 inch pan.
2. For Middle Layer: Cream butter, cream, custard powder, and icing sugar together well. Beat until light in colour. Spread over bottom layer.
3. For Top Layer: Melt chocolate and unsalted butter over low heat. Cool. Once cool, pour over middle layer and chill.

jan_64

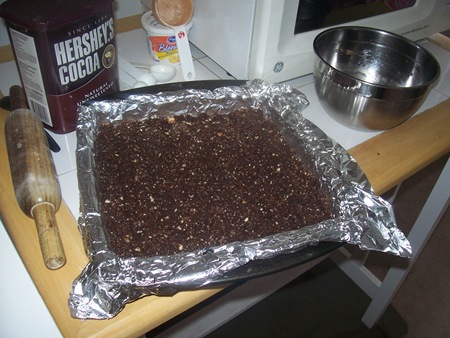
Making of the Nanaimo Bar………bottom layer

(This is the only photograph I have :-)) )

——————————-

My Tweaks to the recipe:

  1. Used whole wheat pastry flour (atta) for the crackers.
  2. Substituted molasses for some  honey as I was out of honey.
  3. I made double the middle layer (mistake..) and double the chocolate (bring on more 🙂 )

Additional Information:

These bars freeze very well, so don’t be afraid to pop some into the freezer.

The graham wafers may be kept in an airtight container for up to 2 weeks. Mine lasted about that long.

If making the graham crackers with wheat, replace the gluten-free flours (tapioca starch, sweet rice flour, and sorghum flour) with 2 ½ cups plus 2 tbsp of all-purpose wheat flour, or wheat pastry flour. Watch the wheat-based graham wafers very closely in the oven, as they bake faster than the gluten-free ones, sometimes only 12 minutes OR even 10.

For the Nanaimo Bars, if making with wheat, replace the gluten-free graham wafer crumbs with equal parts wheat graham wafer crumbs!

Information on Celiac Disease: http://www.mayoclinic.com/health/celiac-disease/DS00319

Information on Vancouver 2010: http://www.vancouver2010.com/

City of Nanaimo: http://www.nanaimo.ca/EN/index.html

Gluten Free Flour Information: http://glutenfreemommy.com/gluten-free-grains-101-the-best-flour-blend/

Video on making Nanaimo bars: http://www.youtube.com/watch?v=x5aqa6R1jIM&feature=fvsr

Recipe and video for Vegan Nanaimo Bars (you didn’t think I’d leave you guys out?): http://www.everydaydish.tv/index.php?page=recipe&recipe=159

Recipe for gluten-free and vegan Graham Wafers: http://www.thesensitivepantry.com/the-sensitive-pantry/2009/8/3/grahams-…


Nanaimo bars disappointed me because of the middle layer. A bit too sweet. I will try other buttercreams or some custard as filling the next time. The husband was pretty impressed with the texture of the middle layer though and wanted me to just follow the recipe and make the amount of filling given.

For the funny attempts at decorating. I used plastic chocolate. I will post the plastic chocolate recipe separately later.

It’s after ages I am posting a daring baker challenge on time. I also hope that I shall continue to do so in the coming months and blog a little more….I have dozens of posts half written which have not yet made it to the blog.

Expenditure:

Heavy Whipping Cream 1/2 pint ……….$1.99………….from Meijer

———————————————————————————————

Total………………………………………$1.99

IMG_1344

I just received this photo…..it certainly looks better than the first

Posted in - Confectioner's Sugar, -Almonds, -Butter, -Coconut, -Cream, -Dark Brown sugar, -Honey, -Molasses, -Semisweet Chocolate, -Vanilla, -Whole Wheat Pastry flour, Baking Soda, Daring Bakers, Eggs, Milk, Sugar, Vanilla Pudding mix | Tagged: , , , | 4 Comments »

This Halloween we decided to eat some sleeping swaddled Babies

Posted by vivnidhi on November 2, 2009

Yeah the ghoulish spirits entered our house this year and we ate these babies up with some butter and honey.

100_4209

This is before baking them……notice the colored little fingers

This month Gretchen of Canela & Comino baked up Tanta Wawas (Peruvian Bread Babies). Now the name itself sounds so much fun and she has made such beautiful loaves (just looking at them will tell you that they were fun to make). She has a lot about Tanta Wawas on her blog. I just remembered ” On November 2nd, these bread babies are taken to the cemeteries in town so they can be left as offerings to those that have passed away and then are broken apart and eaten among the visitors. It is unknown when this Andean tradition began but it is known that from long ago, special breads were made and eaten in this manner.” I knew I’d be making it on Halloween.

As you can see from the picture above, we had a great time making these. The kids colored their hands well (yeah, there was more color on their hands than on the dough). And since they are a little sweet, they were liked by all.

100_4210

Look at those hands……project totally worth it

The Recipe:

Tanta Wawa (Peruvian Bread Babies)

Makes 4 small loaves

  • sponge:
    1 egg
    1/2 cup of all purpose flour
    1 tablespoon of sugar
    1/4 teaspoon of yeast
  • dough:
    1/2 cup of all purpose flour
    1 cup of whole wheat flour
    2 cups of bread flour
    1/2 cup of white sugar
    1/4 cup of brown sugar (I used turbinado sugar)
    1 tablespoon of dry yeast
    1 teaspoon of ground cinnamon
    1/8 teaspoon of ground cloves
    1/2 teaspoon of sesame seeds
    2 teaspoons of salt
    1/2 cup of milk
    1/4 cup of water
    1/4 cup of butter (I used smart balance)
    2 eggs (at room temperature)
    1/2 teaspoon of vanilla
    1 egg yolk (for painting)

1. In a bowl create the sponge by combining 1/2 cup of flour, 1 egg, 2 tablespoons of water, a pinch of instant yeast and 1 tablespoon of sugar. Stir together, cover and let rest for a few hours. …..(Mine was 6-7 hours as it was the day before Halloween)

2. In a bowl, mix the flours, sugar, yeast, salt, cinnamon, cloves, and sesame seeds. Sprinkle over the sponge. Don’t stir. Cover and let rest for a few hours. (Mine rested overnight)

3. Add the 2 eggs and vanilla to the flour mixture. Measure the milk, water and butter in a measuring cup. Heat for 30 seconds in the microwave, pour into the flour mixture. Mix well, then turn out and knead for 10-15 minutes, using additional flour if necessary. Divide dough into 4 equal portions. Form them into ovals. Cover and let the dough rest for 10 minutes.

4. Stretch each dough ball into the form of a “fat baby” and place them on baking sheets. Cover with plastic and let the dough babies rise for 2 hours (there won’t be too much rise at this point).

5. Preheat the oven to 180C. Brush the egg yolks evenly over the dough babies. Bake bread at 180C for 30 minutes.

I am sending these swaddled sleeping Tanta Wawa, or Peruvian Bread Babies, to YeastSpotting .

 100_4213

So, the oven baked up triplets for us :-))

The husband asked why did you not paint them after baking and I wondered why too.

Thanks a lot Gretchen for a real fun challenge. All the Bread Baking Babes have baked up beautiful babies, a must see.

No new expenses for this one ;-). I had everything at home.

Posted in - Bread Flour, - Smart Balance, -All Purpose flour, -Cinnamon, -cloves, -Sesame seeds, -Turbinado Sugar, -Vanilla, -Whole wheat flour, Eggs, Sugar, Yeast | 8 Comments »

Daring Cooks cook Indian : Masala Dosa (Updated)

Posted by vivnidhi on September 15, 2009

aug2_95

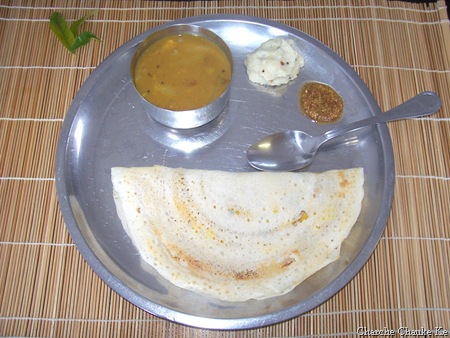
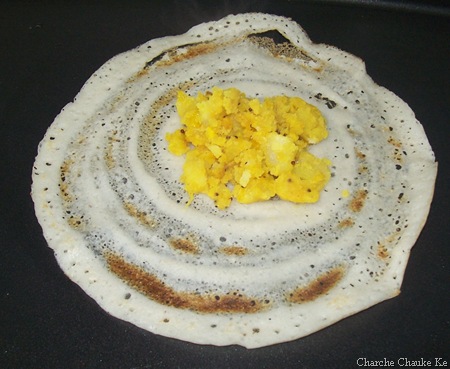
Masala Dosa with Sambhar, coconut chutney and Podi

Debyi from http://www.healthyvegankitchen.com hosted this month’s challenge and ordered Indian Dosas for all of us at Fresh Restaurants (www.freshrestaurants.ca) in Toronto, Canada. Since we all live in a virtual world these days, we were all handed over a recipe from their cookbook  and asked to make dosas to serve ourselves. Now, masala dosas (and oh my dear idlis, made from a similar batter) are a very big favorites with me. I can eat them all the time. My parents and I spent a couple of years in Vishakhapatnam , Andhra Pradesh and that is where my mother learnt to make good idlis and dosas. Another big influence was my Aunt who spent half her life in Chennai, then Madras and cooked fabulous South Indian meals.

Unfortunately I cannot make something with grains and flour and call it a dosa. A similar fare called Chil-ra is made in North India and I will be talking about it at the end of the post. Hence, I used my regular recipe for making dosas . I hope Debyi won’t mind it……..I kept the whole thing Vegan 🙂 .

The Recipe:

Dosa:

  • Idli Rice 3 cups soaked in water overnight
  • Black gram (Urad Daal)  1 cup soaked in water overnight
  • Fenugreek seeds 1 tsp.
  • salt to taste

aug2_39 aug2_48

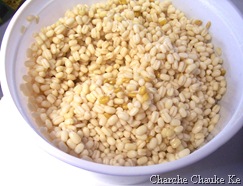
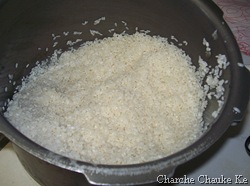
Fenugreek seeds,urad daal soaked and drained and idli rice soaked and drained in picture 2

Soak fenugreek seeds and urad daal together in water overnight. Since I make idlis and dosas from the same batter, I soak rice and lentils separately. Grind the lentils with little water till a very smooth paste is achieved.

aug2_44 aug2_45

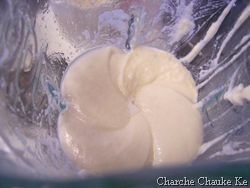
Ground lentils

aug2_49 aug2_50

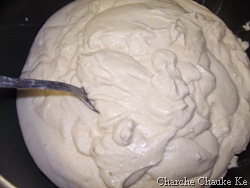
Rice needs to ground well too…..adding rice paste to lentils paste and final paste before fermentation

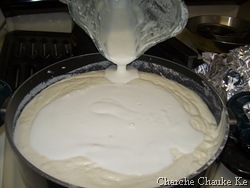
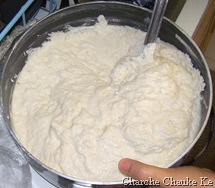
After lentils and rice are ground well, add rice paste to lentils paste and add about 2 tsp. salt. Leave to ferment 12 to 14 hours. Unless, you live in a hot weather, in that case check after 5-6 hours. The dough should almost double.

aug2_65  aug2_78

Half the batter : after fermentation. Add water as required and dosa batter’s ready

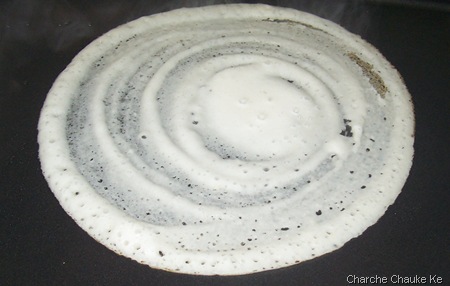
aug2_88 

Ladle the dosa batter in circular motion

Potato filling:

  • Potatoes 4 medium boiled and chopped
  • Onion 1 big sliced
  • Ginger grated 1 tsp.
  • Canola Oil 2 tsp.
  • Asafoetida (Heeng) 1/2 tsp.
  • Mustard seeds (Rai) 1 tsp.
  • Fresh Curry leaves 2 stems washed
  • Bengal gram (Chana Daal ) 1 tsp.
  • Black gram (Urad Daal) 1 tsp.
  • Turmeric powder (Haldi) 1 tsp.
  • Red chilli powder (Lal mirch) 1/2 tsp.
  • salt to taste

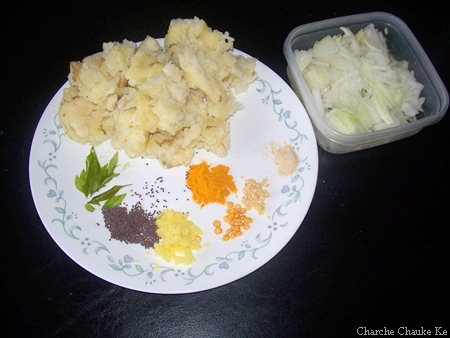
aug2_60

Potato filling ingredients clockwise:Fresh curry leaves, boiled potatoes, asafoetida, urad daal, chana daal, grated ginger, mustard seeds and sliced onions

To make the filling:

Heat the oil in a wok and add all the ingredients except potatoes, onion and salt.

Fry for one minute then add the onions. Let them fry for 2 more minutes.

When the onions start to turn translucent, add the potatoes and salt. If the mixture seems too dry, add 2 Tbsps. water. Cover and cook the filling for 5 minutes. The filling is ready.

aug2_90

Add the potato filling as the dosa starts to brown at the bottom

aug2_92

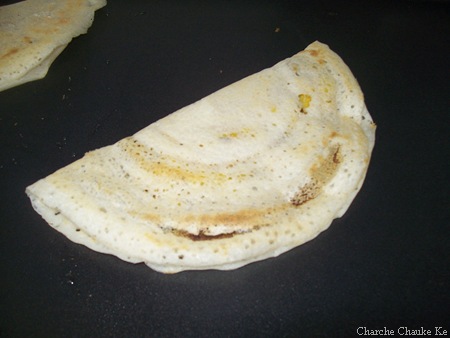
Fold the dosa and we’re done

I prepared 2-3 dosas at a time on a big electric griddle as I was serving 5 people at a time. The best crispness and color is achieved on an iron griddle. The iron griddle is heated , a couple of drops of oil are added to it and a raw onion just sliced at the top is used to spread the oil on the griddle. This is the traditional way of preparing dosas.

Sambhar :

  • Split yellow pigeon peas (Arhar/Toor Daal)  2 cups boiled in a pressure cooker with turmeric and salt
  • Canola Oil 1 Tbsp.
  • Mustard seeds (Rai) 1 tsp.
  • Cumin seeds (Jeera) 1 tsp.
  • Asafoetida (Heeng)  1/2 tsp.
  • Fresh Curry leaves 2 stems washed (remove the stems 😉 )
  • Ginger 2 tsp. grated
  • Garlic 2 cloves minced
  • Shallots/pearl onions 1/2 cup (cut if required to bite size pieces)
  • Tomatoes 2 chopped
  • Vegetables of choice (beans, bell pepper, bottle gourd etc. ) optional
  • Sambhar Masala powder 1 Tbsp.
  • Tamarind concentrate 1/2 tsp.
  • Salt to taste
  • Cilantro/coriander leaves for garnish

To prepare the sambhar heat oil in a big saucepan. Add mustard seeds, cumin seeds, asafoetida and fresh curry leaves. When you hear the mustard seeds crackle, add the ginger and garlic.

Next add the shallots or pearl onions and fry for a little bit more. Next add the tomatoes. When the tomatoes start getting mushy, add the boiled lentils. Mix well and let it come to a boil. The consistency should be like lentil soup. It can be thinned a bit more if desired.  Finally add the sambhar masala powder and the tamarind concentrate.

(If using actual tamarind, soak it in hot water for 15 minutes. Take the pulp out and discard the fibrous portion and the seeds.)

Garnish with cilantro leaves and the sambhar is ready.

Coconut Chutney:

  • Grated coconut (fresh/frozen) 1 cup
  • Dalia Daal (Roasted split Bengal gram) 1/2 cup
  • Peanuts 2 Tbsp.
  • salt to taste

for tempering:

  • Canola Oil 1 Tbsp.
  • Asafoetida 1/4 tsp.
  • Mustard seeds 1 tsp.
  • Fresh Curry leaves 2 stems washed
  • Whole Red chili 1

aug2_66

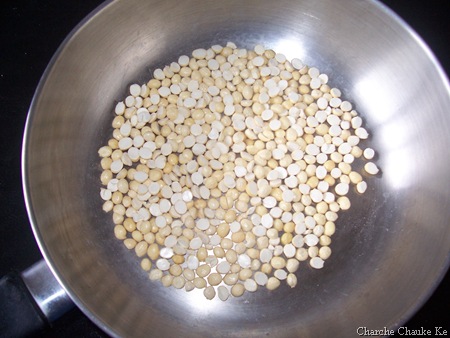
Dalia Daal/ Roasted split Bengal gram

This is a very basic coconut chutney but tastes great! To prepare the chutney, grind the chutney ingredients in a grinder (ideally) or a blender (I use) and add a little water. Grind the ingredients well till you get a smooth consistency.

Heat oil in a small wok and add all the tempering ingredients. Heat till you hear crackling noise and the tempering ingredients look crisp. Do not let it burn. Add immediately to the ground chutney.

The coconut chutney’s ready!

aug2_67

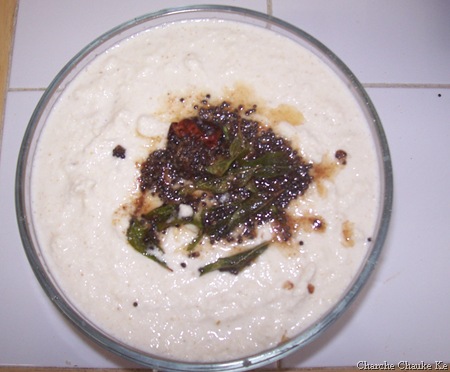
Coconut chutney

aug2_95

Please help yourself 😉

aug2_85

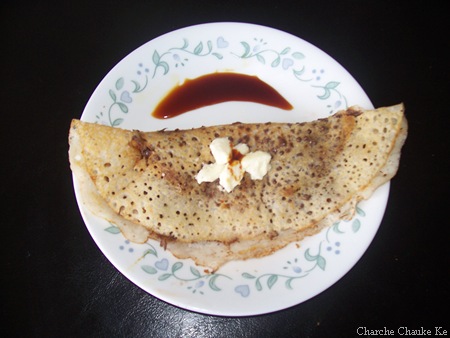
Dosa with Nutella , caramel sauce and some sweet butter


Chil-ra or Godhuma Dosa:

The actual recipe given by Debyi uses spelt flour to make the crepe. In North India , it is called Chilra and in South India, it is called Godhuma Dosa (whole wheat flour dosa)

The way we make it in North India is slightly different and hence my clarifications. We do not eat the chil-ra with any curry. It is usually eaten with pickle or cilantro chutney or even Bhukni (a dry tangy spice powder)

The Recipe:

  • Whole wheat pastry flour (atta) 2 cups
  • Onion 1/2 medium minced
  • Ginger 1 tsp. grated/minced
  • green chilli 1 cut fine
  • tomato 1/2 medium chopped fine
  • Carom seeds 1 tsp.
  • salt to taste
  • water

100_3946

Clockwise: Atta , water , onion, green chili, ginger and tomatoes

100_3950

Chil-ra with yogurt and mango pickle……comfort food

Add all the ingredients and enough water to make a smooth batter. Make sure no lumps remain.

Heat a griddle and make crepes out of these. These will not be as thin as the lentil mixture. But the meal’s ready instantly. I used to love eating these as kid and still do. My kids are a big fan as well……….only I do not know if it’s the chance to eat pickle or chil-ra that draws them to it. Anyway, it’s a good quick fix for me 😉 .

Edit : 17 Sep.  09 : Oh Dear me! I just re-read my post and realized that I have written the quantity of rice as 1 cup and that of the lentils too. It was a typo. I am so very sorry if anyone has tried making this with the wrong ratio given.  I have marked in red , please do check.

Posted in - Turmeric, -Arhar (Toor) Dal, -Asafoetida, -Canola Oil, -Cilantro, -Curry leaves, -Dalia Daal/Roasted split Bengal Gram, -Fenugreek seeds, -Garlic, -Ginger, -Idli Rice, -Mustard Seeds, -Onion, -Potatoes, -Red chili powder, -Tamarind, -Tomato, -Urad daal/ black gram, -Whole wheat flour, Shallots, _Chana Daal/ Bengal gram | Tagged: , , , | 7 Comments »

Beirut Tahini Swirls…….Sukkar Bi Tahin

Posted by vivnidhi on July 29, 2009

Bread Baking Babes make Sukkar bi Tahin.

1100_3665

Sukkar bi Tahin

100_3678  100_3673

Here’s my savory …garbanzo filled swirls and sweet Tahini paranthas

As soon it was approaching the middle of the month, I was frantically searching for bread baking babes….what are they baking this month, I hope I don’t miss it……….I did not 😉 . I made 2 batches at least and mix and match here and there ;-). This month’s host babe was Natashya of Living in the Kitchen with Puppies.

The recipe she chose is for Beirut Tahini Swirls, Sukkar bi Tahin. It is a cross between a flatbread and a yeasted pastry, only mildly sweet. It is street food in Beirut, and very addictive!
“Beirut has a lot of good food at every level, from fancy restaurants to local eateries, from home cooking to quality market shopping. And for a curbside snacker like me, it’s paradise. There are sesame-covered flatbreads, grilled meats, and sweet and not so sweet cookies; there’s always something nearby to eat.” “These tahini swirls, called sukkar bi tahin in Arabic, are flattened flaky rounds flavored with tahini and sugar, not too sweet, not too strong tasting. Serve them warm or at room temperature-they’re just right either way.”
Alford and Duguid, Home Baking .

The recipe:

Sukkar bi Tahin – Beirut Tahini Swirls

Home Baking, The Artful Mix of Flour and Tradition Around the World

Jeffrey Alford and Naomi Duguid

Makes 6 golden brown, flaky textured coiled rounds, about 6 inches wide, filled with sesame paste and sugar.


Ingredients


Dough

  • 1/2 tsp. active dry yeast
  • 1 cup lukewarm water
  • 1 cup all purpose flour
  • 1 cup whole wheat flour
  • about 1/2 cup all purpose flour for dusting
  • 2 tsp sugar
  • 1 tbsp olive oil

Filling

  • 3/4 cup tahini
  • 3/4 cup sugar


Garbanzo Bean Filling

  • 1/2 cup Garbanzo beans soaked for at least 4 hours and boiled…mashed lightly
  • 4 sun dried tomatoes soaked in water and drained
  • 1/2 cup Tahini
  • 2 cloves garlic minced
  • 1/4 Cilantro chopped
  • 1 Tbsp. lemon juice
  • salt to taste


Directions

In a medium bowl, dissolve the yeast in the lukewarm water.

Stir in one cup of the flour, then add the sugar and oil and stir in.

Incorporate a second cup of flour, then turn the dough out onto a well floured surface and knead for 5 minutes, or until smooth.

Cover the dough with plastic wrap and let rise for 2 to 3 hours, until doubled in volume.

Meanwhile, place a baking stone or unglazed quarry tiles, if you have them, (or a baking sheet) on the middle oven rack and preheat the oven to 375 F.

Mix together the tahini and sugar and stir until smooth. Set aside.
Cut the dough into 6 equal pieces.

Work with 3 at a time, keeping the others covered.

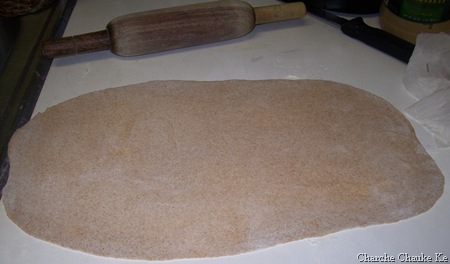
Flatten each out on a lightly floured surface, then roll each out to a rectangle about 5 inches by 10 inches.

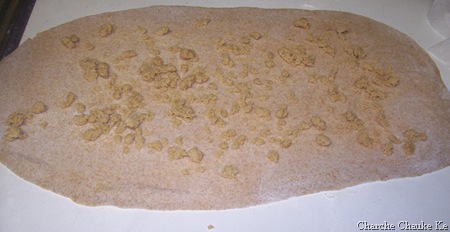
Spread the top surface with 2 1/2 tablespoons of the filling mixture, spreading it almost to the edges.

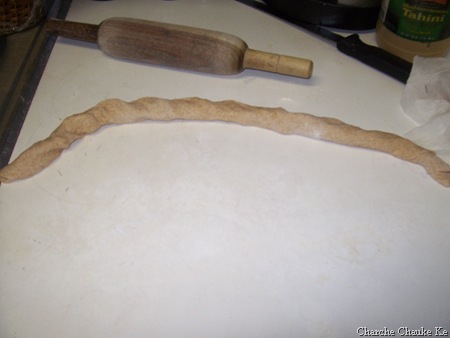
Roll up the rectangle from a long side into a cylinder, which will stretch as you roll to about 20 inches long.

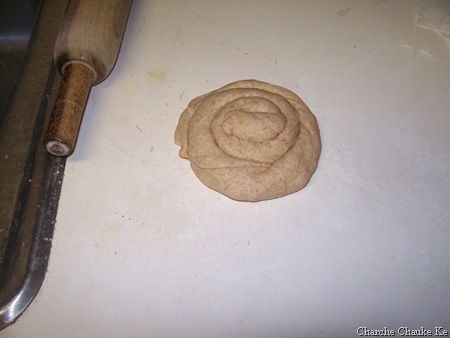
Anchor one end and coil the bread around itself, then tuck the end in.

Flatten with the palm of your hand, then set aside, covered, while you fill and shape the other 2 rectangles.

Return to the first coil and roll out gently with a rolling pin.
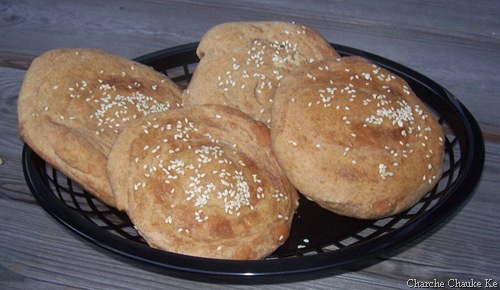
Roll the other 2 out a little and then return to the first one and roll it out a little more thinly, and so on, until you have rolled each to a round about 6 to 7 inches in diameter.

A little filling may leak out—don’t worry, just leave it.

I brushed the top with a wee bit of oil and sprinkled some sesame seeds before baking. (optional)

Place the breads on the hot baking stone or tiles (or baking sheet) and bake for 15 to 20 minutes, until golden brown and flaky.

Transfer to a rack to cool.

Shape and bake the remaining 3 pieces of dough.

Serve warm or at room temperature.


*Tahini is a paste of ground sesame seeds. It can be found in health food stores, Middle Eastern markets and some grocery stores. It is a common ingredient in hummus, and is gaining in popularity in most parts of the world. It must be refrigerated after opening.

Natashya says: “The swirls should end up like puffy pita. If they are very thin they will be crispy, if they are not rolled enough, they will puff up like cinnamon rolls. We are striving for a flatbread pastry that puffs a little. Try them a couple of times, experiment. They are fun to bake.”  You bet they are ……I had a ton of fun……as usual 😉 .

I used half whole wheat flour and half all purpose flour for sweet tahini filling ones and all whole wheat flour for the savory garbanzo beans ones. Original recipe uses all purpose flour only.

 100_3642 100_3650 

Left: 1/2 whole wheat with 1/2 all purpose flour dough Right: Whole wheat flour dough

100_3651 

We have risen..the 1/2-1/2 dough was a little behind, but it did catch on

 100_3652

Dough cut in 6 pieces ..sweet tahini filling behind

100_3653

1 piece rolled

100_3654

Filled up

100_3659 

Rolled up again

100_3663

Ready to be baked

100_3665

Sukkar bi Tahin

100_3666

Had some leftover sweet tahini filling…..what did I do with that

100_3667

Made sweet paranthas of course…..dough details here and here

100_3668

Filled up and closed

100_3669

rolled …

100_3671

On the griddle…ready to be turned and oiled

100_3670

The other side…..

100_3673

Quick , delicious sweet treat…….kids will thank you…..this tastes best warm, will harden as it cools cause the flour cover is thin….does not taste bad even then 😉

You bet I enjoy taking pictures and posting huge ones on the blog 😉 . I dare say I loved making these. Thank you Natashya and Bread Baking Babes.

Posted in -All Purpose flour, -Cilantro, -Garlic, -lemon, -Olive Oil, -Sesame seeds, -Sun dried tomatoes, -Tahini, -Whole wheat flour, Sugar, Yeast | Tagged: , , , | 2 Comments »

YES….Asparagus bread with Parmesan cheese and Walnuts and uh… Arugula

Posted by vivnidhi on June 26, 2009

It’s been a long time that I wrote anything on the blog. Not even posting more photographs of the gnocchi , not posting about the daring bakers and cooks challenges. Past couple of months have been absolutely crazy. It’s an absolute surprise how time flies by, really…….doesn’t the time ever get tired of just ticking. Oh, I get crazy running after it, never really making it. I want to be on top of situations and reach appointments early……….but the reality is …I am mostly running late. If I wake at 5 am in the morning, the day and the task list gets longer……..I start thinking…..”Oh, why didn’t I wake up at 4″ And……I don’t even work outside the house……..I don’t know what is wrong and do I even have the time to think of it…..ha?

Anyway, now that I have opened up my heart, written a full paragraph without interruption……….(ah, lets not count the fact that I have a fidgety 1 year old who landed up on my lap scribbled a little on the table till I actually handed her “writing book”) OK OK……focus, focus………I just had to break my silence on the blog and I have been so excited this past month about the Bread Baking Babes.

I baked the bread they blogged about and it just tasted superb. I had to blog about it and yeah………..today is the last day if I want the badge. I always manage doing things…….it’s ok if on the last minute. A friend a few years back illuminated me about the JIT….Just in Time Theory. Well, I am a perfect practitioner.

June1_68

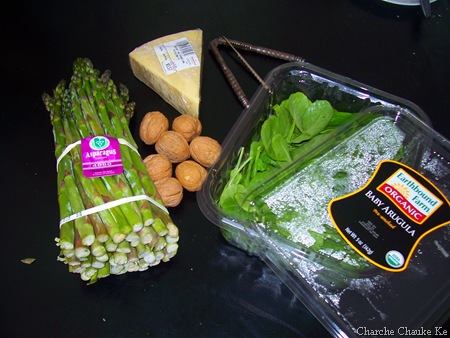
Asparagus, walnuts, parmesan cheese and baby Arugula/Rocket

I was going to bake this month’s BBB bread no matter what cause I love baking breads and these folks bake great looking breads:-) . I was out of almost every bread baking ingredient so I bought a lot of stuff. It was fun. Baked the bread yesterday…..and was really thankful that it was not difficult. The only added activity for me was shelling the walnuts but I better use them before they go bad.

The Recipe:

Asparagus Bread (with Parmesan Cheese and Walnuts)

2 small loaves

This bread goes very well with a cold meat and salad buffet.

125 g green asparagus ……..9 pieces for me

25-30 g rocket

50 g walnuts,

50 g freshly grated parmesan cheese

450 g strong bread flour (you can also use half whole wheat and half white or white whole wheat if you can get that)

12 g fresh yeast or 1 1/4 tsp dry instant yeast

250-270 g water

25 g olive oil…….1 1/2 Tbsp for me

10 g (sea) salt………….1 1/2 tsp. for me

  • Boil 3/4 liter of water with a pinch of (sea) salt. Clean the asparagus, set two of them aside, cut the rest into 4 pieces. Boil these pieces for 2 minutes in the water, scoop them out (so you can use the water for the rocket as well) and rinse under cold water (to stop them cooking).
  • Put the rocket in the boiling water for a few seconds (until wilted), drain and rinse under cold water and drain again.
  • Press the water our of the rocket, chop it coarsely and cut the asparagus into 1/4 inch (± 1 cm) long pieces, set aside.
  • Crush the walnuts coarsely and grate the parmesan.
  • Measure the flour and yeast in a large bowl, mix in most of the water and knead for a few minutes (on low speed), add the olive oil and knead for 10-12 minutes. Add the salt and knead on medium speed for 5 minutes until very elastic.
  • Let the dough rest for 10 minutes. Work the asparagus pieces, rocket, walnuts and parmesan in with care so that they’re evenly distributed. The dough should be very supple and elastic, hence the long kneading time. For me the best way to incorporate all the ingredients is to spread the dough out into a large slap, sprinkle all the ingredients on and roll it up. Let it rest for 5-10 minutes, press flat and fold… rest 5-10 minutes press flat and fold. Shape into rounds.
  • Place the dough in a greased container, cover and let rise for about 2 hrs.
  • Divide the dough into 2 equal parts.
  • Make round balls, cover with a tea towel and let rest for 10 minutes.
  • Flatten the balls and fold into taut breads with slightly tapering ends. Lay one asparagus in lengthwise in the middle of the bread and press in slightly. Sprinkle with wheat flour and cover to rise for 70 minutes or until doubled. Before baking you can sprinkle a little grated cheese on the bread if you like (optional).
  • Preheat the oven (preferably with stone) to 460ºF.
  • Place the loaves directly on the stone. Spray with water (or poor some hot water in a metal container on the bottom of the oven that you preheated to create steam)
  • Lower the temperature after 5 minutes to 400ºF. Open the door after another 10 minutes to let some air in. Repeat twice during baking.
  • Bake for 40-45 minutes and cool on a wire rack.

(adapted from: “Artisan Bread” -Jan Hedh)

Original post can be found on the blog “Notitie van Lien” ©2009.

www.notitievanlien.blogspot.com

I used half whole wheat and half bread flour. I followed the recipe exactly except for these changes: Mixed with hands, mixed flour, yeast , salt and water together and then knead in oil.  After letting the dough rest for about minutes, I incorporated the greens and walnuts , shaped the dough and left it to rise. No excessive resting allowed in this house. Next I shaped the bread for final rising on the sheet I was going to bake it in. I do not have a stone, so I baked the breads on a normal baking sheet. Sprayed some water on the loaves before baking and baked for 40 minutes. The bread tasted fabulous. One thing I’d change about my recipe is that I would spread some cornmeal instead of the whole wheat flour I put under the loaves as I was in a rush (always!!)

One more note about the ingredients: I should admit that I am not an asparagus fan at all and the husband has very limited likes in the vegetable world. But, what do you do if you have an adamant wife determined to put all kinds of vegetables on the plate:-) ? And the husband can’t even complain these days cause the 31/2 year old catches it instantly …….”even Papa doesn’t like broccoli” . So, I these days find the husband eating broccoli and actually saying  that he likes it:-)………even when there are other choices:-). Ok, gist of the matter…..everybody at home enjoyed the bread thoroughly. This is a delicious bread, do try it…..and it’s even good for beginners as the recipe is so simple. Thanks Lien!

June1_69

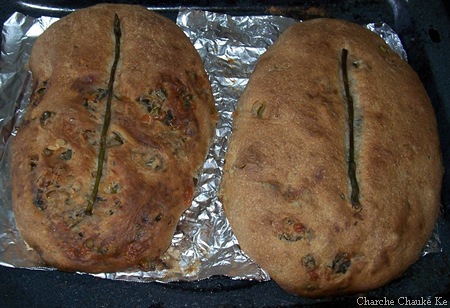
After the second rise, before baking

June1_70

Baked loaves

June1_76

Pick a slice………….

Expenditure:

Asparagus………………….1.57 lb. …………$3.12 ,        from Busch’s………lots left

Arugula……………………5 oz………………$ 3.99        from Busch’s………lots left

Argentine Parmesan……..0.62 oz……………$5.57          from Busch’s………lots left

Whole wheat flour(KA)…. 5 lb………………..$3.22          from Walmart…….lots left

Bread flour………………..5 lb……………..$2.64         from Walmart…….lots left

——————————————————————————————————–

Total………………………………………….$18.54………..

That’s an expensive bread! The pleasure I got out of baking and eating it……….priceless……


Posted in - Bread Flour, -Arugula/Rocket, -Asparagus, -Olive Oil, -Walnuts, -Whole wheat flour | Tagged: , , | 6 Comments »

Lavash Crackers with Watermelon Salsa, Mutabal and Cilantro Hummus

Posted by vivnidhi on September 27, 2008

100_2496

Lavash Crackers

Another Daring Bakers Challenge. For the first time in 3 months, not that big a challenge for me as I am quite familiar with homemade crackers and have been working with yeast every day these days………..as “the bake your own bread” ghost has entered my body.  This has led to the husband going to the grocery store and snacking on some “store” bread and the 3 year old using his resources fully “If I will be a good boy, will you buy me sliced bread ?” Now who would have imagined that 3 year olds can be determined to be good …………for bread. Sounds like either I live on an uninhabited island or are an island myself. Well , a fabulous cook and bread baker is to blame for all this……….her book has enchanted me like no other………..More later.

Don’t worry about me rambling for no reason…….its been a month that I wrote anything at all and I am so full of things to say. Tackled this challenge really early this month but just didn’t write the post………so here I am up at 4:45 am in the morning determined to post on the specified date. Ah, determination, ………so much is brewing in my mind these days and I am so involved in the world matters ………..on my dining table…….. that its better that I do not post anything……..you can see ……….can’t you?

OK, I heard about Lavash and tasted this beautiful bread when a friend of mine brought it for me from the most authentic Armenian bakery in the bay area in California. This friend is Armenian and Armen is his name 🙂 . Armen is a wonderful structural engineer who helped me get conversant with the American Civil Engineering. I volunteered for him before I started working……..I have spent too many a fabulous evenings discussing the world with him and have learnt a lot from him. I know, if we’d meet again you would still wonder how I can drink decaf………. Someday, I hope to meet him again and introduce him to his grandkids. Hope you are keeping good health Armen, I have thought of you a lot as I prepared these crackers. Lavash bread is an amazing bread………it looks big and crackery but if you roll it in a wet towel………..it gets soft. Fill and roll. Makes amazing sandwiches.

Shel, of Musings From the Fishbowl and Natalie of Gluten A Go Go hosted this month’s fabulous challenge. There is a great alternative baking side to the Daring Bakers ….its a great resource for all kinds of alternative baking. We always make them work too hard. This month’s challenge was hosted by that branch of daring bakers’ making some history and letting us eat the delicious results. A big thank you to them for letting us get so creative.

Here’s the Recipe:

RECIPE – Recipe Reference:  The Bread Baker’s Apprentice: Mastering The Art of Extraordinary Bread, by Peter Reinhart. Ten Speed Press, Berkeley, CA.  Copyright 2001.  ISBN-10: 1-58008-268-8, ISBN-13: 978-158008-268-6.

Here’s a simple formula for making snappy Armenian-style crackers, perfect for breadbaskets, company and kids…It is similar to the many other Middle Eastern and Northern African flatbreads known by different names, such as mankoush or mannaeesh (Lebanese), barbari (Iranian), khoubiz or khobz (Arabian), aiysh (Egyptian), kesret and mella (Tunisian), pide or pita (Turkish), and pideh (Armenian).  The main difference between these breads is either how thick or thin the dough is rolled out, or the type of oven in which they are baked (or on which they are baked, as many of these breads are cooked on stones or red-hot pans with a convex surface)…

The key to a crisp lavash,…is to roll out the dough paper-thin.  The sheet can be cut into crackers in advance or snapped into shards after baking.  The shards make a nice presentation when arranged in baskets.

I do not like too thin a cracker otherwise I end up hurting my mouth somewhere with a sharp end…I know, I know :)), so I like mine with some substance without being bready.

Makes 1 sheet pan of crackers

* 1 1/2 cups (6.75 oz) unbleached bread flour or gluten free flour blend (If you use a blend without xanthan gum, add 1 tsp xanthan or guar gum to the recipe)
* 1/2 tsp (.13 oz) salt
* 1/2 tsp (.055 oz) instant yeast
* 1 Tbsp. (.75 oz) agave syrup or sugar
* 1 Tbsp. (.5 oz) vegetable oil
* 1/3 to 1/2 cup + 2 Tbsp. (3 to 4 oz) water, at room temperature
* Poppy seeds, sesame seeds, paprika, cumin seeds, caraway seeds, or kosher salt for toppings

I made 4 batches. Used whole wheat flour (American, store bought, from a local mill though) for 1 batch and 3 batches with Indian “Atta…..whole wheat flour” which is actually a finer grind of the same thing but not as fine as all purpose flour. I am not really aware of the gluten content of atta. I liked mine with the atta flour;)……….old habits die hard.

100_2495

Whole wheat flour and Atta dough before proofing

1.  In a mixing bowl, stir together the flour, salt yeast, agave, oil, and just enough water to bring everything together into a ball.  You may not need the full 1/2 cup + 2 Tbsp. of water, but be prepared to use it all if needed.

I needed all the water and needed to knead and knead and knead. I was lazy , just used my hands as I didn’t want to wash the mixer but after 4 batches in one go……….I really questioned the wisdom of doing so. The good part was that my hands were in no condition to knead bread dough for a couple of days and the folks at home heaved a sigh of relief:).

2.  For Non Gluten Free Cracker Dough:  Sprinkle some flour on the counter and transfer the dough to the counter.  Knead for about 10 minutes, or until the ingredients are evenly distributed.  The dough should pass the windowpane test (see http://www.wikihow.com/Determine-if-Bre … ong-Enough for a description of this) and register 77 degrees to 81 degrees Fahrenheit. The dough should be firmer than French bread dough, but not quite as firm as bagel dough (what I call medium-firm dough), satiny to the touch, not tacky, and supple enough to stretch when pulled.  Lightly oil a bowl and transfer the dough to the bowl, rolling it around to coat it with oil.  Cover the bowl with plastic wrap.
or
2.  For Gluten Free Cracker Dough:  The dough should be firmer than French bread dough, but not quite as firm as bagel dough (what I call medium-firm dough), and slightly tacky. Lightly oil a bowl and transfer the dough to the bowl, rolling it around to coat it with oil.  Cover the bowl with plastic wrap.

3. Ferment at room temperature for 90 minutes, or until the dough doubles in size. (You can also retard the dough overnight in the refrigerator immediately after kneading or mixing).

4.  For Non Gluten Free Cracker Dough:  Mist the counter lightly with spray oil and transfer the dough to the counter.  Press the dough into a square with your hand and dust the top of the dough lightly with flour.  Roll it out with a rolling pin into a paper thin sheet about 15 inches by 12 inches.  You may have to stop from time to time so that the gluten can relax.  At these times, lift the dough from the counter and wave it a little, and then lay it back down.  Cover it with a towel or plastic wrap while it relaxes.  When it is the desired thinness, let the dough relax for 5 minutes.  Line a sheet pan with baking parchment.  Carefully lift the sheet of dough and lay it on the parchment.  If it overlaps the edge of the pan, snip off the excess with scissors.
or
4.  For Gluten Free Cracker Dough: Lay out two sheets of parchment paper.  Divide the cracker dough in half and then sandwich the dough between the two sheets of parchment.  Roll out the dough until it is a paper thin sheet about 15 inches by 12 inches.  Slowly peel away the top layer of parchment paper.  Then set the bottom layer of parchment paper with the cracker dough on it onto a baking sheet.

5. Preheat the oven to 350 degrees Fahrenheit with the oven rack on the middle shelf.  Mist the top of the dough with water and sprinkle a covering of seeds or spices on the dough (such as alternating rows of poppy seeds, sesame seeds, paprika, cumin seeds, caraway seeds, kosher or pretzel salt, etc.)  Be careful with spices and salt – a little goes a long way. If you want to precut the cracker, use a pizza cutter (rolling blade) and cut diamonds or rectangles in the dough.  You do not need to separate the pieces, as they will snap apart after baking.  If you want to make shards, bake the sheet of dough without cutting it first.
5.  Bake for 15 to 20 minutes, or until the crackers begin to brown evenly across the top (the time will depend on how thinly and evenly you rolled the dough).

I tried all these seeds individually and pretzel salt individually and all in one. The sesame ones tasted best:). I failed to get the seeds to stick the first time around. With the rest, I would finish rolling out, keep the rolled dough aside, sprinkle the seeds on the counter and roll one last time to get the seeds to stick well. I also used the fork to mark the rolled dough. This prevents the crackers from puffing up, though it won’t puff up if you have kneaded the dough well. But, again its a habit:).
6.  When the crackers are baked, remove the pan from the oven and let them cool in the pan for about 10 minutes.  You can then snap them apart or snap off shards and serve.

RECIPES – Toppings
You may use your choice of topping/dip/salsa/relish/spread for your lavash crackers as long as it is vegan and gluten free.

The first evening I was in a rush and had to finish a watermelon sitting in the refrigerator. The watermelon was not too sweet and so a salsa made from it really perked it up. Recipe is from “Watermelon Fire and Ice Salsa”  at allrecipes.com . Delicious!!
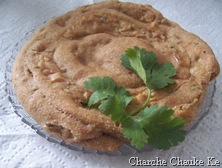
100_2497

Lavash Crackers with Watermelon salsa

Next I wanted to make an Armenian dip…….as authentic as I could make it:). Mutabal is similar to Baba Ghanoush and has chopped onions and cumin in it.

Mutabal Recipe:

  • Eggplant 1 big
  • Olive oil 1/2 tsp.
  • Tahini 1 1/2  Tbsp.
  • Garlic 2 cloves
  • Lemon Juice 1 Tbsp.
  • Onion 2 Tbsp. very finely chopped
  • Cumin powder 1/4 tsp. dry roasted
  • Salt to taste
  • Parsley 1 Tbsp. chopped fine for garnish
  • Olive oil 1 tsp. for garnish

Spread some olive oil on the shiny eggplant and use a fork to make some holes in it. Put the eggplant under the broiler and let it brown on all sides. I sometimes turn it and sometimes I don’t. Works both ways. Should take about 15-20 minutes.

Once the eggplant is cool enough to be handled. Peel the skin off and remove the big bulk of seeds, if there. I take the bulk of seeds out, if it is a seedy eggplant, a few always remain.

Next I mixed the eggplant flesh, tahini, salt, garlic and lemon juice in a blender. Came out creamy. Mix the onion it it , sprinkle with cumin powder and garnish with parsley and a tsp. of olive oil.

First bite into the mutabal with crackers was “yeah, not bad” and then I kept going back to it. Its addicting. I also made a cilantro hummus, but forgot to take a picture:) . Recipe from here.

These were sent off as a gift to a dear friend who has to sometimes suffer my baking escapades:).

Variety Lavash crackers with Mutabal and Cilantro hummus (ran away from the picture)

In addition to my usual crackers, these will be made often:). Thanks for  a  lovely challenge.

Now, who all of the daring bakers have made what……….lets check it out Daring Bakers Blogroll……..

Expenditure:
Whole wheat Flour : $ 1.68
Total $ 1.68
That’s neat……….isn’t it;).

Posted in -Caraway seeds, -Cumin seeds, -Poppy seeds, -Red chili powder, -Sesame seeds, -Whole wheat flour, Sugar, Yeast | Tagged: , , | 15 Comments »

Cucumber Parsley Focaccia with spicy whipped Butter

Posted by vivnidhi on August 5, 2008

100_2165

Parsley & cucumber for bread

Yes, cucumber focaccia. Unusual, but delicious:). Focaccia (pronounced foe-ca-chia) is a popular flatbread which was originally made without a leavening agent but now some small amount of yeast is added to it. More history here.

Did you know that a full refrigerator actually cools more efficiently than an empty one. Here’s a link  that says so and I know it for sure:). 2 pickle cucumbers, for which I even paid more; froze in my fridge cause the refrigerator was full. It had hardly been a day that I bought them and I felt quite sad looking at them. I wanted to eat bread that day and this bread just happened but it tasted really great.

Pickle cucumbers are the normal ones in India but called pickling cucumbers in the USA. This is certainly among the best breads I have baked.

The Recipe:

For the Bread:

  • Cucumber puree 3/4 cup
  • Curly Parsley 1/2 bunch washed and minced (cut really small, I used my small food processor)
  • All Purpose Flour 1 cup
  • Whole wheat flour 1 cup
  • Instant dried yeast 1 1/2 tsp.
  • Honey 1 1/2 tsp.
  • Cumin powder 1 tsp.
  • Oregano 1/4 tsp.
  • Salt 1 tsp.
  • Olive oil 3 Tbsp.

For the whipped Butter:

  • Butter 1/4 cup
  • Red chilli powder 1/2 tsp.
  • lime juice 1 tsp.
  • salt to taste

Peel and puree the cucumber.Do not throw the cucumber water away. Mince the cleaned and dried parsley. Keep cucumber and parsley aside.

In a big bowl, mix the flours together and make a well. In the well add yeast and honey.

Warm the cucumber a little more than lukewarm. Add the warm cucumber and the rest of the ingredients. Knead really well. The dough will be sticky in the beginning but keep working on it. It will dry up and become elastic. Remove the dough, oil the bowl with an extra tsp of oil , place the dough in  the bowl and cover with cling wrap. Keep in a dark draft free place for 1 hour. Let it rise till almost double in size.

Punch the dough after 1 hour. Prepare a round 9″ cake pan by spreading a Tbsp. of butter on it and then adding some dry flour on it. Spread the dough with your finger tips till covers the pan. Brush some olive oil on the top of the dough. Cover with cling wrap and leave it to rise again for 45 minutes to 1 hour.

Preheat the oven to 350 degrees Fahrenheit. Place the ready cake pan into the oven and bake for 25-28 minutes till the top of the bread turns golden.

For the spicy butter, whip all the ingredients well. First taste without adding any salt if you are using salted butter and then adjust the salt per your liking.

Extremely fresh tasting and delicious cucumber focaccia is ready:)

Here’s a taste for the eyes:

100_2191

Cucumber Parsley Focaccia

100_2199

A small bite with spicy whipped Butter

My cucumber parsley focaccia is on its way to image Original Recipe organized by Culinarty .

And, my bread will be well packed for the picnic basket to image Waiter There’s Something in my……….Picnic hosted by Johanna of thepassionatecook. I love the name:)

Posted in -All Purpose flour, -Cucumber, -Cumin seeds, -Oregano, -Parsley, -Whole wheat flour, Yeast | Tagged: , , , | 9 Comments »

American Chop Suey

Posted by vivnidhi on July 14, 2008

2July_68

The “AMERICAN CHOP SUEY”

Almost all restaurants serving Chinese food in India boast of the “American Chop Suey”.

American Chop Suey (also American Goulash, Chili-Macaroni, Chili-Mac, Mac ‘n Beef, Macaroni and Beef, or simply Macaroni) is an American pasta dish. The preferred name and recipe varies by region, for example, the name American chop suey is most prevalent in New England. Commercial preparations of this dish are commonly marketed as Macaroni and Beef. Classic American chop suey consists of elbow macaroni and bits of cooked ground beef with sautéed onions and green peppers in a thick tomato-based sauce. Though this decidedly American comfort food is clearly influenced by Italian-American cuisine, it is known as a chop suey because it is a sometimes-haphazard hodgepodge of meat and vegetables.………….source Wikipedia

Food historians generally agree that chop suey as we know it was invented in the United States in the mid-1800’s, possibly by one of the Cantonese immigrants who flooded California searching for work. Constrained by the lack of Asian vegetables, and trying to produce a Chinese dish palatable to westerners, a Cantonese cook stir-fried whatever vegetables were handy, added some meat or chicken, and served the finished product on a plate of steamed rice. He christened his creation, chop suey, which is the English pronunciation of the Cantonese words “tsap seui” (“tsa-sui” in Mandarin) which means “mixed pieces”. …………source Chinesefood.about.com

Anyway, American chop suey is quite a favorite of a lot of people and its quite wholesome and delicious too.  Here is a recipe that I learnt from a professional cook Mrs. Minocha in Aurangabad , India.

The recipe:  (4 servings)

For the Noodles:

  • Maggi/Ramen/Mama noodles  2 Packs (200 grams)

For the Sauce:

  • Garlic 7 cloves (minced)
  • Tomato sauce/Ketchup 1 cup
  • Soya Sauce 1 tsp.
  • Red chilli powder 1/2 tsp.
  • Sugar 1 1/2 Tbsp.
  • oil 1 tsp.
  • Corn starch 1 Tbsp. (called corn flour in India)
  • salt to taste

For the Vegetables:

  • Onion 1 sliced lengthwise
  • Green Bell Pepper/Capsicum 1 sliced thin
  • Cauliflower 3 Flowerets chopped
  • Carrots 2 sliced like matchsticks
  • Green Beans 7-8 french cut(lengthwise)
  • Soya sauce 1 Tbsp.
  • Crushed Black Pepper 1/2 tsp.
  • Oil 1 Tbsp.
  • Salt to taste

The actual recipe called for Mama noodles first boiled in salted water and then deep fried. I used Maggi masala Atta (whole wheat) noodles (available in Indian grocery stores) . Ramen noodles can easily be substituted. I did not use the masala sachet i.e. the seasoning. I sprayed the noodles with oil spray and put them in a preheated oven. 400 degrees F for 10 minutes. Make sure to keep moving them every 3-4 minutes to avoid them getting burnt.

July_66

Noodles on the baking tray

For the Sauce: Heat the oil and fry the garlic for 1 minute.  Add tomato sauce, red chilli powder, salt , soya sauce and sugar. Add 1- 1/2 cups water. Let the whole thing come to a boil. Mix the corn starch with 1 Tbsp. cold water and add it to the sauce. Reduce heat to low and cook for 1 more minute. Orange color is added in Indian restaurants but I have never felt the need to do so.

For the vegetables: First par boil cauliflower in a little salted water. I used the microwave for 1 minute. Heat oil in a wok and fry onion for a minute. I use high flame for the vegetables. Next add the capsicum and cabbage. Next add carrot, green beans and cauliflower. Mix well. Next add salt, soya sauce and crushed black pepper . Mix well and turn off the heat. The key is to keep the vegetables quite crunchy.
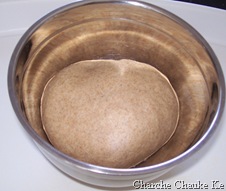
July_67

Baked noodles, sweet & sour sauce and Chop Suey Vegetables

To assemble: First make a layer of the vegetables. Add fried noodles on top and pour the hot sauce on top of the noodles. Indianized American Chop Suey is Ready!!

July_68

Dinner’s ready. The crunchy noodles had to be hidden cause the son couldn’t keep his hands off them!

This Indian-Chinese “American Chop Suey” (Shouldn’t we be thankful it does not involve more countries;) ) is headed to DK of DK’s Culinary Bazaar for AWED Chinese. This is the main course……….a complete meal in itself. Hence it is also headed to Archana of Archana’s Kitchen for Monthly One dish Meal event. Enjoy!!

Preparation time for this would be about 20 minutes and cooking time would be 25 minutes.

Posted in -Cauliflower, -Garlic, -Green Beans, -Green Bell Pepper, -Onion, -Tomato Sauce, -Whole wheat flour | Tagged: , | 25 Comments »

Peethi ki Paronthi (Lentil filled Flatbread)

Posted by vivnidhi on June 4, 2008

100_1662

Peethi ki Paronthi & Aam ka Achar (Mango Pickle)

Paronthi is the Parantha’s younger sister OR………. who knows………. maybe Parantha is the husband and Paronthi, the wife. Well, the relationship is quite hazy here. But, as the wise have said……….”Don’t go where you are not required to go” All I can tell you is that the Paronthi is smaller and thinner than the parantha, (may I add , a little more delicate there;) ).

Peethi is a filling made with Urad Daal (Black gram lentils). I have heard that there was a time when people in Northern India would only eat Pooris and Kachoris at every meal. For the longest time, my husband’s Grandmother ate Poori or Kachori, she was not a Roti, Phulka liking person. She was a fabulous cook and would work very very hard to cook good food. I have been fortunate enough to taste her handmade Mungodis which absolutely melted in one’s mouth when cooked. I am mentioning Kachori several times cause a very similar filling is used in traditional North Indian Kachori. But for the faint of heart like me, making a paronthi with peethi is good enough. It’s made very rarely at our place and it is such a treat, that we all end up eating way more than we should.
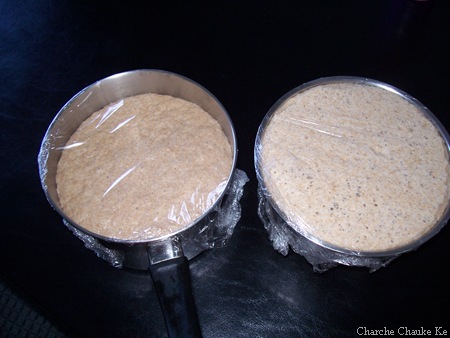
The Recipe: (For 18-20 paronthis)

For the Dough:

  • 4 cups whole wheat flour
  • 1 3/4 cups water

For Filling (Peethi):

  • Urad daal/ split black lentils without skin 1 cup
  • Ginger 2″ piece chopped fine or grated
  • Oil 2 tsp.
  • Green chili 2 chopped fine
  • Red chili powder 1 tsp.
  • fennel seeds/saunf 1 Tbsp.
  • cumin seeds/jeera 2 tsp.
  • Fenugreek seeds/methi 1/2 tsp.
  • Garam masala 1 tsp.
  • coriander powder/dry cilantro powder/dhaniya 1 Tbsp.
  • Asafoetida/heeng powdered 1/2 tsp.
  • Dry mango powder/Amchur 2 Tbsp.
  • Salt to taste

Make a dough with whole wheat flour and water. More about the dough can be found in my post here.

100_1633

In the plate (clockwise) green chili, red chili powder, fennel seeds,cumin seeds, fenugreek seeds, Garam masala, coriander powder, asafoetida powder, dry mango powder, ginger minced and salt in center. Soaked and ground black gram also in picture.

To prepare the peethi for the filling, soak urad daal overnight or at least 4-6 hours. Grind it coarse in a grinder the next morning. In a wok or sauce pan (preferably non-stick), heat 2 tsp. oil and add the rest of ingredients except salt and dry mango powder. Add the ground urad daal and fry a little till it dries. Next add salt and dry mango powder. Mix well.

100_1636

Peethi is ready!

Make balls of the whole wheat dough of the size shown below.

100_1660

Whole wheat balls with dry flour for dusting

Flatten the dough balls with a rolling pin and fill the peethi as shown below.100_1640

Whole wheat dough flats and the filling

Pull the whole wheat edges and form a ball again. Dust a little flour and roll out the Paronthi. Heat a cast iron griddle. Oil the griddle a wee bit and then put the rolled out paronthi on the griddle. Make sure you put the paronthi only when the griddle is sizzling hot, that is you should be able to throw some drops of water and they should first sizzle and then evaporate. If they evaporate right away, the griddle is too hot. Turn the paronthi over when you start seeing tiny bubbles on the surface. Spread a little oil on the surface of the paronthi and apply a little pressure with a spatula to ensure uniform cooking. Turn it over once more and apply pressure gain. A well made paronthi will puff up on all sides.

100_1659

Peethi ki paronthi on the griddle

A paronthi well cooked should not have doughy edges and should be uniformly cooked. Peethi ki paronthi tastes fabulous with achar, dried potato curry or my all time favorite Masaledaar Aloo ki Sabji.

100_1664

Have a bite!!

Peethi ki Paronthi is off to Srivalli for the Roti Mela. Looking forward to a variegated collection of flatbreads there.

I was making paper fans for my son and he was scribbling on them. A few minutes later he comes to me & asks me to make a paper AC this time……….ha. I could only look at him in astonishment! Now, if we could all make paper AC’s , wouldn’t that solve India’s energy problems!  I asked my son to grow up and do something about alternative energy as I have little hope from myself. That certainly left him content with paper fans………..for now.

Posted in -Cumin seeds, -Fennel seeds, -Fenugreek seeds, -Ginger, -Urad daal/ black gram, -Whole wheat flour, Daal, Flours, Spices | Tagged: , | 15 Comments »

Dressing up the Dulha……….Bhara hua Daal ka Dulha Series……….Round 2

Posted by vivnidhi on May 9, 2008

100_1649

Peethi Bhara Daal Ka Dulha

Ok, so we are onto filling no. 2 for our daal ka dulha. Peethi bhara daal ka dulha means ground black gram (peethi) filled whole wheat pastas. I could have easily listed the types of fillings for daal ka dulha but I wanted to chronicle the procedure as well. Please refer to my earlier posts Daal Ka Dulha and Dressing up  the Dulha………… if I seem to be talking Greek (or khadi boli (that’s village Hindi) for that matter;))

Peethi means soaked and ground Urad daal/Black gram. This dish is like pasta with spicy lentil filling in lentil soup. Sounds strange but tastes quite good;).

The Recipe:

Initial tempering:

  • Oil 1/2 tsp
  • cumin seeds/Jeera 1/2 tsp.
  • turmeric powder/Haldi 1 tsp.

For Daal:

  • Toor Daal/Arhar daal/split yellow pigeon peas 2 cups
  • Water 6 cups
  • sugar 1 tsp
  • salt to taste

For Dulha:(This is the ratio for making roti dough.About 1/10th is used to make the dulhas in the daal given)

  • Whole wheat flour 4 cups
  • Water 1 3/4 cups
  • Salt (optional)

For Filling:

  • Urad daal/ split black lentils without skin 1/4 cup
  • Ginger 1″ piece chopped fine or grated
  • Oil 2 tsp.
  • Green chili 1 chopped fine
  • Red chili powder 1 tsp.
  • fennel seeds/saunf 2 tsp.
  • cumin seeds/jeera 2 tsp.
  • Fenugreek seeds/methi 1/2 tsp.
  • Garam masala 1 tsp.
  • coriander powder/dry cilantro powder/dhaniya 1 Tbsp.
  • Asafoetida/heeng powdered 1/2 tsp.
  • Dry mango powder/Amchur 1 Tbsp.
  • Salt to taste

Final tempering:

  • Oil (preferably ghee) 2 Tbsp.
  • Asafoetida/heeng powdered 1 tsp.
  • Cumin seeds 1 Tbsp .
  • Red chilli powder 2 tsp.

We begin as usual by making the daal or lentil soup in a pressure cooker. Heat oil and add the initial tempering. Once the cumin seeds are crackling, add the ingredients listed under daal and close the pressure cooker. Further details on making the daal can be found in my post Everyday daal.

100_1633

In the plate (clockwise) green chili, red chili powder, fennel seeds,cumin seeds, fenugreek seeds, Garam masala, coriander powder, asafoetida powder, dry mango powder, ginger minced and salt in center. Soaked and ground black gram also in picture.

The most important part is our Dulha (filled pasta). Dulhas can be prepared while the daal is cooking. To prepare the peethi for the filling, soak urad daal overnight or at least 4-6 hours. Grind it well in a grinder the next morning. In a wok or sauce pan (preferably non-stick), heat 2 tsp. oil and add the rest of ingredients except salt and dry mango powder. Add the ground urad daal and fry a little till it dries. Next add salt and dry mango powder. Mix well.

100_1636

Fried urad daal along with spices ………peethi is ready:)

Take a small ball from  the whole wheat dough. Make a thin flat round of the ball. A drop of oil can be spread on the fingers and the dough while making the flat. Keep the filling (peethi) in the flat and close it. Use the palm of the hand to flatten the filled round of the dough. Make as many dulhas as required.

100_1640

Peethi filling and wheat dough flats

100_1644

Flattened uncooked dulhas

Heat the daal if made earlier. Make sure that the daal is hot when the dulhas are added to it in the pressure cooker. Give two more whistles to the cooker or let it simmer for at least half an hour if one is not using a pressure cooker. Make the final tempering in a separate pan. When the cumin seeds start crackling, add it to the daal.

100_1645100_1647

Daal ka dulha and final tempering (chhaunka in Hindi)

Peethi (ground urad daal) filled daal ka dulha is ready to be served. It does not soften up as much as plain daal ka dulha or the potato filled one but this is really delicious too. It can be eaten alone or with roti and some vegetables also.

100_1649

Here’s the authentic rustic peethi bhara daal ka dulha

Posted in -Arhar (Toor) Dal, -Ginger, -Urad daal/ black gram, -Whole wheat flour, Daal, Spices | Tagged: , | 9 Comments »

Dressing up the Dulha……….Bhara hua Daal ka Dulha Series…….Round 1:

Posted by vivnidhi on May 4, 2008

100_1588

Aloo Bhara Daal Ka Dulha

Our dulha is coming of age in my house (the daal ka dulha is being made so often). So, we thought we start dressing it up in various forms we know of and then decide the winning costume for our dear dulha:). Credit goes to my mother for all these recipes.

The first filling is of the evergreen potato. This dish is like spicy pierogies in lentil soup. This truly is a delicious combination. Our dear rustic dulha too can stand among the finest raviolis and pastas of the world when dressed up;)

The Recipe:

Initial tempering:

  • Oil 1/2 tsp
  • cumin seeds/Jeera 1/2 tsp.
  • turmeric powder/Haldi 1 tsp.

For Daal:

  • Toor Daal/Arhar daal/split yellow pigeon peas 2 cups
  • Water 6 cups
  • sugar 1 tsp
  • salt to taste

For Dulha:(This is the ratio for making roti dough.About 1/10th is used to make the dulhas in the daal given)

  • Whole wheat flour 4 cups
  • Water 1 3/4 cups
  • Salt (optional)

For Filling:

  • Potatoes 2 boiled and mashed
  • Ginger 1″ piece chopped fine or grated
  • Cilantro/coriander leaves a handful chopped fine
  • Green chili 1 chopped fine
  • Red chili powder 1 tsp.
  • Garam masala 1 tsp.
  • Dry mango powder/Amchur 1 Tbsp.
  • Asafoetida/heeng powdered 1 tsp.
  • Salt to taste
  • Onion 1/2 finely chopped (optional)
  • Garlic 1 clove finely chopped (optional)

Final tempering:

  • Oil (preferably ghee) 2 Tbsp.
  • Asafoetida/heeng powdered 1 tsp.
  • Cumin seeds 1 Tbsp .
  • Red chilli powder 2 tsp.

We begin as usual by making the daal or lentil soup in a pressure cooker. Heat oil and add the initial tempering. Once the cumin seeds are crackling, add the ingredients listed under daal and close the pressure cooker. Further details on making the daal can be found in my post Everyday daal.

100_1584

Filling Ingredients clockwise……potatoes, onions, garlic, ginger, asafoetida, red chili powder,dry mango powder, Garam masala, green chilies and salt………missing is cilantro leaves…

The most important part is our Dulha. Dulhas can be prepared while the daal is cooking. To prepare the potato for the filling, I like to pierce the potato with a fork, wet the potato well and bake it in the microwave.Boiling the potatoes in water causes them to get watery at times. Mix all the ingredients listed under filling and make small balls of the filling. Onions and garlic are optional, I like them, but the original recipe as made by our elders did not have onions or garlic. Make a thin flat round of the wheat dough. A drop of oil can be spread on the fingers and the dough while making the flat. Keep the filling in the flat and close it. Use the palm of the hand to flatten the filled round of the dough. Make as many dulhas as required.

100_1586

Potato filling and wheat dough balls

100_1587

Flattened uncooked dulhas

Heat the daal if made earlier. Make sure that the daal is hot when the dulhas are added to it in the pressure cooker. Give two more whistles to the cooker or let it simmer for at least half an hour if one is not using a pressure cooker. Make the final tempering in a separate pan. When the cumin seeds start crackling, add it to the daal. Aloo (potato) bhara daal ka dulha is ready to be served. It can be eaten alone or with roti and some vegetables also.

100_1588

So, how does the bhara hua daal ka dulha look?

Posted in -Arhar (Toor) Dal, -Garlic, -Ginger, -Onion, -Potatoes, -Whole wheat flour, Daal, Flours, Spices | Tagged: , | 6 Comments »

Masala Coffee Cake

Posted by vivnidhi on April 25, 2008

100_1569

Masala Coffee Cake

Flour, Eggs, Sugar and Spice……….a tasty cake that’s low on cholesterol too………..isn’t that nice.

Ok, lame attempt at rhyming. I baked a cake that can be called as my recipe for the first time. I have baked several cakes following other recipes ( and following them to a ‘T’) but this time, I tried to bake a cake as I please……………and succeeded:).   Hurray  !! Ok, let me not brag too much………..I admit the idea was my Mom’s but …………..Mummy had baked a cake with strong clove flavor which was in turn inspired by masala coffee. To me, Mummy’s masala coffee was a revelation too :))

I made a smaller cake (I was experimenting;), not sure, it would turn out this good! )

The recipe: Ideal for 9″ round pan or even a 9″x 5″ loaf pan

  • cloves ground 1 Tbsp/ 10 cloves of cloves ground fine
  • nutmeg  ground 1/2 Tbsp.
  • ginger ground 1 tsp./fresh grated ginger 1/2 tsp.
  • instant coffee 2 Tbsp.
  • sugar 6 Tbsp.
  • milk 1 Tbsp.
  • water 1 Tbsp.
  • egg whites 4
  • margarine/ butter 1/3 cup
  • sugar 2/3 cup
  • vanilla extract 1/2 tsp.
  • all purpose flour 2/3 cup
  • whole wheat flour 1/3 cup
  • baking powder 1 Tbsp.
  • baking soda 1/2 tsp.
  • cashews, raisins and chocolate chips for garnish

100_1557

Instant coffee, ground nutmeg, ground ginger and cloves ready to be ground in my shining mortar and pestle

Preheat the oven to 325 degrees Fahrenheit. Prepare the pan by greasing the pan and coating it with flour.

Mix the cloves, nutmeg and ginger with water and heat in the microwave. Add milk, sugar and coffee to the hot spices. I whipped the coffee really well to make it quite foamy. It changed its color from very dark brown to very pale brown. I even earned myself a blister in trying too hard:).

100_1558

Spice mix with water and coffee

100_1565

Coffee well beaten up!!

Beat the egg whites till soft peaks form. Set it aside. Beat margarine and sugar well. Add vanilla extract and beat again. In a large bowl, mix the flours, baking powder and baking soda. To the flour mixture, add the beaten margarine, sugar mix. Next, fold in the egg whites and the beaten coffee. Pour into prepared pan and bake for 22-25 minutes.One could add the dry fruits in this batter as well, but I added the garnish after the cake was kept in the oven for 20 minutes.

100_1568

Here’s my cake batter………..

And, voila……….spicy masala coffee cake is ready!!

100_1569

…………And here’s my delicious masala coffee cake……….Enjoy!!

This is my entry to Sunita’s Think spice…Think cloves event hosted by  Canela & Comino ……….author of wonderful Peruvian food blog.

Posted in -All Purpose flour, -Cashews, -cloves, -Ginger, -Nutmeg, -Raisins, -Whole wheat flour, Chocolate, Coffee, Eggs, Flours, Nuts, Spices, Sweets | Tagged: , | 9 Comments »

Daal ka Dulha

Posted by vivnidhi on April 23, 2008

Hi, Not that I have started looking for a dulha or groom for my daughter already. Daal ka dulha is the name of a favorite recipe of mine. After eating 3-4 types of pasta that I had been making for my mother, Mummy (with a smile) asked me if I had made daal ka dulha in the recent past? I had completely forgotten about daal ka dulha these years.

I mentioned pasta cause daal ka dulha comes closest to pasta in North Indian cuisine (of course leaving vermicelli aside). This recipe can also be called a very crude form of Daal bati……….but crude really:)).

100_1458

Daal ka Dulha

Recipe:

Initial tempering:

  • Oil 1/2 tsp
  • cumin seeds 1/2 tsp.
  • turmeric powder 1 tsp

For Daal:

  • Toor Daal 2 cups
  • Water 6 cups
  • sugar 1 tsp
  • salt to taste

For Dulha:(This is the ratio for making roti dough.About 1/10th is used to make the dulhas in the daal given)

  • Whole wheat flour 4 cups
  • water 1 3/4 cups
  • salt (optional)

Final tempering:

  • Oil (preferably ghee) 2 Tbsp
  • asafoetida 1 tsp
  • cumin seeds 1 Tbsp
  • red chilli powder 2 tsp

Ok, this is a quick, simple one. Begin by making plain simple toor daal as detailed in my everyday daal post Arhar daal.  That is : add the initial tempering, add daal ingredients and give two whistles in a pressure cooker.

Make the whole wheat dough (which is basically roti dough). The directions for making the dough is detailed  in  Beginning with the staple: The ROTI . The important part of this recipe is making the dulha. Take a small ball in the and thin it it out with fingers. One could use a rolling pin, but traditionally hands were used to flatten the dough ball. Once you have made it quite thin. Apply a dropful of ghee or oil in the center of the flattened disc. Bring  four ends of the disc together and pinch making a flower like shape.  The shape is very important as it allows the daal to seep in and soften the dulha. 6 to 8 dulhas can be made per person.

100_1452

When the cooker is safe to be opened, open the cooker cover. Add the dulhas  while the daal in the cooker is hot, otherwise the dulhas don’t soften properly. Close the pressure cooker and give two more whistles. When the pressure cooker is cool enough to be opened, add the final tempering. The plain daal also tastes more delicious than usual. One could try adding this in everyday daal to see if they like the taste of it before making a complete meal only of daal ka dulha.

And daal ka dulha is ready to be served. A drop of ghee in individual servings adds a lot of taste. Anybody fond of pasta should like this, though this is quite an old simple recipe concocted when women of the house would be in a hurry. There are other varieties of dulhas like stuffed about which I will post soon. This is the simplest form. This is also my entry in Lights Out, Knives Out event  hosted by Celine Asril. This is a great earth hour event in which no electricity is used in cooking. Well! in this recipe, no electricity is used (apart from using an electric stove) nor are any knives used:)

100_1458 .

Daal ka Dulha with pickle………..fabulous afternoon meal

Posted in -Arhar (Toor) Dal, -Whole wheat flour, Daal, The staple | Tagged: , | 13 Comments »

Baked Guna

Posted by vivnidhi on December 10, 2007

100_1086.jpg

Baked Gunas with a cup of milk and thekuas

Its fun participating in the various events going on this season. That was part of the reason why I wanted to write a foodblog; to be able to participate and chronicle my recipes. So, I have been really excited about participating in the Eat Christmas Cookies event hosted by http://foodblogga.blogspot.com. And, I got a surprising go-ahead from my Doctor when it seems like I am not going to get gestational diabetes this time around. This news definitely called for a celebration!

I have never seen my mother bake a lot except cakes and nan khatai……..the only Indian cookie that could be made at home. But I have seen my mother deep fry a lot of snacks.  As I wanted to try something authentic, I decided to try one of her standard recipes and bake it instead of frying. The result was fabulous, delicious like fried yet healthier.  I also wanted to use a recipe which had whole wheat flour instead of all purpose flour and oil instead of ghee which is almost entirely saturated fat.

Though not a regular everyday snack, Guna is certainly made on Hartalika teej in Uttar Pradesh. It is  accompanied by “mathi” which is plain, unsalted form of Guna made using all purpose flour.  Hartalika teej is a 3 day festival which takes place on the onset of monsoon, the third day of first fortnight of ‘Bhadra’ month based on lunar calendar. Its a festival very dear to the womenfolk cause it celebrates them in a way. Rural parts have fairs and make shift swings seem to spring up on every tree. Women adorn themselves with jewellery, new clothes and its basically fun time.  Mythology states that Goddess Parvati had penanced for a 100 years to be able to unite with Lord Shiv. Goddess Parvati is worshipped on Hartalika teej  as her blessings would lead to marital bliss. The difficult part for married women is that they have to fast, without water on the second day. The next day, fasting women break their fast with guna and mathi. As I do not celebrate teej anymore here in  the US, I can certainly make it as a sweet treat for Christmas. The festive spirit’s the same!!

The recipe:
(Makes 50-60 gunas)

Whole wheat flour 2 cups
Almonds 1/4 cup
Walnuts 1/4 cup
Jaggery 1 cup
Green Cardamom 2
Vegetable Oil 1/4 cup + 2 Tbsp.

I have used jaggery in this recipe cause it gives a very distinct taste to the gunas. First wet the jaggery in as little water as possible, just to make it pliable enough to be mixed with flour. Alternatively you can put small pieces of jaggery in a food processor and mix the sticky jaggery with flour. Soaking the processor container in water for 10 mins will clean it without a hassle. Grind the almonds and walnuts along with cardamom to flour like consistency. A few bigger pieces remaining would be fine. Mix all ingredients really well. This is the most difficult and important part: mix everything really well.

100_1072.jpg

Flour, oil and grinded nuts

100_1073.jpg

Mix the ingredients well

If you need to add any water, just keep adding by fistfuls, till you are able to make a hard dough.

100_1074.jpg

Guna Dough

Make 3 parts of the big dough and roll it with hands till you have a thinner, longer dough piece. There will be oil on your hands as well as the rolling board. Having enough oil is the key to making crisp yet not hard gunas. Break it with hands along the cross section into smaller pieces or use a knife to cut. Heat the oven to 350° F. Flatten the small rounds now using a rolling pin. Line a cookie sheet with aluminum foil and keep putting the flattened rounds on it.  Bake it in the oven for 8-10 minutes. The gunas get crisper as they cool.

100_1083.jpg

The gunas are ready!

Another sweet called thekuas can be made from the same dough.

100_1076.jpg

Small rounds are made of the dough. The colander imprint is made by pressing on the colander.

100_1077.jpg

These are baked at 350° F for about 15-20 minutes.
My personal choice are the gunas. Hope you like them too!

Posted in -Almonds, -Walnuts, -Whole wheat flour, Sweets | Tagged: , , , | 5 Comments »

Beginning with the staple: The ROTI

Posted by vivnidhi on November 19, 2007

My first post. Starting with the very basic……the staple in our house. Carb watching for me and cholesterol watching for my husband has already led to the roti being the only flour preparation made everyday. Paranthas, naans, all are enjoyed only rarely, when we like to treat ourselves.

100_10321.jpg

Hot Rotis stay fresh in aluminum foil

Rotis or phulkas need no introduction whatsoever. But the art of making them is really THE skill to know in the chauka (kitchen).  It used to be an accomplishment when my roti too would puff like my Mom’s. Her standards are still too high for me. If left on my own, I would make my family members eat all the rotis I made till they got to eat the properly puffed up one (which would be rare.)

That changed after marriage when I would quietly eat all the messed up ones or the ones which were charred and give only soft puffed up ones to my husband. So, even though I could make rotis in India, making them in the U.S. required another set of skills as we had an electric stove in our apartment. I can’t wait to see my mother struggle with her first couple of rotis when she comes here……..mean, I know, yet I am amused, even by that thought.

First, one needs whole wheat flour. Durum flour is a complete no no as far as I am concerned if one really wants soft which also stay soft until the next day. Sujata is the only brand I get here in Indian grocery stores although Pillsbury is as good.

Next you need a griddle, metal mesh (to prevent the roti from burning on electric coil) and a rolling pin.

Recipe:

4 cups flour

1 3/4 cups water

That’s it, yes. I don’t add salt cause I have always eaten roti this way. Enjoy the basic wheat taste. For the dough, I use a big plate with raised edges….called ‘paraat’ in India but I guess any vessel with high edges can be used. Spread the dry wheat flour in the plate and I sprinkle half the amount of water in the flour. Using circular motion of my hands, I try to wet all the flour. Then I start gathering the flour together and keep sprinkling more water as needed. After the dough gets together, hands’ knuckles and the small of the palm is used. 2-3 oz of extra water may be used during the process of kneading, if one finds it comfortable. A clean plate is a sign of just the right dough. If by chance, it gets very sticky, more dry flour needs to be added.  The softer the dough, the better, I just make sure that it can be rolled properly. Punching the dough well with hands and using the knuckles also helps.  A drop of oil is spread in the plate in the end and the dough is kneaded on it till it absorbs all oil. The dough is ready.I make a fair amount of dough  and keep it in the refrigerator and it lasts me for about 4 days. It does change color and become darker but the rotis come out just as good.

100_0997.jpgv

Roti dough with dry flour for dusting.

100_0999.jpg

Divide the dough into equal rounds. Here’s my 2 year old trying to help me out.

100_1000.jpg

Smaller rounds make thin phulkas ..closer to perfect. Dust the round with dry flour and begin rolling using a rolling pin on a flat surface.

100_1001.jpg

Uniform thickness of the rolled out roti is the key to it being puffed up later. Try to roll out away from the center of the ball.  Make sure that the edges are of the same thickness as the center after the roti is rolled out completely.

100_1002.jpg

I try making a thin round; one can suit one’s taste

100_1003.jpg

I keep the metal mesh under the griddle so that it heats up sufficiently as well. The griddle is heated before one starts rolling out the dough round. If the roti sticks on the griddle, then the griddle is too hot, reduce the heat. If the griddle is not hot enough, the surface visible will take longer to develop bubbles. Usually the burner stays on maximum heat when I make rotis, reducing it in between if the next roti is not rolled out already.

100_1006.jpg

Once some bubbles seem to develop on the underside of the roti on the griddle, it is turned over. Tongs can be used for this but hands work as well. This is the first turn.

100_1029.jpg

This is after the first turn. Its fine if you if it does not get this brown.

100_1009.jpg

Using the smaller burner helps. Next the griddle is removed and the roti is directly put on the wire mesh. Elevate the wire mesh after putting the roti on it. The heat has to be at the maximum when I put the roti directly on the coil.  Give the roti a jump and flip it over if it is not puffed up fully. Both sides need to get a few brown spots. 100_1030.jpg

The Phulka’s ready!!

Similar procedure can be used for making rotis on gas stoves. http://www.ifood.tv/recipe/roti is a good video through wikipedia.

Posted in -Whole wheat flour, The staple | Tagged: , , | 15 Comments »