चर्चे चौके के Charche Chauke Ke

Hey! Join in the Kitchen Gossip!!

Archive for the ‘-Garlic’ Category

Lehsun

Daring Cooks cook Indian : Masala Dosa (Updated)

Posted by vivnidhi on September 15, 2009

aug2_95

Masala Dosa with Sambhar, coconut chutney and Podi

Debyi from http://www.healthyvegankitchen.com hosted this month’s challenge and ordered Indian Dosas for all of us at Fresh Restaurants (www.freshrestaurants.ca) in Toronto, Canada. Since we all live in a virtual world these days, we were all handed over a recipe from their cookbook  and asked to make dosas to serve ourselves. Now, masala dosas (and oh my dear idlis, made from a similar batter) are a very big favorites with me. I can eat them all the time. My parents and I spent a couple of years in Vishakhapatnam , Andhra Pradesh and that is where my mother learnt to make good idlis and dosas. Another big influence was my Aunt who spent half her life in Chennai, then Madras and cooked fabulous South Indian meals.

Unfortunately I cannot make something with grains and flour and call it a dosa. A similar fare called Chil-ra is made in North India and I will be talking about it at the end of the post. Hence, I used my regular recipe for making dosas . I hope Debyi won’t mind it……..I kept the whole thing Vegan 🙂 .

The Recipe:

Dosa:

  • Idli Rice 3 cups soaked in water overnight
  • Black gram (Urad Daal)  1 cup soaked in water overnight
  • Fenugreek seeds 1 tsp.
  • salt to taste

aug2_39 aug2_48

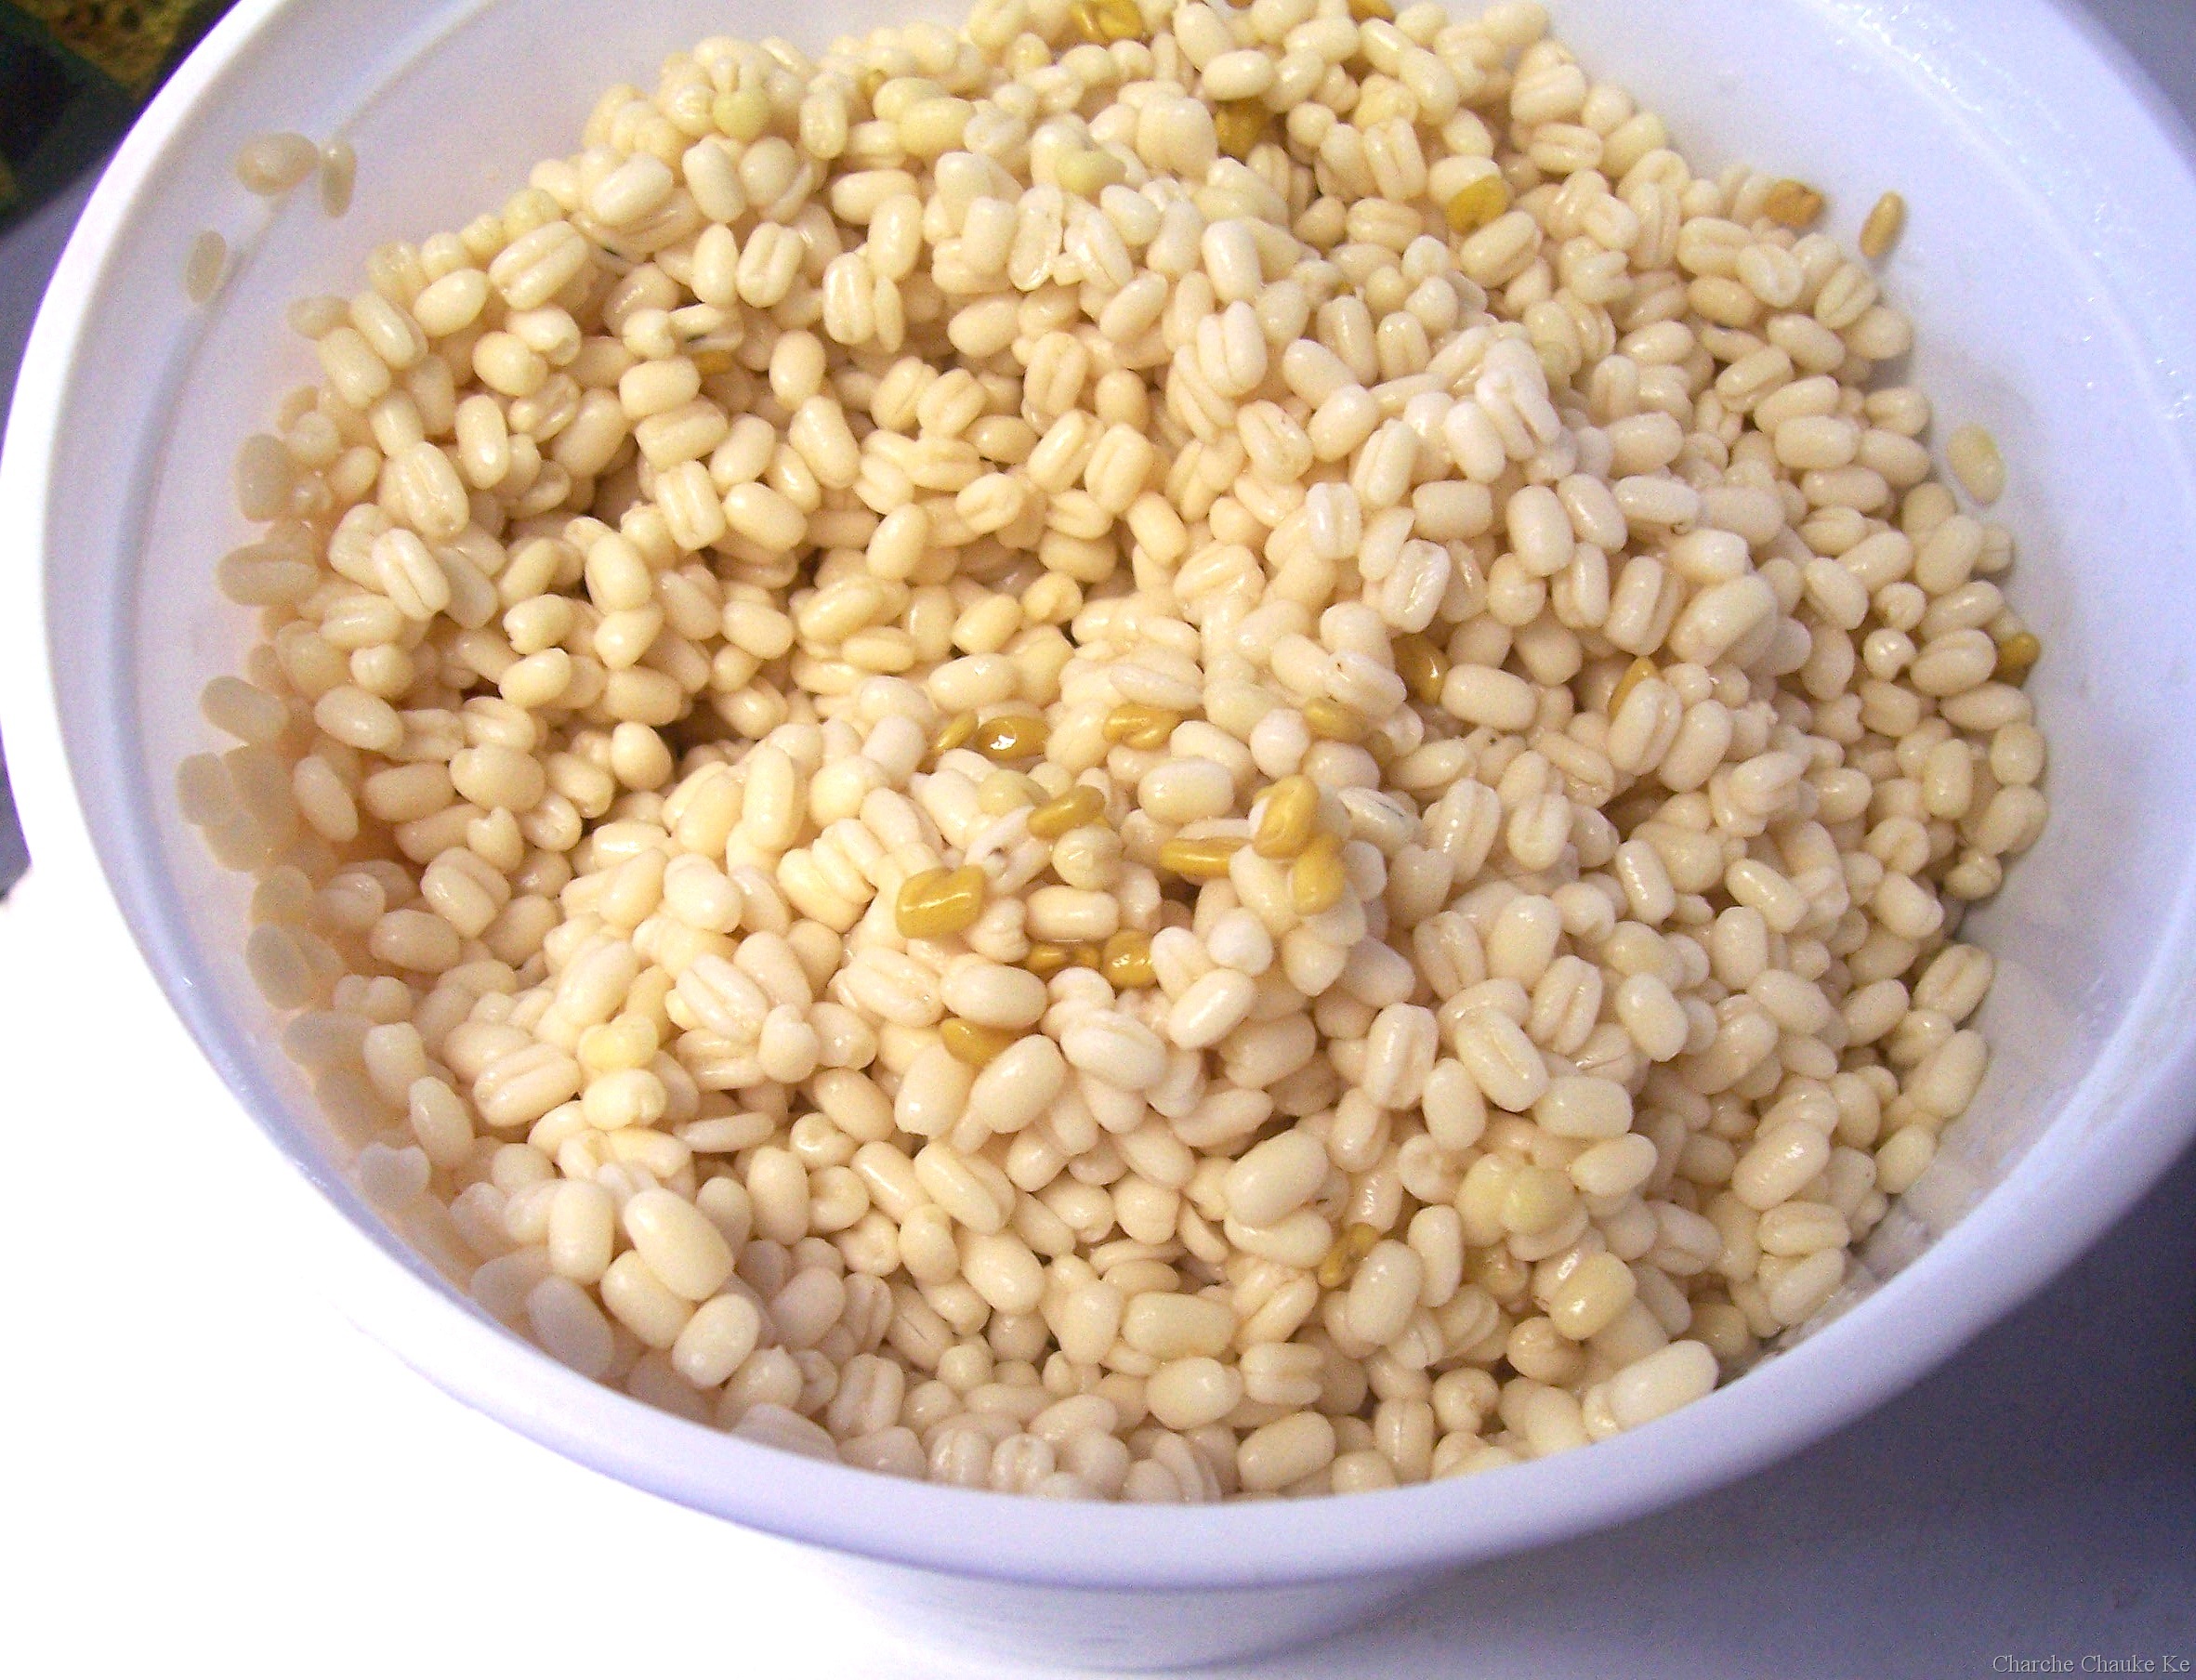
Fenugreek seeds,urad daal soaked and drained and idli rice soaked and drained in picture 2

Soak fenugreek seeds and urad daal together in water overnight. Since I make idlis and dosas from the same batter, I soak rice and lentils separately. Grind the lentils with little water till a very smooth paste is achieved.

aug2_44 aug2_45

Ground lentils

aug2_49 aug2_50

Rice needs to ground well too…..adding rice paste to lentils paste and final paste before fermentation

After lentils and rice are ground well, add rice paste to lentils paste and add about 2 tsp. salt. Leave to ferment 12 to 14 hours. Unless, you live in a hot weather, in that case check after 5-6 hours. The dough should almost double.

aug2_65  aug2_78

Half the batter : after fermentation. Add water as required and dosa batter’s ready

aug2_88 

Ladle the dosa batter in circular motion

Potato filling:

  • Potatoes 4 medium boiled and chopped
  • Onion 1 big sliced
  • Ginger grated 1 tsp.
  • Canola Oil 2 tsp.
  • Asafoetida (Heeng) 1/2 tsp.
  • Mustard seeds (Rai) 1 tsp.
  • Fresh Curry leaves 2 stems washed
  • Bengal gram (Chana Daal ) 1 tsp.
  • Black gram (Urad Daal) 1 tsp.
  • Turmeric powder (Haldi) 1 tsp.
  • Red chilli powder (Lal mirch) 1/2 tsp.
  • salt to taste

aug2_60

Potato filling ingredients clockwise:Fresh curry leaves, boiled potatoes, asafoetida, urad daal, chana daal, grated ginger, mustard seeds and sliced onions

To make the filling:

Heat the oil in a wok and add all the ingredients except potatoes, onion and salt.

Fry for one minute then add the onions. Let them fry for 2 more minutes.

When the onions start to turn translucent, add the potatoes and salt. If the mixture seems too dry, add 2 Tbsps. water. Cover and cook the filling for 5 minutes. The filling is ready.

aug2_90

Add the potato filling as the dosa starts to brown at the bottom

aug2_92

Fold the dosa and we’re done

I prepared 2-3 dosas at a time on a big electric griddle as I was serving 5 people at a time. The best crispness and color is achieved on an iron griddle. The iron griddle is heated , a couple of drops of oil are added to it and a raw onion just sliced at the top is used to spread the oil on the griddle. This is the traditional way of preparing dosas.

Sambhar :

  • Split yellow pigeon peas (Arhar/Toor Daal)  2 cups boiled in a pressure cooker with turmeric and salt
  • Canola Oil 1 Tbsp.
  • Mustard seeds (Rai) 1 tsp.
  • Cumin seeds (Jeera) 1 tsp.
  • Asafoetida (Heeng)  1/2 tsp.
  • Fresh Curry leaves 2 stems washed (remove the stems 😉 )
  • Ginger 2 tsp. grated
  • Garlic 2 cloves minced
  • Shallots/pearl onions 1/2 cup (cut if required to bite size pieces)
  • Tomatoes 2 chopped
  • Vegetables of choice (beans, bell pepper, bottle gourd etc. ) optional
  • Sambhar Masala powder 1 Tbsp.
  • Tamarind concentrate 1/2 tsp.
  • Salt to taste
  • Cilantro/coriander leaves for garnish

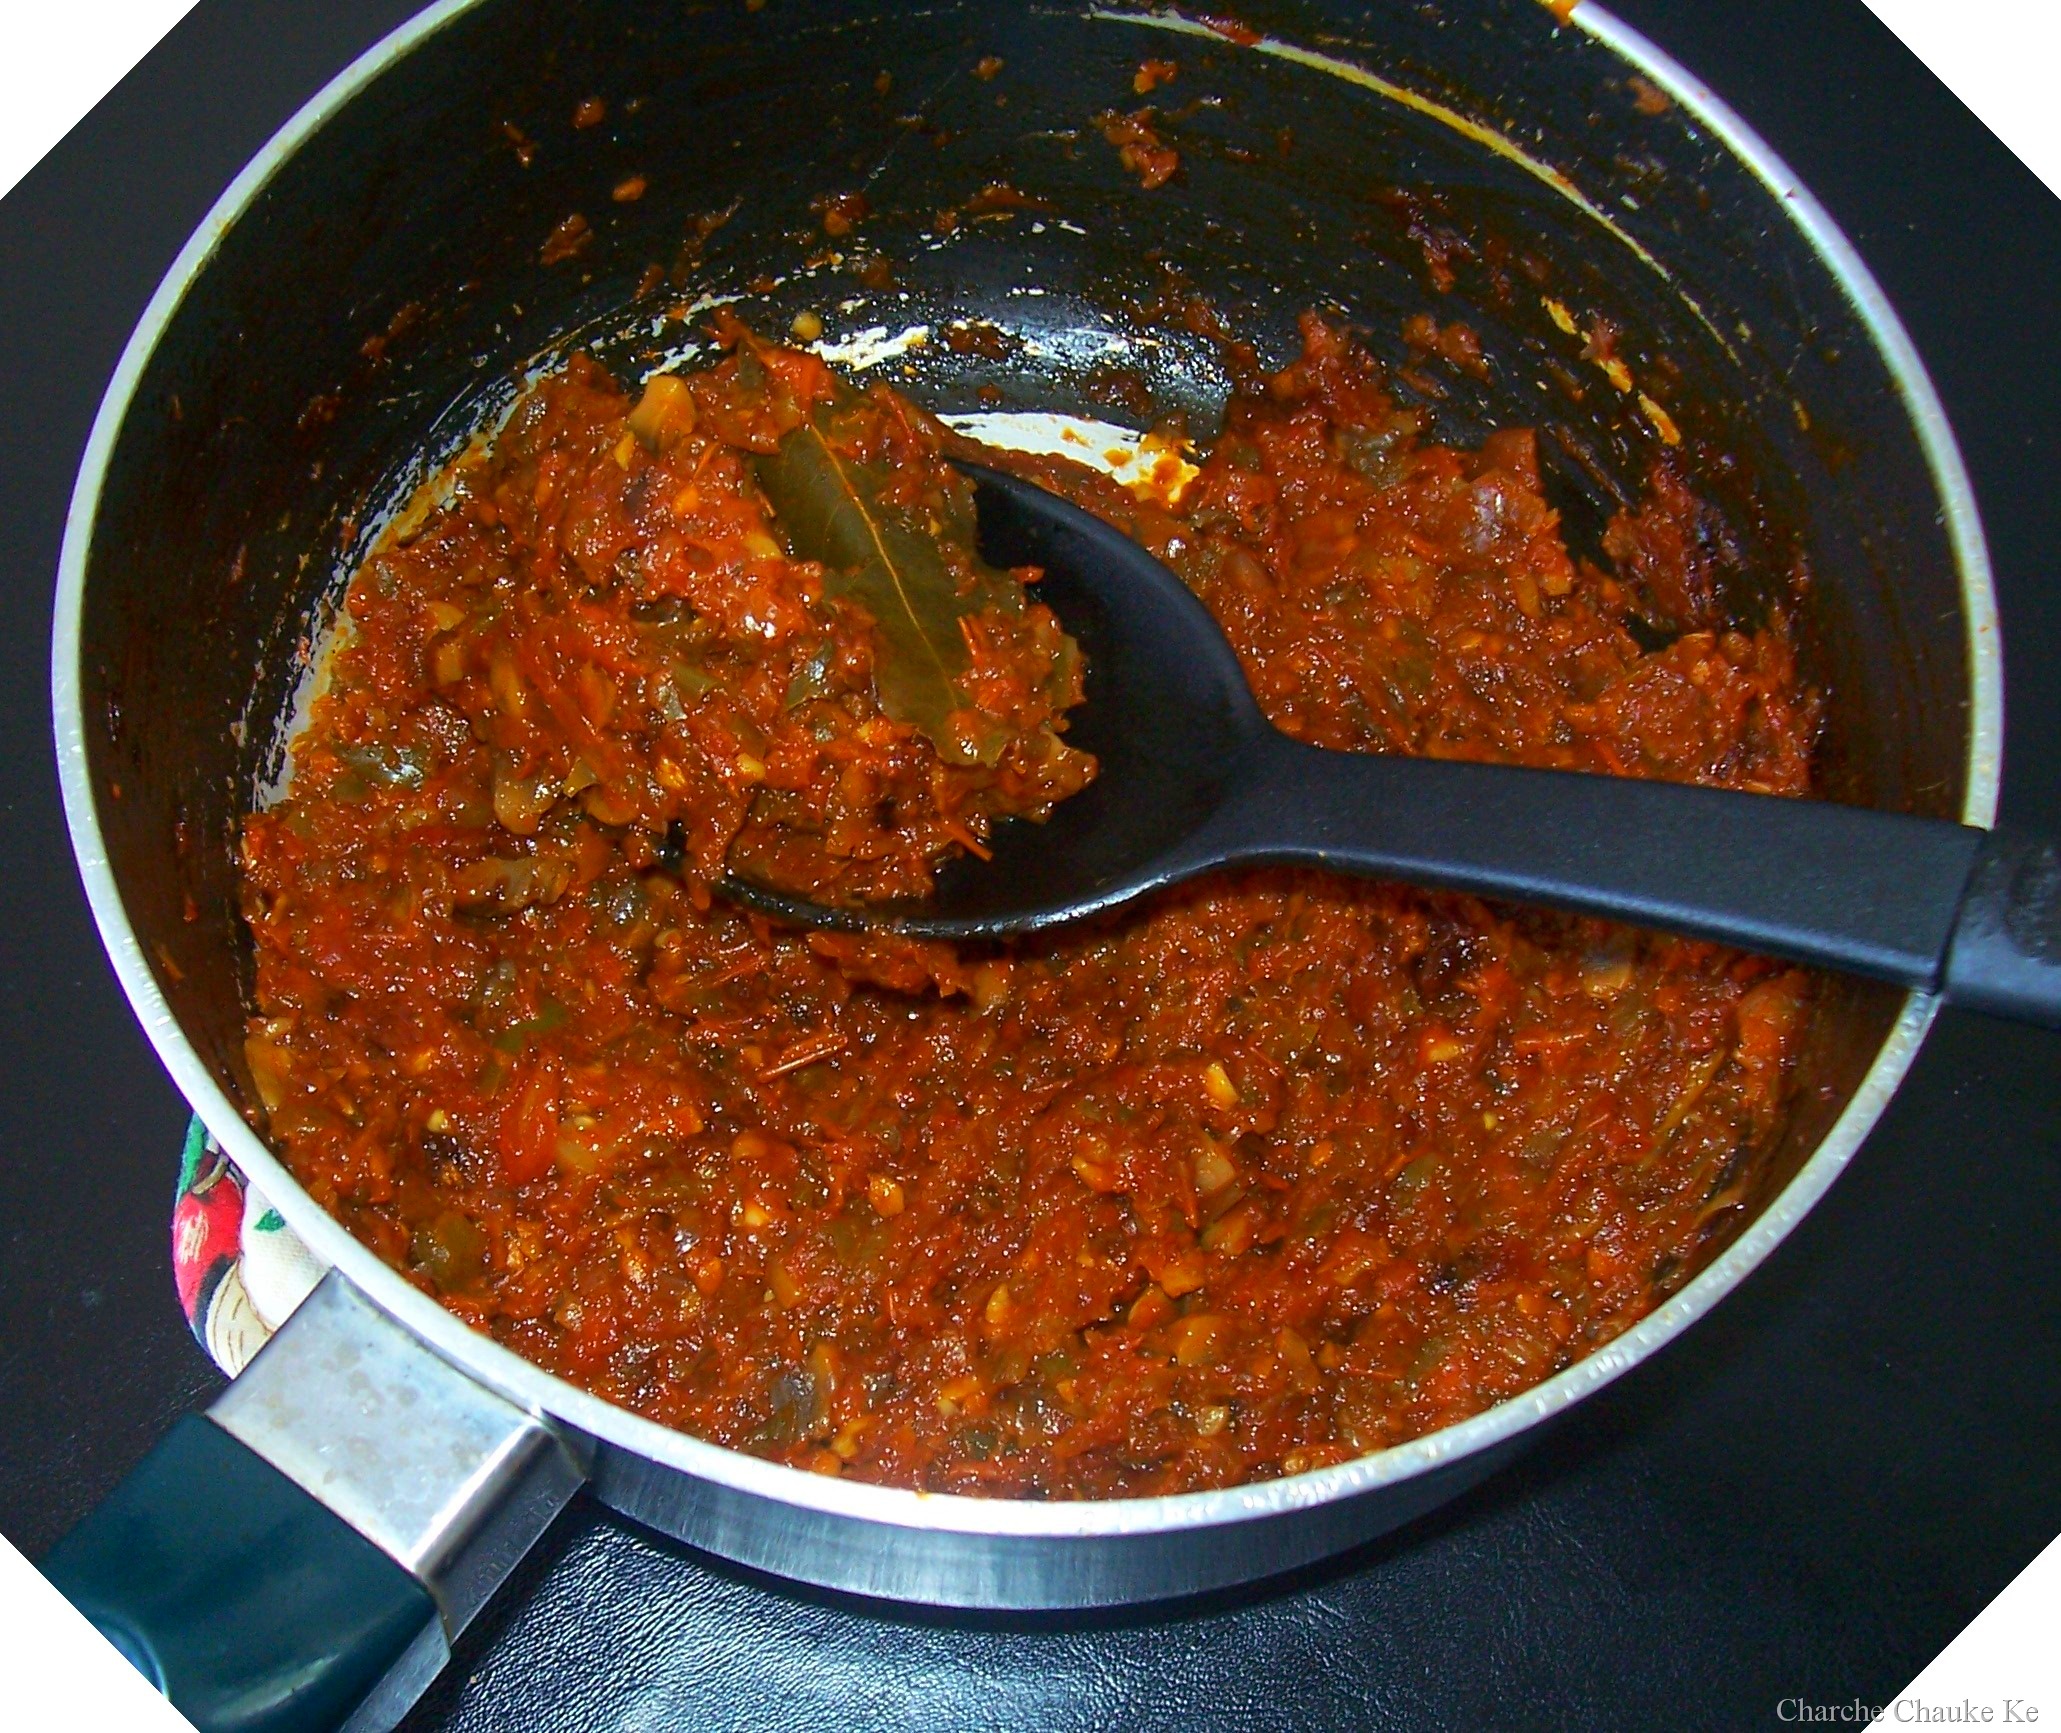
To prepare the sambhar heat oil in a big saucepan. Add mustard seeds, cumin seeds, asafoetida and fresh curry leaves. When you hear the mustard seeds crackle, add the ginger and garlic.

Next add the shallots or pearl onions and fry for a little bit more. Next add the tomatoes. When the tomatoes start getting mushy, add the boiled lentils. Mix well and let it come to a boil. The consistency should be like lentil soup. It can be thinned a bit more if desired.  Finally add the sambhar masala powder and the tamarind concentrate.

(If using actual tamarind, soak it in hot water for 15 minutes. Take the pulp out and discard the fibrous portion and the seeds.)

Garnish with cilantro leaves and the sambhar is ready.

Coconut Chutney:

  • Grated coconut (fresh/frozen) 1 cup
  • Dalia Daal (Roasted split Bengal gram) 1/2 cup
  • Peanuts 2 Tbsp.
  • salt to taste

for tempering:

  • Canola Oil 1 Tbsp.
  • Asafoetida 1/4 tsp.
  • Mustard seeds 1 tsp.
  • Fresh Curry leaves 2 stems washed
  • Whole Red chili 1

aug2_66

Dalia Daal/ Roasted split Bengal gram

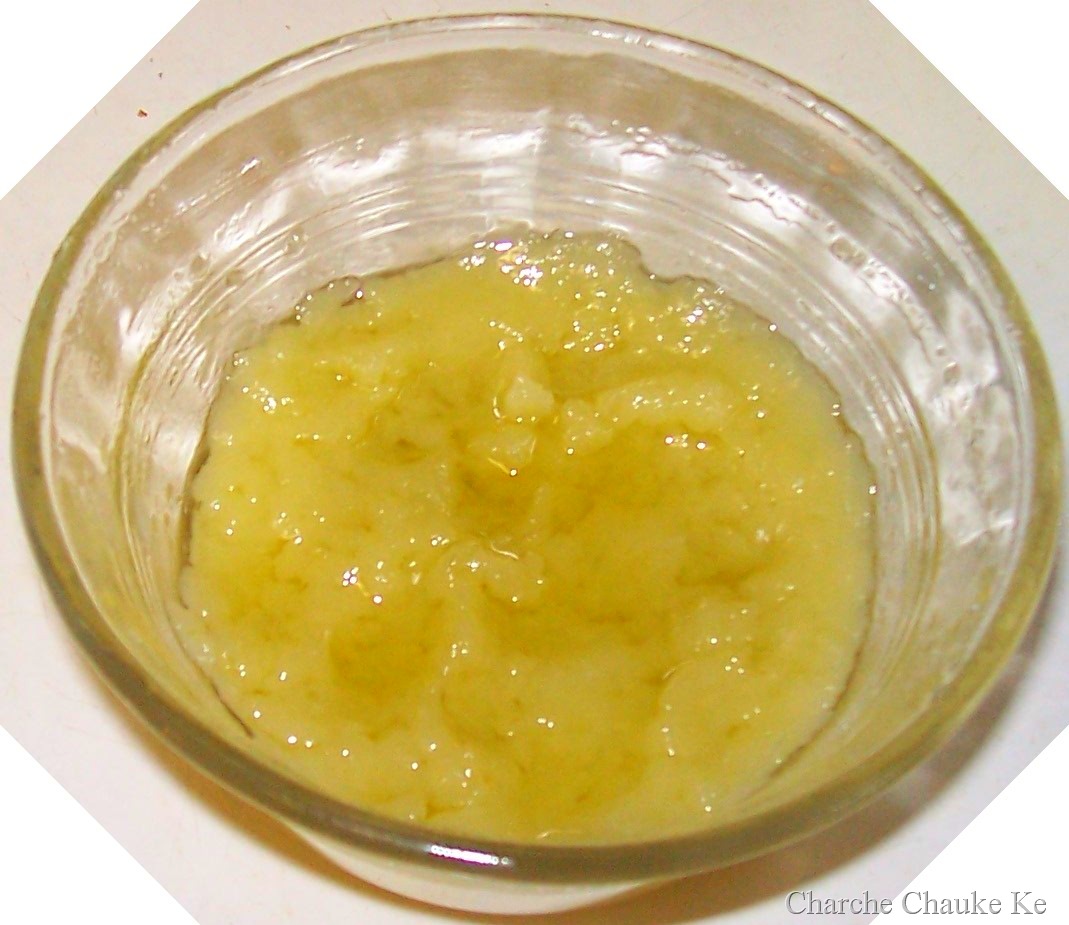
This is a very basic coconut chutney but tastes great! To prepare the chutney, grind the chutney ingredients in a grinder (ideally) or a blender (I use) and add a little water. Grind the ingredients well till you get a smooth consistency.

Heat oil in a small wok and add all the tempering ingredients. Heat till you hear crackling noise and the tempering ingredients look crisp. Do not let it burn. Add immediately to the ground chutney.

The coconut chutney’s ready!

aug2_67

Coconut chutney

aug2_95

Please help yourself 😉

aug2_85

Dosa with Nutella , caramel sauce and some sweet butter


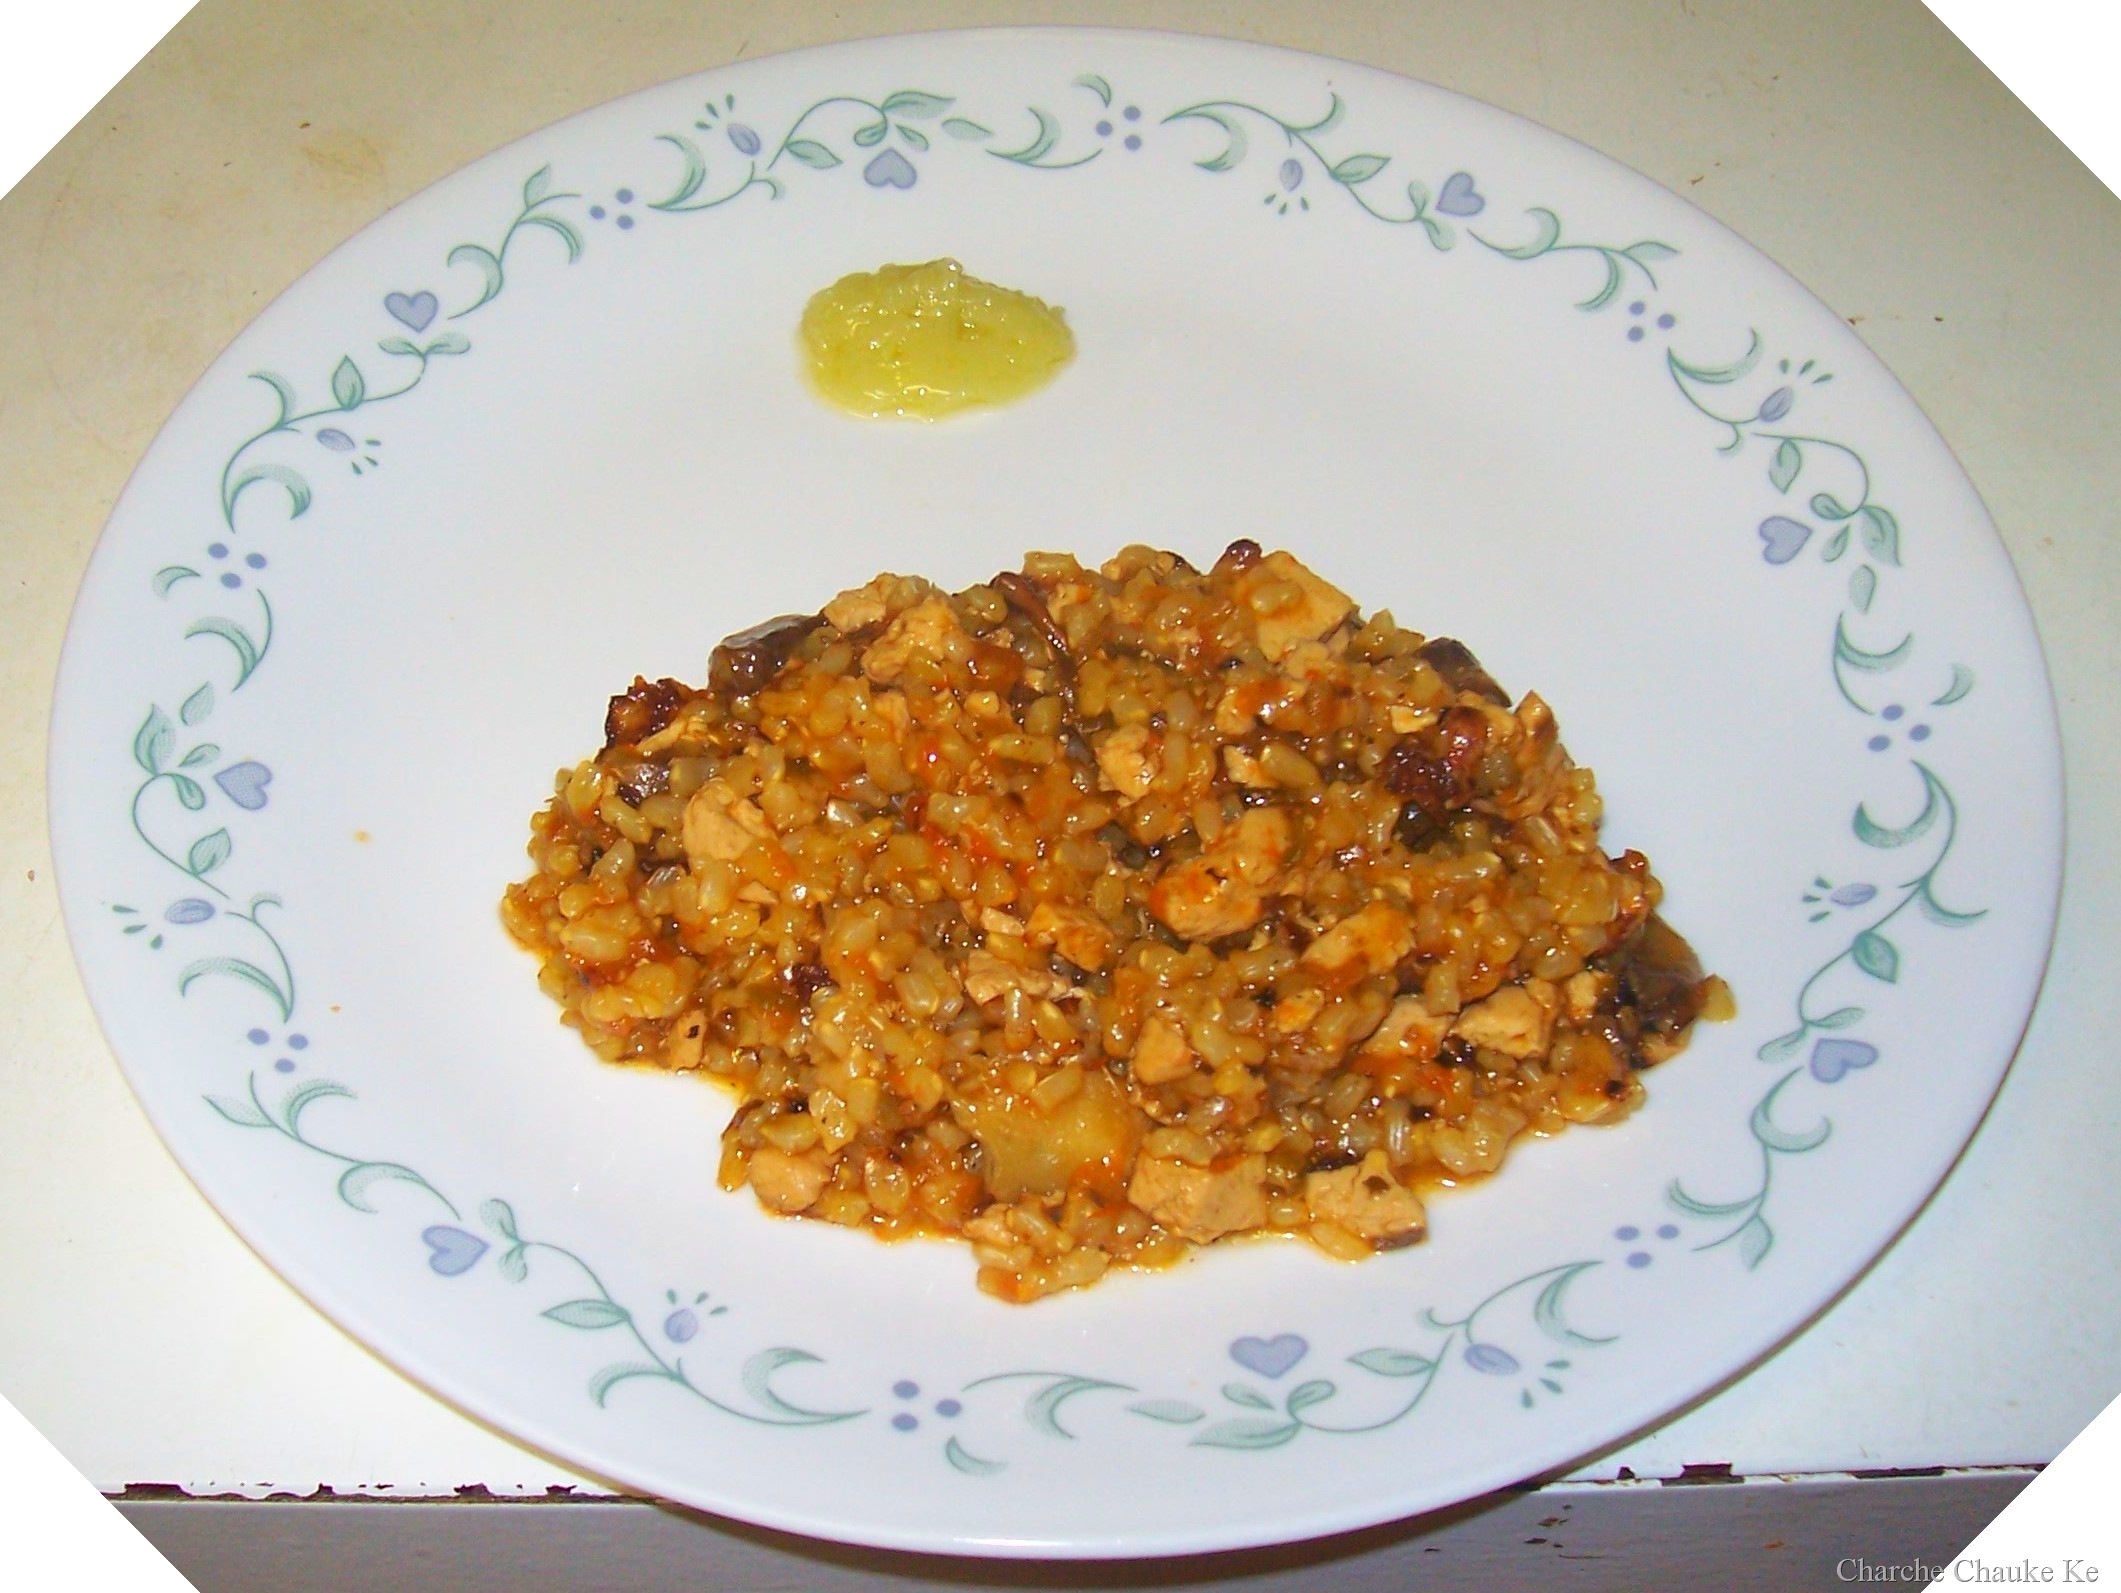
Chil-ra or Godhuma Dosa:

The actual recipe given by Debyi uses spelt flour to make the crepe. In North India , it is called Chilra and in South India, it is called Godhuma Dosa (whole wheat flour dosa)

The way we make it in North India is slightly different and hence my clarifications. We do not eat the chil-ra with any curry. It is usually eaten with pickle or cilantro chutney or even Bhukni (a dry tangy spice powder)

The Recipe:

  • Whole wheat pastry flour (atta) 2 cups
  • Onion 1/2 medium minced
  • Ginger 1 tsp. grated/minced
  • green chilli 1 cut fine
  • tomato 1/2 medium chopped fine
  • Carom seeds 1 tsp.
  • salt to taste
  • water

100_3946

Clockwise: Atta , water , onion, green chili, ginger and tomatoes

100_3950

Chil-ra with yogurt and mango pickle……comfort food

Add all the ingredients and enough water to make a smooth batter. Make sure no lumps remain.

Heat a griddle and make crepes out of these. These will not be as thin as the lentil mixture. But the meal’s ready instantly. I used to love eating these as kid and still do. My kids are a big fan as well……….only I do not know if it’s the chance to eat pickle or chil-ra that draws them to it. Anyway, it’s a good quick fix for me 😉 .

Edit : 17 Sep.  09 : Oh Dear me! I just re-read my post and realized that I have written the quantity of rice as 1 cup and that of the lentils too. It was a typo. I am so very sorry if anyone has tried making this with the wrong ratio given.  I have marked in red , please do check.

Posted in - Turmeric, -Arhar (Toor) Dal, -Asafoetida, -Canola Oil, -Cilantro, -Curry leaves, -Dalia Daal/Roasted split Bengal Gram, -Fenugreek seeds, -Garlic, -Ginger, -Idli Rice, -Mustard Seeds, -Onion, -Potatoes, -Red chili powder, -Tamarind, -Tomato, -Urad daal/ black gram, -Whole wheat flour, Shallots, _Chana Daal/ Bengal gram | Tagged: , , , | 7 Comments »

Daring Cooks make Rice with mushrooms, Tofu, Potatoes and artichokes

Posted by vivnidhi on August 14, 2009

Vegetarians Win!! Yeah well, I should not rejoice so much. My expertise at preparing any non-vegetarian food is pretty bleak………and if I have to cook seafood, its worse. I (with the husband’s help 😉 , of course ) can handle salmon well now ….and we know when it is done, but the rest of the stuff leaves me shivering. I tried making scallops thrice and only once did I get it right, rest of the times the family could not eat leather. So, this time we attempted squid…..and I FAILED ……….and hence, everybody ate vegetarian…….YEAH!!

Before I say anything about what I made and what happened, I must mention the accompaniment. This month I learnt to make allioli (the traditional way) and it is just phenomenal. No garlic lover should not – not try it.  To me , it was like tasting sheer bliss. I LOVE garlic. I can eat allioli with bread, pasta, roti, parantha, of course rice , just about anything (OK, spare the desserts 😉 )

This month’s challenge was hosted by Olga of  Las Cosas de Olga and Olga’s Recipes . . She chose a delicious Spanish recipe, Rice with mushrooms, cuttlefish and artichokes by José Andrés, one of the most important Spanish Chefs at the moment. The recipe is from his US TV show Made in Spain.  (Please note Olga’s tips (2) and (3) at the bottom for alternative cooking).

Allioli is my favorite and so lets begin with that. I made it the traditional way and just loved it. This will be made a lot in my house. A lot of people find it strong, but for this spice accustomed tongue, it was just great!

aug1_01

Allioli…..the traditional way


Allioli (Traditional recipe)
Cooking time: 20 min aprox.
Ingredients:

  • 4 garlic cloves, peeled
  • Pinch of salt
  • Fresh lemon juice (some drops)
  • Extra-virgin olive oil (Spanish preferred but not essential)

Directions:

  1. Place the garlic in a mortar along with the salt.
  2. Using a pestle, smash the garlic cloves to a smooth paste. (The salt stops the garlic from slipping at the bottom of the mortar as you pound it down.)
  3. Add the lemon juice to the garlic.
  4. Drop by drop; pour the olive oil into the mortar slowly as you continue to crush the paste with your pestle.
  5. Keep turning your pestle in a slow, continuous circular motion in the mortar. The drip needs to be slow and steady. Make sure the paste soaks up the olive oil as you go.
  6. Keep adding the oil, drop by drop, until you have the consistency of a very thick mayonnaise. If your allioli gets too dense, add water to thin it out. This takes time—around 20 minutes of slow motion around the mortar—to create a dense, rich sauce.

José’s tips for traditional recipe: It’s hard to think that, when you start crushing the garlic, it will ever turn into something as dense and smooth as allioli. But don’t give up. It’s worth the extra time and effort to see the oil and garlic come together before your eyes. Just make sure you’re adding the olive oil slowly, drop by drop. Keep moving the pestle around the mortar in a circular motion and keep dreaming of the thick, creamy sauce at the end of it all.

Allioli a la moderna (Modern recipe)
Cooking time: 3-4 minutes
Ingredients:

  • 1 small egg
  • 1 cup extra-virgin olive oil (as above, Spanish oil is highly recommended)
  • 1 garlic clove, peeled
  • 1 Tbs. Spanish Sherry vinegar or lemon juice (if Sherry vinegar is not available, use can use cider or white vinegar)
  • Salt to taste

Directions:

  1. Break the egg into a mixing bowl.
  2. Add 2 tablespoons of the olive oil and the garlic cloves, along with the vinegar or lemon juice.
  3. Using a hand blender, start mixing at high speed until the garlic is fully pureed into a loose paste.
  4. Little by little, add what’s left of the olive oil as you continue blending.
  5. If the mixture appears too thick as you begin pouring the oil, add 1 teaspoon of water to loosen the sauce.
  6. Continue adding the oil and blending until you have a rich, creamy allioli.
  7. The sauce will be a lovely yellow color.
  8. Add salt to taste.

José’s tips for modern recipe:
(1) If you do not have access to a hand blender, you can use a hand mixer (the kind with the two beaters) or a food processor. If you use a food processor, you must double the recipe or the amount will be too little for the blades to catch and emulsify.
(2) What happens if the oil and egg separate? Don’t throw it out. You can do two things. One is to whisk it and use it as a side sauce for a fish or vegetable. But if you want to rescue the allioli, take 1 tablespoon of lukewarm water in another beaker and start adding to the mix little by little. Blend it again until you create the creamy sauce you wanted.

Why did I FAIL? OK, I am a bit of a purist when it comes to food. If a recipe calls for an ingredient and that ingredient is within my means, I try and go the extra mile. Well! in this case several extra miles around the town and just would not find the short grain Spanish rice. I went crazy and really could not believe that I could not find it. (I saw it at Kroger after I had finished all my experiments.) Anyway, I got short grain brown rice !!! Guess what I cooked sea food till the brown rice got tender. now who could eat what I had dished out? The husband, who could not believe his ears (and was really pleased) when I told him that I would be buying squid for him, asked me to never buy that stuff again :-)) . So all ate my vegetarian basmati version 🙂 . 

Here is the recipe:

Rice with mushrooms, cuttlefish and artichokes
Cooking time: 45 minutes
Equipment:

  • 1 Chopping Board
  • 1 knife
  • 1 medium saucepan
  • 1 Paella pan (30 cm/11” is enough for 4 people. If not available, you may use a simple pan that size)
  • 1 Saucepan

Ingredients (serves 4):

  • 4 Artichokes (you can use jarred or frozen if fresh are not available)
  • 12 Mushrooms (button or Portobello)
  • 1 or 2 Bay leaves (optional but highly recommended)
  • Tofu 1 block cubed and baked at 400 F for 15 minutes
  • 1 glass of white wine
  • 1 Potato  cubed
  • “Sofregit” (see recipe below) (pronounced so-frito)
  • 300 gr (2 cups) Basmati rice – about 75 gr per person ( ½ cup per person) Please read this for more info on suitable rices.
  • Water or Fish Stock (use 1 ½ cup of liquid per ½ cup of rice)
  • Saffron threads (if you can’t find it or afford to buy it, you can substitute it for turmeric or yellow coloring powder)
  • Allioli (olive oil and garlic sauce, similar to mayonnaise sauce) – optional

Directions:

  1. Add 1 or 2 tablespoon of olive oil in a frying pan and put the tofu cubes in the pan.
  2. If you use fresh artichokes, clean them as shown in the video in tip #7. Cut artichokes in eights.
  3. Clean the mushrooms and cut them in fourths.
  4. Add a bay leaf to the tofu and add also the artichokes,potatoes and the mushrooms.
  5. Sauté until we get a golden color in the artichokes.
  6. Put a touch of white wine so all the solids in the bottom of the get mixed, getting a more flavorful dish.
  7. Add a couple or three tablespoons of sofregit and mix to make sure everything gets impregnated with the sofregit.
  8. Add all the liquid and bring it to boil.
  9. Add all the rice. Let boil for about 5 minutes in heavy heat.
  10. Add some saffron thread to enrich the dish with its flavor and color. Stir a little bit so the rice and the other ingredients get the entire flavor. If you’re using turmeric or yellow coloring, use only 1/4 teaspoon.
  11. Turn to low heat and boil for another 8 minutes (or until rice is a little softer than “al dente”)
  12. Put the pan away from heat and let the rice stand a couple of minutes.

aug1

Sofregit ingredients: Onion, tomatoes, green pepper, garlic and mushrooms

Sofregit (a well cooked and fragrant sauce made of olive oil, tomatoes, garlic and onions, and may at times
different vegetables such as peppers or mushrooms)-

Cooking time: aprox. 1 hour
Ingredients:

  • 2 tablespoons of olive oil
  • 5 big red ripe tomatoes, chopped
  • 2 small onions, chopped
  • 1 green pepper, chopped (optional)
  • 4 or 5 garlic cloves, chopped
  • 1 cup of button or Portobello mushrooms, chopped (optional)
  • 1 Bay leaf
  • Salt
  • Touch of ground cumin
  • Touch of dried oregano

Directions:

  1. Put all the ingredients together in a frying pan and sauté slowly until all vegetables are soft.
  2. Taste and salt if necessary (maybe it’s not!)

Sofregit tastes superb with just about anything.

aug1_00

Sofregit’s ready!

Olga’s Tips:
(1) In Spain, rice is not stired as often as it is when cooking Italian risotto. You must stir it once or twice maximum. This tip is valid for all Spanish rice dishes like paella, arròs negre, arròs a banda…
(2) When cooking the alternative style you can change the cuttlefish or squid for diced potato.
(3) If you can’t find cuttlefish or squid, or you’re not able to eat them because of allergies, you can try to substitute them for chicken or vegetables at your choice.
(4) Sofregit can be done in advance. You can keep it in the fridge or even freeze it.
(5) For more information on how to clean and remove the heart of artichokes, please watch this video
(6) To watch how Jose Andres cooks this dish click here.
(7) To tone down the taste when you do it by hand in a mortar, then add an egg yolk. If you want to tone it down in the alternative way use milk or soy milk. Anyway, the best alternative way is the original oil and garlic alone.
(9) Allioli must be consumed during the preparation day and preserved in the fridge before using it.
(10) For help on conversion on metric to imperial, visit this page.

My first attempt at cooking Spanish food apart from Sangria and we had a lot of fun in spite of the failure. The husband made  some sangria and I made flan. Thanks for a good meal Olga. Dinner’s ready!!

aug1_02

Rice with mushrooms, tofu,  potatoes and artichokes

aug1_06

Some Crema Catalana too…. (Olga’s recipe)

Expenditure:

Artichokes 2………………………..from Meijer ……………..$ 3.34 (I had bought some from Randazzo for 59 c each…..ah supermarkets)

Mushrooms 1 lb……………………..from Kroger …………….$ 1.00 (deal, deal)

Short grain Brown rice 1 lb…………from Arbor farms market $ 1.69

———————————————————————————————————————————————–

Total……………………………………………………………..$ 6.03

Posted in - Bay Leaf, -Artichoke, -Cumin seeds, -Garlic, -Green Bell Pepper, -lemon, -mushrooms, -Olive Oil, -Onion, -Oregano, -Potatoes, -Saffron, -Tomato, -White Wine, Alcohol | Tagged: , , , | 13 Comments »

Beirut Tahini Swirls…….Sukkar Bi Tahin

Posted by vivnidhi on July 29, 2009

Bread Baking Babes make Sukkar bi Tahin.

1100_3665

Sukkar bi Tahin

100_3678  100_3673

Here’s my savory …garbanzo filled swirls and sweet Tahini paranthas

As soon it was approaching the middle of the month, I was frantically searching for bread baking babes….what are they baking this month, I hope I don’t miss it……….I did not 😉 . I made 2 batches at least and mix and match here and there ;-). This month’s host babe was Natashya of Living in the Kitchen with Puppies.

The recipe she chose is for Beirut Tahini Swirls, Sukkar bi Tahin. It is a cross between a flatbread and a yeasted pastry, only mildly sweet. It is street food in Beirut, and very addictive!
“Beirut has a lot of good food at every level, from fancy restaurants to local eateries, from home cooking to quality market shopping. And for a curbside snacker like me, it’s paradise. There are sesame-covered flatbreads, grilled meats, and sweet and not so sweet cookies; there’s always something nearby to eat.” “These tahini swirls, called sukkar bi tahin in Arabic, are flattened flaky rounds flavored with tahini and sugar, not too sweet, not too strong tasting. Serve them warm or at room temperature-they’re just right either way.”
Alford and Duguid, Home Baking .

The recipe:

Sukkar bi Tahin – Beirut Tahini Swirls

Home Baking, The Artful Mix of Flour and Tradition Around the World

Jeffrey Alford and Naomi Duguid

Makes 6 golden brown, flaky textured coiled rounds, about 6 inches wide, filled with sesame paste and sugar.


Ingredients


Dough

  • 1/2 tsp. active dry yeast
  • 1 cup lukewarm water
  • 1 cup all purpose flour
  • 1 cup whole wheat flour
  • about 1/2 cup all purpose flour for dusting
  • 2 tsp sugar
  • 1 tbsp olive oil

Filling

  • 3/4 cup tahini
  • 3/4 cup sugar


Garbanzo Bean Filling

  • 1/2 cup Garbanzo beans soaked for at least 4 hours and boiled…mashed lightly
  • 4 sun dried tomatoes soaked in water and drained
  • 1/2 cup Tahini
  • 2 cloves garlic minced
  • 1/4 Cilantro chopped
  • 1 Tbsp. lemon juice
  • salt to taste


Directions

In a medium bowl, dissolve the yeast in the lukewarm water.

Stir in one cup of the flour, then add the sugar and oil and stir in.

Incorporate a second cup of flour, then turn the dough out onto a well floured surface and knead for 5 minutes, or until smooth.

Cover the dough with plastic wrap and let rise for 2 to 3 hours, until doubled in volume.

Meanwhile, place a baking stone or unglazed quarry tiles, if you have them, (or a baking sheet) on the middle oven rack and preheat the oven to 375 F.

Mix together the tahini and sugar and stir until smooth. Set aside.
Cut the dough into 6 equal pieces.

Work with 3 at a time, keeping the others covered.

Flatten each out on a lightly floured surface, then roll each out to a rectangle about 5 inches by 10 inches.

Spread the top surface with 2 1/2 tablespoons of the filling mixture, spreading it almost to the edges.

Roll up the rectangle from a long side into a cylinder, which will stretch as you roll to about 20 inches long.

Anchor one end and coil the bread around itself, then tuck the end in.

Flatten with the palm of your hand, then set aside, covered, while you fill and shape the other 2 rectangles.

Return to the first coil and roll out gently with a rolling pin.

Roll the other 2 out a little and then return to the first one and roll it out a little more thinly, and so on, until you have rolled each to a round about 6 to 7 inches in diameter.

A little filling may leak out—don’t worry, just leave it.

I brushed the top with a wee bit of oil and sprinkled some sesame seeds before baking. (optional)

Place the breads on the hot baking stone or tiles (or baking sheet) and bake for 15 to 20 minutes, until golden brown and flaky.

Transfer to a rack to cool.

Shape and bake the remaining 3 pieces of dough.

Serve warm or at room temperature.


*Tahini is a paste of ground sesame seeds. It can be found in health food stores, Middle Eastern markets and some grocery stores. It is a common ingredient in hummus, and is gaining in popularity in most parts of the world. It must be refrigerated after opening.

Natashya says: “The swirls should end up like puffy pita. If they are very thin they will be crispy, if they are not rolled enough, they will puff up like cinnamon rolls. We are striving for a flatbread pastry that puffs a little. Try them a couple of times, experiment. They are fun to bake.”  You bet they are ……I had a ton of fun……as usual 😉 .

I used half whole wheat flour and half all purpose flour for sweet tahini filling ones and all whole wheat flour for the savory garbanzo beans ones. Original recipe uses all purpose flour only.

 100_3642 100_3650 

Left: 1/2 whole wheat with 1/2 all purpose flour dough Right: Whole wheat flour dough

100_3651 

We have risen..the 1/2-1/2 dough was a little behind, but it did catch on

 100_3652

Dough cut in 6 pieces ..sweet tahini filling behind

100_3653

1 piece rolled

100_3654

Filled up

100_3659 

Rolled up again

100_3663

Ready to be baked

100_3665

Sukkar bi Tahin

100_3666

Had some leftover sweet tahini filling…..what did I do with that

100_3667

Made sweet paranthas of course…..dough details here and here

100_3668

Filled up and closed

100_3669

rolled …

100_3671

On the griddle…ready to be turned and oiled

100_3670

The other side…..

100_3673

Quick , delicious sweet treat…….kids will thank you…..this tastes best warm, will harden as it cools cause the flour cover is thin….does not taste bad even then 😉

You bet I enjoy taking pictures and posting huge ones on the blog 😉 . I dare say I loved making these. Thank you Natashya and Bread Baking Babes.

Posted in -All Purpose flour, -Cilantro, -Garlic, -lemon, -Olive Oil, -Sesame seeds, -Sun dried tomatoes, -Tahini, -Whole wheat flour, Sugar, Yeast | Tagged: , , , | 2 Comments »

Daring Cooks # 2 Potstickers / Gyoza

Posted by vivnidhi on July 21, 2009

July1_21

Yaay! I can make neat Potstickers  too!

Those who have read my earlier post know that I am late in posting about practically all the posts for the past two months. OK, enough of apologizing. Lost time can’t be brought back again but I can try to learn (Oh yeah………. 😉 )

The reason these potstickers are late is that I experimented a lot with these. Since I first ate the vegetarian gyozas that Trader Joe’s sells, I have been hooked. I remember telling the husband very comfortably……I can make these as he was trying to pick up the last TJ’s one off my plate too. I generously handed the last gyoza to him and said to myself, “shouldn’t be a big deal really”. Before I could fully make a plan about these gyozas, Jen from use real butter announced that the Daring cook challenge as Potstickers. I was very excited (shows when I don’t post on time, right 😉  ).

Anyway, the bigger challenge these days is posting , not making.

Let me start with saying, I have made it four times now (very unusual for me, I hate repeating) and don’t think my stint with gyozas ends here. I only repeat recipes which I am trying to master…….say Idlis………and now potstickers :-).  How do people write recipe books, how many times do they test?

Round 1: Stuffed whatever I had on hand, forgot soy sauce and cornstarch. You bet………..it tasted great…….I was the only one who ate 🙂 .

Round 2:  A planned visit to the Asian store, bought garlic chives, tofu etc…….pantry equipped. Even though I baked the tofu and drained it well, I found the end stuffing mixture to be quite wet. This resulted in not well shaped gyozas. Anyway, tasted great, got a pat on the back 🙂

Round 3: Cooked the stuffing up, mixed it with some finely chopped veggie burgers (this was for something else) but ended up in potstickers. Husband said, I liked round 2 better.

Round 4: This time, I was dead sure of what I wanted to do………everything in place……….yet the husband said…….round 2 was better…………and boo hoo hoo ……..he is right.

Round 5: Got filled with coconut fudge and some also had chocolate ganache filling , and topped with powdered sugar…Yes, I was cleaning the freezer which is filled with small tit-bits.

Here’s the recipe with my vegetarian filling and the best proportions *(these matter….all I had wrong in round 4 was a little extra daikon radish ):

Jen says “It’s a basic concept: a filling inside a dough wrapper, sealed, and cooked. This delicious theme runs through many cultures and is among the more popular bites at Chinese restaurants – especially dim sum. “

The process goes a little like this:

You can (and should) reference instructional photos and discussion on Jen’s blog post here.

Wrappers: Well yes, you could purchase pre-made dumpling wrappers at the store (NO WONTON WRAPPERS – they have egg), but they are inferior compared to homemade. The whole point of this challenge is to make the dumpling wrappers by hand. So here is the one requirement: the dumpling wrappers must be made by hand. It isn’t all that hard, it just takes a little time and practice. People usually get the hang of it after making about a dozen.

Fillings: the beauty of the Chinese dumpling/potsticker is that the filling is very versatile. That’s why there are so many different kinds of dumplings when you go to dim sum. The two most common are pork and shrimp. You can make them with other ground meats (beef, chicken…) or vegetarian (tofu, mushrooms, bamboo shoots, water chestnuts, glass noodles, Chinese chives – oh yum!). The important thing to keep in mind is that the filling needs to “stick” to itself or else you will make your life incredibly miserable wrapping up filling that keeps falling apart. I think if I were to make vegetarian dumplings, I would sauté the cabbage and mash up the tofu for a better cohesiveness. It’s up to you how you want to fill your dumplings and I say – run with it! Just keep it cohesive and no big chunks of hard ingredients (they poke through the wrapper dough = disaster). I realize it may be tempting to dump all of the vegetables into a food processor and give it a whir, but I caution against it. You don’t want a slurry, you want a mince. Practice your knife skills and be careful.

Special Equipment: A rolling pin – preferably not tapered. (see blog pictures for the type I use).

Time: Prep for the filling takes me 30 minutes – longer if peeling and de-veining shrimp. It will depend on your proficiency with a good sharp knife. Rolling and wrapping several dozen dumplings takes me 1 hour by myself. My parents can crank through it in 30 minutes when one person is rolling wrappers and the other is wrapping dumplings. Might be fun to get a second person to help! Cooking: I have to cook mine in batches. When steaming, I can cook a dozen at a time in about 10 minutes. Potstickers: 15 minutes per 2 dozen determined by the size of your pan. Boiling – 6 minutes per dozen or so depending on size of pot. My own personal preference is for potstickers – mmmmm! But they are ALL good.

The Recipe:

Dough:

  • 2 cups (250g) all-purpose flour
    1/2 cup (113g) warm water
    flour for worksurface

Make the dough, Method 1: Place the flour in the work bowl of a food processor with the dough blade. Run the processor and pour the warm water in until incorporated. Pour the contents into a sturdy bowl or onto a work surface and knead until uniform and smooth. The dough should be firm and silky to the touch and not sticky.[Note: it’s better to have a moist dough and have to incorporate more flour than to have a dry and pilling dough and have to incorporate more water).

Make the dough, Method 2 (my mom’s instructions): In a large bowl mix flour with 1/4 cup of water and stir until water is absorbed. Continue adding water one teaspoon at a time and mixing thoroughly until dough pulls away from sides of bowl. We want a firm dough that is barely sticky to the touch.

Both dough methods: Knead the dough about twenty strokes then cover with a damp towel for 15 minutes. Take the dough and form a flattened dome. Cut into strips about 1 1/2 to 2 inches wide. Shape the strips into rounded long cylinders. On a floured surface, cut the strips into 3/4 inch pieces. Press palm down on each piece to form a flat circle (you can shape the corners in with your fingers). With a rolling pin, roll out a circular wrapper from each flat disc. Take care not to roll out too thin or the dumplings will break during cooking – about 1/16th inch. Leave the centers slightly thicker than the edges. Place a tablespoon of filling in the center of each wrapper and fold the dough in half, pleating the edges along one side (see images in Jen’s post for how to fold pleats). Keep all unused dough under damp cloth.

June1_35

The dough, even though feels very dry….just let it rest ;-)…..this is after the rest

June1_38

Dough cut into 5 pieces

June1_41

The cut portion of the dough is rolled into a thinner round and cut further. Good idea to cut it bigger than I am showing here. This was my first attempt.

  • Vegetarian filling:
    2 carrots minced
  • 4 large napa cabbage leaves, minced
    3 stalks green onions, minced
    6 cloves garlic
  • 1/4 bunch Chinese chives/garlic chives minced
  • 1 medium red onion minced
    1/2 cup Daikon radish peeled and minced (lesser than shown in picture below)
    1/4  cup ginger root, minced
  • 1 cup tofu (baked in oven at 400F for 15 minutes) mashed (optional)
  • 2 Tbsp. sugar
    3 Tbsp (40g) soy sauce
    2 Tbsp (28g) sesame oil
    6 Tbsp (16g) corn starch

July1_18

Finally some color……spring onion, carrots, napa cabbage, garlic, garlic chives, red onion,ginger and daikon radish

Even though Jen asks to mince  the veggies by hand, I chose to use the food processor………and was I glad I did ;-). Mince these veggies and drain the water by pressing with hands. Add the sugar, soy sauce, sesame oil and corn starch.

June1_33

Vegetarian filling

  • dipping sauce:
    2 parts soy sauce
    1 part vinegar (red wine or black)
    a few drops of sesame oil
    chili garlic paste (optional)
    minced ginger (optional)
    minced garlic (optional)
    minced green onion (optional)
    sugar (optional)

To boil: Bring a large pot of water to a boil and add dumplings to pot. Boil the dumplings until they float.

To steam: Place dumplings on a single layer of napa cabbage leaves or on a well-greased surface in a steamer basket with lid. Steam covered for about 6 minutes.

To pan fry (potstickers): Place dumplings in a frying pan with 2-3 tbsp of vegetable oil. Heat on high and fry for a few minutes until bottoms are golden. Add 1/2 cup water and cover. Cook until the water has boiled away and then uncover and reduce heat to medium or medium low. Let the dumplings cook for another 2 minutes then remove from heat and serve.

To freeze: Assemble dumplings on a baking sheet so they are not touching. It helps to rub the base of the dumpling in a little flour before setting on the baking sheet for ease of release. Freeze for 20-30 minutes until dumplings are no longer soft. Place in ziploc bag and freeze for up to a couple of months. Prepare per the above instructions, but allow extra time to ensure the filling is thoroughly cooked.

To serve: Serve dumplings or potstickers hot with your choice of dipping sauce combinations.

July1_22 July1_26

Pan fried is the way to go for us: these look  darker than they actually were ….trust me, these are delicious

June1_47 July1_28

Ah…..my black background

One more pic and the one with the coconut fudge filling (tasted like modaks :-)) )

Posted in - Napa Cabbage, - Red onion, -All Purpose flour, -Carrot, -Daikon Radish, -Garlic, -Garlic chives, -Ginger, -Sesame oil, -Soya Sauce, -Spring Onions, -Tofu, Corn Starch, Sugar | Tagged: , , | 3 Comments »

Rajma (Red Kidney Beans Curry)

Posted by vivnidhi on November 12, 2008

100-2681.jpg

Dried Red Kidney Beans

Rajma or Red kidney beans were rarely made in my house in India. It was a treat made, like, once in 6 months and that too……..with potatoes like a vegetable;) . My grandmother had a grave dislike for kidney beans for its flatulent tendencies. She also believed that its ‘taseer’ was hot. Now, that means that it was one of the foods that would cause excess heat in the body when eaten. The flatulence part of kidney beans cannot be disputed but I really don’t know much about “hot” and “cold” foods :). Anyway, kidney beans are quite a favorite with people from Punjab and Delhi. I believe that it is not that commonly eaten in Uttar Pradesh. I got a request a few days back from Lavanya, who wanted me to tell her how I made Rajma. Thank you for considering my recipe worthy enough to know. Well! this is how I make Rajma,it is mostly liked by all who have had to eat it. Try it out and let me know what you think. This blog is nearing its first anniversary which is BIG for me cause it’s hard to believe that I am still blogging:).

I ate Rajma a lot when I was suffering from Gestational Diabetes. This is one of  the few foods that women who suffer can eat without worrying about the numbers, as it has enough protein and folate AND is also filling:).One can have  2 servings, 1/2 cup each and that would equal approximately 30 g. carbs. At least this paired with 1 thin roti 6″ in diameter along with LOTS of lettuce and cucumber worked very well for me. This is when my lunch was restricted to only 45 g. carbs.  Since, I have gone through the pain of gestational diabetes and am a good candidate for diabetes in the future , I try to eat as much sugar as I can eat now:))…………………….NO, I am careful of my diet and I am sending this recipe to all diabetes conscious people:)  Sangeeth’s  Eat Healthy Fight Diabetes Contest of Art of Cooking Indian food and Raulillo OK’s Blogg Event: Gastronomical adventure 2008 on the occasion of World Diabetes Day on November 14th.

I have learnt to make decent Rajma from my Husband’s  Aunt who makes Rajma quite well. Never really sat and jotted down this recipe from her but I believe that mine turns out quite like hers now:).  The key points in a good rajma recipe is that the kidney beans should be well cooked (one should not need to apply pressure to break the beans (hey, we don’t want a paste either…..somewhere in between) ) and the gravy should not be watery.

The Recipe:

  • Red Kidney Beans 1 1/2 cups soaked for at least 4 hours or overnight
  • Vegetable oil 1 Tbsp.
  • Bay Leaf 1
  • Cinnamon stick 2″ piece
  • Onion 1 big chopped very fine
  • Ginger 2″ piece minced
  • Garlic 5-6 cloves minced
  • Green Chillies 2 chopped fine (add less for less heat, though this results in medium hot)
  • Cumin seeds (Jeera) 2 tsp.
  • Asafoetida (Heeng) 1/2 tsp. (optional)
  • Turmeric powder (Haldi) 2 tsp.
  • Coriander powder (Dhaniya) 2 Tbsp.
  • Salt to taste
  • Tomato puree/Tomato sauce 1 1/2 cups or about 4 medium sized tomatoes chopped fine
  • Water 3 cups
  • Garam Masala 1 Tbsp.
  • Kasoori Methi 1 Tbsp.
  • Cilantro leaves for garnish 1/2 cup

I used to boil the kidney beans prior to adding it to the gravy but now I have learnt that it is not a necessary step. With the help of a pressure cooker, a well soaked kidney beans gets cooked quite well in the gravy itself. Hence all the masalas can be directly fried in the pressure cooker itself. This recipe makes quite a lot of curry, but then who minds rajma leftovers?

Heat oil in the pressure cooker. Add asafoetida (which I add in addition to garlic to reduce the flatulence tendencies of the beans), cumin seeds, bay leaf, cinnamon stick and turmeric powder. Add finely chopped onion, ginger,green chillies and garlic. Fry it well, when this mixture starts to brown, add coriander powder, salt and tomatoes. Fry a little more till this mixture starts to dry out and one can specks of oil on the masala. If you are using fresh tomatoes, the tomatoes should be all mushy at this stage. In case the masala starts sticking to the pan, you can add 2-3 Tbsps. of water to it and stir well. Next add the kidney beans and the water. Close the pressure cooker. Keep the gas on high flame till you can hear the pressure being built up (approximately 2-3 minutes), then reduce the flame to medium low. I tend to cook until I hear 4 whistles (approximately 30 minutes).

When the pressure cooker can be safely opened, open it and check the salt. Add more if needed. If the curry is dry, one can add some warm water to the rajma or add plain water and heat the gravy well again. Now add the Garam masala and Kasoori Methi. Its a good idea to crush the kasoori methi between your palms as you add to the curry. Add fresh cilantro leaves just before serving.

Rajma Chawal (Red kidney beans with Rice) is quite famous and pairs beautifully but the last time I made Naan with it and so the rice had few takers:). In fact, the best quality of rajma is that it can be paired well with almost anything………roti, parantha, tortilla, bread…………:) Save leftovers in the refrigerator. This is ideal for freezing too, lasts a good couple of months in the Freezer and the taste remains the same. And yes, if you are short on kidney beans, by all means, add a potato to this recipe………..I sometimes do that just cause I want my mother’s rajma:)

nov-21.jpgEnjoy………Rajma

Posted in - Bay Leaf, - Turmeric, -Asafoetida, -Cinnamon, -Coriander, -Cumin seeds, -Garam Masala, -Garlic, -Ginger, -Green Chillies, -Kasoori Methi, -Onion, -Red Kidney Beans, -Tomato, -Vegetable Oil | Tagged: , , | 6 Comments »

Hot Hot from the oven……Pizza…….

Posted by vivnidhi on October 30, 2008

A very happy Deepavali to my readers!!  Had a fabulous festival of lights, cooking for Diwali was a very satisfying experience this year with just a  few hitches..:)

As I had not tried this month’s Daring Bakers Challenge early enough this month, I am a day late in posting this month. This month’s challenge was hosted by the benevolent Rosa of Rosa’s Yummy Yums. This challenge is also a tribute to the memory of Sher of What Did you Eat who passed away suddenly in July. She was to host this month’s challenge along with Rosa and Glenna of a Fridge full of Food.

Here are the pizzas I made up without much pre-planning.

garden100_2580

Garden veggie pizza with Paneer

peethi100_2582

Olives, spicy lentils, paneer and cilantro Pizza

The main thing is the pizza base.

The Recipe:

EQUIPMENT: Stand mixer with paddle and dough hook attachments (optional, see recipe), cooking thermometer, baking sheet, parchment paper, cooking oil, plastic wrap, pizza peel/scraper, pizza stone or pan.

RECIPE SOURCE: “The Bread Baker’s Apprentice: Mastering The Art of Extraordinary Bread” by Peter Reinhart. Ten Speed Press, Berkeley, CA. Copyright 2001. ISBN-10: 1-58008-268-8, ISBN-13: 978-158008-268-6.

***************

~ BASIC PIZZA DOUGH ~

Original recipe taken from “The Bread Baker’s Apprentice” by Peter Reinhart.

Makes 6 pizza crusts (about 9-12 inches/23-30 cm in diameter).

Ingredients:

4 1/2 Cups (20 1/4 ounces/607.5 g) Unbleached high-gluten (%14) bread flour or all purpose flour, chilled – FOR GF: 4 ½ cups GF Flour Blend with xanthan gum or 1 cup brown rice flour, 1 cup corn flour, 1 cup oat flour, 1 ½ cup arrowroot, potato or tapioca starch + 2 tsp xanthan or guar gum

1 3/4 Tsp Salt

1 Tsp Instant yeast – FOR GF use 2 tsp

1/4 Cup (2 ounces/60g) Olive oil or vegetable oil (both optional, but it’s better with)

1 3/4 Cups (14 ounces/420g or 420ml) Water, ice cold (40° F/4.5° C)

1 Tb sugar – FOR GF use agave syrup

Semolina/durum flour or cornmeal for dusting

DAY ONE

Method:

1. Mix together the flour, salt and instant yeast in a big bowl (or in the bowl of your stand mixer).

2. Add the oil, sugar and cold water and mix well (with the help of a large wooden spoon or with the paddle attachment, on low speed) in order to form a sticky ball of dough. On a clean surface, knead for about 5-7 minutes, until the dough is smooth and the ingredients are homogeneously distributed. If it is too wet, add a little flour (not too much, though) and if it is too dry add 1 or 2 teaspoons extra water.

NOTE: If you are using an electric mixer, switch to the dough hook and mix on medium speed for the same amount of time.The dough should clear the sides of the bowl but stick to the bottom of the bowl. If the dough is too wet, sprinkle in a little more flour, so that it clears the sides. If, on the contrary, it clears the bottom of the bowl, dribble in a teaspoon or two of cold water.

The finished dough should be springy, elastic, and sticky, not just tacky, and register 50°-55° F/10°-13° C.

Or

2. FOR GF: Add the oil, sugar or agave syrup and cold water, then mix well (with the help of a large wooden spoon or with the paddle attachment, on low speed) in order to form a sticky ball of dough.

3. Flour a work surface or counter. Line a jelly pan with baking paper/parchment. Lightly oil the paper.

4. With the help of a metal or plastic dough scraper, cut the dough into 6 equal pieces (or larger if you want to make larger pizzas).

NOTE: To avoid the dough from sticking to the scraper, dip the scraper into water between cuts.

5. Sprinkle some flour over the dough. Make sure your hands are dry and then flour them. Gently round each piece into a ball.

NOTE: If the dough sticks to your hands, then dip your hands into the flour again.

6. Transfer the dough balls to the lined jelly pan and mist them generously with spray oil. Slip the pan into plastic bag or enclose in plastic food wrap.

7. Put the pan into the refrigerator and let the dough rest overnight or for up to thee days.

NOTE: You can store the dough balls in a zippered freezer bag if you want to save some of the dough for any future baking. In that case, pour some oil(a few tablespooons only) in a medium bowl and dip each dough ball into the oil, so that it is completely covered in oil. Then put each ball into a separate bag. Store the bags in the freezer for no longer than 3 months. The day before you plan to make pizza, remember to transfer the dough balls from the freezer to the refrigerator.

DAY TWO

8. On the day you plan to eat pizza, exactly 2 hours before you make it, remove the desired number of dough balls from the refrigerator. Dust the counter with flour and spray lightly with oil. Place the dough balls on a floured surface and sprinkle them with flour. Dust your hands with flour and delicately press the dough into disks about 1/2 inch/1.3 cm thick and 5 inches/12.7 cm in diameter. Sprinkle with flour and mist with oil. Loosely cover the dough rounds with plastic wrap and then allow to rest for 2 hours.

Or

8. FOR GF: On the day you plan to eat pizza, exactly 2 hours before you make it, remove the number of desired dough balls from the refrigerator. Place on a sheet of parchment paper and sprinkle with a gluten free flour. Delicately press the dough into disks about ½ inch/1.3 cm thick and 5 inches/12.7 cm in diameter. Sprinkle the dough with flour, mist it again with spray oil. Lightly cover the dough round with a sheet of parchment paper and allow to rest for 2 hours.

9. At least 45 minutes before making the pizza, place a baking stone on the lower third of the oven. Preheat the oven as hot as possible (500° F/260° C).

NOTE: If you do not have a baking stone, then use the back of a jelly pan. Do not preheat the pan.

10. Generously sprinkle the back of a jelly pan with semolina/durum flour or cornmeal. Flour your hands (palms, backs and knuckles). Take 1 piece of dough by lifting it with a pastry scraper. Lay the dough across your fists in a very delicate way and carefully stretch it by bouncing it in a circular motion on your hands, and by giving it a little stretch with each bounce. Once the dough has expanded outward, move to a full toss.

Or

10. FOR GF: Press the dough into the shape you want (about 9-12 inches/23-30 cm in diameter – for a 6 ounces/180g piece of dough).

NOTE: Make only one pizza at a time.

During the tossing process, if the dough tends to stick to your hands, lay it down on the floured counter and reflour your hands, then continue the tossing and shaping.

In case you would be having trouble tossing the dough or if the dough never wants to expand and always springs back, let it rest for approximately 5-20 minutes in order for the gluten to relax fully,then try again.

You can also resort to using a rolling pin, although it isn’t as effective as the toss method.

11. When the dough has the shape you want (about 9-12 inches/23-30 cm in diameter – for a 6 ounces/180g piece of dough), place it on the back of the jelly pan, making sure there is enough semolina/durum flour or cornmeal to allow it to slide and not stick to the pan.

Or

11. FOR GF: Lightly top it with sweet or savory toppings of your choice.

12. Lightly top it with sweet or savory toppings of your choice.

Or

12. FOR GF: Place the garnished pizza on the parchment paper onto the stone in the oven or bake directly on the jelly pan. Close the door and bake for about 5-8 minutes.

NOTE: Remember that the best pizzas are topped not too generously. No more than 3 or 4 toppings (including sauce and cheese) are sufficient.

13. Slide the garnished pizza onto the stone in the oven or bake directly on the jelly pan. Close the door and bake for abour 5-8 minutes.

Or

13. FOR GF: Follow the notes for this step.

NOTE: After 2 minutes baking, take a peek. For an even baking, rotate 180°.

If the top gets done before the bottom, you will need to move the stone or jelly pane to a lower shelf before the next round. On the contrary, if the bottom crisps before the cheese caramelizes, then you will need to raise the stone or jelly.

14. Take the pizza out of the oven and transfer it to a cutting board or your plate. In order to allow the cheese to set a little, wait 3-5 minutes before slicing or serving.

garden100_2580

Garden Veggie Pizza with Paneer:

  • Tomato 1 sliced thin
  • Shallots 2 sliced
  • Garlic 2 cloves minced
  • Ginger 1/2 inch piece minced
  • Roasted Red Bell Pepper 1/2 sliced
  • Paneer 1/4 cup sliced
  • Sea Salt 2 tsp.
  • Chat masala 1/4 tsp.
  • Cilantro leaves 10-12 for garnish

Since sauce and toppings both were a MUST according to the rules…………my sauce for this was a very unusual one………if it can actually be called a sauce;)

Mix ginger, garlic and tomatoes. Add salt and let the whole thing sweat for 5-10 minutes. After we have some liquid in the mixture…….this becomes our sauce;). Spread this on the pizza base. Add shallots, roasted bell pepper and paneer.

In the 500F oven for 8 minutes. Remove from oven and garnish with cilantro leaves immediately and sprinkle with chat masala.

The result was absolutely delicious:) A great quick fix if you have pizza base ready.

Note: Chat masala can be bought at most Indian Stores. It is basically a tangy spicy mix.

Olives, spicy lentils, Paneer and cilantro Pizza

Kaheen ka eenth, kaheen ka roda………..Bhanumati ne Kumbha joda

(bricks from somewhere and pebbles from somewhere else, Bhanumati somehow made a house………….)

Diwali had some leftovers too:) Made Kachoris for Diwali and the (peethi) spicy lentils were left. They are a big favorite in my house as you must have seen in my previous posts:) Peethi Bhara Daal ka Dulha, Peethi ki Paronthi……….;)

peethi100_2582

The Recipe:

Spicy Lentils:

  • Urad daal/ split black lentils without skin 1 cup
  • Ginger 2″ piece chopped fine or grated
  • Oil 2 tsp.
  • Green chili 2 chopped fine
  • Red chili powder 1 tsp.
  • fennel seeds/saunf 1 Tbsp.
  • cumin seeds/jeera 2 tsp.
  • Fenugreek seeds/methi 1/2 tsp.
  • Garam masala 1 tsp.
  • coriander powder/dry cilantro powder/dhaniya 1 Tbsp.
  • Asafoetida/heeng powdered 1/2 tsp.
  • Dry mango powder/Amchur 2 Tbsp.
  • Salt to taste
  • Trader Joe’s Mixed Olive Bruschetta
  • Paneer 1/4 cup crumbled
  • Cilantro leaves 10-12 for garnish

For the spicy lentils, the lentils, ginger and green chillies are ground coarsely. They are then fried in oil with the rest of the spices.  These can be stored in the refrigerator for upto two weeks.

Bake the pizza crust for 5 minutes. Remove from oven. Spread the bruschetta mix , top with spicy lentils and paneer. In  the oven again for 6 minutes.

Out form the oven and garnish with cilantro leaves.

The son just loved this one. This is a strange combination but delicious………..trust me:)

By the way, here’s the snap of me trying to toss the dough. All rules satisfied;) I don’t think I know how to toss the dough at all but it was fun.

toss100_2578

That’s my flying Saucer……..

Thank you for a fun challenge Rosa. Have you checked other Daring Bakers’ posts on pizza as yet or not?? Don’t be late like me;)

Expenditure:

  • Bread Flour $ 2.68 ………from Kroger…………lots left
  • Paneer $ 4.49 …………from Indian Store ………………lots left
  • Total ………….$ 7.17 …………not bad at all:)

Posted in - Bread Flour, -Asafoetida, -Cilantro, -Coriander, -Cumin seeds, -Dry Mango Powder, -Fennel seeds, -Fenugreek seeds, -Garlic, -Ginger, -Olive Oil, -Olives, -Red Bell Pepper, -Red chili powder, -Tomato, Daring Bakers, Paneer, Shallots, Sugar, Yeast | Tagged: , , , | 6 Comments »

Spicy Garlic Vegetarian Sausage Bread

Posted by vivnidhi on July 20, 2008

t100_2111

Can’t wait… Pieces disappearing from behind : Spicy Garlic Vegetarian Sausage Bread

Necessity is the mother of invention and creativity becomes a necessity if resources are limited. This is especially true in my kitchen.

I have to have the plan of dinner in my mind by late afternoon otherwise things start falling apart:) . With a young boy and a baby together, often most other plans end up only being in my mind. Dinner, lunch…….cooking is the first plan I execute cause not only is food important for all of us, cooking is a big stress buster for me. Couple of days back, I went grocery shopping without the dinner cooked at home. Returned home late and with an unplanned impulsive buy…………

100_2106

Sesame Semolina Bread

Yes, artisan breads are a big weakness for the husband and me. We bought 2 loaves cause we shop at Sam’s Club:) . These breads do not have a lot of shelf life and best consumed the day you buy. One of them could be frozen but something had to be done the other one. So, what did I have at home? Boiled garbanzo beans (for hummus) and I couldn’t see much else. The refrigerator had tomatoes.

So, the freezer came to rescue. People avoiding boca burgers …convert! Out of the freezer came boca burgers and spinach. The daughter and husband had given me 35-40 mins for coming up with something after which they would both be tired of each other and …………so, I had to just start cooking:) .Finally, what I made had us licking our fingers, scratching the aluminum foil the bread was cooked on and……fighting for leftovers the next day.

Here it is …..The Recipe:

  • Hearty artisan bread sesame semolina /Italian/French loaf

For the spinach layer:

  • Chopped Frozen Spinach 1 cup/Fresh spinach 1 1/2 cups chopped
  • Garlic 2 big cloves minced
  • Olive oil  1 tsp.
  • Salt 1/8 tsp.

For the spicy sausage layer:

  • Frozen Boca Burger/ Garden Burger 2 cooked OR Nutrela granules soaked in hot water and drained.
  • Olive oil 2 tsp.
  • Cumin powder/Jeera powder 1 Tbsp.
  • Turmeric 1/2 tsp.
  • Dry coriander powder / Dhaniya 2 Tbsp.
  • Garam Masala/ Curry powder 2 tsp.
  • Chhole masala 1 tsp. (optional)
  • Garlic 2 big cloves minced
  • Ginger 2″ piece minced
  • Tomato (big) 1 chopped small
  • Yogurt 1 Tbsp.
  • Garbanzo Beans/ Chickpeas 1 cup (soaked in water for 6 hours and boiled or from a can)
  • Salt to taste
  • Tomatoes 2 cut in slices

For the oil & vinegar :

  • Olive oil 1/4 cup
  • Balsamic Vinegar 1/4 cup
  • Garlic 1 minced
  • Sugar 1 tsp.
  • Basil 1/2 tsp.
  • Oregano 1/4 tsp.

In a saucepan, heat the oil and add 2 cloves minced garlic. Add spinach and saute for a minute on medium heat. When the spinach is wilted, remove from pan and set aside.

Cook the burgers either in the microwave or on a griddle. I made a slit in the burger and cooked for 2 minutes, turned and cooked for 1 minute in the microwave.  Remove from the microwave and cut in very small pieces when cool enough to be handled. Nutrela can be substituted for this though the boca burger tastes great! I have heard there is something called boca sausage too, perhaps that can be substituted too.

100_2105

Chopped ginger, garlic, boca burger and cooked spinach and garlic

In the same saucepan, heat oil and add cumin seeds powder ,dry coriander powder, turmeric and garam masala. Once these get mixed with oil, add ginger and garlic. The ginger adds a lot of flavor. Next add the chopped tomatoes and yogurt. Mix well and keep stirring on medium heat till the mixture starts to dry out a little. Add garbanzo beans and the chopped boca burger. Add Chhole/ Chana masala at this point. Cover and cook for 5 more minutes on low heat.  Leftover Chhole would also taste good, I think. Mash the garbanzo bean, veggie sausage mixture a little and turn off the gas.

Mix the oil and vinegar ingredients and set aside.

Preheat the oven to 400 degrees F. Cut the bread in half lengthwise and then five slices of each length. It helps to cut the bread in bite size pieces so it becomes easier to eat.

First layer the pieces with the spinach. Next comes the garbanzo sausage layer topped with sliced tomatoes. Lastly top the slices with the oil and vinegar mixture.

Bake in the oven for 10 to 15 minutes till the sides become crisp. Out comes a very delicious bread. If one remotely likes curry, this is going to be a hit! These are very addictive too!!

I should mention the recipe which was the inspiration for this recipe. And that is Papa Felicos Garlic Sausage Bread from http://allrecipes.com/.

100_2107

Spicy Garlic Vegetarian Sausage Bread

This recipe is off to the wonderful Mother Daughter duo of Equal Opportunity Kitchen for their image Tried, Tested and True…Take Two event . Their event has an Organ Donation cause attached to it as well. There is spice in this recipe but its quite a healthy recipe full of protein and fiber and uses olive oil. This event is being judged by Christine Cushing , just the fact  that a professional chef will look at my recipe and photograph is making me jittery. But, anyway, this does please anyone who tastes it.

So, fellow bloggers, if you haven’t posted for this event, hurry up, bring your best recipe out , the deadline’s tomorrow!

Oh, I forgot………I better not, my two year old’s message to the readers is:

ZZZZZ1111         QQQQQQQQQQQQQQQQQ222222222222

Please go ahead and interpret as you like:) .

Posted in - Turmeric, -Basil, -Coriander, -Cumin seeds, -Garbanzo Beans, -Garlic, -Ginger, -Oregano, -Spinach, -Tomato, -Yogurt | Tagged: , , , | 6 Comments »

American Chop Suey

Posted by vivnidhi on July 14, 2008

2July_68

The “AMERICAN CHOP SUEY”

Almost all restaurants serving Chinese food in India boast of the “American Chop Suey”.

American Chop Suey (also American Goulash, Chili-Macaroni, Chili-Mac, Mac ‘n Beef, Macaroni and Beef, or simply Macaroni) is an American pasta dish. The preferred name and recipe varies by region, for example, the name American chop suey is most prevalent in New England. Commercial preparations of this dish are commonly marketed as Macaroni and Beef. Classic American chop suey consists of elbow macaroni and bits of cooked ground beef with sautéed onions and green peppers in a thick tomato-based sauce. Though this decidedly American comfort food is clearly influenced by Italian-American cuisine, it is known as a chop suey because it is a sometimes-haphazard hodgepodge of meat and vegetables.………….source Wikipedia

Food historians generally agree that chop suey as we know it was invented in the United States in the mid-1800’s, possibly by one of the Cantonese immigrants who flooded California searching for work. Constrained by the lack of Asian vegetables, and trying to produce a Chinese dish palatable to westerners, a Cantonese cook stir-fried whatever vegetables were handy, added some meat or chicken, and served the finished product on a plate of steamed rice. He christened his creation, chop suey, which is the English pronunciation of the Cantonese words “tsap seui” (“tsa-sui” in Mandarin) which means “mixed pieces”. …………source Chinesefood.about.com

Anyway, American chop suey is quite a favorite of a lot of people and its quite wholesome and delicious too.  Here is a recipe that I learnt from a professional cook Mrs. Minocha in Aurangabad , India.

The recipe:  (4 servings)

For the Noodles:

  • Maggi/Ramen/Mama noodles  2 Packs (200 grams)

For the Sauce:

  • Garlic 7 cloves (minced)
  • Tomato sauce/Ketchup 1 cup
  • Soya Sauce 1 tsp.
  • Red chilli powder 1/2 tsp.
  • Sugar 1 1/2 Tbsp.
  • oil 1 tsp.
  • Corn starch 1 Tbsp. (called corn flour in India)
  • salt to taste

For the Vegetables:

  • Onion 1 sliced lengthwise
  • Green Bell Pepper/Capsicum 1 sliced thin
  • Cauliflower 3 Flowerets chopped
  • Carrots 2 sliced like matchsticks
  • Green Beans 7-8 french cut(lengthwise)
  • Soya sauce 1 Tbsp.
  • Crushed Black Pepper 1/2 tsp.
  • Oil 1 Tbsp.
  • Salt to taste

The actual recipe called for Mama noodles first boiled in salted water and then deep fried. I used Maggi masala Atta (whole wheat) noodles (available in Indian grocery stores) . Ramen noodles can easily be substituted. I did not use the masala sachet i.e. the seasoning. I sprayed the noodles with oil spray and put them in a preheated oven. 400 degrees F for 10 minutes. Make sure to keep moving them every 3-4 minutes to avoid them getting burnt.

July_66

Noodles on the baking tray

For the Sauce: Heat the oil and fry the garlic for 1 minute.  Add tomato sauce, red chilli powder, salt , soya sauce and sugar. Add 1- 1/2 cups water. Let the whole thing come to a boil. Mix the corn starch with 1 Tbsp. cold water and add it to the sauce. Reduce heat to low and cook for 1 more minute. Orange color is added in Indian restaurants but I have never felt the need to do so.

For the vegetables: First par boil cauliflower in a little salted water. I used the microwave for 1 minute. Heat oil in a wok and fry onion for a minute. I use high flame for the vegetables. Next add the capsicum and cabbage. Next add carrot, green beans and cauliflower. Mix well. Next add salt, soya sauce and crushed black pepper . Mix well and turn off the heat. The key is to keep the vegetables quite crunchy.

July_67

Baked noodles, sweet & sour sauce and Chop Suey Vegetables

To assemble: First make a layer of the vegetables. Add fried noodles on top and pour the hot sauce on top of the noodles. Indianized American Chop Suey is Ready!!

July_68

Dinner’s ready. The crunchy noodles had to be hidden cause the son couldn’t keep his hands off them!

This Indian-Chinese “American Chop Suey” (Shouldn’t we be thankful it does not involve more countries;) ) is headed to DK of DK’s Culinary Bazaar for AWED Chinese. This is the main course……….a complete meal in itself. Hence it is also headed to Archana of Archana’s Kitchen for Monthly One dish Meal event. Enjoy!!

Preparation time for this would be about 20 minutes and cooking time would be 25 minutes.

Posted in -Cauliflower, -Garlic, -Green Beans, -Green Bell Pepper, -Onion, -Tomato Sauce, -Whole wheat flour | Tagged: , | 25 Comments »

Baked Rice Wrapper Rolls with Peanut Wasabi Sauce

Posted by vivnidhi on June 24, 2008

100_1940

Baked Rice Wrapper Rolls with Peanut Wasabi Sauce

No, I have not told you the entire recipe in the title:). More to it;) , I am telling you…..you will have to read the whole post for the recipe. OK, on to the topic, fresh spring roll wrappers are widely available at Oriental stores. These are predominantly Vietnamese & Thai, I believe. These use the rice based wrapper (Banh Trang: Vietnamese) and it is served fresh and generally not fried. There is a tapioca variety as well and well! I ended up with one which had both rice and tapioca starch:). So these rice wrappers do not need a lot of cooking , just slip in hot water and they are ready. 2 good recipes I found for them are Vegetarian and with shrimp. BUT, in our house, the husband is not particularly fond of the fresh ones.

So, now I had rice wrappers AND Wasabi paste ( about to expire in August, cause I got it at Thanksgiving;) ) and I had to make something before all of this went waste…………I KNOW. Then Kay announced Think Spice, think Wasabi event, brainchild of Sunita. I knew I was going to make something sooner than later. My first stint with wasabi were the wasabi peas which I fell in love with. Then I first used them in these won tons…………of course mine were filled with Tofu and the Husband’s were imitation crabmeat.

I have not had the courage to make sushi yet……..looking forward to some great ideas at the Think spice event. So, to make full use of the stock in my pantry, I baked the rice wrapper rolls and made a sauce with wasabi.They turned out deliciously crunchy , heavenly with the peanut wasabi sauce.

The Recipe:

For the Rice Wrapper Rolls:

  • Rice wrappers 25 sheets
  • Nutrela granules 1 cup, soaked in salted water and drained
  • Garlic 2 cloves minced
  • Ginger 1″ piece minced
  • Green beans 1/2 cup french cut or julienned
  • Carrot 1 cut lengthwise matchsticks
  • Red bell pepper 1 julienned
  • Napa cabbage 1/4 cup sliced thin
  • Cilantro/ coriander leaves 1/4 cup
  • Oil 2 tsp.
  • Soya sauce 1 Tbsp.
  • Rice Wine Vinegar 1 Tbsp.
  • Black pepper powder 1 tsp.
  • Salt to taste

For the Wasabi Peanut Sauce:

  • Garlic 2 cloves minced
  • Peanut butter 2 Tbsp.
  • Soya Sauce 3 Tbsp.
  • Sugar 1 tsp.
  • Wasabi 2 tsp.
  • Sambal Oelek/ red chili paste 1 tsp.
  • Water 2 Tbsp.

Since I made this recipe up, the vegetables can be varied as per one’s liking.  Heat the oil in a wok and add ginger and garlic. Saute for 30 seconds and then add the carrot, green beans and bell pepper. Saute further for a couple of minutes and then add cabbage. Stir fry further for a minute and then add the rest of the ingredients. Mix well. Preheat the oven to  400 degrees F.

Heat 2 cups of water in  pan and put off the heat. When the water temperature becomes tolerable, dip each rice wrapper in it , turn and dip the side you were holding and spread it on a plate.

100_1936 100_1937

Then put  about 1 Tbsp of filling and fold and roll as shown below.

100_1938 100_1939

Spray a little oil on aluminum foil and place the rolls on them. Spray some oil on the rolls as well and they all go in the oven. Bake for about 15 minutes and then broil for another 2-3 minutes. When they are crisp all over , take them out of the oven.

Mix all the sauce ingredients and the peanut wasabi sauce is ready. Tastes great with the rolls. In fact, the sauce is so good, tastes great on plain rice noodles or even boiled eggs.

This recipe is on its way to Sangeeth for the eat healthy….. protein rich event as well. Rice vermicelli could also be used in  the rolls but I chose nutrela cause it’s full of protein and delicious too.

Posted in -Cabbage, -Carrot, -Cilantro, -Garlic, -Ginger, -Green Beans, -Red Bell Pepper, -Wasabi, Rice | Tagged: , , | 7 Comments »

Here’s Hot and Sour Soup

Posted by vivnidhi on May 31, 2008

100_1762

This is a big favorite in  the house with “Indian Chinese” food. So, here’s a soup- Chinese but completely Desi. Credit for this recipe goes to Mrs. Minocha of Aurangabad, India who taught us to cook Indian Chinese food. A lot of my friends and I have learnt some good cooking from her.

The Recipe:

  • Green Bell Pepper 1 chopped coarse
  • Cabbage 1/2 cup chopped thin
  • carrots 2 cut into cubes
  • Green Beans chopped into 2 ” lengths 1/2 cup
  • cauliflower 2 flowerets broken into smaller pieces
  • garlic 6-8 cloves minced
  • Soya Sauce 4 Tbsp.
  • Vinegar 1 Tbsp.
  • sugar 1 tsp.
  • Black pepper powder 1/2 tsp.
  • Red chilli powder 1/2 tsp.
  • Cornstarch 3 Tbsp.
  • Vegetable Oil 1 tsp.
  • Spring onions 1 bunch chopped fine
  • Boiled egg whites 2 chopped (optional)
  • Salt to taste

100_1754

Getting ready for the soup

Heat the oil and fry garlic for a minute.

Add cauliflower, french beans and carrots. Fry a little more till they soften a wee bit.

Add red chili powder and 6 cups of water. Let the water come to a boil and then add soya sauce, sugar, vinegar, bell peppers and cabbage. Boil the soup for a couple of minutes more.

Lastly add spring onion and black pepper powder. Make a paste of cornstarch in cold water and and add to the soup. Taste for salt and vinegar. Add more if desired and serve hot.

Bow when you are praised;)

100_1763

The soup’s hot!!

I would like to send this as an entry to Eat Healthy – Fiber Rich, an event hosted by Sangeeth.

And yes, this is also my entry to Fortune Cooking Contest hosted by Nithu & Shriya. It is dedicated to my mother whose sun sign is cancer, hence she qualifies with the cauliflower entry and she loves the soup too.

Now, are there any other events missing my entries??

Posted in -Cabbage, -Carrot, -Cauliflower, -Garlic, -Green Beans, -Green Bell Pepper, -Spring Onions, -Tofu, Eggs | Tagged: , , | 5 Comments »

Indian Chinese Menu for the JIHVA

Posted by vivnidhi on May 31, 2008

100_1739

Bell Peppers, Tofu and a budding cook’s hand

In everyday Hindi, Jihva means tongue. This week, my jihva has been devoid of taste, thanks to a lingering cold. So, the jihva needed something really spicy to perk it up. And, this month’s VOW-JFI hosted by Pooja of The Creative Ideas calls for bell peppers. This is my entry for the two year completion of Jihva started by Indira of Mahanandi.

Excuse for me to cook up something Chinese (only in the US, I realized that there is an authentic Chinese also;) , otherwise our Desi Chinese was Chinese food to me:) ) I can’t think of “Indian Chinese” food without capsicums (bell peppers, got carried away to India again) So, tonight’s menu is Hot and sour soup, Chilli Tofu Fry and Rice!

Here’s Chili Tofu Fry for you. Well, I know you sort of make it too, but try this too……….oh please try it. Its good you know, its been experimented upon, its the best……….it is ………..try it please.

now what do you want me to beg…………

OK, people , try it if you feel like:)

The Recipe:

  • Tofu Extra Firm 3 slabs chopped in cubes
  • Green Bell Peppers 2 chopped lengthwise thin
  • Garlic 6 cloves minced
  • Spring Onions 4 chopped fine
  • Vegetable Oil 1 tsp.
  • Soya Sauce 4 Tbsp.
  • Black Pepper Powder 1/2 tsp.
  • sugar 1 Tbsp.
  • Cornstarch 1 Tbsp.

100_1748

All chopped up

Place the tofu pieces on a greased baking sheet and spray some on the tofu as well. Bake at 400 degrees F for about 10 minutes. Turn over and bake for 10 minutes more.

100_1753

Baked Tofu

Spread the julienned bell pepper on the baking tray and spray some oil on it too. Bake at 400 degrees F till they are crisp on the sides.

100_1755

Crispy bell pepper

Heat the oil and fry garlic till it turns light brown. I had to run around my son as he ran away with the spoon. So, mine were dark brown but that was fine too:)

Add 1-1/2 cups of water and increase the heat to high. Once the water starts boiling add soya sauce, sugar and tofu pieces. Next add bell peppers, spring onions and black pepper powder.

Make a solution of cold water and cornstarch.  Add to the tofu chilli fry and its ready! Best served immediately. OR the sauce can be made ready and then add the tofu and bell pepper and heat just before serving.

Tastes great with rice , though my son ate it with roti as his mother refused to make any other curry. The Husband was pleased, now what else do I want in life, huh?

100_1760

Tofu Chilli Fry is ready….now, will you try it…….please….

Posted in -Garlic, -Green Bell Pepper, -Spring Onions, -Tofu | Tagged: , | 4 Comments »

Dressing up the Dulha……….Bhara hua Daal ka Dulha Series…….Round 1:

Posted by vivnidhi on May 4, 2008

100_1588

Aloo Bhara Daal Ka Dulha

Our dulha is coming of age in my house (the daal ka dulha is being made so often). So, we thought we start dressing it up in various forms we know of and then decide the winning costume for our dear dulha:). Credit goes to my mother for all these recipes.

The first filling is of the evergreen potato. This dish is like spicy pierogies in lentil soup. This truly is a delicious combination. Our dear rustic dulha too can stand among the finest raviolis and pastas of the world when dressed up;)

The Recipe:

Initial tempering:

  • Oil 1/2 tsp
  • cumin seeds/Jeera 1/2 tsp.
  • turmeric powder/Haldi 1 tsp.

For Daal:

  • Toor Daal/Arhar daal/split yellow pigeon peas 2 cups
  • Water 6 cups
  • sugar 1 tsp
  • salt to taste

For Dulha:(This is the ratio for making roti dough.About 1/10th is used to make the dulhas in the daal given)

  • Whole wheat flour 4 cups
  • Water 1 3/4 cups
  • Salt (optional)

For Filling:

  • Potatoes 2 boiled and mashed
  • Ginger 1″ piece chopped fine or grated
  • Cilantro/coriander leaves a handful chopped fine
  • Green chili 1 chopped fine
  • Red chili powder 1 tsp.
  • Garam masala 1 tsp.
  • Dry mango powder/Amchur 1 Tbsp.
  • Asafoetida/heeng powdered 1 tsp.
  • Salt to taste
  • Onion 1/2 finely chopped (optional)
  • Garlic 1 clove finely chopped (optional)

Final tempering:

  • Oil (preferably ghee) 2 Tbsp.
  • Asafoetida/heeng powdered 1 tsp.
  • Cumin seeds 1 Tbsp .
  • Red chilli powder 2 tsp.

We begin as usual by making the daal or lentil soup in a pressure cooker. Heat oil and add the initial tempering. Once the cumin seeds are crackling, add the ingredients listed under daal and close the pressure cooker. Further details on making the daal can be found in my post Everyday daal.

100_1584

Filling Ingredients clockwise……potatoes, onions, garlic, ginger, asafoetida, red chili powder,dry mango powder, Garam masala, green chilies and salt………missing is cilantro leaves…

The most important part is our Dulha. Dulhas can be prepared while the daal is cooking. To prepare the potato for the filling, I like to pierce the potato with a fork, wet the potato well and bake it in the microwave.Boiling the potatoes in water causes them to get watery at times. Mix all the ingredients listed under filling and make small balls of the filling. Onions and garlic are optional, I like them, but the original recipe as made by our elders did not have onions or garlic. Make a thin flat round of the wheat dough. A drop of oil can be spread on the fingers and the dough while making the flat. Keep the filling in the flat and close it. Use the palm of the hand to flatten the filled round of the dough. Make as many dulhas as required.

100_1586

Potato filling and wheat dough balls

100_1587

Flattened uncooked dulhas

Heat the daal if made earlier. Make sure that the daal is hot when the dulhas are added to it in the pressure cooker. Give two more whistles to the cooker or let it simmer for at least half an hour if one is not using a pressure cooker. Make the final tempering in a separate pan. When the cumin seeds start crackling, add it to the daal. Aloo (potato) bhara daal ka dulha is ready to be served. It can be eaten alone or with roti and some vegetables also.

100_1588

So, how does the bhara hua daal ka dulha look?

Posted in -Arhar (Toor) Dal, -Garlic, -Ginger, -Onion, -Potatoes, -Whole wheat flour, Daal, Flours, Spices | Tagged: , | 6 Comments »