 presents
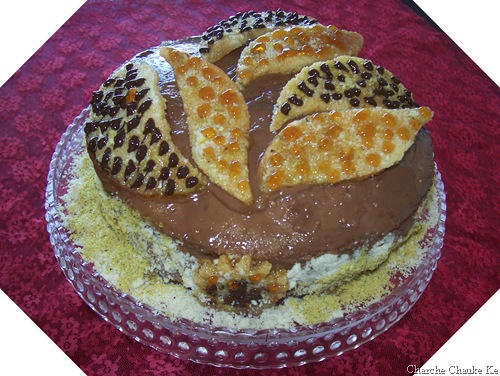
My bejeweled Dobos Torte
The August 2009 Daring Bakers’ challenge was hosted by Angela of A Spoonful of Sugar and Lorraine of Not Quite Nigella. They chose the spectacular Dobos Torte based on a recipe from Rick Rodgers’ cookbook Kaffeehaus: Exquisite Desserts from the Classic Caffés of Vienna, Budapest, and Prague.
So, what is the Dobos Torta (or Torte)?
The Dobos Torta is a five-layer sponge cake, filled with a rich chocolate buttercream and topped with thin wedges of caramel. (You may come across recipes which have anywhere between six and 12 layers of cake; there are numerous family variations!) It was invented in 1885 by József C. Dobos, a Hungarian baker, and it rapidly became famous throughout Europe for both its extraordinary taste and its keeping properties. The recipe was a secret until Dobos retired in 1906 and gave the recipe to the Budapest Confectioners’ and Gingerbread Makers’ Chamber of Industry, providing that every member of the chamber can use it freely.
Equipment
- 2 baking sheets
- 9” (23cm) springform tin and 8” cake tin, for templates
- mixing bowls (1 medium, 1 large)
- a sieve
- a double boiler (a large saucepan plus a large heat-proof mixing bowl which fits snugly over the top of the pan)
- a small saucepan
- a whisk (you could use a balloon whisk for the entire cake, but an electric hand whisk or stand mixer will make life much easier)
- metal offset spatula
- sharp knife
- a 7 1/2” cardboard cake round, or just build cake on the base of a springform tin.
- piping bag and tip, optional
Prep times
- Sponge layers 20 mins prep, 40 mins cooking total if baking each layer individually.
- Buttercream: 20 mins cooking. Cooling time for buttercream: about 1 hour plus 10 minutes after this to beat and divide.
- Caramel layer: 10-15 minutes.
- Assembly of whole cake: 20 minutes
Sponge cake layers
- 6 large eggs, separated, at room temperature
- 1 1/3 cups (162g) confectioner’s (icing) sugar, divided
- 1 teaspoon (5ml) vanilla extract
- 1 cup plus 2 tablespoons (112g) sifted cake flour (SUBSTITUTE 95g plain flour + 17g cornflour (cornstarch) sifted together)
- pinch of salt
Chocolate Buttercream
- 4 large eggs, at room temperature
- 1 cup (200g) caster (ultrafine or superfine white) sugar
- 4oz (110g) bakers chocolate or your favorite dark chocolate, finely chopped
- 2 sticks plus 2 tablespoons (250g) unsalted butter, at room temperature.
Caramel topping
- 1 cup (200g) caster (superfine or ultrafine white) sugar
- 12 tablespoons (180 ml) water
- 8 teaspoons (40 ml) lemon juice
- 1 tablespoon neutral oil (e.g. grapeseed, rice bran, sunflower)
Finishing touches
- a 7” cardboard round
- 12 whole hazelnuts, peeled and toasted
- ½ cup (50g) peeled and finely chopped hazelnuts
Directions for the sponge layers:
NB. The sponge layers can be prepared in advance and stored interleaved with parchment and well-wrapped in the fridge overnight.
1.Position the racks in the top and centre thirds of the oven and heat to 400F (200C).
2.Cut six pieces of parchment paper to fit the baking sheets. Using the bottom of a 9″ (23cm) springform tin as a template and a dark pencil or a pen, trace a circle on each of the papers, and turn them over (the circle should be visible from the other side, so that the graphite or ink doesn’t touch the cake batter.)
3.Beat the egg yolks, 2/3 cup (81g) of the confectioner’s (icing) sugar, and the vanilla in a medium bowl with a mixer on high speed until the mixture is thick, pale yellow and forms a thick ribbon when the beaters are lifted a few inches above the batter, about 3 minutes. (You can do this step with a balloon whisk if you don’t have a mixer.)4.In another bowl, using clean beaters, beat the egg whites until soft peaks form. Gradually beat in the remaining 2/3 cup (81g) of confectioner’s (icing)sugar until the whites form stiff, shiny peaks. Using a large rubber spatula, stir about 1/4 of the beaten whites into the egg yolk mixture, then fold in the remainder, leaving a few wisps of white visible. Combine the flour and salt. Sift half the flour over the eggs, and fold in; repeat with the remaining flour.
5.Line one of the baking sheets with a circle-marked paper. Using a small offset spatula, spread about 3/4cup of the batter in an even layer, filling in the traced circle on one baking sheet. Bake on the top rack for 5 minutes, until the cake springs back when pressed gently in the centre and the edges are lightly browned. While this cake bakes, repeat the process on the other baking sheet, placing it on the centre rack. When the first cake is done, move the second cake to the top rack. Invert the first cake onto a flat surface and carefully peel off the paper. Slide the cake layer back onto the paper and let stand until cool. Rinse the baking sheet under cold running water to cool, and dry it before lining with another parchment. Continue with the remaining papers and batter to make a total of six layers. Completely cool the layers. Using an 8″ springform pan bottom or plate as a template, trim each cake layer into a neat round. (A small serrated knife is best for this task.)
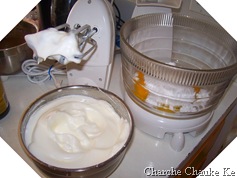
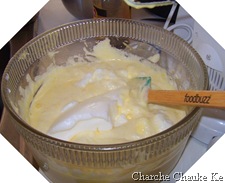
Whipped egg whites and yellows whipped with sugar
Divide the egg whites in 4 parts
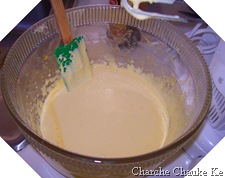
First pic: first part of egg whites mixed in Second pic: Folding in of the last part of egg white
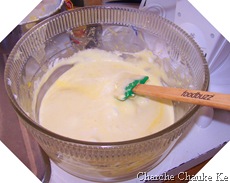
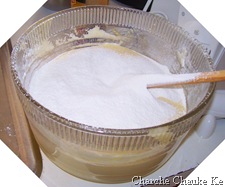
First pic : Folding in flour & second pic: 3/4 cup cake batter in a spring form pan
Directions for the chocolate buttercream:
NB. This can be prepared in advance and kept chilled until required.
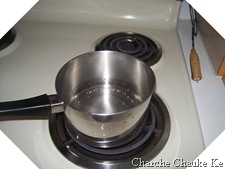
1.Prepare a double-boiler: quarter-fill a large saucepan with water and bring it to a boil.
2.Meanwhile, whisk the eggs with the sugar until pale and thickened, about five minutes. You can use a balloon whisk or electric hand mixer for this.
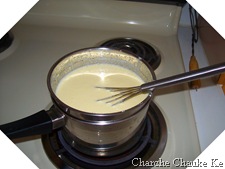
3.Fit bowl over the boiling water in the saucepan (water should not touch bowl) and lower the heat to a brisk simmer. Cook the egg mixture, whisking constantly, for 2-3 minutes until you see it starting to thicken a bit. Whisk in the finely chopped chocolate and cook, stirring, for a further 2-3 minutes.
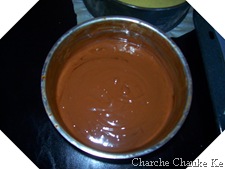
4.Scrape the chocolate mixture into a medium bowl and leave to cool to room temperature. It should be quite thick and sticky in consistency.
5.When cool, beat in the soft butter, a small piece (about 2 tablespoons/30g) at a time. An electric hand mixer is great here, but it is possible to beat the butter in with a spatula if it is soft enough. You should end up with a thick, velvety chocolate buttercream. Chill while you make the caramel topping.
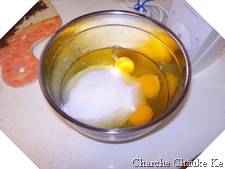
Chopped chocolate and eggs with sugar
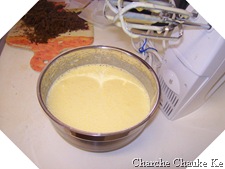
Whipped eggs and boiling water ready for cooking
Cooking buttercream on double boiler and the finished product
Directions for the caramel topping:
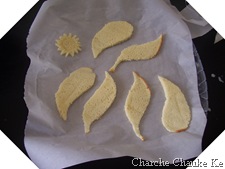
1.Choose the best-looking cake layer for the caramel top. To make the caramel topping: Line a jellyroll pan with parchment paper and butter the paper. Place the reserved cake layer on the paper. Score the cake into 12 equal wedges. Lightly oil a thin, sharp knife and an offset metal spatula.
2.Stir the sugar, water and lemon juice in a small saucepan. Bring to a boil over a medium heat, stirring often to dissolve the sugar. Once dissolved into a smooth syrup, turn the heat up to high and boil without stirring, swirling the pan by the handle occasionally and washing down any sugar crystals on the sides of the pan with a wet brush until the syrup has turned into an amber-colored caramel.
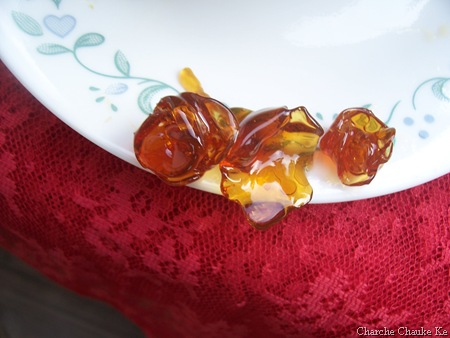
3.The top layer is perhaps the hardest part of the whole cake so make sure you have a oiled, hot offset spatula ready. I also find it helps if the cake layer hasn’t just been taken out of the refrigerator. I made mine ahead of time and the cake layer was cold and the toffee set very, very quickly—too quickly for me to spread it. Immediately pour all of the hot caramel over the cake layer. You will have some leftover most probably but more is better than less and you can always make nice toffee pattern using the extra to decorate. Using the offset spatula, quickly spread the caramel evenly to the edge of the cake layer. Let cool until beginning to set, about 30 seconds. Using the tip of the hot oiled knife (keep re-oiling this with a pastry brush between cutting), cut through the scored marks to divide the caramel layer into 12 equal wedges. Cool another minute or so, then use the edge of the knife to completely cut and separate the wedges using one firm slice movement (rather than rocking back and forth which may produce toffee strands). Cool completely.
Preparation for caramel layer
Assembling the cake
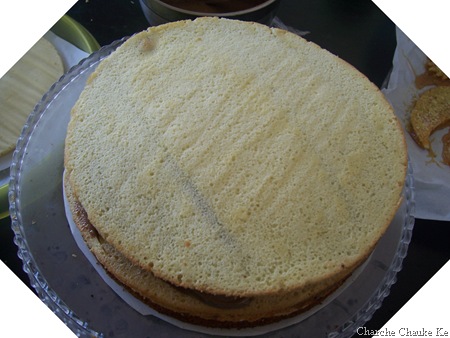
I brushed hazelnut coffee(unsweetened) on the layers as I found the buttercream a tad too sweet
Assembling the Dobos
1.Divide the buttercream into six equal parts.
2.Place a dab of chocolate buttercream on the middle of a 7 1/2” cardboard round and top with one cake layer. Spread the layer with one part of the chocolate icing. Repeat with 4 more cake layers. Spread the remaining icing on the sides of the cake.
3.Optional: press the finely chopped hazelnuts onto the sides of the cake.
4.Propping a hazelnut under each wedge so that it sits at an angle, arrange the wedges on top of the cake in a spoke pattern. If you have any leftover buttercream, you can pipe rosettes under each hazelnut or a large rosette in the centre of the cake. Refrigerate the cake under a cake dome until the icing is set, about 2 hours. Let slices come to room temperature for the best possible flavor.
I used ground cashews and pistachios for topping. I even topped the caramel layer with these nut powders and then caramel or chocolate on top.
Well! It’s been cut
Here’s a slice…..The top layers are our favorite……:-))……you won’t like it if you do not like sticky, chewy….the sonny and I do :-))
My favorite picture : Just playing with caramel
Verdict :
The cake overall tasted pretty good. I am not sure if I will make it again.
Too many eggs 🙂 . The sponge layers were easy to work with but would not have tasted good without some liquor brushed on it.
The buttercream is quick and easy but again I found it less firm than other buttercreams I have worked with. I don’t think I would make it again.
A lot of daring bakers did not like the lemony sticky chewy caramel. I LOVED it. The son and I can’t get enough of it. Of course I let him eat it cause I should not ….right 😉 . I will make this a lot of times 🙂 .
I may have made better components of this cake but all assembled together and chilled well, we all really enjoyed the cake. Thanks a lot Angela and Lorraine.
Expenditure:
Bakers semisweet chocolate (8 oz.) …….from Walmart…………………$2.88
Butter (1 lb.)………………………….from Walmart………………….$1.98
——————————————————————————————————-
Total…………………………………………………………………….$4.86
Not bad at all for such a delicious end product. Do not forget to check out the other daring bakers on the blogroll. Outstanding cakes….you will be surprised.







 presents:


