चर्चे चौके के Charche Chauke Ke

Hey! Join in the Kitchen Gossip!!

Archive for the ‘-Semisweet Chocolate’ Category

Daring Bakers 2010 : Nanaimo Bars

Posted by vivnidhi on January 27, 2010

jan_66

Nanaimo Bars

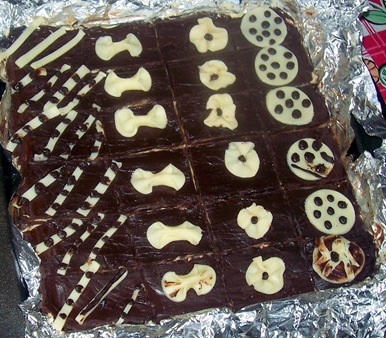
This is the only picture I was able to take…..took them to a friend’s potluck and forgot to take photos

All the Daring Bakers are headed to Canada for winter Olympics. Of course, I can’t fool you….no……we are not going….just celebrating 😉 by making nanaimo bars. OK, I also had never heard of these until………..”The January 2010 Daring Bakers’ challenge was hosted by Lauren of Celiac Teen. Lauren chose Gluten-Free Graham Wafers and Nanaimo Bars as the challenge for the month.”

Nanaimo Bars are a classic Canadian dessert created in none other than Nanaimo, British Colombia. In case you were wondering, it’s pronounced Nah-nye-Moh. These bars have 3 layers: a base containing graham crackers, cocoa, coconut and nuts, a middle custard layer, and a topping of chocolate. They are extremely rich and available almost everywhere across the country.

Lauren wanted us to bake the Graham Crackers gluten free. I used all  whole wheat pastry flour (atta) instead of the gluten free flours as I am too lazy. These are absolutely divine. You will not want to buy store bought after trying these out. Superlative praises for these graham crackers. I stopped buying Indian Glucose biscuits long long back because of Trans fats. These graham crackers will certainly fill that craving. Please visit Celiac Teen or the other daring bakers this month for some great gluten free versions.

Recipe Source: Graham Wafers — 101 Cookbooks (http://www.101cookbooks.com/archives/000126.html) I adapted it to be gluten-free. The adapted recipe is below.
Nanaimo Bars — City of Nanaimo (http://www.nanaimo.ca/EN/main/visitors/NanaimoBars.html)

The Recipe:

Preparation time:
• Graham Wafers: 30 to 45 minutes total active prep, 2 ½ hours to overnight and 45 minutes inactive prep.
• Nanaimo Bars: 30 minutes.

Equipment required:
• Food Processor
• Bowls
• Parchment paper or silpats
• Cookie sheets
• Double boiler or pot and heatproof bowl
• 8 by 8 inch square pan
• Hand mixer or stand mixer (You may use a wooden spoon, but this makes it much easier!)
• Saucepan

  • For  Graham Wafers
    Ingredients
    2 1/2 cups + 2 Tbsp. Whole wheat pastry flour (atta)
    1 cup (200 g) (7.1 ounces) Dark Brown Sugar, Lightly packed
    1 teaspoon (5 mL) Baking soda
    3/4 teaspoon (4 mL ) Kosher Salt
    7 tablespoons (100 g) (3 ½ ounces) Unsalted Butter (Cut into 1-inch cubes and frozen)
    2 Tbsp. Honey, Mild-flavored such as clover.
  • 3 Tbsp. Molasses
    5 tablespoons (75 mL) Whole Milk
    2 tablespoons (30 mL) Pure Vanilla Extract

Directions:
1. In the bowl of a food processor fitted with a steel blade, combine the flours, brown sugar, baking soda, and salt. Pulse on low to incorporate. Add the butter and pulse on and off, until the mixture is the consistency of a coarse meal. If making by hand, combine aforementioned dry ingredients with a whisk, then cut in butter until you have a coarse meal. No chunks of butter should be visible.
2. In a small bowl or liquid measuring cup, whisk together the honey, molasses, milk and vanilla. Add to the flour mixture until the dough barely comes together. It will be very soft and sticky.
3. Turn the dough onto a surface well-floured with atta and pat the dough into a rectangle about 1 inch thick. Wrap in plastic and chill until firm, about 2 hours, or overnight.
4. Divide the dough in half and return one half to the refrigerator. Sift an even layer of whole wheat pastry flour onto the work surface and roll the dough into a long rectangle, about 1/8 inch thick. The dough will be quite sticky, so flour as necessary. Cut into 4 by 4 inch squares. Gather the scraps together and set aside. Place wafers on one or two parchment-lined baking sheets. Chill until firm, about 30 to 45 minutes. Repeat with the second batch of dough.
5. Adjust the rack to the upper and lower positions and preheat oven to 350 degrees Fahrenheit (180 degrees Celsius).
6. Gather the scraps together into a ball, chill until firm, and reroll. Dust the surface with more flour and roll out the dough to get a couple more wafers.
7. Prick the wafers with toothpick or fork, not all the way through, in two or more rows.
8. Bake for 25 minutes, until browned and slightly firm to the touch, rotating sheets halfway through to ensure even baking. Might take less, and the starting location of each sheet may determine its required time. The ones that started on the bottom browned faster.
9. When cooled completely, place enough wafers in food processor to make 1 ¼ cups (300 mL) of crumbs. Another way to do this is to place in a large ziplock bag, force all air out and smash with a rolling pin until wafers are crumbs.

jan_70

Graham Crackers

jan_74

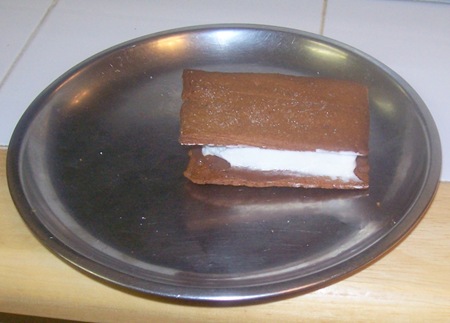
We loved our graham crackers with some nutella and whipped topping……….Husband can’t have enough of it 🙂

Nanaimo Bars
Ingredients:

For Nanaimo Bars — Bottom Layer
1/2 cup (115 g) (4 ounces) Unsalted Butter
1/4 cup (50 g) (1.8 ounces) Granulated Sugar
5 tablespoons (75 mL) Unsweetened Cocoa
1 Large Egg, Beaten
1 1/4 cups (300 mL) (160 g) (5.6 ounces) Graham Wafer Crumbs (See previous recipe)
1/2 cup (55 g) (1.9 ounces) Almonds (Any type, Finely chopped)
1 cup (130 g) (4.5 ounces) Coconut  unsweetened

For Nanaimo Bars — Middle Layer
1/2 cup (115 g) (4 ounces) Unsalted Butter
2 tablespoons and 2 teaspoons (40 mL) Heavy Cream
2 tablespoons (30 mL) Vanilla Custard Powder (Such as Bird’s. Vanilla pudding mix may be substituted.)
2 cups (254 g) (8.9 ounces) Icing Sugar

For Nanaimo Bars — Top Layer
4 ounces (115 g) Semi-sweet chocolate
2 tablespoons (28 g) (1 ounce) Unsalted Butter

Directions:
1. For bottom Layer: Melt unsalted butter, sugar and cocoa in top of a double boiler. Add egg and stir to cook and thicken. Remove from heat. Stir in crumbs, nuts and coconut. Press firmly into an ungreased 8 by 8 inch pan.
2. For Middle Layer: Cream butter, cream, custard powder, and icing sugar together well. Beat until light in colour. Spread over bottom layer.
3. For Top Layer: Melt chocolate and unsalted butter over low heat. Cool. Once cool, pour over middle layer and chill.

jan_64

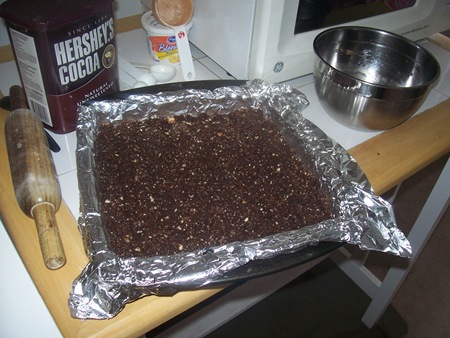
Making of the Nanaimo Bar………bottom layer

(This is the only photograph I have :-)) )

——————————-

My Tweaks to the recipe:

  1. Used whole wheat pastry flour (atta) for the crackers.
  2. Substituted molasses for some  honey as I was out of honey.
  3. I made double the middle layer (mistake..) and double the chocolate (bring on more 🙂 )

Additional Information:

These bars freeze very well, so don’t be afraid to pop some into the freezer.

The graham wafers may be kept in an airtight container for up to 2 weeks. Mine lasted about that long.

If making the graham crackers with wheat, replace the gluten-free flours (tapioca starch, sweet rice flour, and sorghum flour) with 2 ½ cups plus 2 tbsp of all-purpose wheat flour, or wheat pastry flour. Watch the wheat-based graham wafers very closely in the oven, as they bake faster than the gluten-free ones, sometimes only 12 minutes OR even 10.

For the Nanaimo Bars, if making with wheat, replace the gluten-free graham wafer crumbs with equal parts wheat graham wafer crumbs!

Information on Celiac Disease: http://www.mayoclinic.com/health/celiac-disease/DS00319

Information on Vancouver 2010: http://www.vancouver2010.com/

City of Nanaimo: http://www.nanaimo.ca/EN/index.html

Gluten Free Flour Information: http://glutenfreemommy.com/gluten-free-grains-101-the-best-flour-blend/

Video on making Nanaimo bars: http://www.youtube.com/watch?v=x5aqa6R1jIM&feature=fvsr

Recipe and video for Vegan Nanaimo Bars (you didn’t think I’d leave you guys out?): http://www.everydaydish.tv/index.php?page=recipe&recipe=159

Recipe for gluten-free and vegan Graham Wafers: http://www.thesensitivepantry.com/the-sensitive-pantry/2009/8/3/grahams-…


Nanaimo bars disappointed me because of the middle layer. A bit too sweet. I will try other buttercreams or some custard as filling the next time. The husband was pretty impressed with the texture of the middle layer though and wanted me to just follow the recipe and make the amount of filling given.

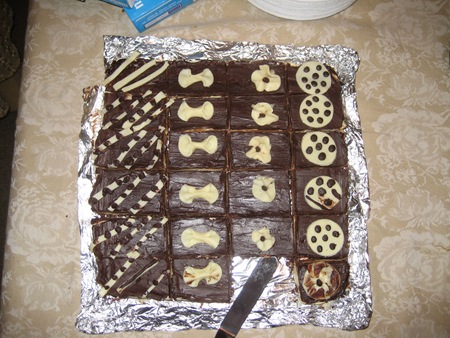
For the funny attempts at decorating. I used plastic chocolate. I will post the plastic chocolate recipe separately later.

It’s after ages I am posting a daring baker challenge on time. I also hope that I shall continue to do so in the coming months and blog a little more….I have dozens of posts half written which have not yet made it to the blog.

Expenditure:

Heavy Whipping Cream 1/2 pint ……….$1.99………….from Meijer

———————————————————————————————

Total………………………………………$1.99

IMG_1344

I just received this photo…..it certainly looks better than the first

Posted in - Confectioner's Sugar, -Almonds, -Butter, -Coconut, -Cream, -Dark Brown sugar, -Honey, -Molasses, -Semisweet Chocolate, -Vanilla, -Whole Wheat Pastry flour, Baking Soda, Daring Bakers, Eggs, Milk, Sugar, Vanilla Pudding mix | Tagged: , , , | 4 Comments »

Daring Bakers Bake Dobos Torte

Posted by vivnidhi on August 27, 2009

Whisk at 180 x 180 (largest)presents

 aug2_132

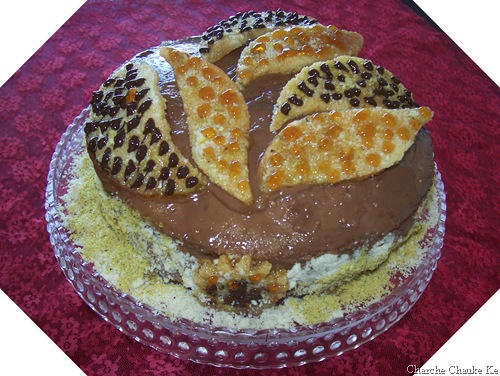
My bejeweled Dobos Torte

The August 2009 Daring Bakers’ challenge was hosted by Angela of A Spoonful of Sugar and Lorraine of Not Quite Nigella. They chose the spectacular Dobos Torte based on a recipe from Rick Rodgers’ cookbook Kaffeehaus:  Exquisite Desserts from the Classic Caffés of Vienna, Budapest, and Prague.

So, what is the Dobos Torta (or Torte)?

The Dobos Torta is a five-layer sponge cake, filled with a rich chocolate buttercream and topped with thin wedges of caramel. (You may come across recipes which have anywhere between six and 12 layers of cake; there are numerous family variations!) It was invented in 1885 by József C. Dobos, a Hungarian baker, and it rapidly became famous throughout Europe for both its extraordinary taste and its keeping properties. The recipe was a secret until Dobos retired in 1906 and gave the recipe to the Budapest Confectioners’ and Gingerbread Makers’ Chamber of Industry, providing that every member of the chamber can use it freely.

Equipment

  • 2 baking sheets
  • 9” (23cm) springform tin and 8” cake tin, for templates
  • mixing bowls (1 medium, 1 large)
  • a sieve
  • a double boiler (a large saucepan plus a large heat-proof mixing bowl which fits snugly over the top of the pan)
  • a small saucepan
  • a whisk (you could use a balloon whisk for the entire cake, but an electric hand whisk or stand mixer will make life much easier)
  • metal offset spatula
  • sharp knife
  • a 7 1/2” cardboard cake round, or just build cake on the base of a springform tin.
  • piping bag and tip, optional

Prep times

  • Sponge layers 20 mins prep, 40 mins cooking total if baking each layer individually.
  • Buttercream: 20 mins cooking. Cooling time for buttercream: about 1 hour plus 10 minutes after this to beat and divide.
  • Caramel layer: 10-15 minutes.
  • Assembly of whole cake: 20 minutes

Sponge cake layers

  • 6 large eggs, separated, at room temperature
  • 1 1/3 cups (162g) confectioner’s (icing) sugar, divided
  • 1 teaspoon (5ml) vanilla extract
  • 1 cup plus 2 tablespoons (112g) sifted cake flour (SUBSTITUTE 95g plain flour + 17g cornflour (cornstarch) sifted together)
  • pinch of salt

Chocolate Buttercream

  • 4 large eggs, at room temperature
  • 1 cup (200g) caster (ultrafine or superfine white) sugar
  • 4oz (110g) bakers chocolate or your favorite dark chocolate, finely chopped
  • 2 sticks plus 2 tablespoons (250g) unsalted butter, at room temperature.

Caramel topping

  • 1 cup (200g) caster (superfine or ultrafine white) sugar
  • 12 tablespoons (180 ml) water
  • 8 teaspoons (40 ml) lemon juice
  • 1 tablespoon neutral oil (e.g. grapeseed, rice bran, sunflower)

Finishing touches

  • a 7” cardboard round
  • 12 whole hazelnuts, peeled and toasted
  • ½ cup (50g) peeled and finely chopped hazelnuts

Directions for the sponge layers:

NB. The sponge layers can be prepared in advance and stored interleaved with parchment and well-wrapped in the fridge overnight.

1.Position the racks in the top and centre thirds of the oven and heat to 400F (200C).
2.Cut six pieces of parchment paper to fit the baking sheets. Using the bottom of a 9″ (23cm) springform tin as a template and a dark pencil or a pen, trace a circle on each of the papers, and turn them over (the circle should be visible from the other side, so that the graphite or ink doesn’t touch the cake batter.)
3.Beat the egg yolks, 2/3 cup (81g) of the confectioner’s (icing) sugar, and the vanilla in a medium bowl with a mixer on high speed until the mixture is thick, pale yellow and forms a thick ribbon when the beaters are lifted a few inches above the batter, about 3 minutes. (You can do this step with a balloon whisk if you don’t have a mixer.)

4.In another bowl, using clean beaters, beat the egg whites until soft peaks form. Gradually beat in the remaining 2/3 cup (81g) of confectioner’s (icing)sugar until the whites form stiff, shiny peaks. Using a large rubber spatula, stir about 1/4 of the beaten whites into the egg yolk mixture, then fold in the remainder, leaving a few wisps of white visible. Combine the flour and salt. Sift half the flour over the eggs, and fold in; repeat with the remaining flour.
5.Line one of the baking sheets with a circle-marked paper. Using a small offset spatula, spread about 3/4cup of the batter in an even layer, filling in the traced circle on one baking sheet. Bake on the top rack for 5 minutes, until the cake springs back when pressed gently in the centre and the edges are lightly browned. While this cake bakes, repeat the process on the other baking sheet, placing it on the centre rack. When the first cake is done, move the second cake to the top rack. Invert the first cake onto a flat surface and carefully peel off the paper. Slide the cake layer back onto the paper and let stand until cool. Rinse the baking sheet under cold running water to cool, and dry it before lining with another parchment. Continue with the remaining papers and batter to make a total of six layers. Completely cool the layers. Using an 8″ springform pan bottom or plate as a template, trim each cake layer into a neat round. (A small serrated knife is best for this task.)

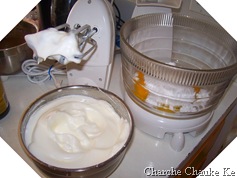
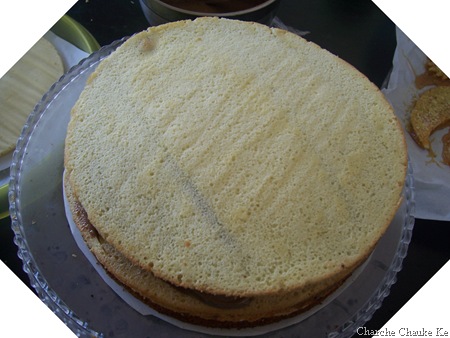
aug2_115 aug2_116

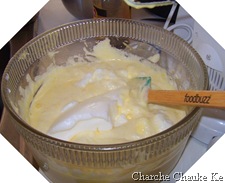
Whipped egg whites and yellows whipped with sugar

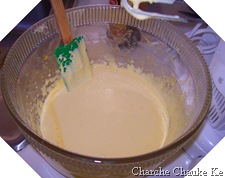
aug2_117 aug2_118

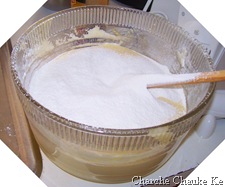
Divide the egg whites in 4 parts

First pic: first part of egg whites mixed in Second pic: Folding in of the last part of egg white

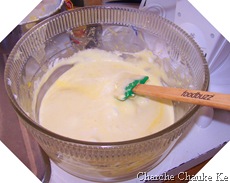
aug2_119 aug2_120

First pic : Folding in flour & second pic: 3/4 cup cake batter in a spring form pan


Directions for the chocolate buttercream:

NB. This can be prepared in advance and kept chilled until required.

1.Prepare a double-boiler: quarter-fill a large saucepan with water and bring it to a boil.
2.Meanwhile, whisk the eggs with the sugar until pale and thickened, about five minutes. You can use a balloon whisk or electric hand mixer for this.
3.Fit bowl over the boiling water in the saucepan (water should not touch bowl) and lower the heat to a brisk simmer. Cook the egg mixture, whisking constantly, for 2-3 minutes until you see it starting to thicken a bit. Whisk in the finely chopped chocolate and cook, stirring, for a further 2-3 minutes.
4.Scrape the chocolate mixture into a medium bowl and leave to cool to room temperature. It should be quite thick and sticky in consistency.
5.When cool, beat in the soft butter, a small piece (about 2 tablespoons/30g) at a time. An electric hand mixer is great here, but it is possible to beat the butter in with a spatula if it is soft enough. You should end up with a thick, velvety chocolate buttercream. Chill while you make the caramel topping.

aug2_97 aug2_104

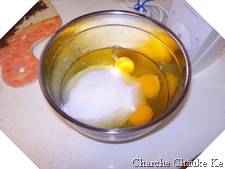
Chopped chocolate and eggs with sugar

aug2_106 aug2_108

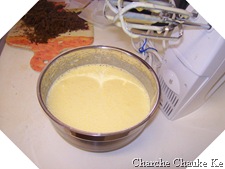
Whipped eggs and boiling water ready for cooking

aug2_110 aug2_121

Cooking buttercream on double boiler and the finished product


Directions for the caramel topping:

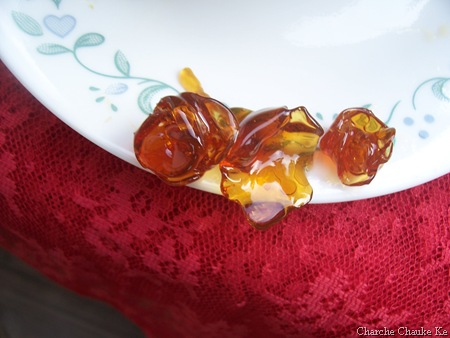
1.Choose the best-looking cake layer for the caramel top. To make the caramel topping: Line a jellyroll pan with parchment paper and butter the paper. Place the reserved cake layer on the paper. Score the cake into 12 equal wedges. Lightly oil a thin, sharp knife and an offset metal spatula.
2.Stir the sugar, water and lemon juice in a small saucepan. Bring to a boil over a medium heat, stirring often to dissolve the sugar. Once dissolved into a smooth syrup, turn the heat up to high and boil without stirring, swirling the pan by the handle occasionally and washing down any sugar crystals on the sides of the pan with a wet brush until the syrup has turned into an amber-colored caramel.
3.The top layer is perhaps the hardest part of the whole cake so make sure you have a oiled, hot offset spatula ready. I also find it helps if the cake layer hasn’t just been taken out of the refrigerator. I made mine ahead of time and the cake layer was cold and the toffee set very, very quickly—too quickly for me to spread it. Immediately pour all of the hot caramel over the cake layer. You will have some leftover most probably but more is better than less and you can always make nice toffee pattern using the extra to decorate. Using the offset spatula, quickly spread the caramel evenly to the edge of the cake layer. Let cool until beginning to set, about 30 seconds. Using the tip of the hot oiled knife (keep re-oiling this with a pastry brush between cutting), cut through the scored marks to divide the caramel layer into 12 equal wedges. Cool another minute or so, then use the edge of the knife to completely cut and separate the wedges using one firm slice movement (rather than rocking back and forth which may produce toffee strands). Cool completely.

aug2_124 aug2_128

Preparation for caramel layer

aug2_129

Assembling the cake

I brushed hazelnut coffee(unsweetened) on the layers as I found the buttercream a tad too sweet


Assembling the Dobos

1.Divide the buttercream into six equal parts.
2.Place a dab of chocolate buttercream on the middle of a 7 1/2” cardboard round and top with one cake layer. Spread the layer with one part of the chocolate icing. Repeat with 4 more cake layers. Spread the remaining icing on the sides of the cake.
3.Optional: press the finely chopped hazelnuts onto the sides of the cake.
4.Propping a hazelnut under each wedge so that it sits at an angle, arrange the wedges on top of the cake in a spoke pattern. If you have any leftover buttercream, you can pipe rosettes under each hazelnut or a large rosette in the centre of the cake. Refrigerate the cake under a cake dome until the icing is set, about 2 hours. Let slices come to room temperature for the best possible flavor.

I used ground cashews and pistachios for topping. I even topped the caramel layer with these nut powders and then caramel or chocolate on top.

aug2_140

Well! It’s been cut

aug2_156

Here’s a slice…..The top layers are our favorite……:-))……you won’t like it if you do not like sticky, chewy….the sonny and I do :-))

aug2_155

My favorite picture : Just playing with caramel

Verdict :

The cake overall tasted pretty good. I am not sure if I will make it again.

Too many eggs 🙂 . The sponge layers were easy to work with but would not have tasted good without some liquor brushed on it.

The buttercream is quick and easy but again I found it less firm than other buttercreams I have worked with. I don’t think I would make it again.

A lot of daring bakers did not like the lemony sticky chewy caramel. I LOVED it. The son and I can’t get enough of it. Of course I let him eat it cause I should not ….right 😉 . I will make this a lot of times 🙂 .

I may have made better components of this cake but all assembled together and chilled well, we all really enjoyed the cake. Thanks a lot Angela and Lorraine.

Expenditure:

Bakers semisweet chocolate (8 oz.) …….from Walmart…………………$2.88

Butter (1 lb.)………………………….from Walmart………………….$1.98

——————————————————————————————————-

Total…………………………………………………………………….$4.86

Not bad at all for such a delicious end product. Do not forget to check out the other daring bakers on the blogroll. Outstanding cakes….you will be surprised.

Posted in - Confectioner's Sugar, -Butter, -Canola Oil, -Cashews, -lemon, -Pistachios, -Semisweet Chocolate, -Vanilla, Eggs, Sugar | Tagged: , , , , | 9 Comments »

Daring Bakers July bring Cookies…….

Posted by vivnidhi on July 28, 2009

Vanilla at 180 x 180 (largest)brings…..

100_3688

The boy can’t stop himself 😉 Plum jam cookies and lots more…….

Jaana tha Japan , pahunch gaye Cheen…………Had to go to Japan , and I reached China…. You don’t get it……yeah…..oh well! the daring baker challenge this month was mallow cookies and milanos….long live Pepperidge Farm! I ended up making those and a fusion…..which we all absolutely loved.

These cookies pictured above are truly the best cookies I have ever made. If you liked and ate jam biscuits (called so in India) in your childhood, these cookies will bring those memories back. I surprised myself……..these tasted so good.

The July Daring Bakers’ challenge was hosted by Nicole at Sweet Tooth. She chose Chocolate Covered Marshmallow Cookies and Milan Cookies from pastry chef Gale Gand of the Food Network.

The mallow cookies were great, I would have never dreamt of making homemade marshmallows but homemade taste so………..good and you can flavor them just as you would want. Thanks a lot Nicole, for this challenge.The mallows biscuit was really delicious. The no. of cookies mentioned in the original recipe is all messed up….which actually worked in my favor 🙂 .  I loved it so much that I made some plum jam and filled them up and loved the result.

Milanos were quite a disappointment and I would certainly not want to make those again. The milanos dough was like tuiles batter yet not even that….I give up.

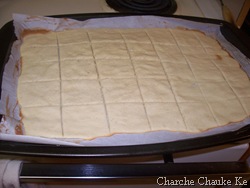
The husband was quite excited about Milano cookies and so I made them first, in fact packed a few for a friend, but it was a lot of effort in trying to make them the same size…..and the end result was not worth it… I just made about 2 dozen of them.After that I split the batter in half , spread on the parchment on the entire tray and baked for 5 minutes in the oven. Cut them with a pizza cutter in squares and back in oven for 5-7 minutes more. Same with the rest of the batter. Filled them up up with the chocolate ganache and anything with chocolate gets eaten here. I do not recommend this and will not be making them again 🙂 . I should mention the chocolate ganache tasted good and the husband even helped me zest the whole orange. What do you think…….I will need help again some other time too..I must not forget the dear husband 🙂

100_3679

Don’t they look cute…….

Milanos for friends…….hope they ate it up soon…..before they turned chewy…….oh no….boo hoo hoo

100_3682 100_3686

Rest of the Milanos……..:-)


Here come the mallows…..pretty good cookies , if one is fond of marshmallows. We are not too fond of them, yet no cookies left of the 28 I made.

The recipe:

Mallows(Chocolate Covered Marshmallow Cookies)
Recipe courtesy Gale Gand, from Food Network website

Prep Time: 10 min
Inactive Prep Time: 5 min
Cook Time: 10 min
Serves: about 2 dozen cookies

• 3 cups (375grams/13.23oz) all purpose flour
• 1/2 cup (112.5grams/3.97oz) white sugar
• 1/2 teaspoon salt
• 3/4 teaspoon baking powder
• 3/8 teaspoon baking soda
• 1/2 teaspoon ground cinnamon
• 12 tablespoons (170grams/ 6 oz) unsalted butter
• 3 eggs, whisked together
• Homemade marshmallows, recipe follows
• Chocolate glaze, recipe follows

1. In a mixer with the paddle attachment, blend the dry ingredients.
2. On low speed, add the butter and mix until sandy.
3. Add the eggs and mix until combine.
4. Form the dough into a disk, wrap with clingfilm or parchment and refrigerate at least 1 hour and up to 3 days.
5. When ready to bake, grease a cookie sheet or line it with parchment paper or a silicon mat.
6. Preheat the oven to 375 degrees F.
7. Roll out the dough to 1/8-inch thickness, on a lightly floured surface. Use a 1 to 1 1/2 inches cookie cutter to cut out small rounds of dough.
8. Transfer to the prepared pan and bake for 10 minutes or until light golden brown. Let cool to room temperature.
9. Pipe a “kiss” of marshmallow onto each cookie. Let set at room temperature for 2 hours.
10. Line a cookie sheet with parchment or silicon mat.
11. One at a time, gently drop the marshmallow-topped cookies into the hot chocolate glaze.
12. Lift out with a fork and let excess chocolate drip back into the bowl.
13. Place on the prepared pan and let set at room temperature until the coating is firm, about 1 to 2 hours.

Note: if you don’t want to make your own marshmallows, you can cut a large marshmallow in half and place on the cookie base. Heat in a preheated 350-degree oven to slump the marshmallow slightly, it will expand and brown a little. Let cool, then proceed with the chocolate dipping.

Homemade marshmallows:
• 1/4 cup water
• 1/4 cup light corn syrup
• 3/4 cup (168.76 grams/5.95oz) sugar
• 1 tablespoon powdered gelatin
• 2 tablespoons cold water
• 2 egg whites , room temperature
• 1/4 teaspoon pure vanilla extract

1. In a saucepan, combine the water, corn syrup, and sugar, bring to a boil until “soft-ball” stage, or 235 degrees on a candy thermometer.
2. Sprinkle the gelatin over the cold water and let dissolve.
3. Remove the syrup from the heat, add the gelatin, and mix.
4. Whip the whites until soft peaks form and pour the syrup into the whites.
5. Add the vanilla and continue whipping until stiff.
6. Transfer to a pastry bag.

Chocolate glaze:
• 12 ounces semisweet chocolate
• 2 ounces cocoa butter or vegetable oil

1. Melt the 2 ingredients together in the top of a double boiler or a bowl set over barely simmering water.

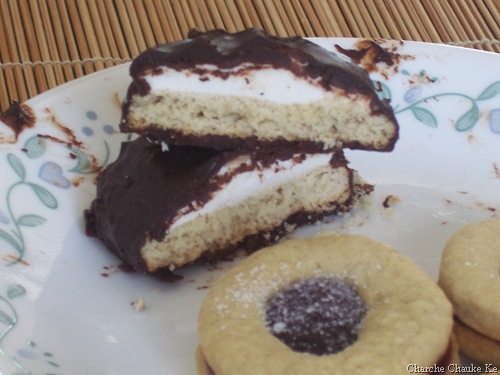
100_3674

Marshmallow cookies before the dip in chocolate

I got 28 cookies by using 1/4 of the cookie dough. Made 1/2 the amount of marshmallows and chocolate glaze. Since my glaze eventually bloomed, I covered them up in Milanos ganache…….the Milano cookie filling :-)………yeah that’s me!! Tasted good, nevertheless 😉

Chocolate Ganache:

• 1/2 cup heavy cream
• 8 ounces semisweet chocolate, chopped
• 1 orange, zested

I also prepared some plum jam….just because I had some plums I had to use. Filled them up in the mallows crust, sprinkled with sugar and loved , loved it! Please do try if you are in the mood to make cookies, true labor of love , forming so many small bites but totally worth it ……..as you will see in pictures below 🙂

Plum Jam Recipe:

  • Plums 2 1/2 cups …..pitted, and chopped fine
  • Sugar 1 1/2 cups
  • Lemon juice  1 Tbsp

That’s it….I added all of this in a heavy bottomed saucepan with 2 Tbsp. water. Cooked it down till I could do the plate test. For the plate test, place a plate in the freezer or chill it well. Pour a big drop of jam on this cold plate and give it 30 seconds. If the jam has reached the right consistency, it will very slowly spread a little. More about jam making here. I made a small quantity, hence it went directly to the refrigerator.

100_3693

Pick one up……these are ready for a sprinkling of sugar

100_3709

Here are the mallows…..this is how they looked

100_3700

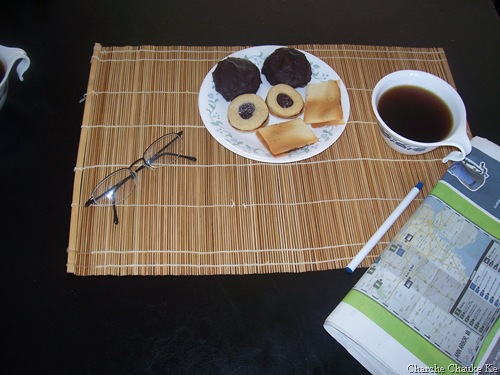
Perfect with coffee….for some great mornings………

I just took a picture as the husband had set the table

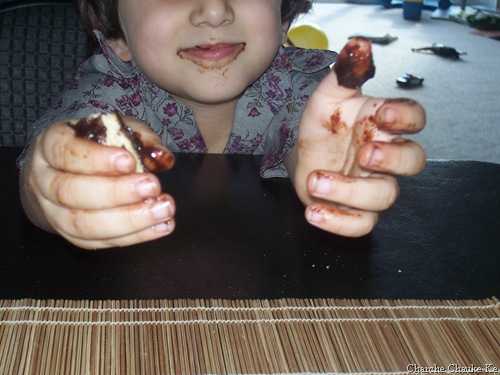
100_3711

Somebody else had a great time too……….

It’s been one whole year being a part of the Daring Bakers for me. I have come a long way…..I remember my first challenge Filbert Gateau….I remember my delight. Now I dare to experiment on my own…..Thank you Lis and Ivonne and the whole Daring Baker community which is the best resource of all.

Expenditure:

Unsalted Butter: ………………….$2.17……….from Walmart, some left

Corn syrup(16 oz.)…………………$1.67……….from Kroger, lots left

Heavy cream(1/2 pint)…………….$2.89…………from Kroger, lots left

Powdered sugar……………………$1.99…………from Kroger, lots left

Bakers Chocolate semisweet(8 oz):$ 3.29………….from Kroger, none left

Orange 1 :-)…………………………$0.64………….from Kroger, ate it up….

————————————————————————————————–

Total………………………………..$12.65

Posted in -All Purpose flour, -Butter, -Canola Oil, -Cinnamon, -Corn Syrup, -Cream, -Orange, -Plums, -Semisweet Chocolate, -Vanilla, Baking Powder, Baking Soda, Daring Bakers, Eggs, Gelatin, Sugar | Tagged: , , , , , | 14 Comments »

Daring Bakers Layered Chocolate Amaretto Cheesecake

Posted by vivnidhi on April 27, 2009

Spatulla at 180 x 180 (largest)Oh Yeah, it was the E L Spatulla’s magic this month!

Apr_84

Perfectly layered Chocolate Amaretto Cheesecake

I must admit here that cheesecake is the ultimate dessert for me. Yes, I am extremely fond of custards and the like…..and if you bake it………I can eat it all the time. This is my all time favorite cake. And I had never eaten it all these years when I was in India! Ah! what a waste………I wish I could have eaten it without the guilt ……..calories…….look at yourself……..you still have 10 lbs to lose………look at all the plain sugars you are putting in your body!! UFF!!!  So, when now I baked it and placed it on the table……..in spite of the fact that I was pleased no end that the cake did not crack one bit and was layered exactly as I wanted………the husband’s look said something else.

“This is a calorie bomb…..fat, sugar, cheese………what kind of life will you have……. if you eat more of these”

“Well! when temptation rules, the mirror breaks, and I asked the husband to look the other way ….pleeeeeeeease….”

Ah! I so wish we did not have to fight this constant war against cholesterol and high blood sugar. As, I have so often admitted, the husband has to keep a check on his cholesterol and I have to worry about an eventual high blood sugar. And since I am still 10 lbs more than I was pre-second pregnancy, the threat is real for me. I am not overweight, just that I’d do my health and myself a favor if I lost these pounds.

Well! this blog is not about health rants (it so often becomes) ! I absolutely loved this cheesecake. I have baked cheesecakes before (coffee caramel remains the husband’s fav…….he can’t get over coffee and I chocolate)  but this is the best recipe. I had never tried layering the cheesecakes and since I got all daring ……….I tired it out!

Love you Jenny and your famous friend Abbey for sharing a great, easy recipe. The April 2009 challenge is hosted by Jenny from Jenny Bakes. She has chosen Abbey’s Infamous Cheesecake as the challenge.

This is truly an easy recipe and I know this will be made again!

Abbey’s Infamous Cheesecake:

crust:
1 3/4  cups / 240 g chocolate wafers

7 Tbsp. / 3 1/2 oz butter, melted
1/4 almonds ground

cheesecake:
3 sticks of cream cheese, 8 oz each (total of 24 oz) room temperature
1 cup / 210 g sugar
3 large eggs
1 cup / 8 oz heavy cream
3 tbsp. Amaretto

7 oz. semi sweet chocolate

The recipe calls for 1 Tbsp of lemon juice, 1 Tbsp. of vanilla extract and 1 Tbsp. of booze. I replace all with amaretto.

DIRECTIONS:
1. Preheat oven to 350 degrees F (Gas Mark 4 = 180C = Moderate heat). Begin to boil a large pot of water for the water bath.

2. Mix together the crust ingredients and press into your preferred pan. You can press the crust just into the bottom, or up the sides of the pan too – baker’s choice. Set crust aside.

Apr_39 Apr_40

Crushed Chocolate Wafers, almonds and butter

Apr_43

Chocolate wafer crust

My crust definitely had too much butter. I need to reduce it the next time. This did not compromise the taste but it would be better with lesser butter.

3. Combine cream cheese and sugar in the bowl of a stand-mixer (or in a large bowl if using a hand-mixer) and cream together until smooth. Add eggs, one at a time, fully incorporating each before adding the next. Make sure to scrape down the bowl in between each egg. Add heavy cream, amaretto and blend until smooth and creamy.

4. Pour batter into prepared crust and tap the pan on the counter a few times to bring all air bubbles to the surface. Place pan into a larger pan and pour boiling water into the larger pan until halfway up the side of the cheesecake pan. If cheesecake pan is not airtight, cover bottom securely with foil before adding water.

Apr_44 Apr_47

Cream cheese on the left and creamed ingredients on the right

Apr_49

3 cups plain Amaretto batter is removed and rest mixed with melted chocolate

I chopped the chocolate well and then melted it in the microwave for 1 minute. Stir the chocolate and check for lumps. Melt further in 15 sec or 30 sec intervals only if there are lumps. Keep stirring after every heating. Removed 3 cups of the batter separately and then added the melted chocolate to the rest of the batter. Mixed with a light hand so as to not overmix.

Apr_54 Apr_55

On top of chocolate wafer crust goes chocolate layer and then sieved very finely ground almonds on top of it.

Apr_57

Ready for the oven

5. Bake 45 to 55 minutes, until it is almost done – this can be hard to judge, but you’re looking for the cake to hold together, but still have a lot of jiggle to it in the center. You don’t want it to be completely firm at this stage. Close the oven door, turn the heat off, and let rest in the cooling oven for one hour. This lets the cake finish cooking and cool down gently enough so that it won’t crack on the top. After one hour, remove cheesecake from oven and lift carefully out of water bath. Let it finish cooling on the counter, and then cover and put in the fridge to chill. Once fully chilled, it is ready to serve.

Pan note: The creator of this recipe used to use a springform pan, but no matter how well she wrapped the thing in tin foil, water would always seep in and make the crust soggy. Now she uses one of those 1-use foil “casserole” shaped pans from the grocery store. They’re 8 or 9 inches wide and really deep, and best of all, water-tight. When it comes time to serve, just cut the foil away.

Prep notes: While the actual making of this cheesecake is a minimal time commitment, it does need to bake for almost an hour, cool in the oven for an hour, and chill overnight before it is served. Please plan accordingly!

Apr_60

The end result! Perfect layers! Hurrah!!

Things I learnt: As I read more on the Daring Baker forum, I realized that my cake top got brown and it should not have browned at all for a perfect cheesecake.

Next My crust indeed got soggy , so I should have either used more foil or used a normal cake pan instead of spring form. Jacque of Daisy lane cakes has very beautifully demonstrated how to use regular pan for cheesecake in her post Sweet Potato Cheesecake.

Some variations from the recipe creator:

** Lavender-scented cheesecake w/ blueberries – heat the cup of heavy cream in the microwave or a saucepan until hot but not boiling. Add 2 tbsp of lavender flowers and stir. Let lavender steep in the cream for about 10-15 minutes, then strain the flowers out. Add strained cream to cheesecake batter as normal. Top with fresh blueberries, or make a quick stovetop blueberry sauce (splash of orange juice, blueberries, a little bit of sugar, and a dash of cinnamon – cook until berries burst, then cool)

** Cafe au lait cheesecake with caramel – take 1/4 cup of the heavy cream and heat it in the microwave for a short amount of time until very hot. Add 1-2 tbsp. instant espresso or instant coffee; stir to dissolve. Add this to the remainder of cream and use as normal. Top cheesecake with homemade caramel sauce (I usually find one on the food network website – just make sure it has heavy cream in it. You can use store-bought in a pinch, but the flavor is just not the same since its usually just sugar and corn syrup with no dairy).

** Tropical – add about a half cup of chopped macadamias to the crust, then top the cake with a mango-raspberry-mandarin orange puree.

** Mexican Turtle – add a bar of melted dark chocolate (between 3 and 5 oz., to taste) to the batter, along with a teaspoon of cinnamon and a dash of cayenne pepper (about 1/8 tsp.). Top it with pecan halves and a homemade caramel sauce.

** Honey-cinnamon with port-pomegranate poached pears – replace 1/2 cup of the sugar with 1/2 cup of honey, add about a teaspoon or more (to taste) of cinnamon. Take 2 pears (any variety you like or whatever is in season), peeled and cored, and poach them in a boiling poaching liquid of port wine, pomegranate juice/seeds, a couple of “coins” of fresh ginger, a cinnamon stick, and about a 1/4 cup of sugar. Poach them until tender, then let cool. Strain the poaching liquid and simmer until reduced to a syrupy-glaze consistency, then cool. Thinly slice the cooled pears and fan them out atop the cooled cheesecake. Pour the cooled poaching syrup over the pears, then sprinkle the top with chopped walnuts and fresh pomegranate seeds.

Some variations from Jenny (from JennyBakes):

**Key lime – add zest from one lime to sugar before mixing with cream cheese. Substitute lemon juice, alcohol, and vanilla with key lime juice.

**Cheesecakelets – put in muffin tins, ramekins, or custard cups. Try baking 20-35 minutes, or until still a little jiggly, and cool as before.

I just melted some more chocolate and piped it lines on top. As I was in a rush, I did not paint the actual leaves with melted chocolate, instead just piped them freehand in leaf shape on wax paper. In the freezer for a quick 15 minutes and the leaves were ready. Remove from wax paper and decorate 😉 .

In spite of the mistakes, this cake was a hit. Loved it a lot and will make again. And guess what the husband visited New York for work and got me a Junior’s cheesecake. Now, I could compare mine against the best. And, I tell you mine was not far from the best. The junior’s cake crust absolutely bowled me over though. I have the junior’s cheesecake cookbook (borrowed from the library) and so I will note down their crust recipe and post when I try it.

If you want to have a look at what all can be done with a cheesecake , please visit the Daring Bakers Blogroll. See imagination and creativity at it best!

r100_3304

Here’s a bite…….enjoy!

Oh, I forgot to list my expenditure:

Cream Cheese 3 (8 oz.) packs ..........$6.18.........from Meijer.......none left
Chocolate wafers ......................$2.50.........from Meijer......all eaten up
Semisweet chocolate....................$2.50..........from Meijer......all eaten up
----------------------------------------------------------------------
Total ................................$11.18

Posted in -Almonds, -Butter, -Chocolate wafer, -Cream, -Semisweet Chocolate, Amaretto, Cream Cheese, Eggs, Sugar | Tagged: , , , , | 31 Comments »

Daring Baker’s February Challenge : Chocolate Valentino cake

Posted by vivnidhi on February 28, 2009

Feb_44

Chocolate Valentino Cake

Here is a flourless cake that is a breeze to make. Surprise Surprise! this month’s Daring Bakers’ Challenge was the easiest I have seen. Ready in 45 minutes total. This is one cake anyone can make ……..easy and sinfully rich and delicious. Just pair it with an ice cream, and you are done. Yes, this definitely needs some ice cream or whipped cream to cut some of the richness of the cake. My cake did not sink in the middle at all because I was careful while beating the eggs.

It was my first time making Ice cream, I have been to lazy to make ice cream at home before. Since the husband loved it, I now have reason to try some more this summer. I made it without any ice cream maker. I would make a lot of ice creams in India in my summer vacations. I wanted to try one of my old recipes but decided to just try David Lebovitz’s plain vanilla ice cream made with vanilla extract. I made a cherry caramel sauce to pair with the cake and ice cream. Result: This cake’s a fabulous dessert!

The February 2009 challenge is hosted by Wendy of WMPE’s blog and Dharm of Dad ~ Baker & Chef.
We have chosen a Chocolate Valentino cake by Chef Wan; a Vanilla Ice Cream recipe from Dharm and a Vanilla Ice Cream recipe from Wendy as the challenge.

February’s challenge is a Flourless Chocolate Cake, Chocolate Valentino, inspired by Malaysia’s “most flamboyant food ambassador”, Chef Wan. Recipe comes from Sweet Treats by Chef Wan.

Serve with – The original recipe calls for the cake to be served with whipping cream.  BUT we decided to make this more of a challenge and ask you to make your own Ice Cream – a first for the DBrs. You can choose any flavor you want and any recipe although we provided two vanilla ice cream recipes. But we are giving you a little freedom here and will allow whipped cream as a topping as well or of course non-dairy whip. Be as creative as you want with your topping. Any fruit puree or sauce would be lovely with this cake.
– Use your favorite chocolate – the finished cake will taste exactly like the chocolate you use. Be creative with your chocolate, if you like a sweeter cake use milk chocolate or a combination of the semisweet and milk chocolate. If you like bittersweet chocolate use that and add sweetness by mixing the semi sweet with bittersweet. If you are daring, try white chocolate. (Dharm used all bittersweet and Wendy used a half bitter/half semi sweet chocolate).
– A higher cocoa percentage increases the bitterness of the chocolate.
-Equipment – it is optional to use a heart shaped pan. For a real Valentino, bake it in a heart shaped pan or cut it out into a heart shape. You may use any shape pan that gives you an area of 50” – 6×8 or 7×7.  An 8” spring form pan works with great results as do smaller pans or ramekins.
-An instant read thermometer highly recommended.
Note on recipeThe recipe consists of 3 simple ingredients and how you interpret them is part of the challenge.

Chocolate Valentino
Preparation Time:  20 minutes

 
16 ounces (1 pound) (454 grams) of semisweet chocolate, roughly chopped
½ cup (1 stick) plus 2 tablespoons (146 grams total) of unsalted butter
5 large eggs separated

1. Put chocolate and butter in a heatproof bowl and set over a pan of simmering water (the bottom of the bowl should not touch the water) and melt, stirring often.
2. While your chocolate butter mixture is cooling. Butter your pan and line with a parchment circle then butter the parchment.
3. Separate the egg yolks from the egg whites and put into two medium/large bowls.
4. Whip the egg whites in a medium/large grease free bowl until stiff peaks are formed (do not over-whip or the cake will be dry).
5. With the same beater beat the egg yolks together.
6. Add the egg yolks to the cooled chocolate.
7. Fold in 1/3 of the egg whites into the chocolate mixture and follow with remaining 2/3rds. Fold until no white remains without deflating the batter. {link of folding demonstration}
8. Pour batter into prepared pan, the batter should fill the pan 3/4 of the way full, and bake at 375F/190C
9. Bake for 25 minutes until an instant read thermometer reads 140F/60C.
Note – If you do not have an instant read thermometer, the top of the cake will look similar to a brownie and a cake tester will appear wet.
10. Cool cake on a rack for 10 minutes then unmold.

Feb_39Feb_38

Microwave melted Chocolate & 8″ spring form pan

Feb_40

Ready for the oven

I used all semisweet chocolate and that was absolutely right for us. We couldn’t have liked it a bit more bitter than that. Milk chocolate would be good too cause the chocolate taste gets a little more intense in the cake.

David Lebovitz link for making ice cream if you do not have an ice cream freezer.
Links to helpful tips:
Folding video demonstration.
Egg Whipping video demonstration.

I used David Lebovitz’ vanilla ice cream recipe.

For the cherry caramel sauce, I heated up a cup of cherries with 1/2 a tsp. of sugar till they got tender. Then they went in a blender and pureed. I mixed it up with caramel sauce made from the earlier daring baker challenge and Voila…..Cherry Caramel sauce is ready.

Feb_37 Feb_74

Pitted fresh cherries and the making of cherry caramel sauce

Finally……

Feb_78

My chocolate cake sunflower with Tuiles

This is a cake that everyone (who is a fan of chocolate) should definitely try.

Expenditure:

Chocolate 1 lb ………$ 5.00 ………from Kroger……none left

Heavy cream 1 pint….$ 3.25……….from Kroger……none left

————————————————————————–

Total………………..$ 8.25


Posted in - Cherry, -Butter, -Cream, -Golden Syrup, -Semisweet Chocolate, -Vanilla, Chocolate, Eggs, Milk, Sugar | Tagged: , , | 12 Comments »