चर्चे चौके के Charche Chauke Ke

Hey! Join in the Kitchen Gossip!!

Posts Tagged ‘Cake’

Daring Bakers Bake Dobos Torte

Posted by vivnidhi on August 27, 2009

Whisk at 180 x 180 (largest)presents

 aug2_132

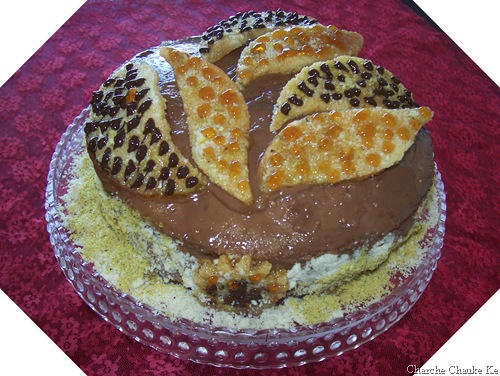
My bejeweled Dobos Torte

The August 2009 Daring Bakers’ challenge was hosted by Angela of A Spoonful of Sugar and Lorraine of Not Quite Nigella. They chose the spectacular Dobos Torte based on a recipe from Rick Rodgers’ cookbook Kaffeehaus:  Exquisite Desserts from the Classic Caffés of Vienna, Budapest, and Prague.

So, what is the Dobos Torta (or Torte)?

The Dobos Torta is a five-layer sponge cake, filled with a rich chocolate buttercream and topped with thin wedges of caramel. (You may come across recipes which have anywhere between six and 12 layers of cake; there are numerous family variations!) It was invented in 1885 by József C. Dobos, a Hungarian baker, and it rapidly became famous throughout Europe for both its extraordinary taste and its keeping properties. The recipe was a secret until Dobos retired in 1906 and gave the recipe to the Budapest Confectioners’ and Gingerbread Makers’ Chamber of Industry, providing that every member of the chamber can use it freely.

Equipment

  • 2 baking sheets
  • 9” (23cm) springform tin and 8” cake tin, for templates
  • mixing bowls (1 medium, 1 large)
  • a sieve
  • a double boiler (a large saucepan plus a large heat-proof mixing bowl which fits snugly over the top of the pan)
  • a small saucepan
  • a whisk (you could use a balloon whisk for the entire cake, but an electric hand whisk or stand mixer will make life much easier)
  • metal offset spatula
  • sharp knife
  • a 7 1/2” cardboard cake round, or just build cake on the base of a springform tin.
  • piping bag and tip, optional

Prep times

  • Sponge layers 20 mins prep, 40 mins cooking total if baking each layer individually.
  • Buttercream: 20 mins cooking. Cooling time for buttercream: about 1 hour plus 10 minutes after this to beat and divide.
  • Caramel layer: 10-15 minutes.
  • Assembly of whole cake: 20 minutes

Sponge cake layers

  • 6 large eggs, separated, at room temperature
  • 1 1/3 cups (162g) confectioner’s (icing) sugar, divided
  • 1 teaspoon (5ml) vanilla extract
  • 1 cup plus 2 tablespoons (112g) sifted cake flour (SUBSTITUTE 95g plain flour + 17g cornflour (cornstarch) sifted together)
  • pinch of salt

Chocolate Buttercream

  • 4 large eggs, at room temperature
  • 1 cup (200g) caster (ultrafine or superfine white) sugar
  • 4oz (110g) bakers chocolate or your favorite dark chocolate, finely chopped
  • 2 sticks plus 2 tablespoons (250g) unsalted butter, at room temperature.

Caramel topping

  • 1 cup (200g) caster (superfine or ultrafine white) sugar
  • 12 tablespoons (180 ml) water
  • 8 teaspoons (40 ml) lemon juice
  • 1 tablespoon neutral oil (e.g. grapeseed, rice bran, sunflower)

Finishing touches

  • a 7” cardboard round
  • 12 whole hazelnuts, peeled and toasted
  • ½ cup (50g) peeled and finely chopped hazelnuts

Directions for the sponge layers:

NB. The sponge layers can be prepared in advance and stored interleaved with parchment and well-wrapped in the fridge overnight.

1.Position the racks in the top and centre thirds of the oven and heat to 400F (200C).
2.Cut six pieces of parchment paper to fit the baking sheets. Using the bottom of a 9″ (23cm) springform tin as a template and a dark pencil or a pen, trace a circle on each of the papers, and turn them over (the circle should be visible from the other side, so that the graphite or ink doesn’t touch the cake batter.)
3.Beat the egg yolks, 2/3 cup (81g) of the confectioner’s (icing) sugar, and the vanilla in a medium bowl with a mixer on high speed until the mixture is thick, pale yellow and forms a thick ribbon when the beaters are lifted a few inches above the batter, about 3 minutes. (You can do this step with a balloon whisk if you don’t have a mixer.)

4.In another bowl, using clean beaters, beat the egg whites until soft peaks form. Gradually beat in the remaining 2/3 cup (81g) of confectioner’s (icing)sugar until the whites form stiff, shiny peaks. Using a large rubber spatula, stir about 1/4 of the beaten whites into the egg yolk mixture, then fold in the remainder, leaving a few wisps of white visible. Combine the flour and salt. Sift half the flour over the eggs, and fold in; repeat with the remaining flour.
5.Line one of the baking sheets with a circle-marked paper. Using a small offset spatula, spread about 3/4cup of the batter in an even layer, filling in the traced circle on one baking sheet. Bake on the top rack for 5 minutes, until the cake springs back when pressed gently in the centre and the edges are lightly browned. While this cake bakes, repeat the process on the other baking sheet, placing it on the centre rack. When the first cake is done, move the second cake to the top rack. Invert the first cake onto a flat surface and carefully peel off the paper. Slide the cake layer back onto the paper and let stand until cool. Rinse the baking sheet under cold running water to cool, and dry it before lining with another parchment. Continue with the remaining papers and batter to make a total of six layers. Completely cool the layers. Using an 8″ springform pan bottom or plate as a template, trim each cake layer into a neat round. (A small serrated knife is best for this task.)

aug2_115 aug2_116

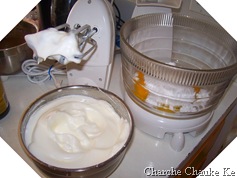
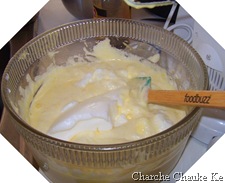
Whipped egg whites and yellows whipped with sugar

aug2_117 aug2_118

Divide the egg whites in 4 parts

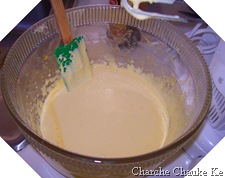
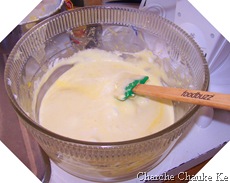
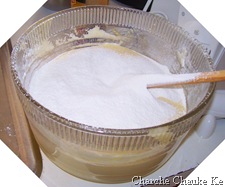
First pic: first part of egg whites mixed in Second pic: Folding in of the last part of egg white

aug2_119 aug2_120

First pic : Folding in flour & second pic: 3/4 cup cake batter in a spring form pan


Directions for the chocolate buttercream:

NB. This can be prepared in advance and kept chilled until required.

1.Prepare a double-boiler: quarter-fill a large saucepan with water and bring it to a boil.
2.Meanwhile, whisk the eggs with the sugar until pale and thickened, about five minutes. You can use a balloon whisk or electric hand mixer for this.
3.Fit bowl over the boiling water in the saucepan (water should not touch bowl) and lower the heat to a brisk simmer. Cook the egg mixture, whisking constantly, for 2-3 minutes until you see it starting to thicken a bit. Whisk in the finely chopped chocolate and cook, stirring, for a further 2-3 minutes.
4.Scrape the chocolate mixture into a medium bowl and leave to cool to room temperature. It should be quite thick and sticky in consistency.
5.When cool, beat in the soft butter, a small piece (about 2 tablespoons/30g) at a time. An electric hand mixer is great here, but it is possible to beat the butter in with a spatula if it is soft enough. You should end up with a thick, velvety chocolate buttercream. Chill while you make the caramel topping.

aug2_97 aug2_104

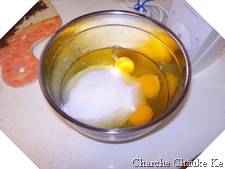
Chopped chocolate and eggs with sugar

aug2_106 aug2_108

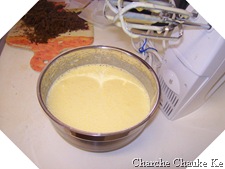
Whipped eggs and boiling water ready for cooking

aug2_110 aug2_121

Cooking buttercream on double boiler and the finished product


Directions for the caramel topping:

1.Choose the best-looking cake layer for the caramel top. To make the caramel topping: Line a jellyroll pan with parchment paper and butter the paper. Place the reserved cake layer on the paper. Score the cake into 12 equal wedges. Lightly oil a thin, sharp knife and an offset metal spatula.
2.Stir the sugar, water and lemon juice in a small saucepan. Bring to a boil over a medium heat, stirring often to dissolve the sugar. Once dissolved into a smooth syrup, turn the heat up to high and boil without stirring, swirling the pan by the handle occasionally and washing down any sugar crystals on the sides of the pan with a wet brush until the syrup has turned into an amber-colored caramel.
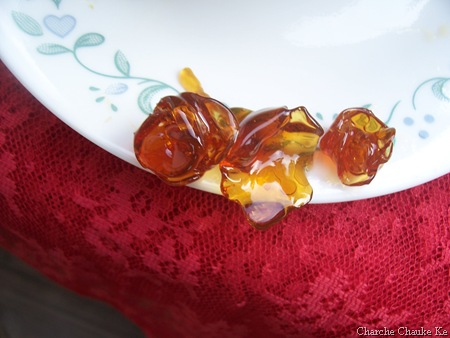
3.The top layer is perhaps the hardest part of the whole cake so make sure you have a oiled, hot offset spatula ready. I also find it helps if the cake layer hasn’t just been taken out of the refrigerator. I made mine ahead of time and the cake layer was cold and the toffee set very, very quickly—too quickly for me to spread it. Immediately pour all of the hot caramel over the cake layer. You will have some leftover most probably but more is better than less and you can always make nice toffee pattern using the extra to decorate. Using the offset spatula, quickly spread the caramel evenly to the edge of the cake layer. Let cool until beginning to set, about 30 seconds. Using the tip of the hot oiled knife (keep re-oiling this with a pastry brush between cutting), cut through the scored marks to divide the caramel layer into 12 equal wedges. Cool another minute or so, then use the edge of the knife to completely cut and separate the wedges using one firm slice movement (rather than rocking back and forth which may produce toffee strands). Cool completely.

aug2_124 aug2_128

Preparation for caramel layer

aug2_129

Assembling the cake

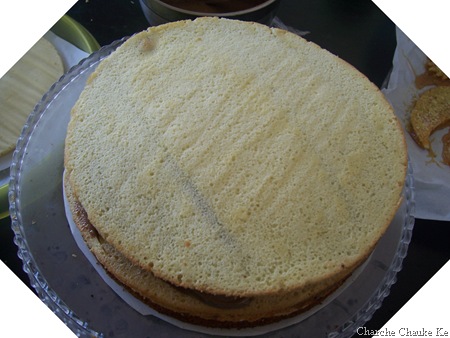
I brushed hazelnut coffee(unsweetened) on the layers as I found the buttercream a tad too sweet


Assembling the Dobos

1.Divide the buttercream into six equal parts.
2.Place a dab of chocolate buttercream on the middle of a 7 1/2” cardboard round and top with one cake layer. Spread the layer with one part of the chocolate icing. Repeat with 4 more cake layers. Spread the remaining icing on the sides of the cake.
3.Optional: press the finely chopped hazelnuts onto the sides of the cake.
4.Propping a hazelnut under each wedge so that it sits at an angle, arrange the wedges on top of the cake in a spoke pattern. If you have any leftover buttercream, you can pipe rosettes under each hazelnut or a large rosette in the centre of the cake. Refrigerate the cake under a cake dome until the icing is set, about 2 hours. Let slices come to room temperature for the best possible flavor.

I used ground cashews and pistachios for topping. I even topped the caramel layer with these nut powders and then caramel or chocolate on top.

aug2_140

Well! It’s been cut

aug2_156

Here’s a slice…..The top layers are our favorite……:-))……you won’t like it if you do not like sticky, chewy….the sonny and I do :-))

aug2_155

My favorite picture : Just playing with caramel

Verdict :

The cake overall tasted pretty good. I am not sure if I will make it again.

Too many eggs 🙂 . The sponge layers were easy to work with but would not have tasted good without some liquor brushed on it.

The buttercream is quick and easy but again I found it less firm than other buttercreams I have worked with. I don’t think I would make it again.

A lot of daring bakers did not like the lemony sticky chewy caramel. I LOVED it. The son and I can’t get enough of it. Of course I let him eat it cause I should not ….right 😉 . I will make this a lot of times 🙂 .

I may have made better components of this cake but all assembled together and chilled well, we all really enjoyed the cake. Thanks a lot Angela and Lorraine.

Expenditure:

Bakers semisweet chocolate (8 oz.) …….from Walmart…………………$2.88

Butter (1 lb.)………………………….from Walmart………………….$1.98

——————————————————————————————————-

Total…………………………………………………………………….$4.86

Not bad at all for such a delicious end product. Do not forget to check out the other daring bakers on the blogroll. Outstanding cakes….you will be surprised.

Posted in - Confectioner's Sugar, -Butter, -Canola Oil, -Cashews, -lemon, -Pistachios, -Semisweet Chocolate, -Vanilla, Eggs, Sugar | Tagged: , , , , | 9 Comments »

Daring Baker’s February Challenge : Chocolate Valentino cake

Posted by vivnidhi on February 28, 2009

Feb_44

Chocolate Valentino Cake

Here is a flourless cake that is a breeze to make. Surprise Surprise! this month’s Daring Bakers’ Challenge was the easiest I have seen. Ready in 45 minutes total. This is one cake anyone can make ……..easy and sinfully rich and delicious. Just pair it with an ice cream, and you are done. Yes, this definitely needs some ice cream or whipped cream to cut some of the richness of the cake. My cake did not sink in the middle at all because I was careful while beating the eggs.

It was my first time making Ice cream, I have been to lazy to make ice cream at home before. Since the husband loved it, I now have reason to try some more this summer. I made it without any ice cream maker. I would make a lot of ice creams in India in my summer vacations. I wanted to try one of my old recipes but decided to just try David Lebovitz’s plain vanilla ice cream made with vanilla extract. I made a cherry caramel sauce to pair with the cake and ice cream. Result: This cake’s a fabulous dessert!

The February 2009 challenge is hosted by Wendy of WMPE’s blog and Dharm of Dad ~ Baker & Chef.
We have chosen a Chocolate Valentino cake by Chef Wan; a Vanilla Ice Cream recipe from Dharm and a Vanilla Ice Cream recipe from Wendy as the challenge.

February’s challenge is a Flourless Chocolate Cake, Chocolate Valentino, inspired by Malaysia’s “most flamboyant food ambassador”, Chef Wan. Recipe comes from Sweet Treats by Chef Wan.

Serve with – The original recipe calls for the cake to be served with whipping cream.  BUT we decided to make this more of a challenge and ask you to make your own Ice Cream – a first for the DBrs. You can choose any flavor you want and any recipe although we provided two vanilla ice cream recipes. But we are giving you a little freedom here and will allow whipped cream as a topping as well or of course non-dairy whip. Be as creative as you want with your topping. Any fruit puree or sauce would be lovely with this cake.
– Use your favorite chocolate – the finished cake will taste exactly like the chocolate you use. Be creative with your chocolate, if you like a sweeter cake use milk chocolate or a combination of the semisweet and milk chocolate. If you like bittersweet chocolate use that and add sweetness by mixing the semi sweet with bittersweet. If you are daring, try white chocolate. (Dharm used all bittersweet and Wendy used a half bitter/half semi sweet chocolate).
– A higher cocoa percentage increases the bitterness of the chocolate.
-Equipment – it is optional to use a heart shaped pan. For a real Valentino, bake it in a heart shaped pan or cut it out into a heart shape. You may use any shape pan that gives you an area of 50” – 6×8 or 7×7.  An 8” spring form pan works with great results as do smaller pans or ramekins.
-An instant read thermometer highly recommended.
Note on recipeThe recipe consists of 3 simple ingredients and how you interpret them is part of the challenge.

Chocolate Valentino
Preparation Time:  20 minutes

 
16 ounces (1 pound) (454 grams) of semisweet chocolate, roughly chopped
½ cup (1 stick) plus 2 tablespoons (146 grams total) of unsalted butter
5 large eggs separated

1. Put chocolate and butter in a heatproof bowl and set over a pan of simmering water (the bottom of the bowl should not touch the water) and melt, stirring often.
2. While your chocolate butter mixture is cooling. Butter your pan and line with a parchment circle then butter the parchment.
3. Separate the egg yolks from the egg whites and put into two medium/large bowls.
4. Whip the egg whites in a medium/large grease free bowl until stiff peaks are formed (do not over-whip or the cake will be dry).
5. With the same beater beat the egg yolks together.
6. Add the egg yolks to the cooled chocolate.
7. Fold in 1/3 of the egg whites into the chocolate mixture and follow with remaining 2/3rds. Fold until no white remains without deflating the batter. {link of folding demonstration}
8. Pour batter into prepared pan, the batter should fill the pan 3/4 of the way full, and bake at 375F/190C
9. Bake for 25 minutes until an instant read thermometer reads 140F/60C.
Note – If you do not have an instant read thermometer, the top of the cake will look similar to a brownie and a cake tester will appear wet.
10. Cool cake on a rack for 10 minutes then unmold.

Feb_39Feb_38

Microwave melted Chocolate & 8″ spring form pan

Feb_40

Ready for the oven

I used all semisweet chocolate and that was absolutely right for us. We couldn’t have liked it a bit more bitter than that. Milk chocolate would be good too cause the chocolate taste gets a little more intense in the cake.

David Lebovitz link for making ice cream if you do not have an ice cream freezer.
Links to helpful tips:
Folding video demonstration.
Egg Whipping video demonstration.

I used David Lebovitz’ vanilla ice cream recipe.

For the cherry caramel sauce, I heated up a cup of cherries with 1/2 a tsp. of sugar till they got tender. Then they went in a blender and pureed. I mixed it up with caramel sauce made from the earlier daring baker challenge and Voila…..Cherry Caramel sauce is ready.

Feb_37 Feb_74

Pitted fresh cherries and the making of cherry caramel sauce

Finally……

Feb_78

My chocolate cake sunflower with Tuiles

This is a cake that everyone (who is a fan of chocolate) should definitely try.

Expenditure:

Chocolate 1 lb ………$ 5.00 ………from Kroger……none left

Heavy cream 1 pint….$ 3.25……….from Kroger……none left

————————————————————————–

Total………………..$ 8.25


Posted in - Cherry, -Butter, -Cream, -Golden Syrup, -Semisweet Chocolate, -Vanilla, Chocolate, Eggs, Milk, Sugar | Tagged: , , | 12 Comments »

Daring Bakers: Caramel Cake with Caramelized Butter Frosting & Golden Vanilla Bean Caramels

Posted by vivnidhi on November 29, 2008

Nov_49

Caramel Cake with Caramelized Butter Frosting

cNov_61

Golden Honey Vanilla Ginger Caramels……They really are delicious…

The mood is really really somber as I write this post. This month was so full of fun……..if only Mumbai was not attacked. The cowardly act has left me anxious. It was extremely sad to watch the city I so adored, terrified like that. I grew up in a town close to the Financial Capital Mumbai. I was always in awe of the Metro and a little scared too….if this small town girl would ever be able to walk as fast as the rest of Mumbaikars. As Luck would have it, I got to work in a Mumbai suburb and I could not believe that the city was so welcoming. Felt like I belonged there. I could walk as fast (or faster) as the Mumbaikars.I, too have walked past the Taj Mahal Hotel and felt a sense of pride, awe. All the politicians have left a sour note by their behavior and power politics. The complete lack of moral value in the politicians of India is shameful. The security forces, firemen and the Doctors have done us Indians proud. If only these people were supported by the “RULERS”. I was absolutely stunned to hear one of the State Ministers call themselves “RULERS” I didn’t know we had “RULERS”, some years back they called themselves Public Servants. Not one of the Indian politician has shown any leadership.Life is getting back to routine for Mumbai residents as we all mourn the deaths of innocents. I can only hope that the security forces are further strengthened and equipped in the days to come as these threats become more real everyday. That would be a fitting tribute to the brave men who have laid down their lives.

Daring Bakers were back to sweet celebrations this month & completed two years on Nov. 19. Charche Chauke Ke turned one year old too this month. So, sweet treats ruled the month. The recipe is by Shuna Fish Lydon of Eggbeater (http://eggbeater.typepad.com/) and her signature caramel cake. Alice Medrich’s Golden Vanilla Bean Caramels were an optional challenge. This month’s challenge was hosted by Dolores (http://culinarycuriosity.blogspot.com/), Alex (Brownie of the Blondie and Brownie duo: http://blondieandbrownie.blogspot.com/), Jenny of Foray into Food (http://forayintofood.blogspot.com/) and helped by Natalie of Gluten-a-Go-Go (http://glutenagogo.blogspot.com/) for gluten free version of the recipe.

I tackled the caramels first as I have never made candy. First I bought an inexpensive candy thermometer. I am extremely impressed by the results. The caramels were just delicious. The hubby and son loved it. I have made it twice. The first time round, I had printed the recipe incomplete and so after the addition of cream…….I just did not heat the caramel mixture:). Yeah….that’s typical me;). So, I waited all night for the caramels to firm up………which they never did………..Result……..I had the most delicious caramel sauce I have ever eaten. Alice Medrich……..I love you. Honestly……if you want the best caramel sauce……..use her recipe and use Golden syrup. It’s the best!!! You will feel like throwing the store bought caramel sauce the moment you taste this. Anyway, I scraped half the mixture back in the pan and heated it back up to 260F and Voila………I had some delicious toffee. Incredible. Now I had a bottle full of caramel sauce and delicious toffee. No more salivating for Alpenliebe:). Well , I made caramels again…….this time it was half honey and half golden syrup. I added ginger while heating the cream and strained it later. I had increased he cream by 2 tablespoons as I thought some would be absorbed by ginger. Anyway, the net result was fabulous. Thank you for this incredible challenge. I would have never made candy otherwise.

Nov_10

First attempt………sugar and golden golden syrup

Nov_24

Result…………..The BEST Caramel Sauce Ever!!

Nov_21

Golden Vanilla Toffee

cNov_23

All dressed up

Caramels Recipe:

Recipe Source: Golden Vanilla Bean Caramels from Pure Dessert by Alice Medrich, Artisan Press, Copyright 2007, ISBN: 978-1579652111

GOLDEN VANILLA BEAN CARAMELS
– makes eighty-one 1-inch caramels –
Ingredients
1 cup golden syrup
2 cups sugar
3/8 teaspoon fine sea salt
2 cups heavy cream
1 1/2 teaspoons pure ground vanilla beans, purchased or ground in a coffee or spice grinders, or 1 tablespoon plus 1 teaspoon pure vanilla extract
3 tablespoons unsalted butter, cut into chunks, softened
Equipment
A 9-inch square baking pan
Candy thermometer
Procedure
Line the bottom and sides of the baking pan with aluminum foil and grease the foil. Combine the golden syrup, sugar, and salt in a heavy 3-quart saucepan and cook over medium heat, stirring with a silicone spatula or wooden spoon, until the mixture begins to simmer around the edges. Wash the sugar and syrup from the sides of the pan with a pastry brush dipped in water. Cover and cook for about 3 minutes. (Meanwhile, rinse the spatula or spoon before using it again later.) Uncover the pan and wash down the sides once more. Attach the candy thermometer to the pan, without letting it touch the bottom of the pan, and cook, uncovered (without stirring) until the mixture reaches 305°F. Meanwhile, combine the cream and ground vanilla beans (not the extract) in a small saucepan and heat until tiny bubbles form around the edges of the pan. Turn off the heat and cover the pan to keep the cream hot.
When the sugar mixture reaches 305°F, turn off the heat and stir in the butter chunks. Gradually stir in the hot cream; it will bubble up and steam dramatically, so be careful. Turn the burner back on and adjust it so that the mixture boils energetically but not violently. Stir until any thickened syrup at the bottom of the pan is dissolved and the mixture is smooth. Continue to cook, stirring occasionally, to about 245°F. Then cook, stirring constantly, to 260°F for soft, chewy caramels or 265°F; for firmer chewy caramels.
Remove the pan from the heat and stir in the vanilla extract, if using it. Pour the caramel into the lined pan. Let set for 4 to 5 hours, or overnight until firm.
Lift the pan liner from the pan and invert the sheet of caramel onto a sheet of parchment paper. Peel off the liner. Cut the caramels with an oiled knife.  Wrap each caramel individually in wax paper or cellophane.
Variations
Fleur de Sel Caramels: Extra salt, in the form of fleur de sel or another coarse flaked salt, brings out the flavor of the caramel and offers a little ying to the yang. Add an extra scant 1/4 teaspoon of coarse sea salt to the recipe. Or, to keep the salt crunchy, let the caramel cool and firm. Then sprinkle with two pinches of flaky salt and press it in. Invert, remove the pan liner, sprinkle with more salt. Then cut and wrap the caramels in wax paper or cellophane.
Nutmeg and Vanilla Bean Caramels: Add 1/2 teaspoon freshly grated nutmeg to the cream before you heat it.
Cardamom Caramels: Omit the vanilla. Add 1/2 teaspoon slightly crushed cardamom seeds (from about 15 cardamom pods) to the cream before heating it. Strain the cream when you add it to the caramel; discard the seeds.
Caramel Sauce: Stop cooking any caramel recipe or variation when it reaches 225°F or, for a sauce that thickens like hot fudge over ice cream, 228°F. Pour it into a sauceboat to serve or into a heatproof jar for storage. The sauce can be stored in the refrigerator for ages and reheated gently in the microwave or a saucepan just until hot and flowing before use. You can stir in rum or brandy to taste. If the sauce is too thick or stiff to serve over ice cream, it can always be thinned with a little water or cream. Or, if you like a sauce that thickens more over ice cream, simmer it for a few minutes longer.
(recipe from Alice Medrich’s Pure Dessert)

Next comes the Caramel Cake. I should admit, overconfidence led to a bitter caramel syrup…and I made the cake with it. Again thankfully, the cake tasted great…..no extra sweetness. Just right……but the leftover caramel syrup is not of much use. I had only made half the caramel syrup recipe given here. I took time to like the cake and the frosting. And I believe that I did not do a good job of it. Next time, I have to be more careful.

The Recipe:

EQUIPMENT: For Cake/Icing: Stand mixer with paddle attachment (or use a hand mixer, or mix the old-fashioned way), 9-inch cake pan (or whatever size/shape you choose), cookie sheet or sheet pan, stainless steel saucepan, pastry brush, whisk, sieve.

RECIPE SOURCE
Caramel Cake with Caramelized Butter Frosting courtesy of Shuna Fish Lydon (
http://eggbeater.typepad.com/), as published on Bay Area Bites (http://blogs.kqed.org/bayareabites/).

CARAMEL CAKE WITH CARAMELIZED BUTTER FROSTING
10 Tablespoons unsalted butter at room temperature
1 1/4 Cups granulated sugar
1/2 teaspoon kosher salt
1/3 Cup Caramel Syrup (see recipe below)
2 large eggs, at room temperature
splash vanilla extract
2 Cups all-purpose flour
1/2 teaspoon baking powder
1 cup milk, at room temperature
Notes from Natalie for those of you baking gluten-free:
So the GF changes to the cake would be:
2 cups of gluten free flour blend (w/xanthan gum) or 2 cups of gf flour blend + 1 1/2 tsp xanthan or guar gum
1/2 – 1 tsp baking powder (this would be the recipe amount to the amount it might need to be raised to & I’m going to check)
I’ll let you when I get the cake finished, how it turns out and if the baking powder amount needs to be raised.

Preheat oven to 350F
Butter one tall (2 – 2.5 inch deep) 9-inch cake pan.
In the bowl of a stand mixer fitted with a paddle attachment, cream butter until smooth. Add sugar and salt & cream until light and fluffy.
Slowly pour room temperature caramel syrup into bowl. Scrape down bowl and increase speed. Add eggs/vanilla extract a little at a time, mixing well after each addition. Scrape down bowl again, beat mixture until light and uniform.
Sift flour and baking powder.
Turn mixer to lowest speed, and add one third of the dry ingredients. When incorporated, add half of the milk, a little at a time. Add another third of the dry ingredients, then the other half of the milk and finish with the dry ingredients. {This is called the dry, wet, dry, wet, dry method in cake making. It is often employed when there is a high proportion of liquid in the batter.}
Take off mixer and by hand, use a spatula to do a few last folds, making sure batter is uniform. Turn batter into prepared cake pan.
Place cake pan on cookie sheet or 1/2 sheet pan. Set first timer for 30 minutes, rotate pan and set timer for another 15-20 minutes. Your own oven will set the pace. Bake until sides pull away from the pan and skewer inserted in middle comes out clean. Cool cake completely before icing it.
Cake will keep for three days outside of the refrigerator.

Nov_32
Creaming Butter and sugar

Nov_35

Addition of Caramel Syrup…….I know that’s dark;);)

Nov_37

Ready for the oven

Nov_44

Here’s the cake!

CARAMEL SYRUP
2 cups sugar
1/2 cup water
1 cup water (for “stopping” the caramelization process)
In a small stainless steel saucepan, with tall sides, mix water and sugar until mixture feels like wet sand. Brush down any stray sugar crystals with wet pastry brush. Turn on heat to highest flame. Cook until smoking slightly: dark amber.
When color is achieved, very carefully pour in one cup of water. Caramel will jump and sputter about! It is very dangerous, so have long sleeves on and be prepared to step back.
Whisk over medium heat until it has reduced slightly and feels sticky between two fingers. {Obviously wait for it to cool on a spoon before touching it.}
Note: For safety reasons, have ready a bowl of ice water to plunge your hands into if any caramel should land on your skin.


CARAMELIZED BUTTER FROSTING
12 tablespoons unsalted butter
1 pound confectioner’s sugar, sifted
4-6 tablespoons heavy cream
2 teaspoons vanilla extract
2-4 tablespoons caramel syrup
Kosher or sea salt to taste
Cook butter until brown. Pour through a fine meshed sieve into a heatproof bowl, set aside to cool.
Pour cooled brown butter into mixer bowl.
In a stand mixer fitted with a paddle or whisk attachment, add confectioner’s sugar a little at a time. When mixture looks too chunky to take any more, add a bit of cream and or caramel syrup. Repeat until mixture looks smooth and all confectioner’s sugar has been incorporated. Add salt to taste.
Note: Caramelized butter frosting will keep in fridge for up to a month.
To smooth out from cold, microwave a bit, then mix with paddle attachment until smooth and light
(recipes above courtesy of Shuna Fish Lydon)

The cake was moist with a distinct caramel flavor. I used crushed up vanilla toffee on top.

Nov_50

Have a bite!!

Expenditure:

  • Sugar 5 lb ………………….$ 2.50 from Kroger……lots left
  • Heavy cream 1 Quart………. $ 6.50 from Kroger………..very little left
  • Golden Syrup 12 oz. ………..$4.99 from Cost Plus ……..finished
  • Candy Thermometer…………$ 2.99 from Walmart

Total…………………………………$ 15.98

Posted in -All Purpose flour, -Butter, -Cream, -Golden Syrup, -Vanilla, Herbs, Milk, Sugar | Tagged: , , | 10 Comments »