चर्चे चौके के Charche Chauke Ke

Hey! Join in the Kitchen Gossip!!

Archive for the ‘Shallots’ Category

Daring Cooks cook Indian : Masala Dosa (Updated)

Posted by vivnidhi on September 15, 2009

aug2_95

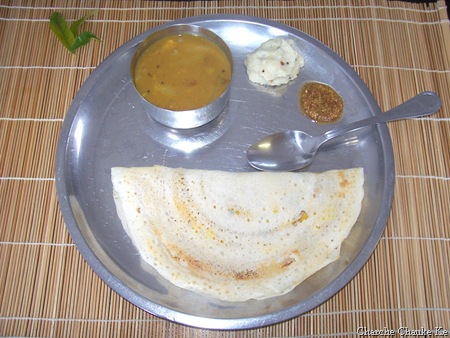
Masala Dosa with Sambhar, coconut chutney and Podi

Debyi from http://www.healthyvegankitchen.com hosted this month’s challenge and ordered Indian Dosas for all of us at Fresh Restaurants (www.freshrestaurants.ca) in Toronto, Canada. Since we all live in a virtual world these days, we were all handed over a recipe from their cookbook  and asked to make dosas to serve ourselves. Now, masala dosas (and oh my dear idlis, made from a similar batter) are a very big favorites with me. I can eat them all the time. My parents and I spent a couple of years in Vishakhapatnam , Andhra Pradesh and that is where my mother learnt to make good idlis and dosas. Another big influence was my Aunt who spent half her life in Chennai, then Madras and cooked fabulous South Indian meals.

Unfortunately I cannot make something with grains and flour and call it a dosa. A similar fare called Chil-ra is made in North India and I will be talking about it at the end of the post. Hence, I used my regular recipe for making dosas . I hope Debyi won’t mind it……..I kept the whole thing Vegan 🙂 .

The Recipe:

Dosa:

  • Idli Rice 3 cups soaked in water overnight
  • Black gram (Urad Daal)  1 cup soaked in water overnight
  • Fenugreek seeds 1 tsp.
  • salt to taste

aug2_39 aug2_48

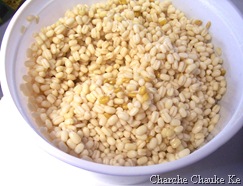
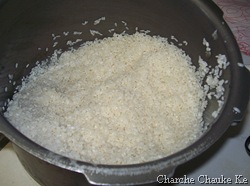
Fenugreek seeds,urad daal soaked and drained and idli rice soaked and drained in picture 2

Soak fenugreek seeds and urad daal together in water overnight. Since I make idlis and dosas from the same batter, I soak rice and lentils separately. Grind the lentils with little water till a very smooth paste is achieved.

aug2_44 aug2_45

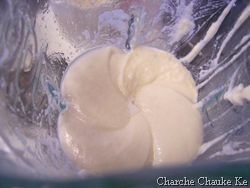
Ground lentils

aug2_49 aug2_50

Rice needs to ground well too…..adding rice paste to lentils paste and final paste before fermentation

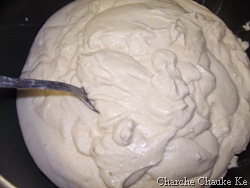
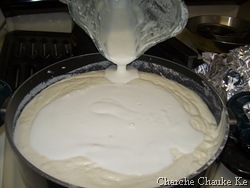
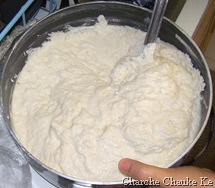
After lentils and rice are ground well, add rice paste to lentils paste and add about 2 tsp. salt. Leave to ferment 12 to 14 hours. Unless, you live in a hot weather, in that case check after 5-6 hours. The dough should almost double.

aug2_65  aug2_78

Half the batter : after fermentation. Add water as required and dosa batter’s ready

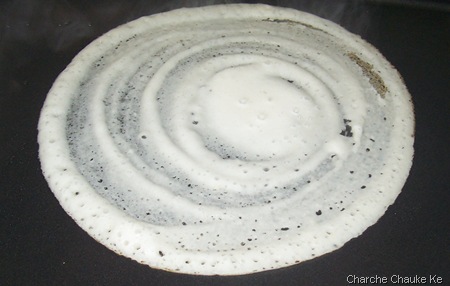
aug2_88 

Ladle the dosa batter in circular motion

Potato filling:

  • Potatoes 4 medium boiled and chopped
  • Onion 1 big sliced
  • Ginger grated 1 tsp.
  • Canola Oil 2 tsp.
  • Asafoetida (Heeng) 1/2 tsp.
  • Mustard seeds (Rai) 1 tsp.
  • Fresh Curry leaves 2 stems washed
  • Bengal gram (Chana Daal ) 1 tsp.
  • Black gram (Urad Daal) 1 tsp.
  • Turmeric powder (Haldi) 1 tsp.
  • Red chilli powder (Lal mirch) 1/2 tsp.
  • salt to taste

aug2_60

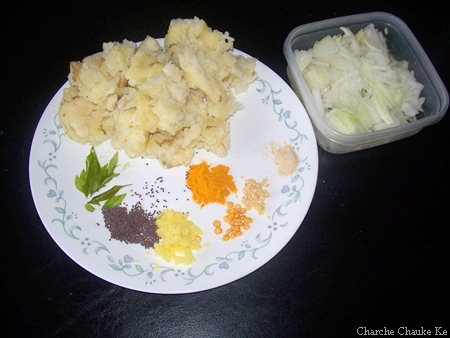
Potato filling ingredients clockwise:Fresh curry leaves, boiled potatoes, asafoetida, urad daal, chana daal, grated ginger, mustard seeds and sliced onions

To make the filling:

Heat the oil in a wok and add all the ingredients except potatoes, onion and salt.

Fry for one minute then add the onions. Let them fry for 2 more minutes.

When the onions start to turn translucent, add the potatoes and salt. If the mixture seems too dry, add 2 Tbsps. water. Cover and cook the filling for 5 minutes. The filling is ready.

aug2_90

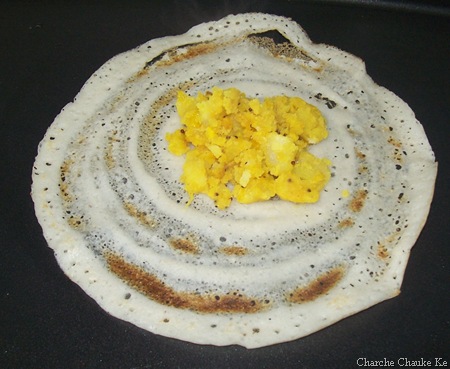
Add the potato filling as the dosa starts to brown at the bottom

aug2_92

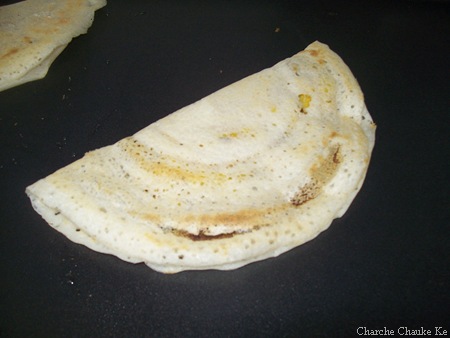
Fold the dosa and we’re done

I prepared 2-3 dosas at a time on a big electric griddle as I was serving 5 people at a time. The best crispness and color is achieved on an iron griddle. The iron griddle is heated , a couple of drops of oil are added to it and a raw onion just sliced at the top is used to spread the oil on the griddle. This is the traditional way of preparing dosas.

Sambhar :

  • Split yellow pigeon peas (Arhar/Toor Daal)  2 cups boiled in a pressure cooker with turmeric and salt
  • Canola Oil 1 Tbsp.
  • Mustard seeds (Rai) 1 tsp.
  • Cumin seeds (Jeera) 1 tsp.
  • Asafoetida (Heeng)  1/2 tsp.
  • Fresh Curry leaves 2 stems washed (remove the stems 😉 )
  • Ginger 2 tsp. grated
  • Garlic 2 cloves minced
  • Shallots/pearl onions 1/2 cup (cut if required to bite size pieces)
  • Tomatoes 2 chopped
  • Vegetables of choice (beans, bell pepper, bottle gourd etc. ) optional
  • Sambhar Masala powder 1 Tbsp.
  • Tamarind concentrate 1/2 tsp.
  • Salt to taste
  • Cilantro/coriander leaves for garnish

To prepare the sambhar heat oil in a big saucepan. Add mustard seeds, cumin seeds, asafoetida and fresh curry leaves. When you hear the mustard seeds crackle, add the ginger and garlic.

Next add the shallots or pearl onions and fry for a little bit more. Next add the tomatoes. When the tomatoes start getting mushy, add the boiled lentils. Mix well and let it come to a boil. The consistency should be like lentil soup. It can be thinned a bit more if desired.  Finally add the sambhar masala powder and the tamarind concentrate.

(If using actual tamarind, soak it in hot water for 15 minutes. Take the pulp out and discard the fibrous portion and the seeds.)

Garnish with cilantro leaves and the sambhar is ready.

Coconut Chutney:

  • Grated coconut (fresh/frozen) 1 cup
  • Dalia Daal (Roasted split Bengal gram) 1/2 cup
  • Peanuts 2 Tbsp.
  • salt to taste

for tempering:

  • Canola Oil 1 Tbsp.
  • Asafoetida 1/4 tsp.
  • Mustard seeds 1 tsp.
  • Fresh Curry leaves 2 stems washed
  • Whole Red chili 1

aug2_66

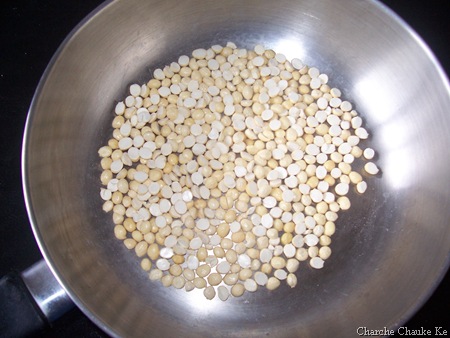
Dalia Daal/ Roasted split Bengal gram

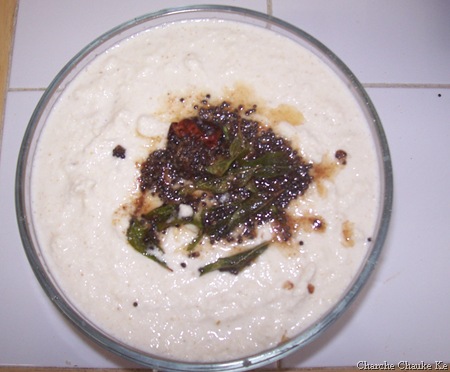
This is a very basic coconut chutney but tastes great! To prepare the chutney, grind the chutney ingredients in a grinder (ideally) or a blender (I use) and add a little water. Grind the ingredients well till you get a smooth consistency.

Heat oil in a small wok and add all the tempering ingredients. Heat till you hear crackling noise and the tempering ingredients look crisp. Do not let it burn. Add immediately to the ground chutney.

The coconut chutney’s ready!

aug2_67

Coconut chutney

aug2_95

Please help yourself 😉

aug2_85

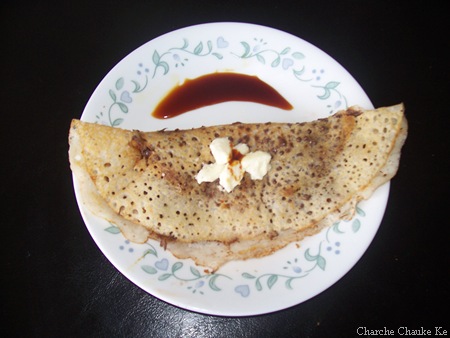
Dosa with Nutella , caramel sauce and some sweet butter


Chil-ra or Godhuma Dosa:

The actual recipe given by Debyi uses spelt flour to make the crepe. In North India , it is called Chilra and in South India, it is called Godhuma Dosa (whole wheat flour dosa)

The way we make it in North India is slightly different and hence my clarifications. We do not eat the chil-ra with any curry. It is usually eaten with pickle or cilantro chutney or even Bhukni (a dry tangy spice powder)

The Recipe:

  • Whole wheat pastry flour (atta) 2 cups
  • Onion 1/2 medium minced
  • Ginger 1 tsp. grated/minced
  • green chilli 1 cut fine
  • tomato 1/2 medium chopped fine
  • Carom seeds 1 tsp.
  • salt to taste
  • water

100_3946

Clockwise: Atta , water , onion, green chili, ginger and tomatoes

100_3950

Chil-ra with yogurt and mango pickle……comfort food

Add all the ingredients and enough water to make a smooth batter. Make sure no lumps remain.

Heat a griddle and make crepes out of these. These will not be as thin as the lentil mixture. But the meal’s ready instantly. I used to love eating these as kid and still do. My kids are a big fan as well……….only I do not know if it’s the chance to eat pickle or chil-ra that draws them to it. Anyway, it’s a good quick fix for me 😉 .

Edit : 17 Sep.  09 : Oh Dear me! I just re-read my post and realized that I have written the quantity of rice as 1 cup and that of the lentils too. It was a typo. I am so very sorry if anyone has tried making this with the wrong ratio given.  I have marked in red , please do check.

Posted in - Turmeric, -Arhar (Toor) Dal, -Asafoetida, -Canola Oil, -Cilantro, -Curry leaves, -Dalia Daal/Roasted split Bengal Gram, -Fenugreek seeds, -Garlic, -Ginger, -Idli Rice, -Mustard Seeds, -Onion, -Potatoes, -Red chili powder, -Tamarind, -Tomato, -Urad daal/ black gram, -Whole wheat flour, Shallots, _Chana Daal/ Bengal gram | Tagged: , , , | 7 Comments »

Black Bread

Posted by vivnidhi on September 7, 2009

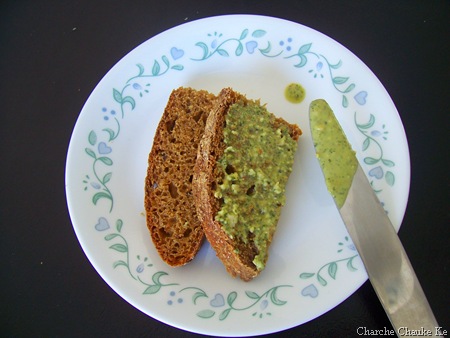
100_3945

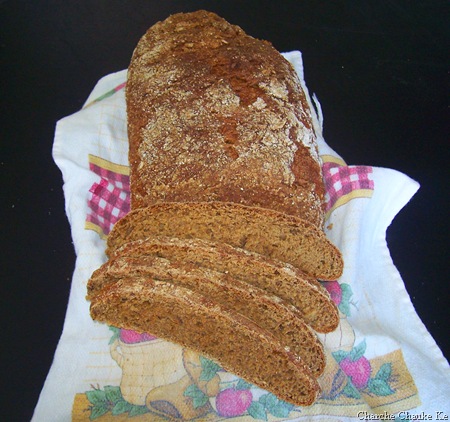
Russian Black Bread…We loved ours with pesto mayo sauce

The bread is black and I cheated too…….was that because I cheated………NO. Gorel of Grain Doe made a Russian Black bread this month for Bread Baking Babes. How she used a couple of recipes to invent this one is a very interesting read. I did not have any sourdough starter and used yeast….that’s my cheat ;-). Now, you think I would not buddy up those who bake bread?

It was such a different looking bread and I had never even heard of it, leave alone taste it.Result : We all loved it. Even when it started getting drier on the 4th day, the husband said ” I like it” :-). The recipe’s a keeper even if it requires more pre-planning than normal.

Black Bread – intermediate style

SOURDOUGH

  • Medium rye flour 300 g (10,6 oz)
  • Water 350 ml (1,5 cup)
  • Active sourdough culture* 2 Tbsp

SOAKER

  • Old bread**, toasted 100 g/3,5 oz
  • Coffee, ground 15 g/0,5 oz
  • Vegetable, neutral oil 25 g/0,9 oz
  • Molasses 60 ml/1/4 cup
  • Caraway seeds 2 tsp
  • Fennel seeds 1 tsp
  • Minced shallots 1 Tbsp

Water, hot 400 ml/1 2/3 cup

FINAL DOUGH

  • Medium rye flour 300 g/10,6 oz
  • High gluten bread flour 400 g/14,1 oz
  • Salt 20 g/0,7 oz (appr. 1 Tbsp)
  • Yeast
  • Fresh: 15 g/0,5 oz
  • Instant dry: 1,5 tsp (0,17 oz)

Soaker

  • All of the above
  • Sourdough
  • All of the above

* If you don’t have any active starter at hand, I think you can cheat by using a small amount (say 5 g fresh or 0,5 tsp instant dry yeast) instead.

**  Gorel used rye sourdough bread, but I guess any old unsweetened bread will do, or any old bread in general.

Sourdough

Mix the ingredients to the sourdough, cover the container with plastic and leave for 12–14 hours at room temperature.

Soaker

Toast the old bread in a toaster or in the oven. The bread should be browned, but absolutely not blackened. Dice the bread or just tear it in pieces and put it in a bowl. Add the rest of the soaker ingredients except the water. Heat the water to near boiling and pour over the soaker ingredients. Cover and leave for the same duration as the sourdough.

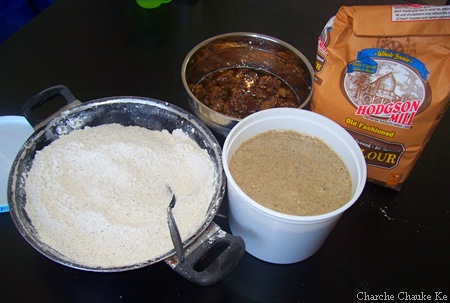
100_3937

All set: Flour mix, Soaker and sourdough…and yes,  that’s my rye flour


Final dough

Mix the two flours in a separate bowl.

If using fresh yeast: Take a small amount of the soaker liquid and dissolve the yeast in it.

Add the yeast mixture OR the instant dry yeast, soaker, sourdough and salt to a mixing bowl.

Add half of the flour mixture and work the dough by hand or in machine. Continue to add about 100 ml or ½ cup of the flour mixture at a time and work until the flour is completely absorbed before you add the next round. The dough shall be firm but still quite sticky. You might not use all the flour, or you might need to add more flour, all depending on the flour used.

Place the dough in an oiled container, cover with plastic and leave for 2–3 hours or until doubled in size.

Shaping and proofing

Drizzle some rye flour on the table top and place the dough on top. If the dough is very sticky, pour just enough rye flour on top of it to make it possible to handle.

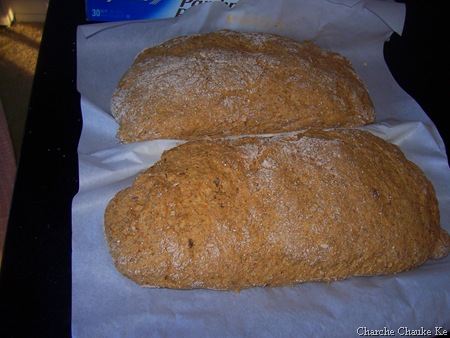
Divide the dough in two and shape the parts into oblong loaves. (I placed them on parchment paper to make it possible to just slide the loaves into the oven.) Stretch the surface using both hands to get a tight loaf. Use more rye if the dough is too sticky to handle.

Cover with a tea towel and leave for 60 minutes. Don’t over-proof! (Fire up the oven after 30 minutes to have it ready.)

100_3938

Sticky dough: After first proof

100_3940

Does this sticky dough proof quickly, this is after 55 minutes

Baking

Place an empty metal container in the bottom of the oven. Put in your baking stone or an empty baking sheet. Heat the oven to 225 °C/435 °F.

Put 3–4 ice cubes in the metal container.

Move the loaves to the hot stone or sheet. Bake for 10 minutes.

Open the oven door to vent out some moist. At the same time, lower the temp. to 200 °C/400 °F. Bake another 30-40 minutes or until they sound hollow when tapped underneath, or when the inner temperature has reached appr. 97 °C/207 °F.

Let the loaves cool down before you slice them. Eat with butter and maybe some sharp cheese, or why not cured salmon.

100_3941

Russian Black Bread

This bread made some delicious veggie sandwiches for us with mayo and pesto. Thank you Gorel.

I’d like to send this to Susan of Wild Yeast as my first YeastSpotting entry.

Posted in - Bread Flour, -Caraway seeds, -Fennel seeds, -Rye Flour, -Vegetable Oil, Baking Powder, Coffee, Old Bread, Shallots, Sugar, Yeast | 7 Comments »

Hot Hot from the oven……Pizza…….

Posted by vivnidhi on October 30, 2008

A very happy Deepavali to my readers!!  Had a fabulous festival of lights, cooking for Diwali was a very satisfying experience this year with just a  few hitches..:)

As I had not tried this month’s Daring Bakers Challenge early enough this month, I am a day late in posting this month. This month’s challenge was hosted by the benevolent Rosa of Rosa’s Yummy Yums. This challenge is also a tribute to the memory of Sher of What Did you Eat who passed away suddenly in July. She was to host this month’s challenge along with Rosa and Glenna of a Fridge full of Food.

Here are the pizzas I made up without much pre-planning.

garden100_2580

Garden veggie pizza with Paneer

peethi100_2582

Olives, spicy lentils, paneer and cilantro Pizza

The main thing is the pizza base.

The Recipe:

EQUIPMENT: Stand mixer with paddle and dough hook attachments (optional, see recipe), cooking thermometer, baking sheet, parchment paper, cooking oil, plastic wrap, pizza peel/scraper, pizza stone or pan.

RECIPE SOURCE: “The Bread Baker’s Apprentice: Mastering The Art of Extraordinary Bread” by Peter Reinhart. Ten Speed Press, Berkeley, CA. Copyright 2001. ISBN-10: 1-58008-268-8, ISBN-13: 978-158008-268-6.

***************

~ BASIC PIZZA DOUGH ~

Original recipe taken from “The Bread Baker’s Apprentice” by Peter Reinhart.

Makes 6 pizza crusts (about 9-12 inches/23-30 cm in diameter).

Ingredients:

4 1/2 Cups (20 1/4 ounces/607.5 g) Unbleached high-gluten (%14) bread flour or all purpose flour, chilled – FOR GF: 4 ½ cups GF Flour Blend with xanthan gum or 1 cup brown rice flour, 1 cup corn flour, 1 cup oat flour, 1 ½ cup arrowroot, potato or tapioca starch + 2 tsp xanthan or guar gum

1 3/4 Tsp Salt

1 Tsp Instant yeast – FOR GF use 2 tsp

1/4 Cup (2 ounces/60g) Olive oil or vegetable oil (both optional, but it’s better with)

1 3/4 Cups (14 ounces/420g or 420ml) Water, ice cold (40° F/4.5° C)

1 Tb sugar – FOR GF use agave syrup

Semolina/durum flour or cornmeal for dusting

DAY ONE

Method:

1. Mix together the flour, salt and instant yeast in a big bowl (or in the bowl of your stand mixer).

2. Add the oil, sugar and cold water and mix well (with the help of a large wooden spoon or with the paddle attachment, on low speed) in order to form a sticky ball of dough. On a clean surface, knead for about 5-7 minutes, until the dough is smooth and the ingredients are homogeneously distributed. If it is too wet, add a little flour (not too much, though) and if it is too dry add 1 or 2 teaspoons extra water.

NOTE: If you are using an electric mixer, switch to the dough hook and mix on medium speed for the same amount of time.The dough should clear the sides of the bowl but stick to the bottom of the bowl. If the dough is too wet, sprinkle in a little more flour, so that it clears the sides. If, on the contrary, it clears the bottom of the bowl, dribble in a teaspoon or two of cold water.

The finished dough should be springy, elastic, and sticky, not just tacky, and register 50°-55° F/10°-13° C.

Or

2. FOR GF: Add the oil, sugar or agave syrup and cold water, then mix well (with the help of a large wooden spoon or with the paddle attachment, on low speed) in order to form a sticky ball of dough.

3. Flour a work surface or counter. Line a jelly pan with baking paper/parchment. Lightly oil the paper.

4. With the help of a metal or plastic dough scraper, cut the dough into 6 equal pieces (or larger if you want to make larger pizzas).

NOTE: To avoid the dough from sticking to the scraper, dip the scraper into water between cuts.

5. Sprinkle some flour over the dough. Make sure your hands are dry and then flour them. Gently round each piece into a ball.

NOTE: If the dough sticks to your hands, then dip your hands into the flour again.

6. Transfer the dough balls to the lined jelly pan and mist them generously with spray oil. Slip the pan into plastic bag or enclose in plastic food wrap.

7. Put the pan into the refrigerator and let the dough rest overnight or for up to thee days.

NOTE: You can store the dough balls in a zippered freezer bag if you want to save some of the dough for any future baking. In that case, pour some oil(a few tablespooons only) in a medium bowl and dip each dough ball into the oil, so that it is completely covered in oil. Then put each ball into a separate bag. Store the bags in the freezer for no longer than 3 months. The day before you plan to make pizza, remember to transfer the dough balls from the freezer to the refrigerator.

DAY TWO

8. On the day you plan to eat pizza, exactly 2 hours before you make it, remove the desired number of dough balls from the refrigerator. Dust the counter with flour and spray lightly with oil. Place the dough balls on a floured surface and sprinkle them with flour. Dust your hands with flour and delicately press the dough into disks about 1/2 inch/1.3 cm thick and 5 inches/12.7 cm in diameter. Sprinkle with flour and mist with oil. Loosely cover the dough rounds with plastic wrap and then allow to rest for 2 hours.

Or

8. FOR GF: On the day you plan to eat pizza, exactly 2 hours before you make it, remove the number of desired dough balls from the refrigerator. Place on a sheet of parchment paper and sprinkle with a gluten free flour. Delicately press the dough into disks about ½ inch/1.3 cm thick and 5 inches/12.7 cm in diameter. Sprinkle the dough with flour, mist it again with spray oil. Lightly cover the dough round with a sheet of parchment paper and allow to rest for 2 hours.

9. At least 45 minutes before making the pizza, place a baking stone on the lower third of the oven. Preheat the oven as hot as possible (500° F/260° C).

NOTE: If you do not have a baking stone, then use the back of a jelly pan. Do not preheat the pan.

10. Generously sprinkle the back of a jelly pan with semolina/durum flour or cornmeal. Flour your hands (palms, backs and knuckles). Take 1 piece of dough by lifting it with a pastry scraper. Lay the dough across your fists in a very delicate way and carefully stretch it by bouncing it in a circular motion on your hands, and by giving it a little stretch with each bounce. Once the dough has expanded outward, move to a full toss.

Or

10. FOR GF: Press the dough into the shape you want (about 9-12 inches/23-30 cm in diameter – for a 6 ounces/180g piece of dough).

NOTE: Make only one pizza at a time.

During the tossing process, if the dough tends to stick to your hands, lay it down on the floured counter and reflour your hands, then continue the tossing and shaping.

In case you would be having trouble tossing the dough or if the dough never wants to expand and always springs back, let it rest for approximately 5-20 minutes in order for the gluten to relax fully,then try again.

You can also resort to using a rolling pin, although it isn’t as effective as the toss method.

11. When the dough has the shape you want (about 9-12 inches/23-30 cm in diameter – for a 6 ounces/180g piece of dough), place it on the back of the jelly pan, making sure there is enough semolina/durum flour or cornmeal to allow it to slide and not stick to the pan.

Or

11. FOR GF: Lightly top it with sweet or savory toppings of your choice.

12. Lightly top it with sweet or savory toppings of your choice.

Or

12. FOR GF: Place the garnished pizza on the parchment paper onto the stone in the oven or bake directly on the jelly pan. Close the door and bake for about 5-8 minutes.

NOTE: Remember that the best pizzas are topped not too generously. No more than 3 or 4 toppings (including sauce and cheese) are sufficient.

13. Slide the garnished pizza onto the stone in the oven or bake directly on the jelly pan. Close the door and bake for abour 5-8 minutes.

Or

13. FOR GF: Follow the notes for this step.

NOTE: After 2 minutes baking, take a peek. For an even baking, rotate 180°.

If the top gets done before the bottom, you will need to move the stone or jelly pane to a lower shelf before the next round. On the contrary, if the bottom crisps before the cheese caramelizes, then you will need to raise the stone or jelly.

14. Take the pizza out of the oven and transfer it to a cutting board or your plate. In order to allow the cheese to set a little, wait 3-5 minutes before slicing or serving.

garden100_2580

Garden Veggie Pizza with Paneer:

  • Tomato 1 sliced thin
  • Shallots 2 sliced
  • Garlic 2 cloves minced
  • Ginger 1/2 inch piece minced
  • Roasted Red Bell Pepper 1/2 sliced
  • Paneer 1/4 cup sliced
  • Sea Salt 2 tsp.
  • Chat masala 1/4 tsp.
  • Cilantro leaves 10-12 for garnish

Since sauce and toppings both were a MUST according to the rules…………my sauce for this was a very unusual one………if it can actually be called a sauce;)

Mix ginger, garlic and tomatoes. Add salt and let the whole thing sweat for 5-10 minutes. After we have some liquid in the mixture…….this becomes our sauce;). Spread this on the pizza base. Add shallots, roasted bell pepper and paneer.

In the 500F oven for 8 minutes. Remove from oven and garnish with cilantro leaves immediately and sprinkle with chat masala.

The result was absolutely delicious:) A great quick fix if you have pizza base ready.

Note: Chat masala can be bought at most Indian Stores. It is basically a tangy spicy mix.

Olives, spicy lentils, Paneer and cilantro Pizza

Kaheen ka eenth, kaheen ka roda………..Bhanumati ne Kumbha joda

(bricks from somewhere and pebbles from somewhere else, Bhanumati somehow made a house………….)

Diwali had some leftovers too:) Made Kachoris for Diwali and the (peethi) spicy lentils were left. They are a big favorite in my house as you must have seen in my previous posts:) Peethi Bhara Daal ka Dulha, Peethi ki Paronthi……….;)

peethi100_2582

The Recipe:

Spicy Lentils:

  • Urad daal/ split black lentils without skin 1 cup
  • Ginger 2″ piece chopped fine or grated
  • Oil 2 tsp.
  • Green chili 2 chopped fine
  • Red chili powder 1 tsp.
  • fennel seeds/saunf 1 Tbsp.
  • cumin seeds/jeera 2 tsp.
  • Fenugreek seeds/methi 1/2 tsp.
  • Garam masala 1 tsp.
  • coriander powder/dry cilantro powder/dhaniya 1 Tbsp.
  • Asafoetida/heeng powdered 1/2 tsp.
  • Dry mango powder/Amchur 2 Tbsp.
  • Salt to taste
  • Trader Joe’s Mixed Olive Bruschetta
  • Paneer 1/4 cup crumbled
  • Cilantro leaves 10-12 for garnish

For the spicy lentils, the lentils, ginger and green chillies are ground coarsely. They are then fried in oil with the rest of the spices.  These can be stored in the refrigerator for upto two weeks.

Bake the pizza crust for 5 minutes. Remove from oven. Spread the bruschetta mix , top with spicy lentils and paneer. In  the oven again for 6 minutes.

Out form the oven and garnish with cilantro leaves.

The son just loved this one. This is a strange combination but delicious………..trust me:)

By the way, here’s the snap of me trying to toss the dough. All rules satisfied;) I don’t think I know how to toss the dough at all but it was fun.

toss100_2578

That’s my flying Saucer……..

Thank you for a fun challenge Rosa. Have you checked other Daring Bakers’ posts on pizza as yet or not?? Don’t be late like me;)

Expenditure:

  • Bread Flour $ 2.68 ………from Kroger…………lots left
  • Paneer $ 4.49 …………from Indian Store ………………lots left
  • Total ………….$ 7.17 …………not bad at all:)

Posted in - Bread Flour, -Asafoetida, -Cilantro, -Coriander, -Cumin seeds, -Dry Mango Powder, -Fennel seeds, -Fenugreek seeds, -Garlic, -Ginger, -Olive Oil, -Olives, -Red Bell Pepper, -Red chili powder, -Tomato, Daring Bakers, Paneer, Shallots, Sugar, Yeast | Tagged: , , , | 6 Comments »

Rainy Day Pyaaz ki Sabji……for Jihva for Ingredients……Onions

Posted by vivnidhi on February 1, 2008

100_1241

Finally made it to writing another post. Just in time for Jihva for Ingredients hosted by radhiskitchen AND talking about rainy days in the middle of winter!

Goes way back to my childhood days when frozen vegetables were completely unheard of. Buying fresh vegetables from a sabjiwala/sabjiwali was the norm in India. Those days a household could be out of vegetables after a heavy rain or just because all the sabjiwala gang was out watching an Amitabh Bachchan  movie the previous night. That was indeed a rainy day!!

Ok, so no fresh vegetables at home, so? Mom had to think of something quick. I distinctly remember this happening to my mother and she prepared a delightful dry sabji from just small onions. This is a quick delicious recipe and I am so glad that I could reproduce it as my mother had made. My parents have tried my version here and since they found it good too, I am quite confident that it will be liked by people who try this one with such few ingredients.

The Recipe: (For 3 people, 1 serving)

  • Oil 2 tsp.
  • Shallots/small onions are preferable  10-12 peeled and halved
  • Ginger 1″ piece minced or grated
  • Tomato 1/2 chopped fine or 2 Tbsp. Tomato paste
  • Yogurt 1 Tbsp.
  • Turmeric 2 tsp.
  • Cumin seeds 2 tsp.
  • Red chilli powder 1 tsp.
  • Coriander( Dhaniya) powder 1 Tbsp.
  • Garam Masala 2 tsp.
  • Amchur( Dry Mango)  Powder 1 tsp.
  • salt  to taste

The list looks big but this one is really quick.

100_1236

Shallots

100_1238

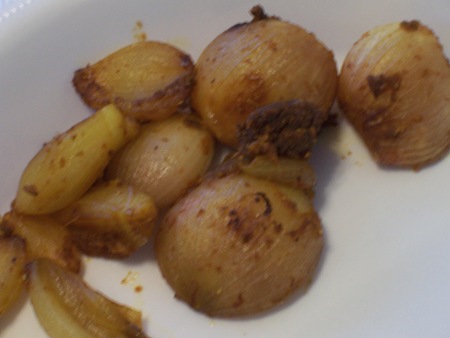
Shallots all cleaned up and ready to be dressed with ginger and masalas

Heat the oil in a wok or pan.  Add the shallots and saute them on medium heat till they start to change color to light pink.  Take the shallots out of the pan. Add all the other ingredients other than the amchur powder and fry them in  the residual oil of the pan. When the masalas start to dry a little, add the shallots. Reduce the flame to low medium and cover the pan.  Add a Tbsp. of water if the sabji seems too dry. When the shallots have become tender, add amchur powder. The sabji is ready!

This is really a delightful, easy and spicy curry. It requires a curry with gravy or daal to accompany it. Tastes great with Paranthas, rotis or rice.

100_1239

Delicious Lunch: Rotis, Pyaaz ki sabji and Daal

Mentioned in IndiWo which is a highly addicting e-magazine.

Posted in -Ginger, -Onion, Shallots | Tagged: , , | 7 Comments »