चर्चे चौके के Charche Chauke Ke

Hey! Join in the Kitchen Gossip!!

Archive for the ‘-Olive Oil’ Category

Chinese Flower Steam Buns (Xiang Cong Hya Juan Bao)

Posted by vivnidhi on October 5, 2009

Trust me, I do not know what half the title says but these are delicious!

sep2_21

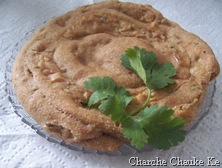
Bad picture …….once again, but these are good!!

Bread Baking Babes have been steaming this month. Trying to produce the best flower buns and each one’s a looker. Mine’s not a looker but was so good. Karen of Bake My Day steamed up a recipe from Global Baker by Dean Brettschneider.

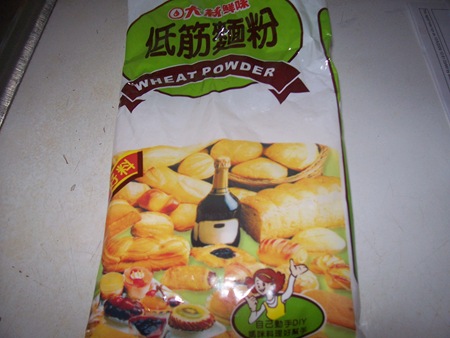
I read all the bread baking babes blogs before I went ahead with the recipe. This recipe calls for Chinese Flour which should be low gluten. I made a trip to our Chinese Store , got all the ingredients and that’s the best thing I did ;-). These came out perfect ……absolutely bread like……no chewiness……perfect soft breads. I was absolutely surprised….how could steaming create such fabulous buns……it was a transformation. Unfortunately, I do not have a cut shot, that would have said more than I can write. We were all so hungry, we just ate it up and forgot all about pictures :-). Anyway, bottom line, if you want to make these……get Chinese Flour :-).

oct_04

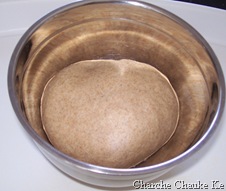
Low Gluten Chinese Flour……called “Weak Flour”

The Recipe:

makes 10 buns

Everywhere you go in China you see people eating steam buns, also known as mantong Typically Chinese, a sweet bread is combined with a savoury filling, such as red bean paste and barbecued pork, but take care and avoid using too much filling or the bun will fall apart during the rising and steaming stage. The baking powder helps to open up the texture and gives a little tenderness to the eating quality of the buns. If you can, use imported Chinese flour from a specialist Asian food market or store”.

Dough

300 g chinese flour (use low gluten flour such as cake flour)

15 g sugar

15 g butter

good pinch of salt

1/4 tsp baking powder

1/4 tsp active dry yeast

150 ml chilled water, placed in the refrigerator overnight ( I just put mine in  the freezer for 15 minutes )


Filling

rice bran oil, for brushing on dough (I used good old extra virgin olive oil 🙂 )

40 g finely chopped spring onions or chives

25 g finely chopped red chillies

salt to taste


To make the dough, place all the ingredients into a large mixing bowl and, using your hands, combine to form a very, very firm dough mass. Don’t be tempted to add any water or the steam buns will be flat after steaming.

Place the dough on a work surface and, using your rolling pin, roll out to a thin strip, fold this in half and roll again. Repeat this 10-15 times with a 30 second rest in between each time. This is a way of mixing a very firm dough, the dough will start to become smooth and elastic as a result of the rolling process.

Put the dough in a lightly oiled bowl and cover with plastic wrap. Leave in a warmish place (23-25C) for 15 minutes. Tip the dough onto a lightly floured surface. Using a rolling pin, roll out each piece to a 25cm square. {{this is strange…he never states that you divide the dough in this stage, so use and roll the one ball of dough you have}}

Brush the dough surface lightly with oil and sprinkle the chopped chives and chillies evenly over the dough. Season with salt.

Fold the dough in half and then cut into 2.5cm strips so that you end up with 10 folded strips. Stretch each strip and, starting at the folding edge, twist the two pieces of each strip over each other to form a rope.

Take the twisted rope and tie into a double knot, tucking the loose ends underneath. Place each bun with ends facing down on a 5cm square of non-stick baking paper** and cover loosely with plastic wrap. Prove for approximately 30-45 minutes in a warm place.

Bring a wok or saucepan of water to the boil with a bamboo steamer sitting on top. Remove the bamboo steamer lid and place the buns on the paper in the steamer 3-4 cm apart to allow for expansion during steaming. Replace the steamer lid and steam for 20 minutes. Repeat until all the buns have been steamed and are firm to the touch.

Karen‘s Notes: you might want to adjust the steaming time from 10-20 minutes, keeping the water at a low blub.

the paper: the pics in the book show him using paper circles, sort of perforated. (as in: paper circles with rather large holes in them). I’m using a regular steam pan with a metal insert and I preferred oiling the base of the metal insert not using any paper, re-oiling when needed. Another thing: I used a tea towel between the lid and the pan to catch any condensation.

I forgot all about the paper and just plain steamed mine. No problems ;-).

I am absolutely in love with garlic chives from Chinese store and so of course I got the authentic stuff.

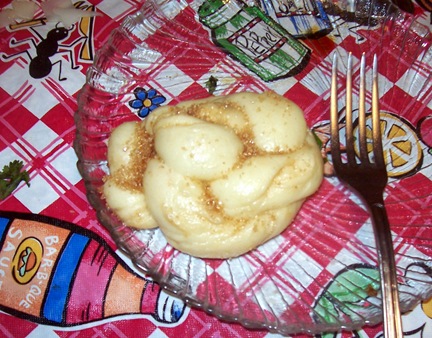
I also made a couple for the kids with turbinado sugar and they were gone in no time.

sep2_19

Chinese Flower Buns with Turbinado Sugar

I will certainly be making  these again. Thanks a lot Karen.  All I wish is that the recipe would at least not have butter and sugar in grams. It’s painful to measure such small quantities in my manual scale which has been even suffered in the hands of my kids 🙂 .

Expenditure:

Chinese Flour…….500 g……….. Chinese Store (Hua Xing)………….$ 2.39

Chives…………….1.03 lb……….Chinese Store (Hua Xing)………….$ 2.21

————————————————————————————————–

Total……………………………………………………………………..$ 4.60

Posted in --Extra virgin olive oil, -Chinese Flour (low gluten), -Garlic chives, -Olive Oil, -Red Chillies, -Turbinado Sugar, Baking Powder, Sugar, Yeast | Tagged: , , , | 1 Comment »

Daring Cooks make Rice with mushrooms, Tofu, Potatoes and artichokes

Posted by vivnidhi on August 14, 2009

Vegetarians Win!! Yeah well, I should not rejoice so much. My expertise at preparing any non-vegetarian food is pretty bleak………and if I have to cook seafood, its worse. I (with the husband’s help 😉 , of course ) can handle salmon well now ….and we know when it is done, but the rest of the stuff leaves me shivering. I tried making scallops thrice and only once did I get it right, rest of the times the family could not eat leather. So, this time we attempted squid…..and I FAILED ……….and hence, everybody ate vegetarian…….YEAH!!

Before I say anything about what I made and what happened, I must mention the accompaniment. This month I learnt to make allioli (the traditional way) and it is just phenomenal. No garlic lover should not – not try it.  To me , it was like tasting sheer bliss. I LOVE garlic. I can eat allioli with bread, pasta, roti, parantha, of course rice , just about anything (OK, spare the desserts 😉 )

This month’s challenge was hosted by Olga of  Las Cosas de Olga and Olga’s Recipes . . She chose a delicious Spanish recipe, Rice with mushrooms, cuttlefish and artichokes by José Andrés, one of the most important Spanish Chefs at the moment. The recipe is from his US TV show Made in Spain.  (Please note Olga’s tips (2) and (3) at the bottom for alternative cooking).

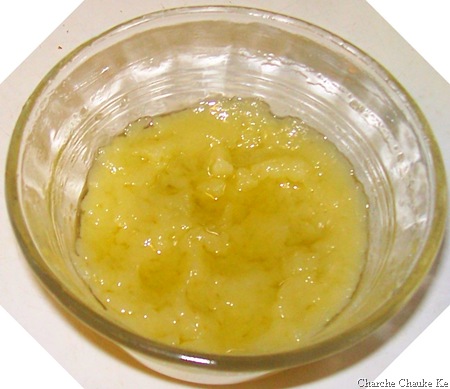
Allioli is my favorite and so lets begin with that. I made it the traditional way and just loved it. This will be made a lot in my house. A lot of people find it strong, but for this spice accustomed tongue, it was just great!

aug1_01

Allioli…..the traditional way


Allioli (Traditional recipe)
Cooking time: 20 min aprox.
Ingredients:

  • 4 garlic cloves, peeled
  • Pinch of salt
  • Fresh lemon juice (some drops)
  • Extra-virgin olive oil (Spanish preferred but not essential)

Directions:

  1. Place the garlic in a mortar along with the salt.
  2. Using a pestle, smash the garlic cloves to a smooth paste. (The salt stops the garlic from slipping at the bottom of the mortar as you pound it down.)
  3. Add the lemon juice to the garlic.
  4. Drop by drop; pour the olive oil into the mortar slowly as you continue to crush the paste with your pestle.
  5. Keep turning your pestle in a slow, continuous circular motion in the mortar. The drip needs to be slow and steady. Make sure the paste soaks up the olive oil as you go.
  6. Keep adding the oil, drop by drop, until you have the consistency of a very thick mayonnaise. If your allioli gets too dense, add water to thin it out. This takes time—around 20 minutes of slow motion around the mortar—to create a dense, rich sauce.

José’s tips for traditional recipe: It’s hard to think that, when you start crushing the garlic, it will ever turn into something as dense and smooth as allioli. But don’t give up. It’s worth the extra time and effort to see the oil and garlic come together before your eyes. Just make sure you’re adding the olive oil slowly, drop by drop. Keep moving the pestle around the mortar in a circular motion and keep dreaming of the thick, creamy sauce at the end of it all.

Allioli a la moderna (Modern recipe)
Cooking time: 3-4 minutes
Ingredients:

  • 1 small egg
  • 1 cup extra-virgin olive oil (as above, Spanish oil is highly recommended)
  • 1 garlic clove, peeled
  • 1 Tbs. Spanish Sherry vinegar or lemon juice (if Sherry vinegar is not available, use can use cider or white vinegar)
  • Salt to taste

Directions:

  1. Break the egg into a mixing bowl.
  2. Add 2 tablespoons of the olive oil and the garlic cloves, along with the vinegar or lemon juice.
  3. Using a hand blender, start mixing at high speed until the garlic is fully pureed into a loose paste.
  4. Little by little, add what’s left of the olive oil as you continue blending.
  5. If the mixture appears too thick as you begin pouring the oil, add 1 teaspoon of water to loosen the sauce.
  6. Continue adding the oil and blending until you have a rich, creamy allioli.
  7. The sauce will be a lovely yellow color.
  8. Add salt to taste.

José’s tips for modern recipe:
(1) If you do not have access to a hand blender, you can use a hand mixer (the kind with the two beaters) or a food processor. If you use a food processor, you must double the recipe or the amount will be too little for the blades to catch and emulsify.
(2) What happens if the oil and egg separate? Don’t throw it out. You can do two things. One is to whisk it and use it as a side sauce for a fish or vegetable. But if you want to rescue the allioli, take 1 tablespoon of lukewarm water in another beaker and start adding to the mix little by little. Blend it again until you create the creamy sauce you wanted.

Why did I FAIL? OK, I am a bit of a purist when it comes to food. If a recipe calls for an ingredient and that ingredient is within my means, I try and go the extra mile. Well! in this case several extra miles around the town and just would not find the short grain Spanish rice. I went crazy and really could not believe that I could not find it. (I saw it at Kroger after I had finished all my experiments.) Anyway, I got short grain brown rice !!! Guess what I cooked sea food till the brown rice got tender. now who could eat what I had dished out? The husband, who could not believe his ears (and was really pleased) when I told him that I would be buying squid for him, asked me to never buy that stuff again :-)) . So all ate my vegetarian basmati version 🙂 . 

Here is the recipe:

Rice with mushrooms, cuttlefish and artichokes
Cooking time: 45 minutes
Equipment:

  • 1 Chopping Board
  • 1 knife
  • 1 medium saucepan
  • 1 Paella pan (30 cm/11” is enough for 4 people. If not available, you may use a simple pan that size)
  • 1 Saucepan

Ingredients (serves 4):

  • 4 Artichokes (you can use jarred or frozen if fresh are not available)
  • 12 Mushrooms (button or Portobello)
  • 1 or 2 Bay leaves (optional but highly recommended)
  • Tofu 1 block cubed and baked at 400 F for 15 minutes
  • 1 glass of white wine
  • 1 Potato  cubed
  • “Sofregit” (see recipe below) (pronounced so-frito)
  • 300 gr (2 cups) Basmati rice – about 75 gr per person ( ½ cup per person) Please read this for more info on suitable rices.
  • Water or Fish Stock (use 1 ½ cup of liquid per ½ cup of rice)
  • Saffron threads (if you can’t find it or afford to buy it, you can substitute it for turmeric or yellow coloring powder)
  • Allioli (olive oil and garlic sauce, similar to mayonnaise sauce) – optional

Directions:

  1. Add 1 or 2 tablespoon of olive oil in a frying pan and put the tofu cubes in the pan.
  2. If you use fresh artichokes, clean them as shown in the video in tip #7. Cut artichokes in eights.
  3. Clean the mushrooms and cut them in fourths.
  4. Add a bay leaf to the tofu and add also the artichokes,potatoes and the mushrooms.
  5. Sauté until we get a golden color in the artichokes.
  6. Put a touch of white wine so all the solids in the bottom of the get mixed, getting a more flavorful dish.
  7. Add a couple or three tablespoons of sofregit and mix to make sure everything gets impregnated with the sofregit.
  8. Add all the liquid and bring it to boil.
  9. Add all the rice. Let boil for about 5 minutes in heavy heat.
  10. Add some saffron thread to enrich the dish with its flavor and color. Stir a little bit so the rice and the other ingredients get the entire flavor. If you’re using turmeric or yellow coloring, use only 1/4 teaspoon.
  11. Turn to low heat and boil for another 8 minutes (or until rice is a little softer than “al dente”)
  12. Put the pan away from heat and let the rice stand a couple of minutes.

aug1

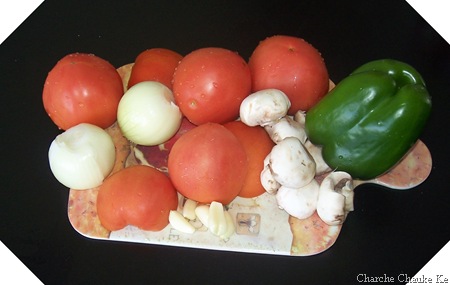
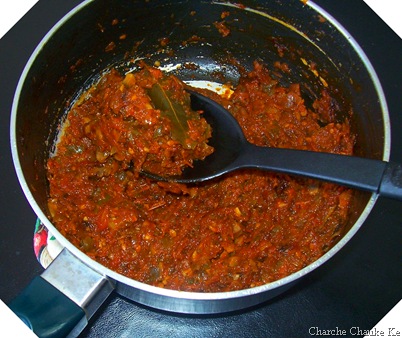
Sofregit ingredients: Onion, tomatoes, green pepper, garlic and mushrooms

Sofregit (a well cooked and fragrant sauce made of olive oil, tomatoes, garlic and onions, and may at times
different vegetables such as peppers or mushrooms)-

Cooking time: aprox. 1 hour
Ingredients:

  • 2 tablespoons of olive oil
  • 5 big red ripe tomatoes, chopped
  • 2 small onions, chopped
  • 1 green pepper, chopped (optional)
  • 4 or 5 garlic cloves, chopped
  • 1 cup of button or Portobello mushrooms, chopped (optional)
  • 1 Bay leaf
  • Salt
  • Touch of ground cumin
  • Touch of dried oregano

Directions:

  1. Put all the ingredients together in a frying pan and sauté slowly until all vegetables are soft.
  2. Taste and salt if necessary (maybe it’s not!)

Sofregit tastes superb with just about anything.

aug1_00

Sofregit’s ready!

Olga’s Tips:
(1) In Spain, rice is not stired as often as it is when cooking Italian risotto. You must stir it once or twice maximum. This tip is valid for all Spanish rice dishes like paella, arròs negre, arròs a banda…
(2) When cooking the alternative style you can change the cuttlefish or squid for diced potato.
(3) If you can’t find cuttlefish or squid, or you’re not able to eat them because of allergies, you can try to substitute them for chicken or vegetables at your choice.
(4) Sofregit can be done in advance. You can keep it in the fridge or even freeze it.
(5) For more information on how to clean and remove the heart of artichokes, please watch this video
(6) To watch how Jose Andres cooks this dish click here.
(7) To tone down the taste when you do it by hand in a mortar, then add an egg yolk. If you want to tone it down in the alternative way use milk or soy milk. Anyway, the best alternative way is the original oil and garlic alone.
(9) Allioli must be consumed during the preparation day and preserved in the fridge before using it.
(10) For help on conversion on metric to imperial, visit this page.

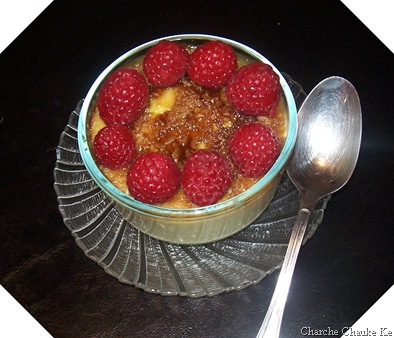
My first attempt at cooking Spanish food apart from Sangria and we had a lot of fun in spite of the failure. The husband made  some sangria and I made flan. Thanks for a good meal Olga. Dinner’s ready!!

aug1_02

Rice with mushrooms, tofu,  potatoes and artichokes

aug1_06

Some Crema Catalana too…. (Olga’s recipe)

Expenditure:

Artichokes 2………………………..from Meijer ……………..$ 3.34 (I had bought some from Randazzo for 59 c each…..ah supermarkets)

Mushrooms 1 lb……………………..from Kroger …………….$ 1.00 (deal, deal)

Short grain Brown rice 1 lb…………from Arbor farms market $ 1.69

———————————————————————————————————————————————–

Total……………………………………………………………..$ 6.03

Posted in - Bay Leaf, -Artichoke, -Cumin seeds, -Garlic, -Green Bell Pepper, -lemon, -mushrooms, -Olive Oil, -Onion, -Oregano, -Potatoes, -Saffron, -Tomato, -White Wine, Alcohol | Tagged: , , , | 13 Comments »

Beirut Tahini Swirls…….Sukkar Bi Tahin

Posted by vivnidhi on July 29, 2009

Bread Baking Babes make Sukkar bi Tahin.

1100_3665

Sukkar bi Tahin

100_3678  100_3673

Here’s my savory …garbanzo filled swirls and sweet Tahini paranthas

As soon it was approaching the middle of the month, I was frantically searching for bread baking babes….what are they baking this month, I hope I don’t miss it……….I did not 😉 . I made 2 batches at least and mix and match here and there ;-). This month’s host babe was Natashya of Living in the Kitchen with Puppies.

The recipe she chose is for Beirut Tahini Swirls, Sukkar bi Tahin. It is a cross between a flatbread and a yeasted pastry, only mildly sweet. It is street food in Beirut, and very addictive!
“Beirut has a lot of good food at every level, from fancy restaurants to local eateries, from home cooking to quality market shopping. And for a curbside snacker like me, it’s paradise. There are sesame-covered flatbreads, grilled meats, and sweet and not so sweet cookies; there’s always something nearby to eat.” “These tahini swirls, called sukkar bi tahin in Arabic, are flattened flaky rounds flavored with tahini and sugar, not too sweet, not too strong tasting. Serve them warm or at room temperature-they’re just right either way.”
Alford and Duguid, Home Baking .

The recipe:

Sukkar bi Tahin – Beirut Tahini Swirls

Home Baking, The Artful Mix of Flour and Tradition Around the World

Jeffrey Alford and Naomi Duguid

Makes 6 golden brown, flaky textured coiled rounds, about 6 inches wide, filled with sesame paste and sugar.


Ingredients


Dough

  • 1/2 tsp. active dry yeast
  • 1 cup lukewarm water
  • 1 cup all purpose flour
  • 1 cup whole wheat flour
  • about 1/2 cup all purpose flour for dusting
  • 2 tsp sugar
  • 1 tbsp olive oil

Filling

  • 3/4 cup tahini
  • 3/4 cup sugar


Garbanzo Bean Filling

  • 1/2 cup Garbanzo beans soaked for at least 4 hours and boiled…mashed lightly
  • 4 sun dried tomatoes soaked in water and drained
  • 1/2 cup Tahini
  • 2 cloves garlic minced
  • 1/4 Cilantro chopped
  • 1 Tbsp. lemon juice
  • salt to taste


Directions

In a medium bowl, dissolve the yeast in the lukewarm water.

Stir in one cup of the flour, then add the sugar and oil and stir in.

Incorporate a second cup of flour, then turn the dough out onto a well floured surface and knead for 5 minutes, or until smooth.

Cover the dough with plastic wrap and let rise for 2 to 3 hours, until doubled in volume.

Meanwhile, place a baking stone or unglazed quarry tiles, if you have them, (or a baking sheet) on the middle oven rack and preheat the oven to 375 F.

Mix together the tahini and sugar and stir until smooth. Set aside.
Cut the dough into 6 equal pieces.

Work with 3 at a time, keeping the others covered.

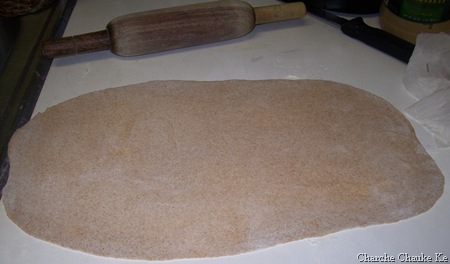
Flatten each out on a lightly floured surface, then roll each out to a rectangle about 5 inches by 10 inches.

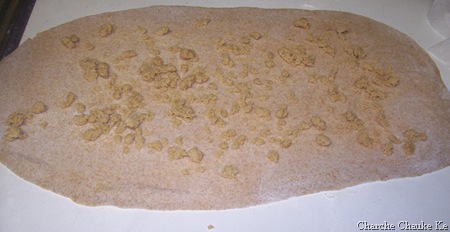
Spread the top surface with 2 1/2 tablespoons of the filling mixture, spreading it almost to the edges.

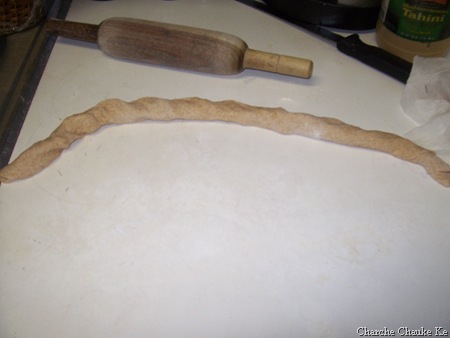
Roll up the rectangle from a long side into a cylinder, which will stretch as you roll to about 20 inches long.

Anchor one end and coil the bread around itself, then tuck the end in.

Flatten with the palm of your hand, then set aside, covered, while you fill and shape the other 2 rectangles.

Return to the first coil and roll out gently with a rolling pin.

Roll the other 2 out a little and then return to the first one and roll it out a little more thinly, and so on, until you have rolled each to a round about 6 to 7 inches in diameter.

A little filling may leak out—don’t worry, just leave it.

I brushed the top with a wee bit of oil and sprinkled some sesame seeds before baking. (optional)

Place the breads on the hot baking stone or tiles (or baking sheet) and bake for 15 to 20 minutes, until golden brown and flaky.

Transfer to a rack to cool.

Shape and bake the remaining 3 pieces of dough.

Serve warm or at room temperature.


*Tahini is a paste of ground sesame seeds. It can be found in health food stores, Middle Eastern markets and some grocery stores. It is a common ingredient in hummus, and is gaining in popularity in most parts of the world. It must be refrigerated after opening.

Natashya says: “The swirls should end up like puffy pita. If they are very thin they will be crispy, if they are not rolled enough, they will puff up like cinnamon rolls. We are striving for a flatbread pastry that puffs a little. Try them a couple of times, experiment. They are fun to bake.”  You bet they are ……I had a ton of fun……as usual 😉 .

I used half whole wheat flour and half all purpose flour for sweet tahini filling ones and all whole wheat flour for the savory garbanzo beans ones. Original recipe uses all purpose flour only.

 100_3642 100_3650 

Left: 1/2 whole wheat with 1/2 all purpose flour dough Right: Whole wheat flour dough

100_3651 

We have risen..the 1/2-1/2 dough was a little behind, but it did catch on

 100_3652

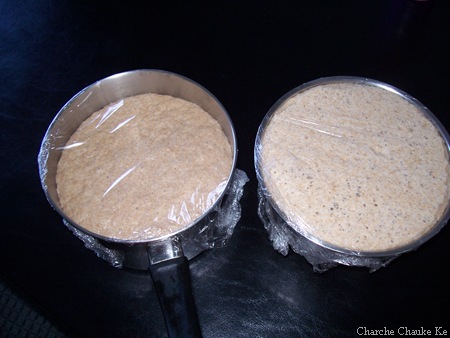
Dough cut in 6 pieces ..sweet tahini filling behind

100_3653

1 piece rolled

100_3654

Filled up

100_3659 

Rolled up again

100_3663

Ready to be baked

100_3665

Sukkar bi Tahin

100_3666

Had some leftover sweet tahini filling…..what did I do with that

100_3667

Made sweet paranthas of course…..dough details here and here

100_3668

Filled up and closed

100_3669

rolled …

100_3671

On the griddle…ready to be turned and oiled

100_3670

The other side…..

100_3673

Quick , delicious sweet treat…….kids will thank you…..this tastes best warm, will harden as it cools cause the flour cover is thin….does not taste bad even then 😉

You bet I enjoy taking pictures and posting huge ones on the blog 😉 . I dare say I loved making these. Thank you Natashya and Bread Baking Babes.

Posted in -All Purpose flour, -Cilantro, -Garlic, -lemon, -Olive Oil, -Sesame seeds, -Sun dried tomatoes, -Tahini, -Whole wheat flour, Sugar, Yeast | Tagged: , , , | 2 Comments »

YES….Asparagus bread with Parmesan cheese and Walnuts and uh… Arugula

Posted by vivnidhi on June 26, 2009

It’s been a long time that I wrote anything on the blog. Not even posting more photographs of the gnocchi , not posting about the daring bakers and cooks challenges. Past couple of months have been absolutely crazy. It’s an absolute surprise how time flies by, really…….doesn’t the time ever get tired of just ticking. Oh, I get crazy running after it, never really making it. I want to be on top of situations and reach appointments early……….but the reality is …I am mostly running late. If I wake at 5 am in the morning, the day and the task list gets longer……..I start thinking…..”Oh, why didn’t I wake up at 4″ And……I don’t even work outside the house……..I don’t know what is wrong and do I even have the time to think of it…..ha?

Anyway, now that I have opened up my heart, written a full paragraph without interruption……….(ah, lets not count the fact that I have a fidgety 1 year old who landed up on my lap scribbled a little on the table till I actually handed her “writing book”) OK OK……focus, focus………I just had to break my silence on the blog and I have been so excited this past month about the Bread Baking Babes.

I baked the bread they blogged about and it just tasted superb. I had to blog about it and yeah………..today is the last day if I want the badge. I always manage doing things…….it’s ok if on the last minute. A friend a few years back illuminated me about the JIT….Just in Time Theory. Well, I am a perfect practitioner.

June1_68

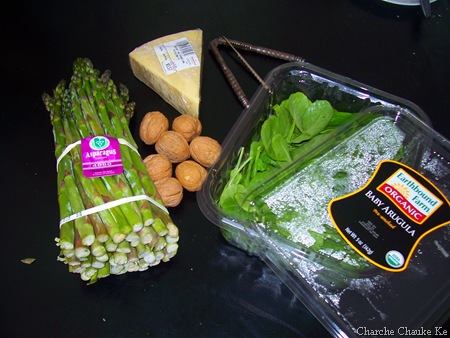
Asparagus, walnuts, parmesan cheese and baby Arugula/Rocket

I was going to bake this month’s BBB bread no matter what cause I love baking breads and these folks bake great looking breads:-) . I was out of almost every bread baking ingredient so I bought a lot of stuff. It was fun. Baked the bread yesterday…..and was really thankful that it was not difficult. The only added activity for me was shelling the walnuts but I better use them before they go bad.

The Recipe:

Asparagus Bread (with Parmesan Cheese and Walnuts)

2 small loaves

This bread goes very well with a cold meat and salad buffet.

125 g green asparagus ……..9 pieces for me

25-30 g rocket

50 g walnuts,

50 g freshly grated parmesan cheese

450 g strong bread flour (you can also use half whole wheat and half white or white whole wheat if you can get that)

12 g fresh yeast or 1 1/4 tsp dry instant yeast

250-270 g water

25 g olive oil…….1 1/2 Tbsp for me

10 g (sea) salt………….1 1/2 tsp. for me

  • Boil 3/4 liter of water with a pinch of (sea) salt. Clean the asparagus, set two of them aside, cut the rest into 4 pieces. Boil these pieces for 2 minutes in the water, scoop them out (so you can use the water for the rocket as well) and rinse under cold water (to stop them cooking).
  • Put the rocket in the boiling water for a few seconds (until wilted), drain and rinse under cold water and drain again.
  • Press the water our of the rocket, chop it coarsely and cut the asparagus into 1/4 inch (± 1 cm) long pieces, set aside.
  • Crush the walnuts coarsely and grate the parmesan.
  • Measure the flour and yeast in a large bowl, mix in most of the water and knead for a few minutes (on low speed), add the olive oil and knead for 10-12 minutes. Add the salt and knead on medium speed for 5 minutes until very elastic.
  • Let the dough rest for 10 minutes. Work the asparagus pieces, rocket, walnuts and parmesan in with care so that they’re evenly distributed. The dough should be very supple and elastic, hence the long kneading time. For me the best way to incorporate all the ingredients is to spread the dough out into a large slap, sprinkle all the ingredients on and roll it up. Let it rest for 5-10 minutes, press flat and fold… rest 5-10 minutes press flat and fold. Shape into rounds.
  • Place the dough in a greased container, cover and let rise for about 2 hrs.
  • Divide the dough into 2 equal parts.
  • Make round balls, cover with a tea towel and let rest for 10 minutes.
  • Flatten the balls and fold into taut breads with slightly tapering ends. Lay one asparagus in lengthwise in the middle of the bread and press in slightly. Sprinkle with wheat flour and cover to rise for 70 minutes or until doubled. Before baking you can sprinkle a little grated cheese on the bread if you like (optional).
  • Preheat the oven (preferably with stone) to 460ºF.
  • Place the loaves directly on the stone. Spray with water (or poor some hot water in a metal container on the bottom of the oven that you preheated to create steam)
  • Lower the temperature after 5 minutes to 400ºF. Open the door after another 10 minutes to let some air in. Repeat twice during baking.
  • Bake for 40-45 minutes and cool on a wire rack.

(adapted from: “Artisan Bread” -Jan Hedh)

Original post can be found on the blog “Notitie van Lien” ©2009.

www.notitievanlien.blogspot.com

I used half whole wheat and half bread flour. I followed the recipe exactly except for these changes: Mixed with hands, mixed flour, yeast , salt and water together and then knead in oil.  After letting the dough rest for about minutes, I incorporated the greens and walnuts , shaped the dough and left it to rise. No excessive resting allowed in this house. Next I shaped the bread for final rising on the sheet I was going to bake it in. I do not have a stone, so I baked the breads on a normal baking sheet. Sprayed some water on the loaves before baking and baked for 40 minutes. The bread tasted fabulous. One thing I’d change about my recipe is that I would spread some cornmeal instead of the whole wheat flour I put under the loaves as I was in a rush (always!!)

One more note about the ingredients: I should admit that I am not an asparagus fan at all and the husband has very limited likes in the vegetable world. But, what do you do if you have an adamant wife determined to put all kinds of vegetables on the plate:-) ? And the husband can’t even complain these days cause the 31/2 year old catches it instantly …….”even Papa doesn’t like broccoli” . So, I these days find the husband eating broccoli and actually saying  that he likes it:-)………even when there are other choices:-). Ok, gist of the matter…..everybody at home enjoyed the bread thoroughly. This is a delicious bread, do try it…..and it’s even good for beginners as the recipe is so simple. Thanks Lien!

June1_69

After the second rise, before baking

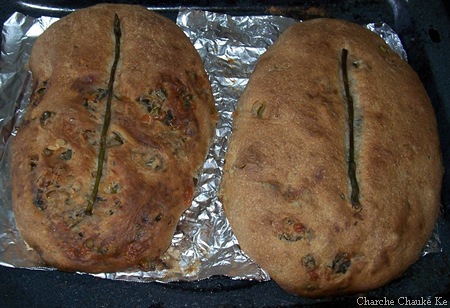
June1_70

Baked loaves

June1_76

Pick a slice………….

Expenditure:

Asparagus………………….1.57 lb. …………$3.12 ,        from Busch’s………lots left

Arugula……………………5 oz………………$ 3.99        from Busch’s………lots left

Argentine Parmesan……..0.62 oz……………$5.57          from Busch’s………lots left

Whole wheat flour(KA)…. 5 lb………………..$3.22          from Walmart…….lots left

Bread flour………………..5 lb……………..$2.64         from Walmart…….lots left

——————————————————————————————————–

Total………………………………………….$18.54………..

That’s an expensive bread! The pleasure I got out of baking and eating it……….priceless……


Posted in - Bread Flour, -Arugula/Rocket, -Asparagus, -Olive Oil, -Walnuts, -Whole wheat flour | Tagged: , , | 6 Comments »

Lasagne Time

Posted by vivnidhi on March 28, 2009

ninja_w180x180 100_3193

Here’s Chopping Ninja …..just being “DARING”

Soon, all the chair backs were also covered! not a pretty picture I know

The husband thanked me first for not growing my own spinach and grinding flour at home (also with a look that said “I know what’s on your mind 😉 ” ) I have been pestering him about CSAs but I know…….one day……..that too will happen 🙂 .

I really could never have envisioned myself making lasagne…….ever…….and that too with home made pasta!! I heard of it only after coming to the US. The husband is not particularly fond of any form of noodles and while I enjoy pasta , I have never quite liked lasagne. Even the ones with eggplants  in them!! While I can say that this Daring Bakers challenge tasted quite good (EVEN the Hubby ate it and said “it’s fine, it’s good, don’t worry, I can eat it :-)” ), I doubt that I will be remaking it.

The husband chose to eat this instead of the “rajma Chawal (kidney beans-rice) back-up was satisfying enough for the amount of work that went into making it 😉 . Though , I did not stop my nagging here. Since I could not believe that he was eating lasagne…….

Me : ” You don’t have to eat it, you know, you just are eating it cause I put in efforts” .

Him : ” This is good, don’t worry, rajma Chawal is too ordinary” .

Me : “Ah, then I should make this a weekly affair”.

Him : (with a smile and a look that said “I mean this!!!!) ” I like it irrespective of who made it and how much effort went in it  Let’s keep it like a once in a decade…..or lifetime experience…..you know me & noodles”

Oh yeah, I got it, I said it in the second paragraph” I won’t remake this lasagne” but will certainly make individual components like the sauces or even the pasta. Heh heh …In the kitchen, the chopping Ninja rules!!

Lasagne of Emilia-Romagna – Daring Bakers March 2009 Challenge

The March 2009 challenge is hosted by Mary of Beans and Caviar, Melinda of Melbourne Larder and Enza of Io Da Grande. They have chosen Lasagne of Emilia-Romagna from The Splendid Table by Lynne Rossetto Kasper as the challenge.

I try to listen to “The Splendid Table” every week on NPR. I am a radio buff and absolutely love the show!


All recipes below from The Splendid Table: Recipes from Emilia-Romagna, the Heartland of Northern Italian Food by Lynne Rossetto Kasper (published by William Morrow and Company Inc., 1992).

Lasagne of Emilia-Romagna (Lasagne Verdi al Forno)
(Serves 8 to 10 as a first course, 6 to 8 as a main dish)

Preparation Time: 15 minutes to assemble and 40 minutes cooking time

10 quarts (9 litres) salted water
1 recipe Spinach Pasta cut for lasagna (recipe follows)#1
1 recipe Bechamel Sauce (recipe follows)#2
1 recipe Country Style Ragu (recipe follows)#3
1 cup (4 ounces/125g) freshly grated Parmigiano-Reggiano

Method
Working Ahead:
The ragu and the béchamel sauce can be made up to three days ahead. The ragu can also be frozen for up to one month. The pasta can be rolled out, cut and dried up to 24 hours before cooking. The assembled lasagne can wait at room temperature (20 degrees Celsius/68 degrees Fahrenheit) about 1 hour before baking. Do not refrigerate it before baking, as the topping of béchamel and cheese will overcook by the time the center is hot.

I made the ragu a day earlier and bechamel before assembling the lasagne.


Assembling the Ingredients:
Have all the sauces, rewarmed gently over a medium heat, and the pasta at hand. Have a large perforated skimmer and a large bowl of cold water next to the stove. Spread a double thickness of paper towels over a large counter space. Preheat the oven to 350 degrees Fahrenheit (180 degrees Celsius). Oil or butter a 3 quart (approx 3 litre) shallow baking dish.

Cooking the Pasta:
Bring the salted water to a boil. Drop about four pieces of pasta in the water at a time. Cook about 2 minutes. If you are using dried pasta, cook about 4 minutes, taste, and cook longer if necessary. The pasta will continue cooking during baking, so make sure it is only barely tender. Lift the lasagne from the water with a skimmer, drain, and then slip into the bowl of cold water to stop cooking. When cool, lift out and dry on the paper towels. Repeat until all the pasta is cooked.

Assembling the Lasagne:
Spread a thin layer of béchamel over the bottom of the baking dish. Arrange a layer of about four overlapping sheets of pasta over the béchamel. Spread a thin layer of béchamel (about 3 or 4 spoonfuls) over the pasta, and then an equally thin layer of the ragu. Sprinkle with about 1&1/2 tablespoons of the béchamel and about 1/3 cup of the cheese. Repeat the layers until all ingredients are used, finishing with béchamel sauce and topping with a generous dusting of cheese.

Baking and Serving the Lasagne:
Cover the baking dish lightly with foil, taking care not to let it touch the top of the lasagne. Bake 40 minutes, or until almost heated through. Remove the foil and bake another 10 minutes, or until hot in the center (test by inserting a knife – if it comes out very warm, the dish is ready). Take care not to brown the cheese topping. It should be melted, creamy looking and barely tinged with a little gold. Turn off the oven, leave the door ajar and let the lasagne rest for about 10 minutes. Then serve. This is not a solid lasagne, but a moist one that slips a bit when it is cut and served.

I baked in my 10″x 10″ square pan and it worked well. Three layers of pasta.

#1 Spinach Egg Pasta (Pasta Verde)

Preparation: 45 minutes

Makes enough for 6 to 8 first course servings or 4 to 6 main course servings, equivalent to 1 pound (450g) dried boxed pasta.

2 jumbo eggs (2 ounces/60g or more)
10 ounces (300g) fresh spinach, rinsed dry, and finely chopped; or 6 ounces (170g) frozen chopped spinach, defrosted and squeezed dry
3&1/2 cups (14 ounces/400g) all purpose unbleached (plain) flour (organic stone ground preferred)

Working by Hand:

Equipment

A roomy work surface, 24 to 30 inches deep by 30 to 36 inches (60cm to 77cm deep by 60cm to 92cm). Any smooth surface will do, but marble cools dough slightly, making it less flexible than desired.

A pastry scraper and a small wooden spoon for blending the dough.

A wooden dowel-style rolling pin. In Italy, pasta makers use one about 35 inches long and 2 inches thick (89cm long and 5cm thick). The shorter American-style pin with handles at either end can be used, but the longer it is, the easier it is to roll the pasta.
Note: although it is not traditional, Enza has successfully made pasta with a marble rolling pin, and this can be substituted for the wooden pin, if you have one.

Plastic wrap to wrap the resting dough and to cover rolled-out pasta waiting to be filled. It protects the pasta from drying out too quickly.

A sharp chef’s knife for cutting pasta sheets.

Cloth-covered chair backs, broom handles, or specially designed pasta racks found in cookware shops for draping the pasta.

Mixing the dough:
Mound the flour in the center of your work surface and make a well in the middle. Add the eggs and spinach. Use a wooden spoon to beat together the eggs and spinach. Then gradually start incorporating shallow scrapings of flour from the sides of the well into the liquid. As you work more and more flour into the liquid, the well’s sides may collapse. Use a pastry scraper to keep the liquids from running off and to incorporate the last bits of flour into the dough. Don’t worry if it looks like a hopelessly rough and messy lump.

Kneading:
With the aid of the scraper to scoop up unruly pieces, start kneading the dough. Once it becomes a cohesive mass, use the scraper to remove any bits of hard flour on the work surface – these will make the dough lumpy. Knead the dough for about 3 minutes. Its consistency should be elastic and a little sticky. If it is too sticky to move easily, knead in a few more tablespoons of flour. Continue kneading about 10 minutes, or until the dough has become satiny, smooth, and very elastic. It will feel alive under your hands. Do not shortcut this step. Wrap the dough in plastic wrap, and let it relax at room temperature 30 minutes to 3 hours.

100_3189

Pasta dough

Till here it was fine, no problems. I washed fresh spinach and drained it in a colander. Mixed it with 2 large eggs in a blender to get a uniform color. I think some water was retained in spinach leaves, the dough just turned out beautiful, quite supple.

Stretching and Thinning:
If using an extra-long rolling pin work with half the dough at a time. With a regular-length rolling pin, roll out a quarter of the dough at a time and keep the rest of the dough wrapped. Lightly sprinkle a large work surface with flour. The idea is to stretch the dough rather than press down and push it. Shape it into a ball and begin rolling out to form a circle, frequently turning the disc of dough a quarter turn. As it thins outs, start rolling the disc back on the pin a quarter of the way toward the center and stretching it gently sideways by running the palms of your hands over the rolled-up dough from the center of the pin outward. Unroll, turn the disc a quarter turn, and repeat. Do twice more.

Stretch and even out the center of the disc by rolling the dough a quarter of the way back on the pin. Then gently push the rolling pin away from you with one hand while holding the sheet in place on the work surface with the other hand. Repeat three more times, turning the dough a quarter turn each time.

Repeat the two processes as the disc becomes larger and thinner. The goal is a sheet of even thickness. For lasagne, the sheet should be so thin that you can clearly see your hand through it and see colors. Cut into rectangles about 4 by 8 inches (10 x 20 cm). Note: Enza says that transparency is a crucial element of lasagne pasta and the dough should be rolled as thinly as possible. She says this is why her housekeeper has such strong arms!

Dry the pasta at room temperature and store in a sealed container or bag.

100_3193

Here , I thought I lost track of what I was doing……..

#2 Bechamel

Preparation Time: 15 minutes

4 tablespoons (2 ounces/60g) unsalted butter
4 tablespoons (2 ounces/60g) all purpose unbleached (plain) flour, organic stone ground preferred
2&2/3 cups (approx 570ml) milk
Salt and freshly ground pepper to taste
Freshly grated nutmeg to taste

Using a medium-sized saucepan, melt the butter over low to medium heat. Sift over the flour, whisk until smooth, and then stir (without stopping) for about 3 minutes. Whisk in the milk a little at a time and keep the mixture smooth. Bring to a slow simmer, and stir 3 to 4 minutes, or until the sauce thickens. Cook, stirring, for about 5 minutes, until the sauce thickens. Season with salt, pepper, and a hint of nutmeg.

You bet, the usual white sauce but nutmeg made it fabulous. Oh well , mine was a generous hint of nutmeg 😉

#3 Country style Ragu’….Vegetarian  (Ragu alla Contadina……vegetarian)

Preparation Time: Ingredient Preparation Time 30 minutes and Cooking time 2 hours

Makes enough sauce for 1 recipe fresh pasta or 1 pound/450g dried pasta)

  • 3 tablespoons extra virgin olive oil (45 ml)
    2 ounces/60g nutrela (textured vegetable protein granules (TVP) )
    1 medium onion, minced
    1 medium stalk celery with leaves, minced
    1 small carrot, minced
    12 ounces/125g firm tofu
  • 4 ounces/125g  Vegetarian sausage
    2/3 cup (5 ounces/160ml) dry red wine
    1 &1/2 cups (12 ounces/375ml) vegetable stock (homemade if possible)
    2 cups (16 ounces/500ml) fat free milk
    3  tomatoes, peeled
  • Salt and freshly ground black pepper to taste

Working Ahead:
The ragu can be made 3 days ahead. Cover and refrigerate. It also freezes well for up to 1 month. Skim the fat from the ragu’ before using it.

Bring a sauce pan of salted water to a boil and add the TVP/nutrela to it. Put the heat off. Remove from from heat and drain after 5 minutes. Press with hands to remove as much water as possible as it cools.

Browning the Ragu Base:
Heat the olive oil in a 12 inch (30cm) skillet (frying pan) over medium-high heat. Have a large saucepan handy to use once browning is complete. Add the nutrela and minced vegetables and sauté, stirring frequently with a wooden spoon, 10 minutes, or until the onions barely begin to color. Coarsely grind the sausage and tofu, in a food processor or meat grinder. Stir into the pan and slowly brown over medium heat. Protect the brown glaze forming on the bottom of the pan by turning the heat down. Cook 15 minutes, or until the stuff is a deep brown. Turn them into the saucepan and set over medium heat.

Reducing and Simmering: Add the wine to the skillet, lowering the heat so the sauce bubbles quietly. Stir occasionally until the wine has reduced by half, about 3 minutes. Scrape up the brown glaze as the wine bubbles. Then pour the reduced wine into the saucepan and set the skillet aside.

Stir ½ cup stock into the saucepan and let it bubble slowly, 10 minutes, or until totally evaporated. Repeat with another ½ cup stock. Stir in the last 1/2 cup stock along with the milk. Adjust heat so the liquid bubbles very slowly. Partially cover the pot, and cook 1 hour. Stir frequently to check for sticking.

Add the tomatoes, crushing them as they go into the pot. Cook uncovered, at a very slow bubble for another 45 minutes, or until the sauce resembles a thick, meaty stew. Season with salt and pepper.

100_3181 100_3182

Chopping & TVP in salted water

100_3186 100_3188

Drained TVP and here’s my soy stew

100_3194

Lasagne of Emilia-Romagna

100_3202

Here’s a piece!

Half of the lasagne is in the freezer now for rainy days and the rest is waiting for us to devour. By the way, the husband took some left overs as well to work the next along with his usual fare………..Now, whatt d’ya call that ?

Check out what other fabulous Daring Bakers have baked at Daring Bakers Blogroll . Egg less, gluten free, SWEET lasagne all there!

Expenditure:

Spinach (1 bunch)………………….$0.79 from Randazzo……..finished

Parmigiano-Reggiano 5 oz ………….$4.99 from Trader Joe’s ….some left

Nutrela 100 g……………………….$ 1.99 from Indian store…..little left

——————————————————————————————–

Total ………………………………$ 7.77

Posted in -All Purpose flour, -Boca Burger, -Butter, -Carrot, -Celery, -Cheese, -Nutmeg, -Nutrela, -Olive Oil, -Onion, -Spinach, -Tofu, -Tomato, Eggs, Milk | Tagged: , , , | 10 Comments »

Hot Hot from the oven……Pizza…….

Posted by vivnidhi on October 30, 2008

A very happy Deepavali to my readers!!  Had a fabulous festival of lights, cooking for Diwali was a very satisfying experience this year with just a  few hitches..:)

As I had not tried this month’s Daring Bakers Challenge early enough this month, I am a day late in posting this month. This month’s challenge was hosted by the benevolent Rosa of Rosa’s Yummy Yums. This challenge is also a tribute to the memory of Sher of What Did you Eat who passed away suddenly in July. She was to host this month’s challenge along with Rosa and Glenna of a Fridge full of Food.

Here are the pizzas I made up without much pre-planning.

garden100_2580

Garden veggie pizza with Paneer

peethi100_2582

Olives, spicy lentils, paneer and cilantro Pizza

The main thing is the pizza base.

The Recipe:

EQUIPMENT: Stand mixer with paddle and dough hook attachments (optional, see recipe), cooking thermometer, baking sheet, parchment paper, cooking oil, plastic wrap, pizza peel/scraper, pizza stone or pan.

RECIPE SOURCE: “The Bread Baker’s Apprentice: Mastering The Art of Extraordinary Bread” by Peter Reinhart. Ten Speed Press, Berkeley, CA. Copyright 2001. ISBN-10: 1-58008-268-8, ISBN-13: 978-158008-268-6.

***************

~ BASIC PIZZA DOUGH ~

Original recipe taken from “The Bread Baker’s Apprentice” by Peter Reinhart.

Makes 6 pizza crusts (about 9-12 inches/23-30 cm in diameter).

Ingredients:

4 1/2 Cups (20 1/4 ounces/607.5 g) Unbleached high-gluten (%14) bread flour or all purpose flour, chilled – FOR GF: 4 ½ cups GF Flour Blend with xanthan gum or 1 cup brown rice flour, 1 cup corn flour, 1 cup oat flour, 1 ½ cup arrowroot, potato or tapioca starch + 2 tsp xanthan or guar gum

1 3/4 Tsp Salt

1 Tsp Instant yeast – FOR GF use 2 tsp

1/4 Cup (2 ounces/60g) Olive oil or vegetable oil (both optional, but it’s better with)

1 3/4 Cups (14 ounces/420g or 420ml) Water, ice cold (40° F/4.5° C)

1 Tb sugar – FOR GF use agave syrup

Semolina/durum flour or cornmeal for dusting

DAY ONE

Method:

1. Mix together the flour, salt and instant yeast in a big bowl (or in the bowl of your stand mixer).

2. Add the oil, sugar and cold water and mix well (with the help of a large wooden spoon or with the paddle attachment, on low speed) in order to form a sticky ball of dough. On a clean surface, knead for about 5-7 minutes, until the dough is smooth and the ingredients are homogeneously distributed. If it is too wet, add a little flour (not too much, though) and if it is too dry add 1 or 2 teaspoons extra water.

NOTE: If you are using an electric mixer, switch to the dough hook and mix on medium speed for the same amount of time.The dough should clear the sides of the bowl but stick to the bottom of the bowl. If the dough is too wet, sprinkle in a little more flour, so that it clears the sides. If, on the contrary, it clears the bottom of the bowl, dribble in a teaspoon or two of cold water.

The finished dough should be springy, elastic, and sticky, not just tacky, and register 50°-55° F/10°-13° C.

Or

2. FOR GF: Add the oil, sugar or agave syrup and cold water, then mix well (with the help of a large wooden spoon or with the paddle attachment, on low speed) in order to form a sticky ball of dough.

3. Flour a work surface or counter. Line a jelly pan with baking paper/parchment. Lightly oil the paper.

4. With the help of a metal or plastic dough scraper, cut the dough into 6 equal pieces (or larger if you want to make larger pizzas).

NOTE: To avoid the dough from sticking to the scraper, dip the scraper into water between cuts.

5. Sprinkle some flour over the dough. Make sure your hands are dry and then flour them. Gently round each piece into a ball.

NOTE: If the dough sticks to your hands, then dip your hands into the flour again.

6. Transfer the dough balls to the lined jelly pan and mist them generously with spray oil. Slip the pan into plastic bag or enclose in plastic food wrap.

7. Put the pan into the refrigerator and let the dough rest overnight or for up to thee days.

NOTE: You can store the dough balls in a zippered freezer bag if you want to save some of the dough for any future baking. In that case, pour some oil(a few tablespooons only) in a medium bowl and dip each dough ball into the oil, so that it is completely covered in oil. Then put each ball into a separate bag. Store the bags in the freezer for no longer than 3 months. The day before you plan to make pizza, remember to transfer the dough balls from the freezer to the refrigerator.

DAY TWO

8. On the day you plan to eat pizza, exactly 2 hours before you make it, remove the desired number of dough balls from the refrigerator. Dust the counter with flour and spray lightly with oil. Place the dough balls on a floured surface and sprinkle them with flour. Dust your hands with flour and delicately press the dough into disks about 1/2 inch/1.3 cm thick and 5 inches/12.7 cm in diameter. Sprinkle with flour and mist with oil. Loosely cover the dough rounds with plastic wrap and then allow to rest for 2 hours.

Or

8. FOR GF: On the day you plan to eat pizza, exactly 2 hours before you make it, remove the number of desired dough balls from the refrigerator. Place on a sheet of parchment paper and sprinkle with a gluten free flour. Delicately press the dough into disks about ½ inch/1.3 cm thick and 5 inches/12.7 cm in diameter. Sprinkle the dough with flour, mist it again with spray oil. Lightly cover the dough round with a sheet of parchment paper and allow to rest for 2 hours.

9. At least 45 minutes before making the pizza, place a baking stone on the lower third of the oven. Preheat the oven as hot as possible (500° F/260° C).

NOTE: If you do not have a baking stone, then use the back of a jelly pan. Do not preheat the pan.

10. Generously sprinkle the back of a jelly pan with semolina/durum flour or cornmeal. Flour your hands (palms, backs and knuckles). Take 1 piece of dough by lifting it with a pastry scraper. Lay the dough across your fists in a very delicate way and carefully stretch it by bouncing it in a circular motion on your hands, and by giving it a little stretch with each bounce. Once the dough has expanded outward, move to a full toss.

Or

10. FOR GF: Press the dough into the shape you want (about 9-12 inches/23-30 cm in diameter – for a 6 ounces/180g piece of dough).

NOTE: Make only one pizza at a time.

During the tossing process, if the dough tends to stick to your hands, lay it down on the floured counter and reflour your hands, then continue the tossing and shaping.

In case you would be having trouble tossing the dough or if the dough never wants to expand and always springs back, let it rest for approximately 5-20 minutes in order for the gluten to relax fully,then try again.

You can also resort to using a rolling pin, although it isn’t as effective as the toss method.

11. When the dough has the shape you want (about 9-12 inches/23-30 cm in diameter – for a 6 ounces/180g piece of dough), place it on the back of the jelly pan, making sure there is enough semolina/durum flour or cornmeal to allow it to slide and not stick to the pan.

Or

11. FOR GF: Lightly top it with sweet or savory toppings of your choice.

12. Lightly top it with sweet or savory toppings of your choice.

Or

12. FOR GF: Place the garnished pizza on the parchment paper onto the stone in the oven or bake directly on the jelly pan. Close the door and bake for about 5-8 minutes.

NOTE: Remember that the best pizzas are topped not too generously. No more than 3 or 4 toppings (including sauce and cheese) are sufficient.

13. Slide the garnished pizza onto the stone in the oven or bake directly on the jelly pan. Close the door and bake for abour 5-8 minutes.

Or

13. FOR GF: Follow the notes for this step.

NOTE: After 2 minutes baking, take a peek. For an even baking, rotate 180°.

If the top gets done before the bottom, you will need to move the stone or jelly pane to a lower shelf before the next round. On the contrary, if the bottom crisps before the cheese caramelizes, then you will need to raise the stone or jelly.

14. Take the pizza out of the oven and transfer it to a cutting board or your plate. In order to allow the cheese to set a little, wait 3-5 minutes before slicing or serving.

garden100_2580

Garden Veggie Pizza with Paneer:

  • Tomato 1 sliced thin
  • Shallots 2 sliced
  • Garlic 2 cloves minced
  • Ginger 1/2 inch piece minced
  • Roasted Red Bell Pepper 1/2 sliced
  • Paneer 1/4 cup sliced
  • Sea Salt 2 tsp.
  • Chat masala 1/4 tsp.
  • Cilantro leaves 10-12 for garnish

Since sauce and toppings both were a MUST according to the rules…………my sauce for this was a very unusual one………if it can actually be called a sauce;)

Mix ginger, garlic and tomatoes. Add salt and let the whole thing sweat for 5-10 minutes. After we have some liquid in the mixture…….this becomes our sauce;). Spread this on the pizza base. Add shallots, roasted bell pepper and paneer.

In the 500F oven for 8 minutes. Remove from oven and garnish with cilantro leaves immediately and sprinkle with chat masala.

The result was absolutely delicious:) A great quick fix if you have pizza base ready.

Note: Chat masala can be bought at most Indian Stores. It is basically a tangy spicy mix.

Olives, spicy lentils, Paneer and cilantro Pizza

Kaheen ka eenth, kaheen ka roda………..Bhanumati ne Kumbha joda

(bricks from somewhere and pebbles from somewhere else, Bhanumati somehow made a house………….)

Diwali had some leftovers too:) Made Kachoris for Diwali and the (peethi) spicy lentils were left. They are a big favorite in my house as you must have seen in my previous posts:) Peethi Bhara Daal ka Dulha, Peethi ki Paronthi……….;)

peethi100_2582

The Recipe:

Spicy Lentils:

  • Urad daal/ split black lentils without skin 1 cup
  • Ginger 2″ piece chopped fine or grated
  • Oil 2 tsp.
  • Green chili 2 chopped fine
  • Red chili powder 1 tsp.
  • fennel seeds/saunf 1 Tbsp.
  • cumin seeds/jeera 2 tsp.
  • Fenugreek seeds/methi 1/2 tsp.
  • Garam masala 1 tsp.
  • coriander powder/dry cilantro powder/dhaniya 1 Tbsp.
  • Asafoetida/heeng powdered 1/2 tsp.
  • Dry mango powder/Amchur 2 Tbsp.
  • Salt to taste
  • Trader Joe’s Mixed Olive Bruschetta
  • Paneer 1/4 cup crumbled
  • Cilantro leaves 10-12 for garnish

For the spicy lentils, the lentils, ginger and green chillies are ground coarsely. They are then fried in oil with the rest of the spices.  These can be stored in the refrigerator for upto two weeks.

Bake the pizza crust for 5 minutes. Remove from oven. Spread the bruschetta mix , top with spicy lentils and paneer. In  the oven again for 6 minutes.

Out form the oven and garnish with cilantro leaves.

The son just loved this one. This is a strange combination but delicious………..trust me:)

By the way, here’s the snap of me trying to toss the dough. All rules satisfied;) I don’t think I know how to toss the dough at all but it was fun.

toss100_2578

That’s my flying Saucer……..

Thank you for a fun challenge Rosa. Have you checked other Daring Bakers’ posts on pizza as yet or not?? Don’t be late like me;)

Expenditure:

  • Bread Flour $ 2.68 ………from Kroger…………lots left
  • Paneer $ 4.49 …………from Indian Store ………………lots left
  • Total ………….$ 7.17 …………not bad at all:)

Posted in - Bread Flour, -Asafoetida, -Cilantro, -Coriander, -Cumin seeds, -Dry Mango Powder, -Fennel seeds, -Fenugreek seeds, -Garlic, -Ginger, -Olive Oil, -Olives, -Red Bell Pepper, -Red chili powder, -Tomato, Daring Bakers, Paneer, Shallots, Sugar, Yeast | Tagged: , , , | 6 Comments »