चर्चे चौके के Charche Chauke Ke

Hey! Join in the Kitchen Gossip!!

Archive for the ‘-All Purpose flour’ Category

Maida

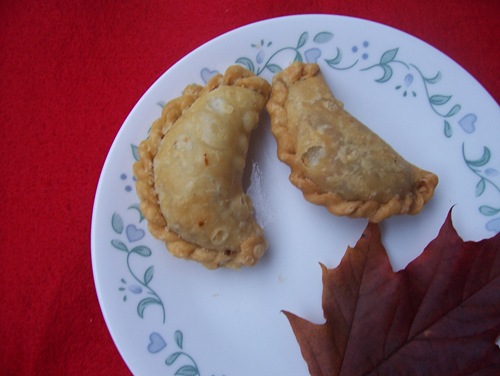
Gujiyas (Indian Fried Pies or sweet empanada)

Posted by vivnidhi on March 21, 2010

100_4177

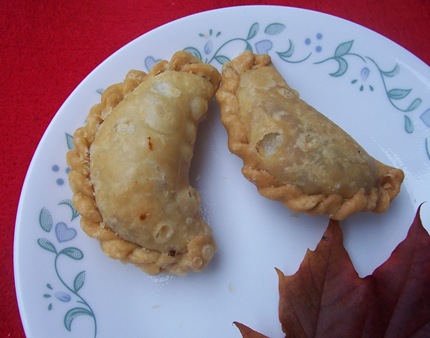
Gujiyas

This post has been lying in my drafts for months now. Yes, my dear blog turned two this November but I could not post anything or even celebrate for that matter. To make the long story short, we all kept falling sick and prey to almost all the bugs around. This certainly has been a very healthy year for the bugs, specially in Michigan. Let me shut the hypochondriac in my brain who wants to enlist every detail of the past months, starting from the no. of coughs per minutes to the boxes of tissues used and move on to better things I can share with you.

In December I attended Michigan Lady Food Bloggers (MLFB) cookie exchange which was real fun.The no. of cookies I brought back home cheered everyone like nothing else could. Check out  Kate’s blog for the photographs and you can absolutely drool at ALL the cookies ….. All the cookies were delicious! I made (as usual) roasted almond macarons with chocolate ganache. I think almost all got over baked. Yet, with all that sugar, how bad can a badly baked macaron taste ?…….so it wasn’t too bad 🙂 .

Moving on…….to an authentic old Indian treat “Gujiya” . I have interesting stories up my sleeve regarding the gujiya or pirakiya.  I grew up watching my Grandmother (Dadda)  and my Mother make gujiya for most festivals. Dadda would always fill it and close it while my Mom would make the dough, the filling and even fry it. My Mom cannot close a gujiya, she never felt the need to learn it 🙂 . Closing the gujiya or making the ‘curved pattern’ is called “Murri Banana” meaning making murri. The good thing is that I know how to make murri somewhat. [You bet, as if  I will leave the chance to brag 😉 .]  In my grandmother’s generation, when a girl (Indian girls then would be married at a very early age i.e. 13-14…..I am talking 1930’s) would be married, she would be asked to make gujiyas and the way her gujiya looked and tasted would be a measure of her competence in the kitchen. As I heard this story almost every year, I thought I better learn to make it well (lest I be judged on the same basis 😉 ) and so I coaxed Dadda to teach it to me. Well! till my last gujiya making stint with her, she was never really pleased with my murri. She always said mine was ok cause it would not open up but I could do better.  So, see I could have actually done without bragging 🙂 . There’s always a gujiya mold available in Indian stores which seals the gujiya well and one need not make murri etc. but I have never used it. An Empanada mold would be perfect too.

Fast forward to my first year after marriage…….the first year on Diwali, I planned to make gujiyas. I really thought to myself,”big deal” I have always helped Dadda and Mummy make it. I made a few and took them to the husband’s aunt (Masiji’s ) place. Oh, were they sweet(no, not the gujiyas……..my husband’s Aunt & Uncle)….. my gujiyas were really soft and I have blanked out on the filling now. Masiji just put all the gujiyas in the oven and I think transformed it into something edible somehow. Then I kept making gujiyas every year and I doubt I ever really got it right. Either the dough would be soft or I would fry on a higher temperature or I would play with the filling , I was always unsatisfied and a bit hesitant to offer it to others. 3 years later came my Mother-In-Law who actually taught me how to make the real thing. Since then, I have been successful consistently. Nothing beats practice.

The Recipe: (For about 30 gujiyas)

For the Shell:

  • 2 cups All Purpose Flour
  • 4 Tbsp. Canola Oil
  • 1/4 cup Water + /- 2 Tbsp. water

For the Filing:

  • 200 g Khoya/Mava (Indian cooked dried milk) cut in small cubes
  • 1/2 cup dry fruits (cashews, almonds, pistachios) slivered, sliced thin
  • 1/4 cup raisins (green/golden ones are preferable )
  • 1/2 cup sugar
  • 1 Tbsp. Cardamom powder (I even crush the cardamom seeds using a rolling pin when in hurry)
  • Canola/Vegetable  Oil for frying

For the binder:

  • 2 Tbsp. All Purpose flour
  • 1/4 cup water

To make the shell dough:

Add the oil to the all purpose flour and rub the mixture between the palms of your hands. The oil should be uniformly distributed in the flour and should resemble fine bread crumbs.

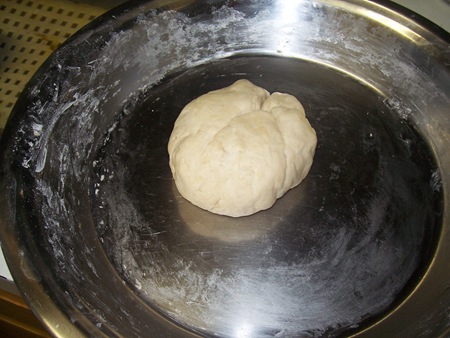
Add the water slowly to the flour and make a stiff dough. It is important to knead the dough well for good gujiyas. A good tip for all such dough is to set aside a tsp. of oil initially and then at the very end add it in a corner of the plate you are using to knead. The dough is then broken in 2 -3 pieces and then made smooth by touching those pieces with the oil in the corner till all the oil is absorbed. Cover the dough and let it rest for 1/2 an hour while the filling is prepared.

100_4090

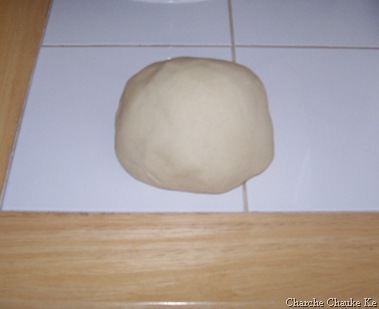
Stiff gujiya dough

To make the filling:

Heat a wok or a saucepan on medium heat (no. 5 mark) and add the khoya (milk solids) in it.

Use a spatula to break the big lumps of the khoya.

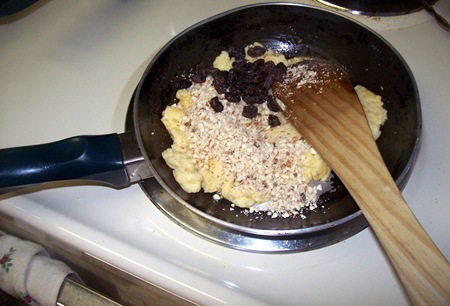
Keep frying the khoya till it turns golden brown. The heat can be reduced a little bit if you are not able to stir all the khoya to (no. 4 mark). Once the khoya turns brown, add the nuts, raisins and cardamom powder.

Let the mixture cool and then add sugar to the mixture. The sugar amount can be varied as per taste too.

100_4072 100_4073

Store bought Khoya / Mawa

100_4076

Khoya cut into cubes

100_4078

Adding nuts and raisins to fried Khoya….we do not want to brown it too much at this stage

100_4079

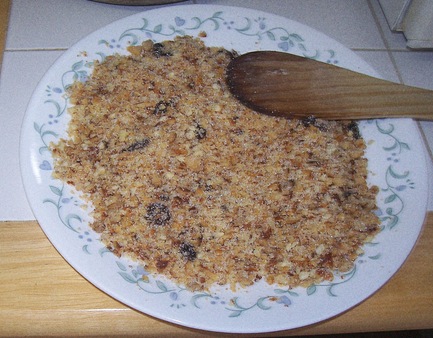
Khoya, nuts, raisins and cardamom…….filling’s ready…it will be crumbly when dry


To make the Gujiyas:

First prepare the binder paste by mixing the all purpose flour and water. Set it aside.

The dough should be more pliable now as it has rested (goes same as humans 😉 ). Break the dough into 30 equal parts and keep rounding them with your palms as you are breaking. Cover the broken and rounded dough with a moist cloth so that they do not dry too much.

Using a rolling pin, roll each dough ball into a round about 2.5″ in diameter.

Apply the binder paste along the edges. Use your index finger to dip in the binder paste and then spread it around the circumference of the rolled out round.

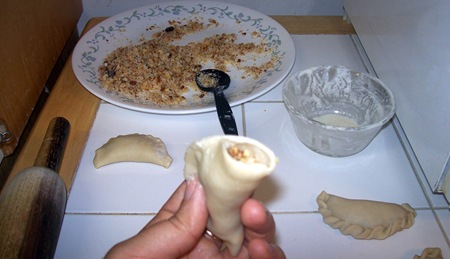
Add about 1 Tbsp. of the filling into the round and fold the round into a semicircle now. At this step, you can either press all the edges hard so that they do not open, or use a gujiya mold ( empanada mold) or make a murri. The murri is made by pulling very small portions of the dough edge and rolling it over the edges. Honestly, it is a little difficult to write about it, its easier to learn when seen. I shall try someday to insert a video here but that has to wait. Keep the prepared gujiya aside and cover with a moist towel while you prepare the other gujiyas.

100_4093 100_4094

Almost round 😉 dough and filling

100_4099

Folding and closing in process

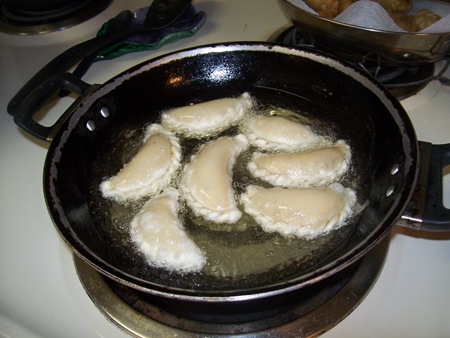
The wok or frying pan should at least have 2″ of oil. Start heating the oil on medium heat as you prepare the gujiyas. Once 5 or 6 gujiyas are ready, add them to the oil. Drop a tiny dough piece to check the oil. It should not be so hot that the dough ball comes to the surface at once. The oil should be just hot enough that the dough ball stays immersed for about 30 seconds. You should be able to see the bubbles as you add the dough piece. Lower the heat just a little bit to about medium low (gas mark 4) and fry the gujiyas till golden and crisp.

100_4098

Gujiyas in hot oil

Serve hot or at room temperature. These gujiyas keep well for at least 2 weeks in an airtight container.

These gujiyas are sometimes further dipped in sugar syrup. The consistency of the sugar syrup varies. The sugar syrup can be quite dry or even a little liquid resulting in different tasting gujiyas. I most often like it without the extra sugar though the other kinds have their own place in my heart 😉 .

If you have made any dumpling, empanada, sweet pie before, please do try this simple filling. It is extra-ordinary. No coconut, semolina….yet these will taste quite good. Most North Indians make it on Holi, the festival of colors….ah well for the next year now!

100_4178

Only pictures for now 😉


Posted in -All Purpose flour, -Almonds, -Canola Oil, -Cardamom, -Cashews, -Khoya/Mava (Milk solids), -Pistachios, -Raisins | Tagged: , , | 4 Comments »

This Halloween we decided to eat some sleeping swaddled Babies

Posted by vivnidhi on November 2, 2009

Yeah the ghoulish spirits entered our house this year and we ate these babies up with some butter and honey.

100_4209

This is before baking them……notice the colored little fingers

This month Gretchen of Canela & Comino baked up Tanta Wawas (Peruvian Bread Babies). Now the name itself sounds so much fun and she has made such beautiful loaves (just looking at them will tell you that they were fun to make). She has a lot about Tanta Wawas on her blog. I just remembered ” On November 2nd, these bread babies are taken to the cemeteries in town so they can be left as offerings to those that have passed away and then are broken apart and eaten among the visitors. It is unknown when this Andean tradition began but it is known that from long ago, special breads were made and eaten in this manner.” I knew I’d be making it on Halloween.

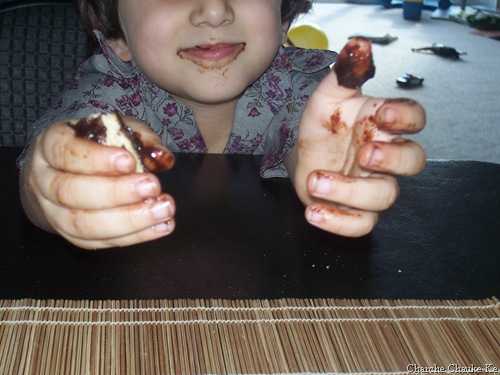
As you can see from the picture above, we had a great time making these. The kids colored their hands well (yeah, there was more color on their hands than on the dough). And since they are a little sweet, they were liked by all.

100_4210

Look at those hands……project totally worth it

The Recipe:

Tanta Wawa (Peruvian Bread Babies)

Makes 4 small loaves

  • sponge:
    1 egg
    1/2 cup of all purpose flour
    1 tablespoon of sugar
    1/4 teaspoon of yeast
  • dough:
    1/2 cup of all purpose flour
    1 cup of whole wheat flour
    2 cups of bread flour
    1/2 cup of white sugar
    1/4 cup of brown sugar (I used turbinado sugar)
    1 tablespoon of dry yeast
    1 teaspoon of ground cinnamon
    1/8 teaspoon of ground cloves
    1/2 teaspoon of sesame seeds
    2 teaspoons of salt
    1/2 cup of milk
    1/4 cup of water
    1/4 cup of butter (I used smart balance)
    2 eggs (at room temperature)
    1/2 teaspoon of vanilla
    1 egg yolk (for painting)

1. In a bowl create the sponge by combining 1/2 cup of flour, 1 egg, 2 tablespoons of water, a pinch of instant yeast and 1 tablespoon of sugar. Stir together, cover and let rest for a few hours. …..(Mine was 6-7 hours as it was the day before Halloween)

2. In a bowl, mix the flours, sugar, yeast, salt, cinnamon, cloves, and sesame seeds. Sprinkle over the sponge. Don’t stir. Cover and let rest for a few hours. (Mine rested overnight)

3. Add the 2 eggs and vanilla to the flour mixture. Measure the milk, water and butter in a measuring cup. Heat for 30 seconds in the microwave, pour into the flour mixture. Mix well, then turn out and knead for 10-15 minutes, using additional flour if necessary. Divide dough into 4 equal portions. Form them into ovals. Cover and let the dough rest for 10 minutes.

4. Stretch each dough ball into the form of a “fat baby” and place them on baking sheets. Cover with plastic and let the dough babies rise for 2 hours (there won’t be too much rise at this point).

5. Preheat the oven to 180C. Brush the egg yolks evenly over the dough babies. Bake bread at 180C for 30 minutes.

I am sending these swaddled sleeping Tanta Wawa, or Peruvian Bread Babies, to YeastSpotting .

 100_4213

So, the oven baked up triplets for us :-))

The husband asked why did you not paint them after baking and I wondered why too.

Thanks a lot Gretchen for a real fun challenge. All the Bread Baking Babes have baked up beautiful babies, a must see.

No new expenses for this one ;-). I had everything at home.

Posted in - Bread Flour, - Smart Balance, -All Purpose flour, -Cinnamon, -cloves, -Sesame seeds, -Turbinado Sugar, -Vanilla, -Whole wheat flour, Eggs, Sugar, Yeast | 8 Comments »

Puff Pastry……..Just Chill!

Posted by vivnidhi on September 27, 2009

Puff pastry is the most delicious thing to eat….all the buttery goodness and crisp flaky layers…..I can always drool. I would not have imagined making those in this life if it wasn’t the Daring Bakers……..prompting, coaxing, luring, guiding and what not. This bunch is really out there to make you daring in life.

In India, puff pastry with spicy potato & mixed vegetable filling were called patties and they were the most delicious things you could lay your hands on. It would always be the first item to finish in a get-together. Even the soggy ones would be gone before the rest of the stuff. These are usually bought from either a canteen or a local bakery and I somehow associate it to my college days. For some strange reason (maybe the egg wash) I never remember eating it at home. Those are my memories associated with the puff. After coming to the US, a friend of mine told me how easy it was to get frozen puff pastry here and make patties. Well! when I got shopping, I bought phyllo dough :-). No matter how hard I tried …….I would not be able to make patties…..whatever I made was delicious but not THAT. I do not even remember if I made the real thing for my in-laws when they were here (or maybe I did on my last trip) …..they too are very fond of it like me… But some years back, I discovered the puff pastry in the grocery store and I attained the joy of finally making Patties at home. I have a killer filling recipe (Thanks to my Mother in law) who taught me the Samosa filling and I use a similar method for this filling. My Dad was really pleased when I made it for him and it’s no easy job pleasing him, he has a very keen sense of taste.

BUT I hardly ever make it……..all that butter…..I think my life is more precious than patties. OK, haven’t I been talking a bit too much of patties? Obviously doesn’t end here……the saga continues…….

The September 2009 Daring Bakers’ Challenge has been chosen by Steph of a whisk and a spoon. Steph chose Vols-au-Vent, which we are pretty sure in French means, “After one bite we could die and go to heaven!” 😉  These are pronounced “vo-o-voh” (Let me make use of High School French 🙂 )…….it’s ok to not pronounce “Hors-de-oeuvres” correctly for the longest time ;-). The September 2009 Daring Bakers’ challenge was hosted by Steph of A Whisk and a Spoon. She chose the French treat, Vols-au-Vent based on the Puff Pastry recipe by Michel Richard from the cookbook Baking With Julia by Dorie Greenspan.

No dessert vols-au vent here, masala filling as always 😉 .

sep_37

Spicy Vegetable filling Vols-au-vent

The Recipe:

Equipment:
-food processor (will make mixing dough easy, but I imagine this can be done by hand as well)
-rolling pin
-pastry brush
-metal bench scraper (optional, but recommended)
-plastic wrap
-baking sheet
-parchment paper
-silicone baking mat (optional, but recommended)
-set of round cutters (optional, but recommended)
-sharp chef’s knife
-fork
-oven
-cooling rack

Prep Times:
-about 4-5 hours to prepare the puff pastry dough (much of this time is inactive, while you wait for the dough to chill between turns…it can be stretched out over an even longer period of time if that better suits your schedule)
-about 1.5 hours to shape, chill and bake the vols-au-vent after your puff pastry dough is complete

Forming and Baking the Vols-au-Vent

Yield: 1/3 of the puff pastry recipe below will yield about 8-10 1.5” vols-au-vent or 4 4” vols-au-vent

In addition to the equipment listed above, you will need:
-well-chilled puff pastry dough (recipe below)
-egg wash (1 egg or yolk beaten with a small amount of water)
-your filling of choice

Line a baking sheet with parchment and set aside.

Using a knife or metal bench scraper, divided your chilled puff pastry dough into three equal pieces. Work with one piece of the dough, and leave the rest wrapped and chilled. (If you are looking to make more vols-au-vent than the yield stated above, you can roll and cut the remaining two pieces of dough as well…if not, then leave refrigerated for the time being or prepare it for longer-term freezer storage. See the “Tips” section below for more storage info.)

On a lightly floured surface, roll the piece of dough into a rectangle about 1/8 to 1/4-inch (3-6 mm) thick. Transfer it to the baking sheet and refrigerate for about 10 minutes before proceeding with the cutting.

(This assumes you will be using round cutters, but if you do not have them, it is possible to cut square vols-au-vents using a sharp chef’s knife.) For smaller, hors d’oeuvre sized vols-au-vent, use a 1.5” round cutter to cut out 8-10 circles. For larger sized vols-au-vent, fit for a main course or dessert, use a 4” cutter to cut out about 4 circles. Make clean, sharp cuts and try not to twist your cutters back and forth or drag your knife through the dough. Half of these rounds will be for the bases, and the other half will be for the sides. (Save any scrap by stacking—not wadding up—the pieces…they can be re-rolled and used if you need extra dough. If you do need to re-roll scrap to get enough disks, be sure to use any rounds cut from it for the bases, not the ring-shaped sides.)

Using a ¾-inch cutter for small vols-au-vent, or a 2- to 2.5-inch round cutter for large, cut centers from half of the rounds to make rings. These rings will become the sides of the vols-au-vent, while the solid disks will be the bottoms. You can either save the center cut-outs to bake off as little “caps” for you vols-au-vent, or put them in the scrap pile.

Dock the solid bottom rounds with a fork (prick them lightly, making sure not to go all the way through the pastry) and lightly brush them with egg wash. Place the rings directly on top of the bottom rounds and very lightly press them to adhere. Brush the top rings lightly with egg wash, trying not to drip any down the sides (which may inhibit rise). If you are using the little “caps,” dock and egg wash them as well.

Refrigerate the assembled vols-au-vent on the lined baking sheet while you pre-heat the oven to 400ºF (200ºC). (You could also cover and refrigerate them for a few hours at this point.)

Once the oven is heated, remove the sheet from the refrigerator and place a silicon baking mat (preferred because of its weight) or another sheet of parchment over top of the shells. This will help them rise evenly. Bake the shells until they have risen and begin to brown, about 10-15 minutes depending on their size. Reduce the oven temperature to 350ºF (180ºC), and remove the silicon mat or parchment sheet from the top of the vols-au-vent. If the centers have risen up inside the vols-au-vent, you can gently press them down. Continue baking (with no sheet on top) until the layers are golden, about 15-20 minutes more. (If you are baking the center “caps” they will likely be finished well ahead of the shells, so keep an eye on them and remove them from the oven when browned.)

Remove to a rack to cool. Cool to room temperature for cold fillings or to warm for hot fillings.

Fill and serve.

*For additional rise on the larger-sized vols-au-vents, you can stack one or two additional ring layers on top of each other (using egg wash to “glue”). This will give higher sides to larger vols-au-vents, but is not advisable for the smaller ones, whose bases may not be large enough to support the extra weight.

*Although they are at their best filled and eaten soon after baking, baked vols-au-vent shells can be stored airtight for a day.

*Shaped, unbaked vols-au-vent can be wrapped and frozen for up to a month (bake from frozen, egg-washing them first).

Michel Richard’s Puff Pastry Dough

From: Baking with Julia by Dorie Greenspan
Yield: 2-1/2 pounds dough

Steph’s note: This recipe makes more than you will need for the quantity of vols-au-vent stated above. While I encourage you to make the full recipe of puff pastry, as extra dough freezes well, you can halve it successfully if you’d rather not have much leftover.

There is a wonderful on-line video from the PBS show “Baking with Julia” that accompanies the book. In it, Michel Richard and Julia Child demonstrate making puff pastry dough (although they go on to use it in other applications). They do seem to give slightly different ingredient measurements verbally than the ones in the book…I listed the recipe as it appears printed in the book. http://video.pbs.org/video/1174110297/search/Pastry

Ingredients:
2-1/2 cups (12.2 oz/ 354 g) unbleached all-purpose flour
1-1/4 cups (5.0 oz/ 142 g) cake flour
1 tbsp. salt (you can cut this by half for a less salty dough or for sweet preparations)
1-1/4 cups (10 fl oz/ 300 ml) ice water
1 pound (16 oz/ 454 g) very cold unsalted butter

plus extra flour for dusting work surface

Mixing the Dough:

Check the capacity of your food processor before you start. If it cannot hold the full quantity of ingredients, make the dough into two batches and combine them.

Put the all-purpose flour, cake flour, and salt in the work bowl of a food processor fitted with a metal blade and pulse a couple of times just to mix. Add the water all at once, pulsing until the dough forms a ball on the blade. The dough will be very moist and pliable and will hold together when squeezed between your fingers. (Actually, it will feel like Play-Doh.)

Remove the dough from the machine, form it into a ball, with a small sharp knife, slash the top in a tic-tac-toe pattern. Wrap the dough in a damp towel and refrigerate for about 5 minutes.

Meanwhile, place the butter between 2 sheets of plastic wrap and beat it with a rolling pin until it flattens into a square that’s about 1″ thick. Take care that the butter remains cool and firm: if it has softened or become oily, chill it before continuing.

Incorporating the Butter:

Unwrap the dough and place it on a work surface dusted with all-purpose flour (A cool piece of marble is the ideal surface for puff pastry) with your rolling pin (preferably a French rolling pin without handles), press on the dough to flatten it and then roll it into a 10″ square. Keep the top and bottom of the dough well floured to prevent sticking and lift the dough and move it around frequently. Starting from the center of the square, roll out over each corner to create a thick center pad with “ears,” or flaps.

Place the cold butter in the middle of the dough and fold the ears over the butter, stretching them as needed so that they overlap slightly and encase the butter completely. (If you have to stretch the dough, stretch it from all over; don’t just pull the ends) you should now have a package that is 8″ square.

To make great puff pastry, it is important to keep the dough cold at all times. There are specified times for chilling the dough, but if your room is warm, or you work slowly, or you find that for no particular reason the butter starts to ooze out of the pastry, cover the dough with plastic wrap and refrigerate it . You can stop at any point in the process and continue at your convenience or when the dough is properly chilled.

Making the Turns:

Gently but firmly press the rolling pin against the top and bottom edges of the square (this will help keep it square). Then, keeping the work surface and the top of the dough well floured to prevent sticking, roll the dough into a rectangle that is three times as long as the square you started with, about 24″ (don’t worry about the width of the rectangle: if you get the 24″, everything else will work itself out.) With this first roll, it is particularly important that the butter be rolled evenly along the length and width of the rectangle; check when you start rolling that the butter is moving along well, and roll a bit harder or more evenly, if necessary, to get a smooth, even dough-butter sandwich (use your arm-strength!).

With a pastry brush, brush off the excess flour from the top of the dough, and fold the rectangle up from the bottom and down from the top in thirds, like a business letter, brushing off the excess flour. You have completed one turn.

Rotate the dough so that the closed fold is to your left, like the spine of a book. Repeat the rolling and folding process, rolling the dough to a length of 24″ and then folding it in thirds. This is the second turn.

Chilling the Dough:

If the dough is still cool and no butter is oozing out, you can give the dough another two turns now. If the condition of the dough is iffy, wrap it in plastic wrap and refrigerate it for at least 30 minutes. Each time you refrigerate the dough, mark the number of turns you’ve completed by indenting the dough with your fingertips. It is best to refrigerate the dough for 30 to 60 minutes between each set of two turns.

The total number of turns needed is six. If you prefer, you can give the dough just four turns now, chill it overnight, and do the last two turns the next day. Puff pastry is extremely flexible in this regard. However, no matter how you arrange your schedule, you should plan to chill the dough for at least an hour before cutting or shaping it.
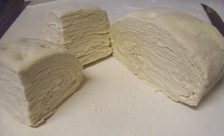
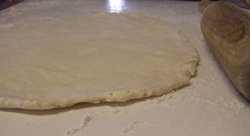
sep_12 sep_26

Puff Pastry dough……..before rolling out & 1/4 of the dough rolled out

Steph’s extra tips:

-While this is not included in the original recipe we are using (and I did not do this in my own trials), many puff pastry recipes use a teaspoon or two of white vinegar or lemon juice, added to the ice water, in the détrempe dough. This adds acidity, which relaxes the gluten in the dough by breaking down the proteins, making rolling easier. You are welcome to try this if you wish.

-Keep things cool by using the refrigerator as your friend! If you see any butter starting to leak through the dough during the turning process, rub a little flour on the exposed dough and chill straight away. Although you should certainly chill the dough for 30 to 60 minutes between each set of two turns, if you feel the dough getting to soft or hard to work with at any point, pop in the fridge for a rest.

-Not to sound contradictory, but if you chill your paton longer than the recommended time between turns, the butter can firm up too much. If this seems to be the case, I advise letting it sit at room temperature for 5-10 minutes to give it a chance to soften before proceeding to roll. You don’t want the hard butter to separate into chunks or break through the dough…you want it to roll evenly, in a continuous layer.

-Roll the puff pastry gently but firmly, and don’t roll your pin over the edges, which will prevent them from rising properly. Don’t roll your puff thinner than about about 1/8 to 1/4-inch (3-6 mm) thick, or you will not get the rise you are looking for.

-Try to keep “neat” edges and corners during the rolling and turning process, so the layers are properly aligned. Give the edges of the paton a scooch with your rolling pin or a bench scraper to keep straight edges and 90-degree corners.

-Brush off excess flour before turning dough and after rolling.

-Make clean cuts. Don’t drag your knife through the puff or twist your cutters too much, which can inhibit rise.

-When egg washing puff pastry, try not to let extra egg wash drip down the cut edges, which can also inhibit rise.

-Extra puff pastry dough freezes beautifully. It’s best to roll it into a sheet about 1/8 to 1/4-inch thick (similar to store-bought puff) and freeze firm on a lined baking sheet. Then you can easily wrap the sheet in plastic, then foil (and if you have a sealable plastic bag big enough, place the wrapped dough inside) and return to the freezer for up to a few months. Defrost in the refrigerator when ready to use.

-You can also freeze well-wrapped, unbaked cut and shaped puff pastry (i.e., unbaked vols-au-vent shells). Bake from frozen, without thawing first.

-Homemade puff pastry is precious stuff, so save any clean scraps. Stack or overlap them, rather than balling them up, to help keep the integrity of the layers. Then give them a singe “turn” and gently re-roll. Scrap puff can be used for applications where a super-high rise is not necessary (such as palmiers, cheese straws, napoleons, or even the bottom bases for your vols-au-vent).

You can find lots more general tips for making puff pastry on-line, including here:
http://www.baking911.com/pastry/puff.htm

I encourage everyone to watch the on-line video from the PBS show “Baking with Julia” that accompanies the book:
http://video.pbs.org/video/1174110297/search/Pastry

Spicy Filling Recipe:

  • Potatoes 1 or 2 (depends on your inclination) chopped in small cubes 
  • Mixed Vegetables (carrots, green beans, peas ..) 1 1/2 cups (I used frozen mix as I was in a rush)
  • Fresh Ginger washed, scrubbed and minced  2″ piece
  • Green chilli minced 1 (optional)
  • Canola Oil 2 Tbsp. (Vegetable oil is fine too)
  • Cumin seeds 1 tsp.
  • Asafoetida 1/4 tsp.
  • Red chilli powder 1/2 tsp.
  • Salt to taste
  • Coriander seeds dry roasted and ground coarse 2 Tbsp.
  • Amchur/Dry mango powder 1 Tbsp.
  • Garam Masala 1/2 tsp.
  • Cilantro leaves torn 1/4 cup (optional)

Heat oil in the wok. Add cumin seeds & asafoetida. When the spices seem to sizzle, add half the ginger and green chilli (if using). These do taste good when a little spicier than usual. Add the potatoes and mixed vegetables. Reduce the heat to medium low and cover the wok.

When the potatoes & the vegetables become tender, add all the remaining ingredients. Mix well and cover again for 2-3 minutes. Remove from heat and finally add the cilantro leaves and mix well. The filling’s ready!

The video is a must watch. I can’t call my tryst with puff pastry a complete success. You must check out the Daring Bakers Blogroll to see the real stuff. But this has tons of potential. I need some more practice and better butter 🙂 to make the perfect puff pastry. So, you can see I do not have high standards for myself on this one. I am quite pleased. I took some at my Son’s preschool potluck (oh yeah 😉 ) and they were very well received. I brought none back. I made a crude galette with spicy peas …of the leftover dough scraps for  friends…….again everything was gobbled leaving none for me..(everybody forgot :-)) ) Anyway, I couldn’t be happier…..not being able to taste the final product gave me the kind of joy that eating the whole thing wouldn’t have.

Expenditure is left for tomorrow …….I need to sleep.

Tomorrow is here already!!

Expenditure:

Cake Flour………From Kroger……………………….$ 3.14

Butter…………..From Walmart……………………..$ 1.98

———————————————————————————

Total…………………………………………………..$ 5.12

Posted in -All Purpose flour, -Asafoetida, -Butter, -Cake Flour, -Canola Oil, -Carrot, -Cilantro, -Coriander, -Cumin seeds, -Dry Mango Powder, -Garam Masala, -Ginger, -Green Beans, -Peas, -Red chili powder, Eggs | 13 Comments »

Last of the oldies: Daring Bakers June Challenge : Bakewell Tart….er…Pudding

Posted by vivnidhi on August 10, 2009

Perhaps the pictures I took were so bad that I never felt like posting. But, nevertheless, I must say that I made this delicious dessert in the month of June when I was supposed to, I don’t know why I did not post it. It was my first time making frangipane……..”it was lovely indeed” ……….as the English would say 😉

It’s easy and quite delicious. The June Daring Bakers’ challenge was hosted by Jasmine of Confessions of a Cardamom Addict and Annemarie of Ambrosia and Nectar. They chose a Traditional (UK) Bakewell Tart… er… pudding that was inspired by a rich baking history dating back to the 1800’s in England.  You can read all about the bakewell tart on these blogs and it is a very interesting read. I am just on one of my “too tired to write sessions” today.

The Mighty Flame at 180 x 180 (largest)presents:

July1_44

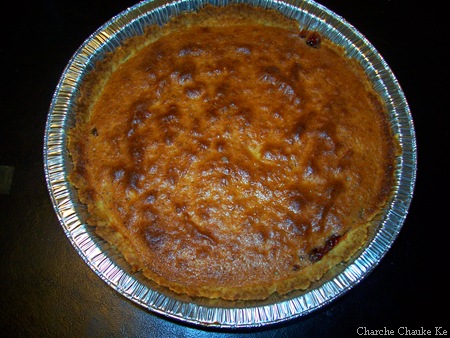
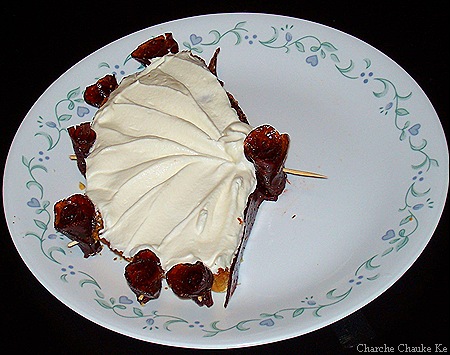
Bakewell Tart ….er pudding

Looks plain but trust me ….tastes delicious

The recipe:

Makes one 23cm (9” tart)
Prep time: less than 10 minutes (plus time for the individual elements)
Resting time: 15 minutes
Baking time: 30 minutes
Equipment needed: 23cm (9”) tart pan or pie tin (preferably with ridged edges), rolling pin

One quantity sweet shortcrust pastry (recipe follows)
Bench flour
250ml (1cup (8 US fl. oz)) jam or curd, warmed for spreadability
One quantity frangipane (recipe follows)
One handful blanched, flaked almonds

Assembling the tart
Place the chilled dough disc on a lightly floured surface. If it’s overly cold, you will need to let it become acclimatised for about 15 minutes before you roll it out. Flour the rolling pin and roll the pastry to 5mm (1/4”) thickness, by rolling in one direction only (start from the centre and roll away from you), and turning the disc a quarter turn after each roll. When the pastry is to the desired size and thickness, transfer it to the tart pan, press in and trim the excess dough. Patch any holes, fissures or tears with trimmed bits. Chill in the freezer for 15 minutes.

Preheat oven to 200C/400F.

Remove shell from freezer, spread as even a layer as you can of jam onto the pastry base. Top with frangipane, spreading to cover the entire surface of the tart. Smooth the top and pop into the oven for 30 minutes. Five minutes before the tart is done, the top will be poofy and brownish. Remove from oven and strew flaked almonds on top and return to the heat for the last five minutes of baking.

The finished tart will have a golden crust and the frangipane will be tanned, poofy and a bit spongy-looking. Remove from the oven and cool on the counter. Serve warm, with crème fraîche, whipped cream or custard sauce if you wish.

When you slice into the tart, the almond paste will be firm, but slightly squidgy and the crust should be crisp but not tough.

Jasmine’s notes:
• If you cannot have nuts, you can try substituting Victoria sponge for the frangipane. It’s a pretty popular popular cake, so you shouldn’t have any troubles finding one in one of your cookbooks or through a Google search.
• You can use whichever jam you wish, but if you choose something with a lot of seeds, such as raspberry or blackberry, you should sieve them out.
• The jam quantity can be anywhere from 60ml (1/4 cup) to 250ml (1cup), depending upon how “damp” and strongly flavored your preserves are. I made it with the lesser quantity of home made strawberry jam, while Annemarie made it with the greater quantity of cherry jam; we both had fabulous results. If in doubt, just split the difference and spread 150ml (2/3cup) on the crust.
Annemarie’s notes:
• The excess shortcrust can be rolled out and cut into cookie-shapes (heck, it’s pretty darned close to a shortbread dough).

Sweet shortcrust pastry

Prep time: 15-20 minutes
Resting time: 30 minutes (minimum)
Equipment needed: bowls, box grater, cling film

  • 225g (8oz) all purpose flour
    30g (1oz) sugar
    2.5ml (½ tsp) salt
    110g (4oz) unsalted butter, cold (frozen is better)
    2 (2) egg yolks
    2.5ml (½ tsp) almond extract (optional)
    15-30ml (1-2 Tbsp) cold water

Sift together flour, sugar and salt. Grate butter into the flour mixture, using the large hole-side of a box grater. Using your finger tips only, and working very quickly, rub the fat into the flour until the mixture resembles bread crumbs. Set aside.

Lightly beat the egg yolks with the almond extract (if using) and quickly mix into the flour mixture. Keep mixing while dribbling in the water, only adding enough to form a cohesive and slightly sticky dough.

Form the dough into a disc, wrap in cling and refrigerate for at least 30 minutes

Jasmine’s notes:
• I make this using vanilla salt and vanilla sugar.
• If you wish, you can substitute the seeds of one vanilla bean, one teaspoon of vanilla paste or one teaspoon of vanilla extract for the almond extract

Frangipane

Prep time: 10-15 minutes
Equipment needed: bowls, hand mixer, rubber spatula

  • 125g (4.5oz) unsalted butter, softened
    125g (4.5oz) icing sugar
    3 (3) eggs
    2.5ml (½ tsp) almond extract
    125g (4.5oz) ground almonds
    30g (1oz) all purpose flour

Cream butter and sugar together for about a minute or until the mixture is primrose in colour and very fluffy. Scrape down the side of the bowl and add the eggs, one at a time, beating well after each addition. The batter may appear to curdle. In the words of Douglas Adams: Don’t panic. Really. It’ll be fine. After all three are in, pour in the almond extract and mix for about another 30 seconds and scrape down the sides again. With the beaters on, spoon in the ground nuts and the flour. Mix well. The mixture will be soft, keep its slightly curdled look (mostly from the almonds) and retain its pallid yellow colour.

We had gone strawberry picking that weekend and so of course I prepared some quick strawberry jam. No pectin, nothing but strawberries, sugar and lemon juice….that’s it and folks at home could not have enough of it…..actually there wasn’t t enough of it as I used it up in the tart 🙂 .

Optional element: Home made jam or curd
We know several amongst us are rather jammy with making their own jams and preserves. Go ahead get wild and creative or simply showcase whatever’s local and in season. If you haven’t jammed before and want some hints or recipes, take a look at Bernardin’s homecanning.ca. If you want to just make some jam for this challenge and not go through sterilizing jars and snap lids, you can try a pan jam, similar to Jasmine’s Blackberry Pan Jam. If you do use homemade jam, please include your recipe or the link to the one you used in your post.

Quick Strawberry Pan Jam (similar to Jasmine‘s pan jam)

  • Strawberries 2 cups cleaned and quartered (measured after cutting)
  • sugar 1 1/2 cups
  • Lemon Juice 1 Tbsp.

On a heavy bottomed pan, heat the strawberries till they boil and add the sugar and lemon juice. Let this cook on medium heat till a  successful plate test can be done. For the plate test, place a plate in the freezer or chill it well. Pour a big drop of jam on this cold plate and give it 30 seconds. If the jam has reached the right consistency, it will very slowly spread a little. More about jam making here.

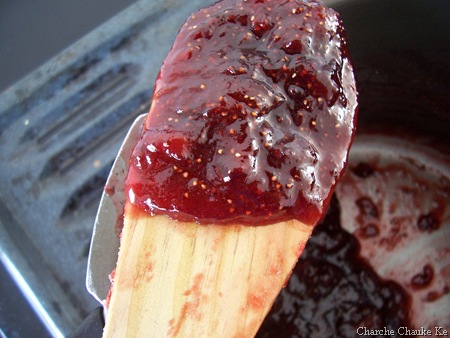
July1_39

Strawberry Pan Jam

I also made some strawberry leather ( I mentioned we went strawberry picking, so, yeah I had a bounty)  for “decoration” which looked good but bad pictures…. Anyway, the boy is nuts about this fruit leather and I prefer making it at home to avoid preservatives and less sugar compared to store bought. Very simple to make, patience is the only virtue required in making fruit leather. Most types of fruits can be used to prepare fruit leather. Please leave melons :-)). I have made fruit leather out of strawberries and kiwi fruit so far. It’s basically like aam papad that we would eat just with other fruits….kids love it. Unfortunately, I have no pictures…next time.

Strawberry Leather:

The Recipe:

  • Strawberries 2 cups cleaned, hulled and pureed
  • sugar  1/4 cup
  • Lemon juice 1 tsp.

1. The same ingredients as jam but tastes quite different. Lemon juice is required both here and in jam to reduce crystallization of sugar. I remember jam bottles which would have rims covered in sugar. Anyway, so far I have only made in small quantities which lasts me about 3-4 weeks in the refrigerator and no sugar crystallization so far. Anyway, puree the strawberries and strain them. I just add the strawberry seeds to the jam….I like the crunch in it .

July1_31 July1_32

Strawberries for strawberry leather

2. In a heavy bottomed pan, add sugar, strained puree and lemon juice and heat on medium heat. Stop after about 20 minutes or until the mixture has thickened considerably yet should be of pouring and spreading consistency. Try your hand at it……..the result will be delicious anyway 🙂 .

3. Cover a baking sheet with parchment paper. Parchment paper is a necessity for making fruit leather. Spread the mix as thinly and uniformly as possible. We don’t want to spread very thin as it will get crisp or worse burn but too thick will take an eternity. About 1/4 inch is good enough.

4. Preheat the oven to 200 F. Keep the baking sheet in the oven and forget for at least an hour. After the first hour (for a small batch) I like to check every half hour. The mixture keeps drying and when it’s ready, there won’t be any soft portion left & will also not be very sticky.

5. Let it cool completely and store wrapped in parchment. Can be cut as desired. The result is worth the effort.

July2_07

Bad attempt really……bakewell tart was delicious with some whipped topping

The red stuff is strawberry leather roses…..bet it didn’t look as bad as here 🙂

We all thoroughly enjoyed this bakewell tart…..er..pudding. It’s a great & easy make ahead dessert. We liked it better the next day. 

Did not cost me anything as I made half the quantity and had everything at home.

Posted in - Confectioner's Sugar, -All Purpose flour, -Almond extract, -Almonds, -Butter, -lemon, -Strawberry, Eggs, Sugar | Tagged: , , | 3 Comments »

Beirut Tahini Swirls…….Sukkar Bi Tahin

Posted by vivnidhi on July 29, 2009

Bread Baking Babes make Sukkar bi Tahin.

1100_3665

Sukkar bi Tahin

100_3678  100_3673

Here’s my savory …garbanzo filled swirls and sweet Tahini paranthas

As soon it was approaching the middle of the month, I was frantically searching for bread baking babes….what are they baking this month, I hope I don’t miss it……….I did not 😉 . I made 2 batches at least and mix and match here and there ;-). This month’s host babe was Natashya of Living in the Kitchen with Puppies.

The recipe she chose is for Beirut Tahini Swirls, Sukkar bi Tahin. It is a cross between a flatbread and a yeasted pastry, only mildly sweet. It is street food in Beirut, and very addictive!
“Beirut has a lot of good food at every level, from fancy restaurants to local eateries, from home cooking to quality market shopping. And for a curbside snacker like me, it’s paradise. There are sesame-covered flatbreads, grilled meats, and sweet and not so sweet cookies; there’s always something nearby to eat.” “These tahini swirls, called sukkar bi tahin in Arabic, are flattened flaky rounds flavored with tahini and sugar, not too sweet, not too strong tasting. Serve them warm or at room temperature-they’re just right either way.”
Alford and Duguid, Home Baking .

The recipe:

Sukkar bi Tahin – Beirut Tahini Swirls

Home Baking, The Artful Mix of Flour and Tradition Around the World

Jeffrey Alford and Naomi Duguid

Makes 6 golden brown, flaky textured coiled rounds, about 6 inches wide, filled with sesame paste and sugar.


Ingredients


Dough

  • 1/2 tsp. active dry yeast
  • 1 cup lukewarm water
  • 1 cup all purpose flour
  • 1 cup whole wheat flour
  • about 1/2 cup all purpose flour for dusting
  • 2 tsp sugar
  • 1 tbsp olive oil

Filling

  • 3/4 cup tahini
  • 3/4 cup sugar


Garbanzo Bean Filling

  • 1/2 cup Garbanzo beans soaked for at least 4 hours and boiled…mashed lightly
  • 4 sun dried tomatoes soaked in water and drained
  • 1/2 cup Tahini
  • 2 cloves garlic minced
  • 1/4 Cilantro chopped
  • 1 Tbsp. lemon juice
  • salt to taste


Directions

In a medium bowl, dissolve the yeast in the lukewarm water.

Stir in one cup of the flour, then add the sugar and oil and stir in.

Incorporate a second cup of flour, then turn the dough out onto a well floured surface and knead for 5 minutes, or until smooth.

Cover the dough with plastic wrap and let rise for 2 to 3 hours, until doubled in volume.

Meanwhile, place a baking stone or unglazed quarry tiles, if you have them, (or a baking sheet) on the middle oven rack and preheat the oven to 375 F.

Mix together the tahini and sugar and stir until smooth. Set aside.
Cut the dough into 6 equal pieces.

Work with 3 at a time, keeping the others covered.

Flatten each out on a lightly floured surface, then roll each out to a rectangle about 5 inches by 10 inches.

Spread the top surface with 2 1/2 tablespoons of the filling mixture, spreading it almost to the edges.

Roll up the rectangle from a long side into a cylinder, which will stretch as you roll to about 20 inches long.

Anchor one end and coil the bread around itself, then tuck the end in.

Flatten with the palm of your hand, then set aside, covered, while you fill and shape the other 2 rectangles.

Return to the first coil and roll out gently with a rolling pin.

Roll the other 2 out a little and then return to the first one and roll it out a little more thinly, and so on, until you have rolled each to a round about 6 to 7 inches in diameter.

A little filling may leak out—don’t worry, just leave it.

I brushed the top with a wee bit of oil and sprinkled some sesame seeds before baking. (optional)

Place the breads on the hot baking stone or tiles (or baking sheet) and bake for 15 to 20 minutes, until golden brown and flaky.

Transfer to a rack to cool.

Shape and bake the remaining 3 pieces of dough.

Serve warm or at room temperature.


*Tahini is a paste of ground sesame seeds. It can be found in health food stores, Middle Eastern markets and some grocery stores. It is a common ingredient in hummus, and is gaining in popularity in most parts of the world. It must be refrigerated after opening.

Natashya says: “The swirls should end up like puffy pita. If they are very thin they will be crispy, if they are not rolled enough, they will puff up like cinnamon rolls. We are striving for a flatbread pastry that puffs a little. Try them a couple of times, experiment. They are fun to bake.”  You bet they are ……I had a ton of fun……as usual 😉 .

I used half whole wheat flour and half all purpose flour for sweet tahini filling ones and all whole wheat flour for the savory garbanzo beans ones. Original recipe uses all purpose flour only.

 100_3642 100_3650 

Left: 1/2 whole wheat with 1/2 all purpose flour dough Right: Whole wheat flour dough

100_3651 

We have risen..the 1/2-1/2 dough was a little behind, but it did catch on

 100_3652

Dough cut in 6 pieces ..sweet tahini filling behind

100_3653

1 piece rolled

100_3654

Filled up

100_3659 

Rolled up again

100_3663

Ready to be baked

100_3665

Sukkar bi Tahin

100_3666

Had some leftover sweet tahini filling…..what did I do with that

100_3667

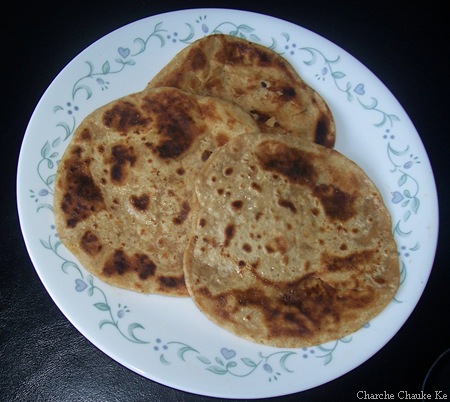
Made sweet paranthas of course…..dough details here and here

100_3668

Filled up and closed

100_3669

rolled …

100_3671

On the griddle…ready to be turned and oiled

100_3670

The other side…..

100_3673

Quick , delicious sweet treat…….kids will thank you…..this tastes best warm, will harden as it cools cause the flour cover is thin….does not taste bad even then 😉

You bet I enjoy taking pictures and posting huge ones on the blog 😉 . I dare say I loved making these. Thank you Natashya and Bread Baking Babes.

Posted in -All Purpose flour, -Cilantro, -Garlic, -lemon, -Olive Oil, -Sesame seeds, -Sun dried tomatoes, -Tahini, -Whole wheat flour, Sugar, Yeast | Tagged: , , , | 2 Comments »

Daring Bakers July bring Cookies…….

Posted by vivnidhi on July 28, 2009

Vanilla at 180 x 180 (largest)brings…..

100_3688

The boy can’t stop himself 😉 Plum jam cookies and lots more…….

Jaana tha Japan , pahunch gaye Cheen…………Had to go to Japan , and I reached China…. You don’t get it……yeah…..oh well! the daring baker challenge this month was mallow cookies and milanos….long live Pepperidge Farm! I ended up making those and a fusion…..which we all absolutely loved.

These cookies pictured above are truly the best cookies I have ever made. If you liked and ate jam biscuits (called so in India) in your childhood, these cookies will bring those memories back. I surprised myself……..these tasted so good.

The July Daring Bakers’ challenge was hosted by Nicole at Sweet Tooth. She chose Chocolate Covered Marshmallow Cookies and Milan Cookies from pastry chef Gale Gand of the Food Network.

The mallow cookies were great, I would have never dreamt of making homemade marshmallows but homemade taste so………..good and you can flavor them just as you would want. Thanks a lot Nicole, for this challenge.The mallows biscuit was really delicious. The no. of cookies mentioned in the original recipe is all messed up….which actually worked in my favor 🙂 .  I loved it so much that I made some plum jam and filled them up and loved the result.

Milanos were quite a disappointment and I would certainly not want to make those again. The milanos dough was like tuiles batter yet not even that….I give up.

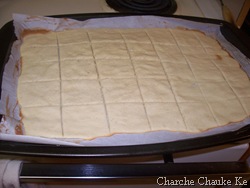
The husband was quite excited about Milano cookies and so I made them first, in fact packed a few for a friend, but it was a lot of effort in trying to make them the same size…..and the end result was not worth it… I just made about 2 dozen of them.After that I split the batter in half , spread on the parchment on the entire tray and baked for 5 minutes in the oven. Cut them with a pizza cutter in squares and back in oven for 5-7 minutes more. Same with the rest of the batter. Filled them up up with the chocolate ganache and anything with chocolate gets eaten here. I do not recommend this and will not be making them again 🙂 . I should mention the chocolate ganache tasted good and the husband even helped me zest the whole orange. What do you think…….I will need help again some other time too..I must not forget the dear husband 🙂

100_3679

Don’t they look cute…….

Milanos for friends…….hope they ate it up soon…..before they turned chewy…….oh no….boo hoo hoo

100_3682 100_3686

Rest of the Milanos……..:-)


Here come the mallows…..pretty good cookies , if one is fond of marshmallows. We are not too fond of them, yet no cookies left of the 28 I made.

The recipe:

Mallows(Chocolate Covered Marshmallow Cookies)
Recipe courtesy Gale Gand, from Food Network website

Prep Time: 10 min
Inactive Prep Time: 5 min
Cook Time: 10 min
Serves: about 2 dozen cookies

• 3 cups (375grams/13.23oz) all purpose flour
• 1/2 cup (112.5grams/3.97oz) white sugar
• 1/2 teaspoon salt
• 3/4 teaspoon baking powder
• 3/8 teaspoon baking soda
• 1/2 teaspoon ground cinnamon
• 12 tablespoons (170grams/ 6 oz) unsalted butter
• 3 eggs, whisked together
• Homemade marshmallows, recipe follows
• Chocolate glaze, recipe follows

1. In a mixer with the paddle attachment, blend the dry ingredients.
2. On low speed, add the butter and mix until sandy.
3. Add the eggs and mix until combine.
4. Form the dough into a disk, wrap with clingfilm or parchment and refrigerate at least 1 hour and up to 3 days.
5. When ready to bake, grease a cookie sheet or line it with parchment paper or a silicon mat.
6. Preheat the oven to 375 degrees F.
7. Roll out the dough to 1/8-inch thickness, on a lightly floured surface. Use a 1 to 1 1/2 inches cookie cutter to cut out small rounds of dough.
8. Transfer to the prepared pan and bake for 10 minutes or until light golden brown. Let cool to room temperature.
9. Pipe a “kiss” of marshmallow onto each cookie. Let set at room temperature for 2 hours.
10. Line a cookie sheet with parchment or silicon mat.
11. One at a time, gently drop the marshmallow-topped cookies into the hot chocolate glaze.
12. Lift out with a fork and let excess chocolate drip back into the bowl.
13. Place on the prepared pan and let set at room temperature until the coating is firm, about 1 to 2 hours.

Note: if you don’t want to make your own marshmallows, you can cut a large marshmallow in half and place on the cookie base. Heat in a preheated 350-degree oven to slump the marshmallow slightly, it will expand and brown a little. Let cool, then proceed with the chocolate dipping.

Homemade marshmallows:
• 1/4 cup water
• 1/4 cup light corn syrup
• 3/4 cup (168.76 grams/5.95oz) sugar
• 1 tablespoon powdered gelatin
• 2 tablespoons cold water
• 2 egg whites , room temperature
• 1/4 teaspoon pure vanilla extract

1. In a saucepan, combine the water, corn syrup, and sugar, bring to a boil until “soft-ball” stage, or 235 degrees on a candy thermometer.
2. Sprinkle the gelatin over the cold water and let dissolve.
3. Remove the syrup from the heat, add the gelatin, and mix.
4. Whip the whites until soft peaks form and pour the syrup into the whites.
5. Add the vanilla and continue whipping until stiff.
6. Transfer to a pastry bag.

Chocolate glaze:
• 12 ounces semisweet chocolate
• 2 ounces cocoa butter or vegetable oil

1. Melt the 2 ingredients together in the top of a double boiler or a bowl set over barely simmering water.

100_3674

Marshmallow cookies before the dip in chocolate

I got 28 cookies by using 1/4 of the cookie dough. Made 1/2 the amount of marshmallows and chocolate glaze. Since my glaze eventually bloomed, I covered them up in Milanos ganache…….the Milano cookie filling :-)………yeah that’s me!! Tasted good, nevertheless 😉

Chocolate Ganache:

• 1/2 cup heavy cream
• 8 ounces semisweet chocolate, chopped
• 1 orange, zested

I also prepared some plum jam….just because I had some plums I had to use. Filled them up in the mallows crust, sprinkled with sugar and loved , loved it! Please do try if you are in the mood to make cookies, true labor of love , forming so many small bites but totally worth it ……..as you will see in pictures below 🙂

Plum Jam Recipe:

  • Plums 2 1/2 cups …..pitted, and chopped fine
  • Sugar 1 1/2 cups
  • Lemon juice  1 Tbsp

That’s it….I added all of this in a heavy bottomed saucepan with 2 Tbsp. water. Cooked it down till I could do the plate test. For the plate test, place a plate in the freezer or chill it well. Pour a big drop of jam on this cold plate and give it 30 seconds. If the jam has reached the right consistency, it will very slowly spread a little. More about jam making here. I made a small quantity, hence it went directly to the refrigerator.

100_3693

Pick one up……these are ready for a sprinkling of sugar

100_3709

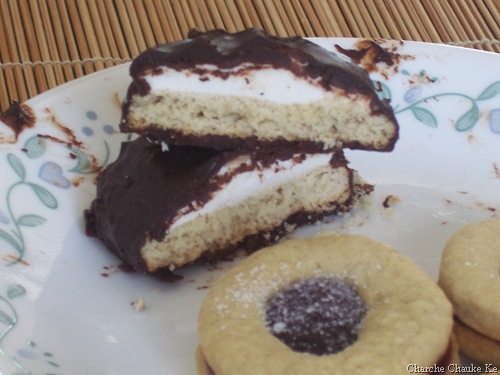
Here are the mallows…..this is how they looked

100_3700

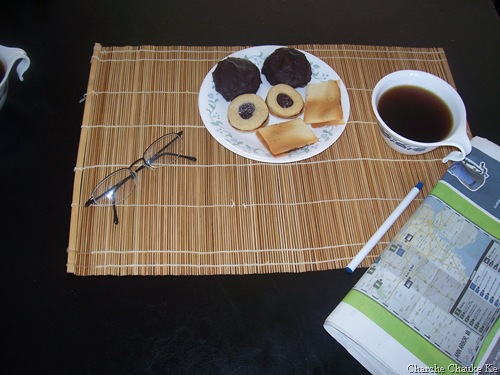
Perfect with coffee….for some great mornings………

I just took a picture as the husband had set the table

100_3711

Somebody else had a great time too……….

It’s been one whole year being a part of the Daring Bakers for me. I have come a long way…..I remember my first challenge Filbert Gateau….I remember my delight. Now I dare to experiment on my own…..Thank you Lis and Ivonne and the whole Daring Baker community which is the best resource of all.

Expenditure:

Unsalted Butter: ………………….$2.17……….from Walmart, some left

Corn syrup(16 oz.)…………………$1.67……….from Kroger, lots left

Heavy cream(1/2 pint)…………….$2.89…………from Kroger, lots left

Powdered sugar……………………$1.99…………from Kroger, lots left

Bakers Chocolate semisweet(8 oz):$ 3.29………….from Kroger, none left

Orange 1 :-)…………………………$0.64………….from Kroger, ate it up….

————————————————————————————————–

Total………………………………..$12.65

Posted in -All Purpose flour, -Butter, -Canola Oil, -Cinnamon, -Corn Syrup, -Cream, -Orange, -Plums, -Semisweet Chocolate, -Vanilla, Baking Powder, Baking Soda, Daring Bakers, Eggs, Gelatin, Sugar | Tagged: , , , , , | 14 Comments »

Daring Cooks # 2 Potstickers / Gyoza

Posted by vivnidhi on July 21, 2009

July1_21

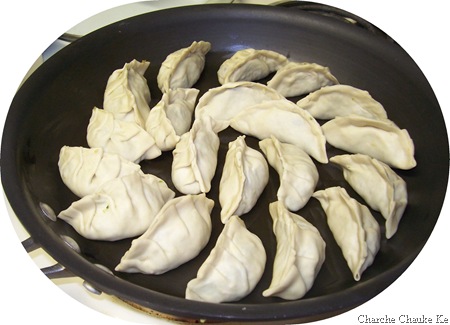
Yaay! I can make neat Potstickers  too!

Those who have read my earlier post know that I am late in posting about practically all the posts for the past two months. OK, enough of apologizing. Lost time can’t be brought back again but I can try to learn (Oh yeah………. 😉 )

The reason these potstickers are late is that I experimented a lot with these. Since I first ate the vegetarian gyozas that Trader Joe’s sells, I have been hooked. I remember telling the husband very comfortably……I can make these as he was trying to pick up the last TJ’s one off my plate too. I generously handed the last gyoza to him and said to myself, “shouldn’t be a big deal really”. Before I could fully make a plan about these gyozas, Jen from use real butter announced that the Daring cook challenge as Potstickers. I was very excited (shows when I don’t post on time, right 😉  ).

Anyway, the bigger challenge these days is posting , not making.

Let me start with saying, I have made it four times now (very unusual for me, I hate repeating) and don’t think my stint with gyozas ends here. I only repeat recipes which I am trying to master…….say Idlis………and now potstickers :-).  How do people write recipe books, how many times do they test?

Round 1: Stuffed whatever I had on hand, forgot soy sauce and cornstarch. You bet………..it tasted great…….I was the only one who ate 🙂 .

Round 2:  A planned visit to the Asian store, bought garlic chives, tofu etc…….pantry equipped. Even though I baked the tofu and drained it well, I found the end stuffing mixture to be quite wet. This resulted in not well shaped gyozas. Anyway, tasted great, got a pat on the back 🙂

Round 3: Cooked the stuffing up, mixed it with some finely chopped veggie burgers (this was for something else) but ended up in potstickers. Husband said, I liked round 2 better.

Round 4: This time, I was dead sure of what I wanted to do………everything in place……….yet the husband said…….round 2 was better…………and boo hoo hoo ……..he is right.

Round 5: Got filled with coconut fudge and some also had chocolate ganache filling , and topped with powdered sugar…Yes, I was cleaning the freezer which is filled with small tit-bits.

Here’s the recipe with my vegetarian filling and the best proportions *(these matter….all I had wrong in round 4 was a little extra daikon radish ):

Jen says “It’s a basic concept: a filling inside a dough wrapper, sealed, and cooked. This delicious theme runs through many cultures and is among the more popular bites at Chinese restaurants – especially dim sum. “

The process goes a little like this:

You can (and should) reference instructional photos and discussion on Jen’s blog post here.

Wrappers: Well yes, you could purchase pre-made dumpling wrappers at the store (NO WONTON WRAPPERS – they have egg), but they are inferior compared to homemade. The whole point of this challenge is to make the dumpling wrappers by hand. So here is the one requirement: the dumpling wrappers must be made by hand. It isn’t all that hard, it just takes a little time and practice. People usually get the hang of it after making about a dozen.

Fillings: the beauty of the Chinese dumpling/potsticker is that the filling is very versatile. That’s why there are so many different kinds of dumplings when you go to dim sum. The two most common are pork and shrimp. You can make them with other ground meats (beef, chicken…) or vegetarian (tofu, mushrooms, bamboo shoots, water chestnuts, glass noodles, Chinese chives – oh yum!). The important thing to keep in mind is that the filling needs to “stick” to itself or else you will make your life incredibly miserable wrapping up filling that keeps falling apart. I think if I were to make vegetarian dumplings, I would sauté the cabbage and mash up the tofu for a better cohesiveness. It’s up to you how you want to fill your dumplings and I say – run with it! Just keep it cohesive and no big chunks of hard ingredients (they poke through the wrapper dough = disaster). I realize it may be tempting to dump all of the vegetables into a food processor and give it a whir, but I caution against it. You don’t want a slurry, you want a mince. Practice your knife skills and be careful.

Special Equipment: A rolling pin – preferably not tapered. (see blog pictures for the type I use).

Time: Prep for the filling takes me 30 minutes – longer if peeling and de-veining shrimp. It will depend on your proficiency with a good sharp knife. Rolling and wrapping several dozen dumplings takes me 1 hour by myself. My parents can crank through it in 30 minutes when one person is rolling wrappers and the other is wrapping dumplings. Might be fun to get a second person to help! Cooking: I have to cook mine in batches. When steaming, I can cook a dozen at a time in about 10 minutes. Potstickers: 15 minutes per 2 dozen determined by the size of your pan. Boiling – 6 minutes per dozen or so depending on size of pot. My own personal preference is for potstickers – mmmmm! But they are ALL good.

The Recipe:

Dough:

  • 2 cups (250g) all-purpose flour
    1/2 cup (113g) warm water
    flour for worksurface

Make the dough, Method 1: Place the flour in the work bowl of a food processor with the dough blade. Run the processor and pour the warm water in until incorporated. Pour the contents into a sturdy bowl or onto a work surface and knead until uniform and smooth. The dough should be firm and silky to the touch and not sticky.[Note: it’s better to have a moist dough and have to incorporate more flour than to have a dry and pilling dough and have to incorporate more water).

Make the dough, Method 2 (my mom’s instructions): In a large bowl mix flour with 1/4 cup of water and stir until water is absorbed. Continue adding water one teaspoon at a time and mixing thoroughly until dough pulls away from sides of bowl. We want a firm dough that is barely sticky to the touch.

Both dough methods: Knead the dough about twenty strokes then cover with a damp towel for 15 minutes. Take the dough and form a flattened dome. Cut into strips about 1 1/2 to 2 inches wide. Shape the strips into rounded long cylinders. On a floured surface, cut the strips into 3/4 inch pieces. Press palm down on each piece to form a flat circle (you can shape the corners in with your fingers). With a rolling pin, roll out a circular wrapper from each flat disc. Take care not to roll out too thin or the dumplings will break during cooking – about 1/16th inch. Leave the centers slightly thicker than the edges. Place a tablespoon of filling in the center of each wrapper and fold the dough in half, pleating the edges along one side (see images in Jen’s post for how to fold pleats). Keep all unused dough under damp cloth.

June1_35

The dough, even though feels very dry….just let it rest ;-)…..this is after the rest

June1_38

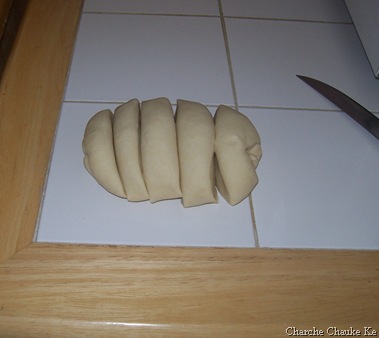
Dough cut into 5 pieces

June1_41

The cut portion of the dough is rolled into a thinner round and cut further. Good idea to cut it bigger than I am showing here. This was my first attempt.

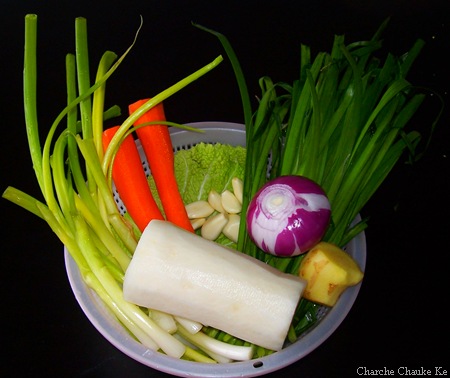
  • Vegetarian filling:
    2 carrots minced
  • 4 large napa cabbage leaves, minced
    3 stalks green onions, minced
    6 cloves garlic
  • 1/4 bunch Chinese chives/garlic chives minced
  • 1 medium red onion minced
    1/2 cup Daikon radish peeled and minced (lesser than shown in picture below)
    1/4  cup ginger root, minced
  • 1 cup tofu (baked in oven at 400F for 15 minutes) mashed (optional)
  • 2 Tbsp. sugar
    3 Tbsp (40g) soy sauce
    2 Tbsp (28g) sesame oil
    6 Tbsp (16g) corn starch

July1_18

Finally some color……spring onion, carrots, napa cabbage, garlic, garlic chives, red onion,ginger and daikon radish

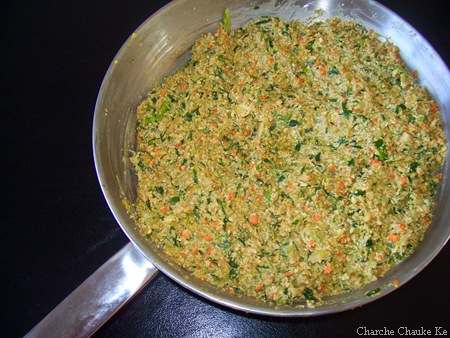
Even though Jen asks to mince  the veggies by hand, I chose to use the food processor………and was I glad I did ;-). Mince these veggies and drain the water by pressing with hands. Add the sugar, soy sauce, sesame oil and corn starch.

June1_33

Vegetarian filling

  • dipping sauce:
    2 parts soy sauce
    1 part vinegar (red wine or black)
    a few drops of sesame oil
    chili garlic paste (optional)
    minced ginger (optional)
    minced garlic (optional)
    minced green onion (optional)
    sugar (optional)

To boil: Bring a large pot of water to a boil and add dumplings to pot. Boil the dumplings until they float.

To steam: Place dumplings on a single layer of napa cabbage leaves or on a well-greased surface in a steamer basket with lid. Steam covered for about 6 minutes.

To pan fry (potstickers): Place dumplings in a frying pan with 2-3 tbsp of vegetable oil. Heat on high and fry for a few minutes until bottoms are golden. Add 1/2 cup water and cover. Cook until the water has boiled away and then uncover and reduce heat to medium or medium low. Let the dumplings cook for another 2 minutes then remove from heat and serve.

To freeze: Assemble dumplings on a baking sheet so they are not touching. It helps to rub the base of the dumpling in a little flour before setting on the baking sheet for ease of release. Freeze for 20-30 minutes until dumplings are no longer soft. Place in ziploc bag and freeze for up to a couple of months. Prepare per the above instructions, but allow extra time to ensure the filling is thoroughly cooked.

To serve: Serve dumplings or potstickers hot with your choice of dipping sauce combinations.

July1_22 July1_26

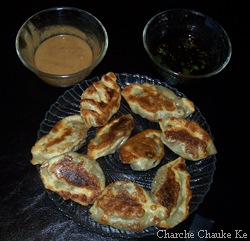
Pan fried is the way to go for us: these look  darker than they actually were ….trust me, these are delicious

June1_47 July1_28

Ah…..my black background

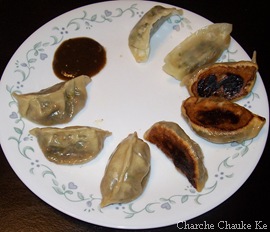
One more pic and the one with the coconut fudge filling (tasted like modaks :-)) )

Posted in - Napa Cabbage, - Red onion, -All Purpose flour, -Carrot, -Daikon Radish, -Garlic, -Garlic chives, -Ginger, -Sesame oil, -Soya Sauce, -Spring Onions, -Tofu, Corn Starch, Sugar | Tagged: , , | 3 Comments »

More than a month late : Daring Bakers May: Apple Strudel

Posted by vivnidhi on July 5, 2009

This was the May’s Daring Baker Challenge. No, its not a case of dementia……..just pure procrastination. Its been strange strange past months, I would make Daring Bakers & Cooks challenges with a lot  of enthusiasm and then not post them. Everybody in the house seems to be suffering from a severe case of Writer’s Block. I really hope Lis and Ivonne don’t kick me out of the group. This month (whole of June), I sat and pondered and planned what I would do with the recipe……..but the truth is : I haven’t made it yet.

Anyway, often in life I have gone in my self-created shells and each time emerged stronger. So, I am hoping that the same would happen this time too. Cooking and baking has kept me sane all these years when I have not paid any particular attention to my career. I remember hearing somewhere (blame the radio for all my weird stories) that the happiest workers are those who work in creative fields. You bet, the only creativity I have is in the kitchen:-). This is the very thread that keeps me excited about the next day. When my mother was here a year back, she was surprised beyond belief to hear my then 2 year old son tell her all about Indian spices, where his Mom kept them, which utensils she used for what purpose.

Oh , now that I have blabbered about everything else, let’s get on with the strudel. I found it to be delicious and a perfect spring-summery light dessert.

Vanilla at 180 x 180 (largest)presents:

May_58

Mini Apple Strudel topped with candied apple peels and caramel sauce

The May Daring Bakers’ challenge was hosted by Linda of make life sweeter! and Courtney of Coco Cooks. They chose Apple Strudel from the recipe book Kaffeehaus: Exquisite Desserts from the Classic Cafés of Vienna, Budapest and Prague by Rick Rodgers.

Preparation time
Total: 2 hours 15 minutes – 3 hours 30 minutes

15-20 min to make dough
30-90 min to let dough rest/to prepare the filling
20-30 min to roll out and stretch dough
10 min to fill and roll dough
30 min to bake
30 min to cool

Apple strudel
from “Kaffeehaus – Exquisite Desserts from the Classic Cafés of Vienna, Budapest and Prague” by Rick Rodgers

2 tablespoons (30 ml) golden rum
3 tablespoons (45 ml) raisins
1/4 teaspoon ground cinnamon
1/3 cup plus 1 tablespoon (80 g) sugar
1/2 cup (1 stick / 115 g) unsalted butter, melted, divided
1 1/2 cups (350 ml) fresh bread crumbs
strudel dough (recipe below)
1/2 cup (120 ml, about 60 g) coarsely chopped walnuts
2 pounds (900 g) tart cooking apples, peeled, cored and cut into ¼ inch-thick slices (use apples that hold their shape during baking)

1. Mix the rum and raisins in a bowl. Mix the cinnamon and sugar in another bowl.

2. Heat 3 tablespoons of the butter in a large skillet over medium-high. Add the breadcrumbs and cook whilst stirring until golden and toasted. This will take about 3 minutes. Let it cool completely.

3. Put the rack in the upper third of the oven and preheat the oven to 400°F (200°C). Line a large baking sheet with baking paper (parchment paper). Make the strudel dough as described below. Spread about 3 tablespoons of the remaining melted butter over the dough using your hands (a bristle brush could tear the dough, you could use a special feather pastry brush instead of your hands). Sprinkle the buttered dough with the bread crumbs. Spread the walnuts about 3 inches (8 cm) from the short edge of the dough in a 6-inch-(15cm)-wide strip. Mix the apples with the raisins (including the rum), and the cinnamon sugar. Spread the mixture over the walnuts.

4. Fold the short end of the dough onto the filling. Lift the tablecloth at the short end of the dough so that the strudel rolls onto itself. Transfer the strudel to the prepared baking sheet by lifting it. Curve it into a horseshoe to fit. Tuck the ends under the strudel. Brush the top with the remaining melted butter.

5. Bake the strudel for about 30 minutes or until it is deep golden brown. Cool for at least 30 minutes before slicing. Use a serrated knife and serve either warm or at room temperature. It is best on the day it is baked.

Strudel dough
from “Kaffeehaus – Exquisite Desserts from the Classic Cafés of Vienna, Budapest and Prague” by Rick Rodgers

1 1/3 cups (200 g) unbleached flour
1/8 teaspoon salt
7 tablespoons (105 ml) water, plus more if needed
2 tablespoons (30 ml) vegetable oil, plus additional for coating the dough
1/2 teaspoon cider vinegar

1. Combine the flour and salt in a stand-mixer fitted with the paddle attachment. Mix the water, oil and vinegar in a measuring cup. Add the water/oil mixture to the flour with the mixer on low speed. You will get a soft dough. Make sure it is not too dry, add a little more water if necessary.
Take the dough out of the mixer. Change to the dough hook. Put the dough ball back in the mixer. Let the dough knead on medium until you get a soft dough ball with a somewhat rough surface.

2. Take the dough out of the mixer and continue kneading by hand on an unfloured work surface. Knead for about 2 minutes. Pick up the dough and throw it down hard onto your working surface occasionally.
Shape the dough into a ball and transfer it to a plate. Oil the top of the dough ball lightly. Cover the ball tightly with plastic wrap. Allow to stand for 30-90 minutes (longer is better).

3. It would be best if you have a work area that you can walk around on all sides like a 36 inch (90 cm) round table or a work surface of 23 x 38 inches (60 x 100 cm). Cover your working area with table cloth, dust it with flour and rub it into the fabric. Put your dough ball in the middle and roll it out as much as you can.
Pick the dough up by holding it by an edge. This way the weight of the dough and gravity can help stretching it as it hangs. Using the back of your hands to gently stretch and pull the dough. You can use your forearms to support it.

4. The dough will become too large to hold. Put it on your work surface. Leave the thicker edge of the dough to hang over the edge of the table. Place your hands underneath the dough and stretch and pull the dough thinner using the backs of your hands. Stretch and pull the dough until it’s about 2 feet (60 cm) wide and 3 feet (90 cm) long, it will be tissue-thin by this time. Cut away the thick dough around the edges with scissors. The dough is now ready to be filled.

Tips
– Ingredients are cheap so we would recommend making a double batch of the dough, that way you can practice the pulling and stretching of the dough with the first batch and if it doesn’t come out like it should you can use the second batch to give it another try;
– The tablecloth can be cotton or polyster;
– Before pulling and stretching the dough, remove your jewelry from hands and wrists, and wear short-sleeves;
– To make it easier to pull the dough, you can use your hip to secure the dough against the edge of the table;
– Few small holes in the dough is not a problem as the dough will be rolled, making (most of) the holes invisible.

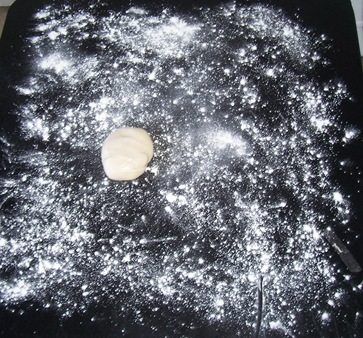
May_67 

Milk Bread for bread crumbs

May_19

This is what happened to the bread

May_20

Sliced apples, flour, bread crumbs and chopped nuts

May_25

Here’s  the dough

May_27

This is what I could do with it

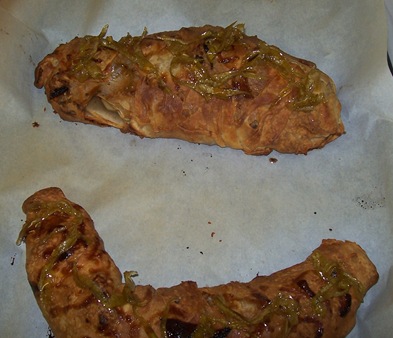
May_30

And, here’s  the result……yeah at least some of it

May_53

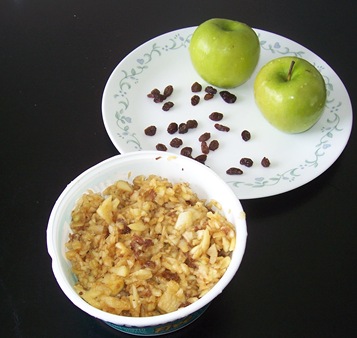
Decided that I do not like sliced apples, minced them up with the rest of the stuff and it stayed marinated in rum for a good 3-4 days…………:-)

May_54

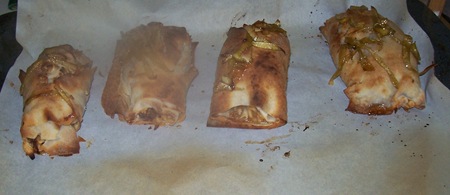
Here’s the result …hot out from the oven

May_26

Oh..this is what I did with the apple peels………candied them 🙂 ………..sliced the peels, blanched them in boiling water for a bit, threw the water and then reduced them with sugar, spread them on parchment and let them dry. Topped them on the strudels in the last 5 minutes of baking. (My son could not stop eating these 🙂 )

May_63

Loved these mini strudels topped with candied apple peels and caramel sauce

Have a bite……

It’s a shame I did not post this scrumptious strudel on time even though I made and took pictures way before the challenge date. Yet I am posting it now:-). Hopefully I will post on time henceforth( don’t apply this to the June challenge for which I am late already:-) ). Thank you Linda and Courtney for a delicious challenge.

Expenditure: Zilch

I had everything at home, specially the big box of granny smith apples(approx. 20 lb for $2) I picked up at Joe’s Randazzo on my early morning finds.

Posted in - Bread Flour, -All Purpose flour, -Bread crumbs, -Butter, -Cider Vinegar, -Cinnamon, -Granny Smith, -Raisins, -Vegetable Oil, Alcohol, Daring Bakers, Sugar | Tagged: , , | Leave a Comment »

Daring Cooks First Challenge : Ricotta Gnocchi

Posted by vivnidhi on May 16, 2009

flame_w180x180 presents

 100_3353

(Drum rolls Please!!!!)The Daring Cooks are out with their first challenge……..Ricotta Gnocchi !

The inaugural May 2009 Daring Cooks’ Challenge was brought to us by Ivonne of Creampuffs in Venice and Lis of La Mia Cucina. They chose a recipe from the stunning cookbook by Judy Rodgers, named after her restaurant, The Zuni Café Cookbook.

As I joined the Daring cooks, I was determined that my version of daring cooks challenges is going to be low fat and mostly vegetarian…..it can only get fishy 😉 , I know but then it won’t be for me ;-).

Long long back, when I did not know how to pronounce (no-kee) correctly, I had attempted making potato gnocchi. I think it turned out ok but since we can’t stay away from spices, after the first day, the leftovers were transformed to aloo kofta curry and THEN they were thoroughly enjoyed 🙂  .

For some strange reason I believed that this won’t be the case with ricotta gnocchi. If you look at Judy Rodgers preparing ricotta gnocchi in this video here, you will feel like picking one up right away.

The first thing I learned that making homemade ricotta is exactly like making paneer. The only difference is that for ricotta Whole milk is used and cream is also added to it, in India nobody adds extra cream. But, I bet anyone will tell you that the creamier the milk, the better the paneer/chhena  will turn out.  Other difference I can think of is that we mostly use buffalo milk in India and here in US, we use cow’s milk and hence the fat content definitely varies.

Well, I used 2% milk , now I do not know how much healthier it was but I tried. I did end up with a ton of whey because of using 2% milk but it was quickly used up in making my regular atta. To make paneer , just bring the milk to a boil and then add lemon juice to it. When the milk separates, drain the whey and further press it to dry it out completely.

Here are the pictures:

100_3330 100_3334 100_3344

Draining the ricotta, whey and the drained ricotta

100_3347 100_3347 100_3350

Can’t help using hands: smoothening out the ricotta, and the gnocchi, ready to be boiled

Oh, I have completely forgotten to mention my discovery. Yeah going very early to our vegetable market has its plusses. I have discovered the “reduced price box”. In $ 2 I end up getting a box full of a particular fruit or vegetable. It’s absolutely amazing, the stuff is good and not old, a few blemishes here and there but it’s far from bad. Honestly, it’s not bad at all. When we shop in the day, those boxes are long gone, but if one is there when the store opens its gates at 6 am, you can find treasures. So, this time I returned home beaming with boxes of green apples, orange bell peppers and pickles :-).I am talking of Joe’s Randazzo, if you are in the Detroit area.  Oh yeah that’s the Scrooge me talking but that’s how I am and always have been;-)

100_3327

Orange Bell Peppers, now who would mind these?

I used some, froze half of them (a couple month’s supply) and roasted the rest. Pealed and in the refrigerator hee hee.

Ok, back to the gnocchi. I believe you can take an Indian out of spice land but you cannot take spice out of him. Its true for our household. First I served it up with roasted bell pepper cashew sauce with dried fenugreek. The sauce was good but the husband wondered aloud, why didn’t you make matar paneer:-). I know he did not mind the gnocchi but matar paneer is the way to go in our house:-).

Next day, I pan fried the gnocchi in a Tbsp. of oil and added salt, pepper and lime juice. Sprinkled some fresh cilantro and the husband absolutely perked up.

Late Update June 28th 2009 : Just uploaded the lost pictures of pan fried ricotta with Indian spices:

May_03

Pan Fried Ricotta Gnocchi with spices

Well! my advice is that if you are not particularly fond of gnocchi, this recipe will not change you. Just take the pressed ricotta/paneer and pan fry it and serve it with preferred seasonings. You will not miss gnocchi:-)

Posted in -All Purpose flour, -Cheese, -Kasoori Methi, -Orange Bell Pepper, -Red chili powder, Eggs, Milk | Tagged: , , | 1 Comment »

Lasagne Time

Posted by vivnidhi on March 28, 2009

ninja_w180x180 100_3193

Here’s Chopping Ninja …..just being “DARING”

Soon, all the chair backs were also covered! not a pretty picture I know

The husband thanked me first for not growing my own spinach and grinding flour at home (also with a look that said “I know what’s on your mind 😉 ” ) I have been pestering him about CSAs but I know…….one day……..that too will happen 🙂 .

I really could never have envisioned myself making lasagne…….ever…….and that too with home made pasta!! I heard of it only after coming to the US. The husband is not particularly fond of any form of noodles and while I enjoy pasta , I have never quite liked lasagne. Even the ones with eggplants  in them!! While I can say that this Daring Bakers challenge tasted quite good (EVEN the Hubby ate it and said “it’s fine, it’s good, don’t worry, I can eat it :-)” ), I doubt that I will be remaking it.

The husband chose to eat this instead of the “rajma Chawal (kidney beans-rice) back-up was satisfying enough for the amount of work that went into making it 😉 . Though , I did not stop my nagging here. Since I could not believe that he was eating lasagne…….

Me : ” You don’t have to eat it, you know, you just are eating it cause I put in efforts” .

Him : ” This is good, don’t worry, rajma Chawal is too ordinary” .

Me : “Ah, then I should make this a weekly affair”.

Him : (with a smile and a look that said “I mean this!!!!) ” I like it irrespective of who made it and how much effort went in it  Let’s keep it like a once in a decade…..or lifetime experience…..you know me & noodles”

Oh yeah, I got it, I said it in the second paragraph” I won’t remake this lasagne” but will certainly make individual components like the sauces or even the pasta. Heh heh …In the kitchen, the chopping Ninja rules!!

Lasagne of Emilia-Romagna – Daring Bakers March 2009 Challenge

The March 2009 challenge is hosted by Mary of Beans and Caviar, Melinda of Melbourne Larder and Enza of Io Da Grande. They have chosen Lasagne of Emilia-Romagna from The Splendid Table by Lynne Rossetto Kasper as the challenge.

I try to listen to “The Splendid Table” every week on NPR. I am a radio buff and absolutely love the show!


All recipes below from The Splendid Table: Recipes from Emilia-Romagna, the Heartland of Northern Italian Food by Lynne Rossetto Kasper (published by William Morrow and Company Inc., 1992).

Lasagne of Emilia-Romagna (Lasagne Verdi al Forno)
(Serves 8 to 10 as a first course, 6 to 8 as a main dish)

Preparation Time: 15 minutes to assemble and 40 minutes cooking time

10 quarts (9 litres) salted water
1 recipe Spinach Pasta cut for lasagna (recipe follows)#1
1 recipe Bechamel Sauce (recipe follows)#2
1 recipe Country Style Ragu (recipe follows)#3
1 cup (4 ounces/125g) freshly grated Parmigiano-Reggiano

Method
Working Ahead:
The ragu and the béchamel sauce can be made up to three days ahead. The ragu can also be frozen for up to one month. The pasta can be rolled out, cut and dried up to 24 hours before cooking. The assembled lasagne can wait at room temperature (20 degrees Celsius/68 degrees Fahrenheit) about 1 hour before baking. Do not refrigerate it before baking, as the topping of béchamel and cheese will overcook by the time the center is hot.

I made the ragu a day earlier and bechamel before assembling the lasagne.


Assembling the Ingredients:
Have all the sauces, rewarmed gently over a medium heat, and the pasta at hand. Have a large perforated skimmer and a large bowl of cold water next to the stove. Spread a double thickness of paper towels over a large counter space. Preheat the oven to 350 degrees Fahrenheit (180 degrees Celsius). Oil or butter a 3 quart (approx 3 litre) shallow baking dish.

Cooking the Pasta:
Bring the salted water to a boil. Drop about four pieces of pasta in the water at a time. Cook about 2 minutes. If you are using dried pasta, cook about 4 minutes, taste, and cook longer if necessary. The pasta will continue cooking during baking, so make sure it is only barely tender. Lift the lasagne from the water with a skimmer, drain, and then slip into the bowl of cold water to stop cooking. When cool, lift out and dry on the paper towels. Repeat until all the pasta is cooked.

Assembling the Lasagne:
Spread a thin layer of béchamel over the bottom of the baking dish. Arrange a layer of about four overlapping sheets of pasta over the béchamel. Spread a thin layer of béchamel (about 3 or 4 spoonfuls) over the pasta, and then an equally thin layer of the ragu. Sprinkle with about 1&1/2 tablespoons of the béchamel and about 1/3 cup of the cheese. Repeat the layers until all ingredients are used, finishing with béchamel sauce and topping with a generous dusting of cheese.

Baking and Serving the Lasagne:
Cover the baking dish lightly with foil, taking care not to let it touch the top of the lasagne. Bake 40 minutes, or until almost heated through. Remove the foil and bake another 10 minutes, or until hot in the center (test by inserting a knife – if it comes out very warm, the dish is ready). Take care not to brown the cheese topping. It should be melted, creamy looking and barely tinged with a little gold. Turn off the oven, leave the door ajar and let the lasagne rest for about 10 minutes. Then serve. This is not a solid lasagne, but a moist one that slips a bit when it is cut and served.

I baked in my 10″x 10″ square pan and it worked well. Three layers of pasta.

#1 Spinach Egg Pasta (Pasta Verde)

Preparation: 45 minutes

Makes enough for 6 to 8 first course servings or 4 to 6 main course servings, equivalent to 1 pound (450g) dried boxed pasta.

2 jumbo eggs (2 ounces/60g or more)
10 ounces (300g) fresh spinach, rinsed dry, and finely chopped; or 6 ounces (170g) frozen chopped spinach, defrosted and squeezed dry
3&1/2 cups (14 ounces/400g) all purpose unbleached (plain) flour (organic stone ground preferred)

Working by Hand:

Equipment

A roomy work surface, 24 to 30 inches deep by 30 to 36 inches (60cm to 77cm deep by 60cm to 92cm). Any smooth surface will do, but marble cools dough slightly, making it less flexible than desired.

A pastry scraper and a small wooden spoon for blending the dough.

A wooden dowel-style rolling pin. In Italy, pasta makers use one about 35 inches long and 2 inches thick (89cm long and 5cm thick). The shorter American-style pin with handles at either end can be used, but the longer it is, the easier it is to roll the pasta.
Note: although it is not traditional, Enza has successfully made pasta with a marble rolling pin, and this can be substituted for the wooden pin, if you have one.

Plastic wrap to wrap the resting dough and to cover rolled-out pasta waiting to be filled. It protects the pasta from drying out too quickly.

A sharp chef’s knife for cutting pasta sheets.

Cloth-covered chair backs, broom handles, or specially designed pasta racks found in cookware shops for draping the pasta.

Mixing the dough:
Mound the flour in the center of your work surface and make a well in the middle. Add the eggs and spinach. Use a wooden spoon to beat together the eggs and spinach. Then gradually start incorporating shallow scrapings of flour from the sides of the well into the liquid. As you work more and more flour into the liquid, the well’s sides may collapse. Use a pastry scraper to keep the liquids from running off and to incorporate the last bits of flour into the dough. Don’t worry if it looks like a hopelessly rough and messy lump.

Kneading:
With the aid of the scraper to scoop up unruly pieces, start kneading the dough. Once it becomes a cohesive mass, use the scraper to remove any bits of hard flour on the work surface – these will make the dough lumpy. Knead the dough for about 3 minutes. Its consistency should be elastic and a little sticky. If it is too sticky to move easily, knead in a few more tablespoons of flour. Continue kneading about 10 minutes, or until the dough has become satiny, smooth, and very elastic. It will feel alive under your hands. Do not shortcut this step. Wrap the dough in plastic wrap, and let it relax at room temperature 30 minutes to 3 hours.

100_3189

Pasta dough

Till here it was fine, no problems. I washed fresh spinach and drained it in a colander. Mixed it with 2 large eggs in a blender to get a uniform color. I think some water was retained in spinach leaves, the dough just turned out beautiful, quite supple.

Stretching and Thinning:
If using an extra-long rolling pin work with half the dough at a time. With a regular-length rolling pin, roll out a quarter of the dough at a time and keep the rest of the dough wrapped. Lightly sprinkle a large work surface with flour. The idea is to stretch the dough rather than press down and push it. Shape it into a ball and begin rolling out to form a circle, frequently turning the disc of dough a quarter turn. As it thins outs, start rolling the disc back on the pin a quarter of the way toward the center and stretching it gently sideways by running the palms of your hands over the rolled-up dough from the center of the pin outward. Unroll, turn the disc a quarter turn, and repeat. Do twice more.

Stretch and even out the center of the disc by rolling the dough a quarter of the way back on the pin. Then gently push the rolling pin away from you with one hand while holding the sheet in place on the work surface with the other hand. Repeat three more times, turning the dough a quarter turn each time.

Repeat the two processes as the disc becomes larger and thinner. The goal is a sheet of even thickness. For lasagne, the sheet should be so thin that you can clearly see your hand through it and see colors. Cut into rectangles about 4 by 8 inches (10 x 20 cm). Note: Enza says that transparency is a crucial element of lasagne pasta and the dough should be rolled as thinly as possible. She says this is why her housekeeper has such strong arms!

Dry the pasta at room temperature and store in a sealed container or bag.

100_3193

Here , I thought I lost track of what I was doing……..

#2 Bechamel

Preparation Time: 15 minutes

4 tablespoons (2 ounces/60g) unsalted butter
4 tablespoons (2 ounces/60g) all purpose unbleached (plain) flour, organic stone ground preferred
2&2/3 cups (approx 570ml) milk
Salt and freshly ground pepper to taste
Freshly grated nutmeg to taste

Using a medium-sized saucepan, melt the butter over low to medium heat. Sift over the flour, whisk until smooth, and then stir (without stopping) for about 3 minutes. Whisk in the milk a little at a time and keep the mixture smooth. Bring to a slow simmer, and stir 3 to 4 minutes, or until the sauce thickens. Cook, stirring, for about 5 minutes, until the sauce thickens. Season with salt, pepper, and a hint of nutmeg.

You bet, the usual white sauce but nutmeg made it fabulous. Oh well , mine was a generous hint of nutmeg 😉

#3 Country style Ragu’….Vegetarian  (Ragu alla Contadina……vegetarian)

Preparation Time: Ingredient Preparation Time 30 minutes and Cooking time 2 hours

Makes enough sauce for 1 recipe fresh pasta or 1 pound/450g dried pasta)

  • 3 tablespoons extra virgin olive oil (45 ml)
    2 ounces/60g nutrela (textured vegetable protein granules (TVP) )
    1 medium onion, minced
    1 medium stalk celery with leaves, minced
    1 small carrot, minced
    12 ounces/125g firm tofu
  • 4 ounces/125g  Vegetarian sausage
    2/3 cup (5 ounces/160ml) dry red wine
    1 &1/2 cups (12 ounces/375ml) vegetable stock (homemade if possible)
    2 cups (16 ounces/500ml) fat free milk
    3  tomatoes, peeled
  • Salt and freshly ground black pepper to taste

Working Ahead:
The ragu can be made 3 days ahead. Cover and refrigerate. It also freezes well for up to 1 month. Skim the fat from the ragu’ before using it.

Bring a sauce pan of salted water to a boil and add the TVP/nutrela to it. Put the heat off. Remove from from heat and drain after 5 minutes. Press with hands to remove as much water as possible as it cools.

Browning the Ragu Base:
Heat the olive oil in a 12 inch (30cm) skillet (frying pan) over medium-high heat. Have a large saucepan handy to use once browning is complete. Add the nutrela and minced vegetables and sauté, stirring frequently with a wooden spoon, 10 minutes, or until the onions barely begin to color. Coarsely grind the sausage and tofu, in a food processor or meat grinder. Stir into the pan and slowly brown over medium heat. Protect the brown glaze forming on the bottom of the pan by turning the heat down. Cook 15 minutes, or until the stuff is a deep brown. Turn them into the saucepan and set over medium heat.

Reducing and Simmering: Add the wine to the skillet, lowering the heat so the sauce bubbles quietly. Stir occasionally until the wine has reduced by half, about 3 minutes. Scrape up the brown glaze as the wine bubbles. Then pour the reduced wine into the saucepan and set the skillet aside.

Stir ½ cup stock into the saucepan and let it bubble slowly, 10 minutes, or until totally evaporated. Repeat with another ½ cup stock. Stir in the last 1/2 cup stock along with the milk. Adjust heat so the liquid bubbles very slowly. Partially cover the pot, and cook 1 hour. Stir frequently to check for sticking.

Add the tomatoes, crushing them as they go into the pot. Cook uncovered, at a very slow bubble for another 45 minutes, or until the sauce resembles a thick, meaty stew. Season with salt and pepper.

100_3181 100_3182

Chopping & TVP in salted water

100_3186 100_3188

Drained TVP and here’s my soy stew

100_3194

Lasagne of Emilia-Romagna

100_3202

Here’s a piece!

Half of the lasagne is in the freezer now for rainy days and the rest is waiting for us to devour. By the way, the husband took some left overs as well to work the next along with his usual fare………..Now, whatt d’ya call that ?

Check out what other fabulous Daring Bakers have baked at Daring Bakers Blogroll . Egg less, gluten free, SWEET lasagne all there!

Expenditure:

Spinach (1 bunch)………………….$0.79 from Randazzo……..finished

Parmigiano-Reggiano 5 oz ………….$4.99 from Trader Joe’s ….some left

Nutrela 100 g……………………….$ 1.99 from Indian store…..little left

——————————————————————————————–

Total ………………………………$ 7.77

Posted in -All Purpose flour, -Boca Burger, -Butter, -Carrot, -Celery, -Cheese, -Nutmeg, -Nutrela, -Olive Oil, -Onion, -Spinach, -Tofu, -Tomato, Eggs, Milk | Tagged: , , , | 10 Comments »

Daring Bakers French Yule Log

Posted by vivnidhi on December 30, 2008

I would have never known of this and certainly not attempted to make a FRENCH YULE LOG had I not joined Daring Bakers. December has been a wacky month with my mind just unable to concentrate on anything at all. And here was a challenge which required immense amount of planning and precision.

So, here’s the result ………shoddy work, but a sincere effort nevertheless. It was a delicious dessert undoubtedly (even with the kind of work I have done.) The next time it will definitely be better looking than this;)……….I only have to figure out an occasion that deserves such a lot of work:))

100_2836

Here’s my Log!

This month’s challenge is brought to us by the adventurous Hilda from Saffron and Blueberry and Marion from Il en Faut Peu Pour Etre Heureux.
They have chosen a French Yule Log by Flore from Florilege Gourmand

A French Yule Log!!!
SO, what is a French Yule Log you say and how is it different from the cake roll Yule Log made last December by Daring Bakers.

In France you can buy two kinds of Yule log, either the Genoise and Buttercream type that we made last December, or what is more commonly purchased which is a frozen Yule Log very reminiscent of an ice cream cake, only often it’s not made of ice cream but rather frozen mousse of some sort. In French this is called an entremets which is sometimes loosely translated in English as simply a cream dessert. This also means that this recipe is not holiday-specific, it is also just a scrumptious dessert recipe.
This recipe comes almost entirely, except for one small labeled portion and some of the variations courtesy of our dear Daring Baker Fairy Tartelette, from the website: Florilège Gourmand (address above) which belongs to Flore (who has not disclosed her last name to me in my exchanges with her) and is unreal. Her website is in French and different portions of the recipe have been pulled from the recipes in the entremets section.
So, to the business of our Yule log:

THE CHALLENGE RULE is that you MUST MAKE ALL 6 of these elements for the log:
1)  Dacquoise Biscuit-               Almond
2)  Mousse-                                   Dark Chocolate with Orange Curacao
3)  Ganache Insert-                   White Chocolate with orange undertones
4)  Praline (Crisp) Insert-      Milk Chocolate & almond praline
5)  Creme Brulee Insert-        Vanilla with orange undertones
6)  Icing-                                       DARK chocolate
The assembly will essentially be a Dacquoise Biscuit at the bottom, and the inserts inter-layered with mousse, with an icing finish.
That’s about it for rules. Oh yeah, please have fun!

FRENCH YULE LOG OR ENTREMETS RECIPE by Flore of Florilège Gourmand

Element #1 Dacquoise Biscuit (Almond Cake)
Preparation time: 10 mn + 15 mn for baking
Equipment: 2 mixing bowls, hand or stand mixer with whisk attachment, spatula, baking pan such as a 10”x15” jelly-roll pan, parchment paper
Note: You can use the Dacquoise for the bottom of your Yule Log only, or as bottom and top layers, or if using a Yule log mold (half-pipe) to line your entire mold with the biscuit. Take care to spread the Dacquoise accordingly. Try to bake the Dacquoise the same day you assemble the log to keep it as moist as possible.
Ingredients:
2.8 oz (3/4cup + 1Tbsp / 80g) almond meal
1.75 oz (1/2 cup / 50g) confectioner’s sugar
2Tbsp (15g) all-purpose flour
3.5oz (100g / ~100ml) about 3 medium egg whites
1.75 oz (4 Tbsp / 50g) granulated sugar
1.    Finely mix the almond meal and the confectioner’s sugar. (If you have a mixer, you can use it by pulsing the ingredients together for no longer than 30 seconds).
2.    Sift the flour into the mix.
3.    Beat the eggs whites, gradually adding the granulated sugar until stiff.
4.    Pour the almond meal mixture into the egg whites and blend delicately with a spatula.
5.    Grease a piece of parchment paper and line your baking pan with it.
6.    Spread the batter on a piece of parchment paper to an area slightly larger than your desired shape (circle, long strip etc…) and to a height of 1/3 inches (8mm).
7.    Bake at 350°F (180°C) for approximately 15 minutes (depends on your oven), until golden.
8.    Let cool and cut to the desired shape.

This was really really delicious! I could eat the whole thing alone. I made a normal almond dacquoise with almond meal made at home. Yes, I had the skins on the almonds. You think I’d not eat that fiber 😉

Element #2 Dark Chocolate Mousse
Preparation time: 20mn
Equipment: stand or hand mixer with whisk attachment, thermometer, double boiler or equivalent, spatula
Note: You will see that a Pate a Bombe is mentioned in this recipe. A Pate a Bombe is a term used for egg yolks beaten with a sugar syrup, then aerated. It is the base used for many mousse and buttercream recipes. It makes mousses and buttercreams more stable, particularly if they are to be frozen, so that they do not melt as quickly or collapse under the weight of heavier items such as the crème brulee insert.
Gelatin is the gelifying agent in all of the following recipes, but if you would like to use agar-agar, here are the equivalencies: 8g powdered gelatin = 1 (0.25 oz) envelope powdered gelatin = 1 Tbsp powdered gelatin = 1 Tbsp Agar-Agar.
1 Tbsp. of agar-agar flakes is equal to 1 tsp. of agar-agar powder.
Ingredients:
2.5 sheets gelatin or 5g / 1 + 1/4 tsp powdered gelatin
1.5 oz (3 Tbsp / 40g) granulated sugar
1 ½ tsp (10g) glucose or thick corn syrup
0.5 oz (15g) water
50g egg yolks (about 3 medium)
6.2 oz (175g) dark chocolate, coarsely chopped
1.5 cups (350g) heavy cream (35% fat content)
1.    Soften the gelatin in cold water. (If using powdered gelatin, follow the directions on the package.)
2.    Make a Pate a Bombe: Beat the egg yolks until very light in colour (approximately 5 minutes until almost white).
2a.  Cook the sugar, glucose syrup and water on medium heat for approximately 3 minutes (if you have a candy thermometer, the mixture should reach 244°F (118°C). If you do not have a candy thermometer, test the sugar temperature by dipping the tip of a knife into the syrup then into a bowl of ice water, if it forms a soft ball in the water then you have reached the correct temperature.
2b.  Add the sugar syrup to the beaten yolks carefully by pouring it into the mixture in a thin stream while continuing to beat the yolks. You can do this by hand but it’s easier to do this with an electric mixer.
2c.  Continue beating until cool (approximately 5 minutes). The batter should become thick and foamy.
3.    In a double boiler or equivalent, heat 2 tablespoons (30g) of cream to boiling. Add the chopped chocolate and stir until melted and smooth.
4. Whip the remainder of the cream until stiff.
5.    Pour the melted chocolate over the softened gelatin, mixing well. Let the gelatin and chocolate cool slightly and then stir in ½ cup (100g) of WHIPPED cream to temper. Add the Pate a Bombe.
6.    Add in the rest of the WHIPPED cream (220g) mixing gently with a spatula.

I added 1/2 tsp. of orange extract and 1 Tbsp. Orange Curacao………..to please the hubby and he loved it;) I cannot rave enough about this, it is among the most delicious mousse I have ever made. The alcohol just makes it perfect!!

Element #3 Dark Chocolate Ganache Insert (I made a white chocolate ganache)
Preparation time: 10mn
Equipment: pan, whisk. If you have plunging mixer (a vertical hand mixer used to make soups and other liquids), it comes in handy.
Note: Because the ganache hardens as it cools, you should make it right before you intend to use it to facilitate piping it onto the log during assembly. Please be careful when caramelizing the sugar and then adding the cream. It may splatter and boil.

Variations on the Dark Chocolate Ganache Insert listed above:
White Chocolate Ganache Insert
1.75 oz (4 Tbsp / 50g) granulated sugar
5 oz (135g) white chocolate, finely chopped
4.5 oz (2/3 cup – 1 Tbsp / 135g) heavy cream (35% fat content)
1.    Make a caramel: Using the dry method, melt the sugar by spreading it in an even layer in a small sauce pan with high sides. Heat over medium-high heat, watching it carefully as the sugar begins to melt. Never stir the mixture. As the sugar starts to melt, swirl the pan occasionally to allow the sugar to melt evenly. Cook to dark amber color (for most of you that means darker than last month’s challenge).
2.    While the sugar is melting, heat the cream until boiling.  Pour cream into the caramel and stir thoroughly. Be very careful as it may splatter and boil.
3.    Pour the hot caramel-milk mixture over the dark chocolate. Wait 30 seconds and stir until smooth.

OK, here I just did not realize that I had to reduce the cream by a Tbsp. My weighing scale is messed up, thanks to the Sonny Boy and so my ganache just never set. BUT, do you know, I loved the caramely gooey ganache, you can’t see a layer of that, but I could taste it:)). Failure in some sense, but I do not mind it one bit.

Element #4 Praline Feuillete (Crisp) Insert
Preparation time: 10 mn (+ optional 15mn if you make lace crepes)
Equipment: Small saucepan, baking sheet (if you make lace crepes).
Double boiler (or one small saucepan in another), wax paper, rolling pin (or I use an empty bottle of olive oil).
Note: Feuillete means layered (as in with leaves) so a Praline Feuillete is a Praline version of a delicate crisp. There are non-praline variations below. The crunch in this crisp comes from an ingredient which is called gavottes in French. Gavottes are lace-thin crepes. To our knowledge they are not available outside of France, so you have the option of making your own using the recipe below or you can simply substitute rice krispies or corn flakes or Special K for them. Special note: If you use one of the substitutes for the gavottes, you should halve the quantity stated, as in use 1oz of any of these cereals instead of 2.1oz.
If you want to make your own praline, please refer back to the Daring Baker Challenge Recipe from July 2008.

Ingredients for the Praline Feuillete:
3.5 oz (100g) milk chocolate
1 2/3 Tbsp (25g) butter
2 Tbsp (1 oz / 30g) praline
2.1oz (60g) lace crepes(gavottes) or rice krispies or corn flakes or Special K
1.    Melt the chocolate and butter in a double boiler.
2.    Add the praline and the coarsely crushed lace crepes. Mix quickly to thoroughly coat with the chocolate.
3.    Spread between two sheets of wax paper to a size slightly larger than your desired shape. Refrigerate until hard.

I did make my own praline, with almonds (skinned) this time but could not achieve a paste with it. It was more like a fine powder, again tasty nevertheless;) I used Special K for the feuillete as I did not have time to make gavottes. BUT my feuillete never really set. I made it twice and both times it was a crumbly mass and it fell both times. Anyway, I refrigerated it well the second time and I could get like big set pieces of it! This makes the final result so very delicious!

Element #5 Vanilla Crème Brulée Insert
Preparation time: 15mn + 1h infusing + 1h baking
Equipment: Small saucepan, mixing bowl, baking mold, wax paper
Note: The vanilla crème brulée can be flavored differently by simply replacing the vanilla with something else e.g. cardamom, lavender, etc…
Ingredients:
1/2 cup (115g) heavy cream (35% fat content)
½ cup (115g) whole milk
4 medium-sized (72g) egg yolks
0.75 oz (2 Tbsp / 25g) granulated sugar
1 vanilla bean
1.    Heat the milk, cream, and scraped vanilla bean to just boiling. Remove from the stove and let the vanilla infuse for about 1 hour.
2.    Whisk together the sugar and egg yolks (but do not beat until white).
3.    Pour the vanilla-infused milk over the sugar/yolk mixture. Mix well.
4.    Wipe with a very wet cloth and then cover your baking mold (whatever shape is going to fit on the inside of your Yule log/cake) with parchment paper. Pour the cream into the mold and bake at 210°F (100°C) for about 1 hour or until firm on the edges and slightly wobbly in the center.
Tartelette says: You can bake it without a water bath since it is going to go inside the log (the aesthetics of it won’t matter as much since it will be covered with other things)….BUT I would recommend a water bath for the following reasons:
– you will get a much nicer mouth feel when it is done
– you will be able to control its baking point and desired consistency much better
– it bakes for such a long time that I fear it will get overdone without a water bath
Now…since it is baked in a pan and it is sometimes difficult to find another large pan to set it in for a water bath, even a small amount of water in your water bath will help the heat be distributed evenly in the baking process. Even as little as 1 inch will help.
5.    Let cool and put in the freezer for at least 1 hour to firm up and facilitate the final assembly.

I again added 1/2 tsp. of orange extract. Lovely. Mine cooked as per the directions and tastes very good.

Element #6 Dark Chocolate Icing
Preparation time: 25 minutes (10mn if you don’t count softening the gelatin)
Equipment: Small bowl, small saucepan
Note: Because the icing gelifies quickly, you should make it at the last minute.
For other gelatin equivalencies or gelatin to agar-agar equivalencies, look at the notes for the mousse component.
Ingredients:
4g / ½ Tbsp powdered gelatin or 2 sheets gelatin
¼ cup (60g) heavy cream (35 % fat content)
2.1 oz (5 Tbsp / 60g) granulated sugar
¼ cup (50g) water
1/3 cup (30g) unsweetened cocoa powder
1.    Soften the gelatin in cold water for 15 minutes.
2.    Boil the rest of the ingredients and cook an additional 3 minutes after boiling.
3.    Add gelatin to the chocolate mixture. Mix well.
4.    Let cool while checking the texture regularly. As soon as the mixture is smooth and coats a spoon well (it is starting to gelify), use immediately.

This is a great icing recipe. Changed nothing but did make 1.5 times the quantity specified. Had leftovers:)

How To Assemble your French Yule Log
Depending on whether your mold is going to hold the assembly upside down until you unmold it or right side up, this order will be different.
THIS IS FOR UNMOLDING FROM UPSIDE DOWN TO RIGHT SIDE UP.
You will want to tap your mold gently on the countertop after each time you pipe mousse in to get rid of any air bubbles.

1)    Line your mold or pan, whatever its shape, with rhodoid (clear hard plastic, I usually use transparencies cut to the desired shape, it’s easier to find than cellulose acetate which is what rhodoid translates to in English) OR plastic film. Rhodoid will give you a smoother shape but you may have a hard time using it depending on the kind of mold you’re using.
You have two choices for Step 2, you can either have Dacquoise on the top and bottom of your log as in version A or you can have Dacquoise simply on the bottom of your log as in version B:
2A)  Cut the Dacquoise into a shape fitting your mold and set it in there. If you are using an actual Yule mold which is in the shape of a half-pipe, you want the Dacquoise to cover the entire half-pipe portion of the mold.
3A)  Pipe one third of the Mousse component on the Dacquoise.
4A)  Take the Creme Brulee Insert out of the freezer at the last minute and set on top of the mousse. Press down gently to slightly ensconce it in the mousse.
5A)  Pipe second third of the Mousse component around and on top of the Creme Brulee Insert.
6A)  Cut the Praline/Crisp Insert to a size slightly smaller than your mold so that it can be surrounded by mousse. Lay it on top of the mousse you just piped into the mold.
7A)  Pipe the last third of the Mousse component on top of the Praline Insert.
8A)  Freeze for a few hours to set. Take out of the freezer.
9A)  Pipe the Ganache Insert onto the frozen mousse leaving a slight eidge so that ganache doesn’t seep out when you set the Dacquoise on top.
10A)  Close with the last strip of Dacquoise.
Freeze until the next day.
OR
2B)  Pipe one third of the Mousse component into the mold.
3B)  Take the Creme Brulee Insert out of the freezer at the last minute and set on top of the mousse. Press down gently to slightly ensconce it in the mousse.
4B)  Pipe second third of the Mousse component around and on top of the Creme Brulee Insert.
5B)  Cut the Praline/Crisp Insert to a size slightly smaller than your mold so that it can be surrounded by mousse. Lay it on top of the mousse you just piped into the mold.
6B)  Pipe the last third of the Mousse component on top of the Praline Insert.
7B)  Freeze for a few hours to set. Take out of the freezer.
8B)  Pipe the Ganache Insert onto the frozen mousse leaving a slight edge so that ganache doesn’t seep out when you set the Dacquoise on top.
9B)  Close with the Dacquoise.
Freeze until the next day.
If you are doing the assembly UPSIDE DOWN with TWO pieces of Dacquoise the order is:
1)  Dacquoise
2)  Mousse
3)  Creme Brulee Insert
4)  Mousse
5)  Praline/Crisp Insert
6)  Mousse
7)  Ganache Insert
8)  Dacquoise
If you are doing the assembly UPSIDE DOWN with ONE piece of Dacquoise on the BOTTOM ONLY the order is:
1)  Mousse
2)  Creme Brulee Insert
3)  Mousse
4)  Praline/Crisp Insert
5)  Mousse
6)  Ganache Insert
7)  Dacquoise
If you are doing the assembly RIGHT SIDE UP in a springform pan the order is:
1)  Dacquoise
2)  Ganache Insert
3)  Mousse
4)  Praline/Crisp Insert
5)  Mousse
6)  Creme Brulee Insert
7)  Mousse
8 OPTIONAL) Dacquoise
THE NEXT DAY…
Unmold the cake/log/whatever and set on a wire rack over a shallow pan.
Cover the cake with the icing.
Let set. Return to the freezer.
You may decorate your cake however you wish. The decorations can be set in the icing after it sets but before you return the cake to the freezer or you may attach them on top using extra ganache or leftover mousse, etc…
Transfer to the refrigerator no longer than ½ hour before serving as it may start to melt quickly depending on the elements you chose.

100-2845.jpg

That’s for December………..2009 will be beautiful!

Mine has dacquoise on top and bottom and one crisp insert. Overall, the almond, chocolate and orange flavors merged so well that this cake tasted absolute top rate. IN SPITE of my mistakes. This should be tried (even by the faint of heart) cause it will be delicious! A big thank you to the hosts! Wanna see more of these…….check it out here Daring Bakers Blogroll

Expenditure:

  • Confectioner’s Sugar 2 lb. ……………$2.19 from Kroger……..tons left
  • Sugar 4 lb………………………….                    $2.25 from Kroger………..yes left but we will eat it up!
  • Dark Chocolate 8 oz. (Bakers)…..    $2.50 from Kroger……..couple of oz. left
  • Heavy cream 1 Quart………………        $5.99 from Kroger …………hardly any left:(

——————————————————————————————

That’s it…………………………                                                $12.73……….ah,I know how much I spent!

Posted in - Confectioner's Sugar, -All Purpose flour, -Almonds, -Butter, -Cocoa Powder, -Corn Syrup, -Cream, -Dark Chocolate, -Milk Chocolate, -Vanilla, -White Chocolate, Cereal, Chocolate, Eggs, Gelatin, Sugar, Uncategorized | Tagged: , , | 24 Comments »

Daring Bakers: Caramel Cake with Caramelized Butter Frosting & Golden Vanilla Bean Caramels

Posted by vivnidhi on November 29, 2008

Nov_49

Caramel Cake with Caramelized Butter Frosting

cNov_61

Golden Honey Vanilla Ginger Caramels……They really are delicious…

The mood is really really somber as I write this post. This month was so full of fun……..if only Mumbai was not attacked. The cowardly act has left me anxious. It was extremely sad to watch the city I so adored, terrified like that. I grew up in a town close to the Financial Capital Mumbai. I was always in awe of the Metro and a little scared too….if this small town girl would ever be able to walk as fast as the rest of Mumbaikars. As Luck would have it, I got to work in a Mumbai suburb and I could not believe that the city was so welcoming. Felt like I belonged there. I could walk as fast (or faster) as the Mumbaikars.I, too have walked past the Taj Mahal Hotel and felt a sense of pride, awe. All the politicians have left a sour note by their behavior and power politics. The complete lack of moral value in the politicians of India is shameful. The security forces, firemen and the Doctors have done us Indians proud. If only these people were supported by the “RULERS”. I was absolutely stunned to hear one of the State Ministers call themselves “RULERS” I didn’t know we had “RULERS”, some years back they called themselves Public Servants. Not one of the Indian politician has shown any leadership.Life is getting back to routine for Mumbai residents as we all mourn the deaths of innocents. I can only hope that the security forces are further strengthened and equipped in the days to come as these threats become more real everyday. That would be a fitting tribute to the brave men who have laid down their lives.

Daring Bakers were back to sweet celebrations this month & completed two years on Nov. 19. Charche Chauke Ke turned one year old too this month. So, sweet treats ruled the month. The recipe is by Shuna Fish Lydon of Eggbeater (http://eggbeater.typepad.com/) and her signature caramel cake. Alice Medrich’s Golden Vanilla Bean Caramels were an optional challenge. This month’s challenge was hosted by Dolores (http://culinarycuriosity.blogspot.com/), Alex (Brownie of the Blondie and Brownie duo: http://blondieandbrownie.blogspot.com/), Jenny of Foray into Food (http://forayintofood.blogspot.com/) and helped by Natalie of Gluten-a-Go-Go (http://glutenagogo.blogspot.com/) for gluten free version of the recipe.

I tackled the caramels first as I have never made candy. First I bought an inexpensive candy thermometer. I am extremely impressed by the results. The caramels were just delicious. The hubby and son loved it. I have made it twice. The first time round, I had printed the recipe incomplete and so after the addition of cream…….I just did not heat the caramel mixture:). Yeah….that’s typical me;). So, I waited all night for the caramels to firm up………which they never did………..Result……..I had the most delicious caramel sauce I have ever eaten. Alice Medrich……..I love you. Honestly……if you want the best caramel sauce……..use her recipe and use Golden syrup. It’s the best!!! You will feel like throwing the store bought caramel sauce the moment you taste this. Anyway, I scraped half the mixture back in the pan and heated it back up to 260F and Voila………I had some delicious toffee. Incredible. Now I had a bottle full of caramel sauce and delicious toffee. No more salivating for Alpenliebe:). Well , I made caramels again…….this time it was half honey and half golden syrup. I added ginger while heating the cream and strained it later. I had increased he cream by 2 tablespoons as I thought some would be absorbed by ginger. Anyway, the net result was fabulous. Thank you for this incredible challenge. I would have never made candy otherwise.

Nov_10

First attempt………sugar and golden golden syrup

Nov_24

Result…………..The BEST Caramel Sauce Ever!!

Nov_21

Golden Vanilla Toffee

cNov_23

All dressed up

Caramels Recipe:

Recipe Source: Golden Vanilla Bean Caramels from Pure Dessert by Alice Medrich, Artisan Press, Copyright 2007, ISBN: 978-1579652111

GOLDEN VANILLA BEAN CARAMELS
– makes eighty-one 1-inch caramels –
Ingredients
1 cup golden syrup
2 cups sugar
3/8 teaspoon fine sea salt
2 cups heavy cream
1 1/2 teaspoons pure ground vanilla beans, purchased or ground in a coffee or spice grinders, or 1 tablespoon plus 1 teaspoon pure vanilla extract
3 tablespoons unsalted butter, cut into chunks, softened
Equipment
A 9-inch square baking pan
Candy thermometer
Procedure
Line the bottom and sides of the baking pan with aluminum foil and grease the foil. Combine the golden syrup, sugar, and salt in a heavy 3-quart saucepan and cook over medium heat, stirring with a silicone spatula or wooden spoon, until the mixture begins to simmer around the edges. Wash the sugar and syrup from the sides of the pan with a pastry brush dipped in water. Cover and cook for about 3 minutes. (Meanwhile, rinse the spatula or spoon before using it again later.) Uncover the pan and wash down the sides once more. Attach the candy thermometer to the pan, without letting it touch the bottom of the pan, and cook, uncovered (without stirring) until the mixture reaches 305°F. Meanwhile, combine the cream and ground vanilla beans (not the extract) in a small saucepan and heat until tiny bubbles form around the edges of the pan. Turn off the heat and cover the pan to keep the cream hot.
When the sugar mixture reaches 305°F, turn off the heat and stir in the butter chunks. Gradually stir in the hot cream; it will bubble up and steam dramatically, so be careful. Turn the burner back on and adjust it so that the mixture boils energetically but not violently. Stir until any thickened syrup at the bottom of the pan is dissolved and the mixture is smooth. Continue to cook, stirring occasionally, to about 245°F. Then cook, stirring constantly, to 260°F for soft, chewy caramels or 265°F; for firmer chewy caramels.
Remove the pan from the heat and stir in the vanilla extract, if using it. Pour the caramel into the lined pan. Let set for 4 to 5 hours, or overnight until firm.
Lift the pan liner from the pan and invert the sheet of caramel onto a sheet of parchment paper. Peel off the liner. Cut the caramels with an oiled knife.  Wrap each caramel individually in wax paper or cellophane.
Variations
Fleur de Sel Caramels: Extra salt, in the form of fleur de sel or another coarse flaked salt, brings out the flavor of the caramel and offers a little ying to the yang. Add an extra scant 1/4 teaspoon of coarse sea salt to the recipe. Or, to keep the salt crunchy, let the caramel cool and firm. Then sprinkle with two pinches of flaky salt and press it in. Invert, remove the pan liner, sprinkle with more salt. Then cut and wrap the caramels in wax paper or cellophane.
Nutmeg and Vanilla Bean Caramels: Add 1/2 teaspoon freshly grated nutmeg to the cream before you heat it.
Cardamom Caramels: Omit the vanilla. Add 1/2 teaspoon slightly crushed cardamom seeds (from about 15 cardamom pods) to the cream before heating it. Strain the cream when you add it to the caramel; discard the seeds.
Caramel Sauce: Stop cooking any caramel recipe or variation when it reaches 225°F or, for a sauce that thickens like hot fudge over ice cream, 228°F. Pour it into a sauceboat to serve or into a heatproof jar for storage. The sauce can be stored in the refrigerator for ages and reheated gently in the microwave or a saucepan just until hot and flowing before use. You can stir in rum or brandy to taste. If the sauce is too thick or stiff to serve over ice cream, it can always be thinned with a little water or cream. Or, if you like a sauce that thickens more over ice cream, simmer it for a few minutes longer.
(recipe from Alice Medrich’s Pure Dessert)

Next comes the Caramel Cake. I should admit, overconfidence led to a bitter caramel syrup…and I made the cake with it. Again thankfully, the cake tasted great…..no extra sweetness. Just right……but the leftover caramel syrup is not of much use. I had only made half the caramel syrup recipe given here. I took time to like the cake and the frosting. And I believe that I did not do a good job of it. Next time, I have to be more careful.

The Recipe:

EQUIPMENT: For Cake/Icing: Stand mixer with paddle attachment (or use a hand mixer, or mix the old-fashioned way), 9-inch cake pan (or whatever size/shape you choose), cookie sheet or sheet pan, stainless steel saucepan, pastry brush, whisk, sieve.

RECIPE SOURCE
Caramel Cake with Caramelized Butter Frosting courtesy of Shuna Fish Lydon (
http://eggbeater.typepad.com/), as published on Bay Area Bites (http://blogs.kqed.org/bayareabites/).

CARAMEL CAKE WITH CARAMELIZED BUTTER FROSTING
10 Tablespoons unsalted butter at room temperature
1 1/4 Cups granulated sugar
1/2 teaspoon kosher salt
1/3 Cup Caramel Syrup (see recipe below)
2 large eggs, at room temperature
splash vanilla extract
2 Cups all-purpose flour
1/2 teaspoon baking powder
1 cup milk, at room temperature
Notes from Natalie for those of you baking gluten-free:
So the GF changes to the cake would be:
2 cups of gluten free flour blend (w/xanthan gum) or 2 cups of gf flour blend + 1 1/2 tsp xanthan or guar gum
1/2 – 1 tsp baking powder (this would be the recipe amount to the amount it might need to be raised to & I’m going to check)
I’ll let you when I get the cake finished, how it turns out and if the baking powder amount needs to be raised.

Preheat oven to 350F
Butter one tall (2 – 2.5 inch deep) 9-inch cake pan.
In the bowl of a stand mixer fitted with a paddle attachment, cream butter until smooth. Add sugar and salt & cream until light and fluffy.
Slowly pour room temperature caramel syrup into bowl. Scrape down bowl and increase speed. Add eggs/vanilla extract a little at a time, mixing well after each addition. Scrape down bowl again, beat mixture until light and uniform.
Sift flour and baking powder.
Turn mixer to lowest speed, and add one third of the dry ingredients. When incorporated, add half of the milk, a little at a time. Add another third of the dry ingredients, then the other half of the milk and finish with the dry ingredients. {This is called the dry, wet, dry, wet, dry method in cake making. It is often employed when there is a high proportion of liquid in the batter.}
Take off mixer and by hand, use a spatula to do a few last folds, making sure batter is uniform. Turn batter into prepared cake pan.
Place cake pan on cookie sheet or 1/2 sheet pan. Set first timer for 30 minutes, rotate pan and set timer for another 15-20 minutes. Your own oven will set the pace. Bake until sides pull away from the pan and skewer inserted in middle comes out clean. Cool cake completely before icing it.
Cake will keep for three days outside of the refrigerator.

Nov_32
Creaming Butter and sugar

Nov_35

Addition of Caramel Syrup…….I know that’s dark;);)

Nov_37

Ready for the oven

Nov_44

Here’s the cake!

CARAMEL SYRUP
2 cups sugar
1/2 cup water
1 cup water (for “stopping” the caramelization process)
In a small stainless steel saucepan, with tall sides, mix water and sugar until mixture feels like wet sand. Brush down any stray sugar crystals with wet pastry brush. Turn on heat to highest flame. Cook until smoking slightly: dark amber.
When color is achieved, very carefully pour in one cup of water. Caramel will jump and sputter about! It is very dangerous, so have long sleeves on and be prepared to step back.
Whisk over medium heat until it has reduced slightly and feels sticky between two fingers. {Obviously wait for it to cool on a spoon before touching it.}
Note: For safety reasons, have ready a bowl of ice water to plunge your hands into if any caramel should land on your skin.


CARAMELIZED BUTTER FROSTING
12 tablespoons unsalted butter
1 pound confectioner’s sugar, sifted
4-6 tablespoons heavy cream
2 teaspoons vanilla extract
2-4 tablespoons caramel syrup
Kosher or sea salt to taste
Cook butter until brown. Pour through a fine meshed sieve into a heatproof bowl, set aside to cool.
Pour cooled brown butter into mixer bowl.
In a stand mixer fitted with a paddle or whisk attachment, add confectioner’s sugar a little at a time. When mixture looks too chunky to take any more, add a bit of cream and or caramel syrup. Repeat until mixture looks smooth and all confectioner’s sugar has been incorporated. Add salt to taste.
Note: Caramelized butter frosting will keep in fridge for up to a month.
To smooth out from cold, microwave a bit, then mix with paddle attachment until smooth and light
(recipes above courtesy of Shuna Fish Lydon)

The cake was moist with a distinct caramel flavor. I used crushed up vanilla toffee on top.

Nov_50

Have a bite!!

Expenditure:

  • Sugar 5 lb ………………….$ 2.50 from Kroger……lots left
  • Heavy cream 1 Quart………. $ 6.50 from Kroger………..very little left
  • Golden Syrup 12 oz. ………..$4.99 from Cost Plus ……..finished
  • Candy Thermometer…………$ 2.99 from Walmart

Total…………………………………$ 15.98

Posted in -All Purpose flour, -Butter, -Cream, -Golden Syrup, -Vanilla, Herbs, Milk, Sugar | Tagged: , , | 10 Comments »

Chocolate Eclairs………….and the likes:)

Posted by vivnidhi on August 31, 2008

This month’s Daring Bakers challenge was the chocolate eclairs. Thanks to Meeta of What’s For Lunch, Honey? and Tony Tahhan of Olive Juice, who were hosting this month’s challenge.

100_2474

Mini Eclairs basking in the sun……….not for long though;)

Many many years ago, I had bought a French eclair (it looked so good) at a bakery in India…….cause I was celebrating something. It was a celebration, cause I was using my first hard-earned paycheck to pay for it. One bite into it and I was like “OK, this ain’t my typpa dessert” ………so I kept away from eclairs from  that day on until August 13th. Meeta and Tony had challenged me to make it and I had to……….. The recipe was from Chocolate Desserts by Pierre Herme .

I thought maybe the bakery in India really didn’t do a good job of making the eclair! I would certainly do better;). Ha , the innate optimism one has!! I think I did a fair job of it and I don’t think the Indian bakery I ate the eclair at……did a bad job either. Conclusion on 31st August…….its a great dessert, some people should like it……BUT “it ain’t my typpa dessert:)) ”

Anyway, it was truly a fabulous experience to learn about Pâte à Choux. As you will read ahead you will realize that I played too much!! A big thank you to the DB’s for yet another fabulous lesson:).

I prepared for the eclairs when the husband was away and the eclairs were kept ready for him when he returned:). He loved it!! My job’s done , right;). Here’s the detailed recipe with my experiences in black:).

The Recipe:

(makes 20-24 Éclairs)

Chocolate Éclairs by Pierre Hermé

Éclairs consist of 3 elements:

Pâte à Choux, also known as Choux Pastry or Cream Puff Dough
– Pastry Cream
– Chocolate glaze

• Cream Puff Dough (see below for recipe), fresh and still warm
1) Preheat your oven to 375 degrees F (190 degrees C). Divide the oven into thirds by
positioning the racks in the upper and lower half of the oven. Line two baking sheets with
waxed or parchment paper.
2) Fill a large pastry bag fitted with a 2/3 (2cm) plain tip nozzle with the warm cream puff dough.
Pipe the dough onto the baking sheets in long, 4 to 41/2 inches (about 11 cm) chubby fingers.
Leave about 2 inches (5 cm) space in between each dough strip to allow them room to puff.
The dough should give you enough to pipe 20-24 éclairs.
3) Slide both the baking sheets into the oven and bake for 7 minutes. After the 7 minutes, slip the
handle of a wooden spoon into the door to keep in ajar. When the éclairs have been in the
oven for a total of 12 minutes, rotate the sheets top to bottom and front to back. Continue
baking for a further 8 minutes or until the éclairs are puffed, golden and firm. The total baking
time should be approximately 20 minutes.
Notes:
1) The éclairs can be kept in a cool, dry place for several hours before filling.

For my first batch, I used my pastry bag without the tip. Felt that the eclairs were too fat and turned up really huge after baking. Baking times are not really perfect in this recipe, would certainly need tweaking. My fat eclairs needed a lot of time to bake otherwise they would be under baked and would deflate. I did not use the wooden spoon in the oven door method. I always baked one tray only at one time.

I also made some gougeres and for that I used a normal ziploc bag, the dough just started oozing out from all places as I was piping it.

For my last batch in which I made mini eclairs …….I used a heavy duty bag……and it worked beautifully. Who said “Third time’s the charm” ?

Ok, if anybody tries to bake these babies, heed my advice. Use a baking tray filled with water at the bottom rack to aid baking the eclairs. Begin with 400F temperature. Bake for 18 minutes. Rotate the pans and lower the temperature to 375F. Poke each eclair with a skewer for moisture to escape and bake for another 5 minutes till it is crisp and brown. Leave them in the oven only to cool with the oven door fully open. Learnt from the fabulous Vera of Baking Obsession!

Assembling the éclairs:
• Chocolate glaze (see below for recipe)
• Chocolate pastry cream (see below for recipe)
1) Slice the éclairs horizontally, using a serrated knife and a gently sawing motion. Set aside the
bottoms and place the tops on a rack over a piece of parchment paper.
2) The glaze should be barely warm to the touch (between 95 – 104 degrees F or 35 – 40
degrees C, as measured on an instant read thermometer). Spread the glaze over the tops of
the éclairs using a metal icing spatula. Allow the tops to set and in the meantime fill the
bottoms with the pastry cream.
3) Pipe or spoon the pastry cream into the bottoms of the éclairs. Make sure you fill the bottoms
with enough cream to mound above the pastry. Place the glazed tops onto the pastry cream
and wriggle gently to settle them.
Notes:
1) If you have chilled your chocolate glaze, reheat by placing it in a bowl over simmering water,
stirring it gently with a wooden spoon. Do not stir too vigorously as you do not want to create
bubbles.
2) The éclairs should be served as soon as they have been filled.

Pierre Hermé’s Cream Puff Dough
Recipe from Chocolate Desserts by Pierre Hermé
(makes 20-24 Éclairs)
• ½ cup (125g) whole milk
• ½ cup (125g) water
• 1 stick (4 ounces; 115g) unsalted butter, cut into 8 pieces
• ¼ teaspoon sugar
• ¼ teaspoon salt
• 1 cup (140g) all-purpose flour
• 5 large eggs, at room temperature
1) In a heavy bottomed medium saucepan, bring the milk, water, butter, sugar and salt to the
boil.
2) Once the mixture is at a rolling boil, add all of the flour at once, reduce the heat to medium
and start to stir the mixture vigorously with a wooden spoon. The dough comes together very
quickly. Do not worry if a slight crust forms at the bottom of the pan, it’s supposed to. You
need to carry on stirring for a further 2-3 minutes to dry the dough. After this time the dough
will be very soft and smooth.
3) Transfer the dough into a bowl of a mixer fitted with the paddle attachment, or using your
handmixer or if you still have the energy, continue by hand. Add the eggs one at a time,
beating after each egg has been added to incorporate it into the dough.
You will notice that after you have added the first egg, the dough will separate, once again do
not worry. As you keep working the dough, it will come back all together again by the time you
have added the third egg. In the end the dough should be thick and shiny and when lifted it
should fall back into the bowl in a ribbon.
4) The dough should be still warm. It is now ready to be used for the éclairs as directed above.
Notes:
1) Once the dough is made you need to shape it immediately.
2) You can pipe the dough and the freeze it. Simply pipe the dough onto parchment-lined baking
sheets and slide the sheets into the freezer. Once the dough is completely frozen, transfer the
piped shapes into freezer bags. They can be kept in the freezer for up to a month.

This was certainly eggy in taste. Since I did not have any idea about the choux pastry, I stuck with the recipe and used as specified. With chocolate pastry cream and chocolate glaze , one doesn’t notice the egg one bit though!

Chocolate Pastry Cream
Recipe from Chocolate Desserts by PierreHermé
• 2 cups (500g) whole milk
• 4 large egg yolks
• 6 tbsp (75g) sugar
• 3 tablespoons cornstarch, sifted
• 7 oz (200g) bittersweet chocolate, preferably Velrhona Guanaja, melted
• 2½ tbsp (1¼ oz: 40g) unsalted butter, at room temperature
1) In a small saucepan, bring the milk to a boil.  In the meantime, combine the yolks, sugar and cornstarch together and whisk in a heavy‐bottomed saucepan.
2) Once the milk has reached a boil, temper the yolks by whisking a couple spoonfuls of the hot milk into the yolk mixture.Continue whisking and slowly pour the rest of the milk into the tempered yolk mixture.
3) Strain the mixture back into the saucepan to remove any egg that may have scrambled.  Place the pan over medium heat and whisk vigorously (without stop) until the mixture returns to a boil. Keep whisking vigorously for 1 to 2 more minutes (still over medium heat).Stir in the melted chocolate and then remove the pan from the heat.
4) Scrape the pastry cream into a small bowl and set it in an ice‐water bath to stop the cooking process. Make sure to continue stirring the mixture at this point so that it  remains smooth.
5) Once the cream has reached a temperature of 140 F remove from the ice‐water bath and stir in the butter in three or four installments. Return the cream to the ice‐water bath to continue cooling, stirring occasionally, until it has completely cooled. The cream is now ready to use or store in the fridge.
Notes:
1) The pastry cream can be made 2‐3 days in advance and stored in the refrigerator.
2) In order to avoid a skin forming on the pastry cream, cover with plastic wrap pressed onto the cream.
3) Tempering the eggs raises the temperature of the eggs slowly so that they do not scramble.

100_2373 100_2379 100_2382

100_2383 100_2385 100_2387

100_2388

Chocolate Pastry Cream’s ready!!

This is the best! No doubt about it, if anyone wants to try the Chocolate Pastry cream for anything, this is the recipe and so easy too!! Don’t change a thing.

Chocolate Glaze
Recipe from Chocolate Desserts by Pierre Hermé
(makes 1 cup or 300g)
• 1/3 cup (80g) heavy cream
• 3½ oz (100g) bittersweet chocolate, finely chopped
• 4 tsp (20 g) unsalted butter, cut into 4 pieces, at room temperature
• 7 tbsp (110 g) Chocolate Sauce (recipe below), warm or at room temperature
1)In a small saucepan, bring the heavy cream to a boil. Remove from the heat and slowly begin to add the chocolate, stirring with a wooden spoon or spatula.
2) Stirring gently, stir in the butter, piece by piece followed by the chocolate sauce.
Notes:
1) If the chocolate glaze is too cool (i.e. not liquid enough) you may heat it briefly
 in the microwave or over a double boiler. A double boiler is basically a bowl sitting over (not touching) simmering water.
2) It is best to glaze the eclairs after the glaze is made, but if you are pressed for time, you can make the glaze a couple days ahead of time, store it in the fridge and bring it up to the proper temperature (95 to 104  F) when ready to glaze.


Chocolate Sauce
Recipe from Chocolate Desserts by Pierre Hermé
(makes 1½ cups or 525 g)
• 4½ oz (130 g) bittersweet chocolate, finely chopped
• 1 cup (250 g) water
• ½ cup (125 g) crème fraîche, or heavy cream
• 1/3 cup (70 g) sugar
1) Place all the ingredients into a heavy‐bottomed saucepan and bring to a boil, making sure to stir constantly.  Then reduce the heat  to low and continue stirring with a wooden spoon until the sauce thickens.
2) It may take 10‐15 minutes for the sauce to thicken, but you will know when it is done when it coats the back of your spoon.
Notes:
1) You can make this sauce ahead of time and store it in the refrigerator for two weeks. Reheat the sauce in a microwave oven or  a double boiler before using.
2) This sauce is also great for cakes, ice-cream and tarts.

100_2369 100_2370 100_2372

The making of the chocolate sauce

I did not like the chocolate sauce much and even  the chocolate glaze was ok. Too much effort for the result. The ganache used in the filbert gateau here is a better glaze and tastes great too!

I made some gougeres too……….with the choux pastry and fine gruyere cheese. In ultimate fusion food………had the gougeres with cilantro chutney:)).

100_2397 100_2401

Individual paris brests with chopped hazelnuts……….I found these the best!

100_2412

Some Ugly ducklings here sitting on kiwi paper and sweetened creme fraiche filling……

The son had a blast assembling these!!

100_2416 100_2418

100_2421

Ultimate fusion food……..Gougères with Chutney!!

With the gougeres recipe, I did not add garlic, wanted the original cheese taste. Thankfully, I did not attempt anymore pastry types or glazes otherwise this post would be longer:)).I had coffee in mind but decided to stick with the original at the last minute. Now, you really need to thank me:) .

Expenditure:

  • Unsalted butter : $ 2.74 from Walmart…. 1 stick left
  • Semisweet Chocolate: $ 8.30 from Kroger 1 oz. left
  • Heavy cream: $ 2.50 from Kroger some left
  • Sour Cream : $ 1.19 from Kroger some left
  • Gruyere cheese: $ 4.83 200 g.  from Morgan & York very little left

Total: $ 19.76…………..somehow I make it to the amount of $ 20. The expenditure would have been less had I not made 3 attempts. Justification: I did not exceed my budget:) Hope I am better in September.

Now check out the Daring Bakers’ blogroll !

Posted in -All Purpose flour, -Butter, -Cream, -Hazelnuts, Chocolate, Eggs, Sugar | Tagged: , , | 13 Comments »

Cucumber Parsley Focaccia with spicy whipped Butter

Posted by vivnidhi on August 5, 2008

100_2165

Parsley & cucumber for bread

Yes, cucumber focaccia. Unusual, but delicious:). Focaccia (pronounced foe-ca-chia) is a popular flatbread which was originally made without a leavening agent but now some small amount of yeast is added to it. More history here.

Did you know that a full refrigerator actually cools more efficiently than an empty one. Here’s a link  that says so and I know it for sure:). 2 pickle cucumbers, for which I even paid more; froze in my fridge cause the refrigerator was full. It had hardly been a day that I bought them and I felt quite sad looking at them. I wanted to eat bread that day and this bread just happened but it tasted really great.

Pickle cucumbers are the normal ones in India but called pickling cucumbers in the USA. This is certainly among the best breads I have baked.

The Recipe:

For the Bread:

  • Cucumber puree 3/4 cup
  • Curly Parsley 1/2 bunch washed and minced (cut really small, I used my small food processor)
  • All Purpose Flour 1 cup
  • Whole wheat flour 1 cup
  • Instant dried yeast 1 1/2 tsp.
  • Honey 1 1/2 tsp.
  • Cumin powder 1 tsp.
  • Oregano 1/4 tsp.
  • Salt 1 tsp.
  • Olive oil 3 Tbsp.

For the whipped Butter:

  • Butter 1/4 cup
  • Red chilli powder 1/2 tsp.
  • lime juice 1 tsp.
  • salt to taste

Peel and puree the cucumber.Do not throw the cucumber water away. Mince the cleaned and dried parsley. Keep cucumber and parsley aside.

In a big bowl, mix the flours together and make a well. In the well add yeast and honey.

Warm the cucumber a little more than lukewarm. Add the warm cucumber and the rest of the ingredients. Knead really well. The dough will be sticky in the beginning but keep working on it. It will dry up and become elastic. Remove the dough, oil the bowl with an extra tsp of oil , place the dough in  the bowl and cover with cling wrap. Keep in a dark draft free place for 1 hour. Let it rise till almost double in size.

Punch the dough after 1 hour. Prepare a round 9″ cake pan by spreading a Tbsp. of butter on it and then adding some dry flour on it. Spread the dough with your finger tips till covers the pan. Brush some olive oil on the top of the dough. Cover with cling wrap and leave it to rise again for 45 minutes to 1 hour.

Preheat the oven to 350 degrees Fahrenheit. Place the ready cake pan into the oven and bake for 25-28 minutes till the top of the bread turns golden.

For the spicy butter, whip all the ingredients well. First taste without adding any salt if you are using salted butter and then adjust the salt per your liking.

Extremely fresh tasting and delicious cucumber focaccia is ready:)

Here’s a taste for the eyes:

100_2191

Cucumber Parsley Focaccia

100_2199

A small bite with spicy whipped Butter

My cucumber parsley focaccia is on its way to image Original Recipe organized by Culinarty .

And, my bread will be well packed for the picnic basket to image Waiter There’s Something in my……….Picnic hosted by Johanna of thepassionatecook. I love the name:)

Posted in -All Purpose flour, -Cucumber, -Cumin seeds, -Oregano, -Parsley, -Whole wheat flour, Yeast | Tagged: , , , | 9 Comments »

Masala Coffee Cake

Posted by vivnidhi on April 25, 2008

100_1569

Masala Coffee Cake

Flour, Eggs, Sugar and Spice……….a tasty cake that’s low on cholesterol too………..isn’t that nice.

Ok, lame attempt at rhyming. I baked a cake that can be called as my recipe for the first time. I have baked several cakes following other recipes ( and following them to a ‘T’) but this time, I tried to bake a cake as I please……………and succeeded:).   Hurray  !! Ok, let me not brag too much………..I admit the idea was my Mom’s but …………..Mummy had baked a cake with strong clove flavor which was in turn inspired by masala coffee. To me, Mummy’s masala coffee was a revelation too :))

I made a smaller cake (I was experimenting;), not sure, it would turn out this good! )

The recipe: Ideal for 9″ round pan or even a 9″x 5″ loaf pan

  • cloves ground 1 Tbsp/ 10 cloves of cloves ground fine
  • nutmeg  ground 1/2 Tbsp.
  • ginger ground 1 tsp./fresh grated ginger 1/2 tsp.
  • instant coffee 2 Tbsp.
  • sugar 6 Tbsp.
  • milk 1 Tbsp.
  • water 1 Tbsp.
  • egg whites 4
  • margarine/ butter 1/3 cup
  • sugar 2/3 cup
  • vanilla extract 1/2 tsp.
  • all purpose flour 2/3 cup
  • whole wheat flour 1/3 cup
  • baking powder 1 Tbsp.
  • baking soda 1/2 tsp.
  • cashews, raisins and chocolate chips for garnish

100_1557

Instant coffee, ground nutmeg, ground ginger and cloves ready to be ground in my shining mortar and pestle

Preheat the oven to 325 degrees Fahrenheit. Prepare the pan by greasing the pan and coating it with flour.

Mix the cloves, nutmeg and ginger with water and heat in the microwave. Add milk, sugar and coffee to the hot spices. I whipped the coffee really well to make it quite foamy. It changed its color from very dark brown to very pale brown. I even earned myself a blister in trying too hard:).

100_1558

Spice mix with water and coffee

100_1565

Coffee well beaten up!!

Beat the egg whites till soft peaks form. Set it aside. Beat margarine and sugar well. Add vanilla extract and beat again. In a large bowl, mix the flours, baking powder and baking soda. To the flour mixture, add the beaten margarine, sugar mix. Next, fold in the egg whites and the beaten coffee. Pour into prepared pan and bake for 22-25 minutes.One could add the dry fruits in this batter as well, but I added the garnish after the cake was kept in the oven for 20 minutes.

100_1568

Here’s my cake batter………..

And, voila……….spicy masala coffee cake is ready!!

100_1569

…………And here’s my delicious masala coffee cake……….Enjoy!!

This is my entry to Sunita’s Think spice…Think cloves event hosted by  Canela & Comino ……….author of wonderful Peruvian food blog.

Posted in -All Purpose flour, -Cashews, -cloves, -Ginger, -Nutmeg, -Raisins, -Whole wheat flour, Chocolate, Coffee, Eggs, Flours, Nuts, Spices, Sweets | Tagged: , | 9 Comments »