चर्चे चौके के Charche Chauke Ke

Hey! Join in the Kitchen Gossip!!

Archive for the ‘-lemon’ Category

Daring Bakers Bake Dobos Torte

Posted by vivnidhi on August 27, 2009

Whisk at 180 x 180 (largest)presents

 aug2_132

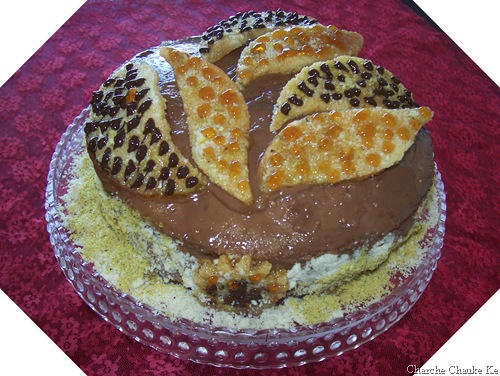
My bejeweled Dobos Torte

The August 2009 Daring Bakers’ challenge was hosted by Angela of A Spoonful of Sugar and Lorraine of Not Quite Nigella. They chose the spectacular Dobos Torte based on a recipe from Rick Rodgers’ cookbook Kaffeehaus:  Exquisite Desserts from the Classic Caffés of Vienna, Budapest, and Prague.

So, what is the Dobos Torta (or Torte)?

The Dobos Torta is a five-layer sponge cake, filled with a rich chocolate buttercream and topped with thin wedges of caramel. (You may come across recipes which have anywhere between six and 12 layers of cake; there are numerous family variations!) It was invented in 1885 by József C. Dobos, a Hungarian baker, and it rapidly became famous throughout Europe for both its extraordinary taste and its keeping properties. The recipe was a secret until Dobos retired in 1906 and gave the recipe to the Budapest Confectioners’ and Gingerbread Makers’ Chamber of Industry, providing that every member of the chamber can use it freely.

Equipment

  • 2 baking sheets
  • 9” (23cm) springform tin and 8” cake tin, for templates
  • mixing bowls (1 medium, 1 large)
  • a sieve
  • a double boiler (a large saucepan plus a large heat-proof mixing bowl which fits snugly over the top of the pan)
  • a small saucepan
  • a whisk (you could use a balloon whisk for the entire cake, but an electric hand whisk or stand mixer will make life much easier)
  • metal offset spatula
  • sharp knife
  • a 7 1/2” cardboard cake round, or just build cake on the base of a springform tin.
  • piping bag and tip, optional

Prep times

  • Sponge layers 20 mins prep, 40 mins cooking total if baking each layer individually.
  • Buttercream: 20 mins cooking. Cooling time for buttercream: about 1 hour plus 10 minutes after this to beat and divide.
  • Caramel layer: 10-15 minutes.
  • Assembly of whole cake: 20 minutes

Sponge cake layers

  • 6 large eggs, separated, at room temperature
  • 1 1/3 cups (162g) confectioner’s (icing) sugar, divided
  • 1 teaspoon (5ml) vanilla extract
  • 1 cup plus 2 tablespoons (112g) sifted cake flour (SUBSTITUTE 95g plain flour + 17g cornflour (cornstarch) sifted together)
  • pinch of salt

Chocolate Buttercream

  • 4 large eggs, at room temperature
  • 1 cup (200g) caster (ultrafine or superfine white) sugar
  • 4oz (110g) bakers chocolate or your favorite dark chocolate, finely chopped
  • 2 sticks plus 2 tablespoons (250g) unsalted butter, at room temperature.

Caramel topping

  • 1 cup (200g) caster (superfine or ultrafine white) sugar
  • 12 tablespoons (180 ml) water
  • 8 teaspoons (40 ml) lemon juice
  • 1 tablespoon neutral oil (e.g. grapeseed, rice bran, sunflower)

Finishing touches

  • a 7” cardboard round
  • 12 whole hazelnuts, peeled and toasted
  • ½ cup (50g) peeled and finely chopped hazelnuts

Directions for the sponge layers:

NB. The sponge layers can be prepared in advance and stored interleaved with parchment and well-wrapped in the fridge overnight.

1.Position the racks in the top and centre thirds of the oven and heat to 400F (200C).
2.Cut six pieces of parchment paper to fit the baking sheets. Using the bottom of a 9″ (23cm) springform tin as a template and a dark pencil or a pen, trace a circle on each of the papers, and turn them over (the circle should be visible from the other side, so that the graphite or ink doesn’t touch the cake batter.)
3.Beat the egg yolks, 2/3 cup (81g) of the confectioner’s (icing) sugar, and the vanilla in a medium bowl with a mixer on high speed until the mixture is thick, pale yellow and forms a thick ribbon when the beaters are lifted a few inches above the batter, about 3 minutes. (You can do this step with a balloon whisk if you don’t have a mixer.)

4.In another bowl, using clean beaters, beat the egg whites until soft peaks form. Gradually beat in the remaining 2/3 cup (81g) of confectioner’s (icing)sugar until the whites form stiff, shiny peaks. Using a large rubber spatula, stir about 1/4 of the beaten whites into the egg yolk mixture, then fold in the remainder, leaving a few wisps of white visible. Combine the flour and salt. Sift half the flour over the eggs, and fold in; repeat with the remaining flour.
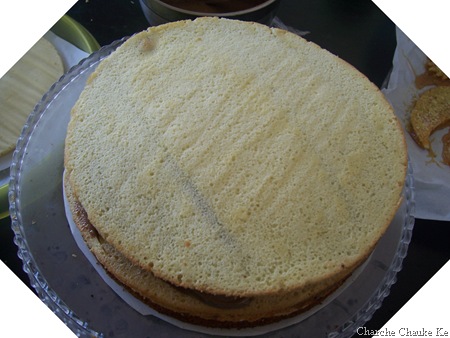
5.Line one of the baking sheets with a circle-marked paper. Using a small offset spatula, spread about 3/4cup of the batter in an even layer, filling in the traced circle on one baking sheet. Bake on the top rack for 5 minutes, until the cake springs back when pressed gently in the centre and the edges are lightly browned. While this cake bakes, repeat the process on the other baking sheet, placing it on the centre rack. When the first cake is done, move the second cake to the top rack. Invert the first cake onto a flat surface and carefully peel off the paper. Slide the cake layer back onto the paper and let stand until cool. Rinse the baking sheet under cold running water to cool, and dry it before lining with another parchment. Continue with the remaining papers and batter to make a total of six layers. Completely cool the layers. Using an 8″ springform pan bottom or plate as a template, trim each cake layer into a neat round. (A small serrated knife is best for this task.)

aug2_115 aug2_116

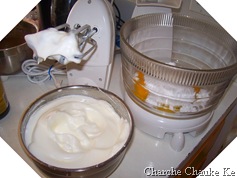
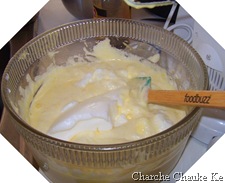
Whipped egg whites and yellows whipped with sugar

aug2_117 aug2_118

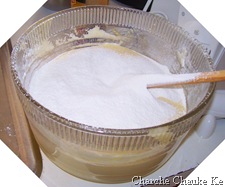
Divide the egg whites in 4 parts

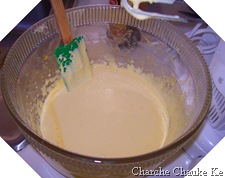
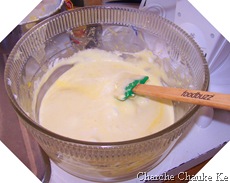
First pic: first part of egg whites mixed in Second pic: Folding in of the last part of egg white

aug2_119 aug2_120

First pic : Folding in flour & second pic: 3/4 cup cake batter in a spring form pan


Directions for the chocolate buttercream:

NB. This can be prepared in advance and kept chilled until required.

1.Prepare a double-boiler: quarter-fill a large saucepan with water and bring it to a boil.
2.Meanwhile, whisk the eggs with the sugar until pale and thickened, about five minutes. You can use a balloon whisk or electric hand mixer for this.
3.Fit bowl over the boiling water in the saucepan (water should not touch bowl) and lower the heat to a brisk simmer. Cook the egg mixture, whisking constantly, for 2-3 minutes until you see it starting to thicken a bit. Whisk in the finely chopped chocolate and cook, stirring, for a further 2-3 minutes.
4.Scrape the chocolate mixture into a medium bowl and leave to cool to room temperature. It should be quite thick and sticky in consistency.
5.When cool, beat in the soft butter, a small piece (about 2 tablespoons/30g) at a time. An electric hand mixer is great here, but it is possible to beat the butter in with a spatula if it is soft enough. You should end up with a thick, velvety chocolate buttercream. Chill while you make the caramel topping.

aug2_97 aug2_104

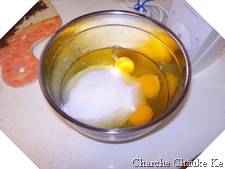
Chopped chocolate and eggs with sugar

aug2_106 aug2_108

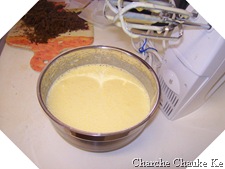
Whipped eggs and boiling water ready for cooking

aug2_110 aug2_121

Cooking buttercream on double boiler and the finished product


Directions for the caramel topping:

1.Choose the best-looking cake layer for the caramel top. To make the caramel topping: Line a jellyroll pan with parchment paper and butter the paper. Place the reserved cake layer on the paper. Score the cake into 12 equal wedges. Lightly oil a thin, sharp knife and an offset metal spatula.
2.Stir the sugar, water and lemon juice in a small saucepan. Bring to a boil over a medium heat, stirring often to dissolve the sugar. Once dissolved into a smooth syrup, turn the heat up to high and boil without stirring, swirling the pan by the handle occasionally and washing down any sugar crystals on the sides of the pan with a wet brush until the syrup has turned into an amber-colored caramel.
3.The top layer is perhaps the hardest part of the whole cake so make sure you have a oiled, hot offset spatula ready. I also find it helps if the cake layer hasn’t just been taken out of the refrigerator. I made mine ahead of time and the cake layer was cold and the toffee set very, very quickly—too quickly for me to spread it. Immediately pour all of the hot caramel over the cake layer. You will have some leftover most probably but more is better than less and you can always make nice toffee pattern using the extra to decorate. Using the offset spatula, quickly spread the caramel evenly to the edge of the cake layer. Let cool until beginning to set, about 30 seconds. Using the tip of the hot oiled knife (keep re-oiling this with a pastry brush between cutting), cut through the scored marks to divide the caramel layer into 12 equal wedges. Cool another minute or so, then use the edge of the knife to completely cut and separate the wedges using one firm slice movement (rather than rocking back and forth which may produce toffee strands). Cool completely.

aug2_124 aug2_128

Preparation for caramel layer

aug2_129

Assembling the cake

I brushed hazelnut coffee(unsweetened) on the layers as I found the buttercream a tad too sweet


Assembling the Dobos

1.Divide the buttercream into six equal parts.
2.Place a dab of chocolate buttercream on the middle of a 7 1/2” cardboard round and top with one cake layer. Spread the layer with one part of the chocolate icing. Repeat with 4 more cake layers. Spread the remaining icing on the sides of the cake.
3.Optional: press the finely chopped hazelnuts onto the sides of the cake.
4.Propping a hazelnut under each wedge so that it sits at an angle, arrange the wedges on top of the cake in a spoke pattern. If you have any leftover buttercream, you can pipe rosettes under each hazelnut or a large rosette in the centre of the cake. Refrigerate the cake under a cake dome until the icing is set, about 2 hours. Let slices come to room temperature for the best possible flavor.

I used ground cashews and pistachios for topping. I even topped the caramel layer with these nut powders and then caramel or chocolate on top.

aug2_140

Well! It’s been cut

aug2_156

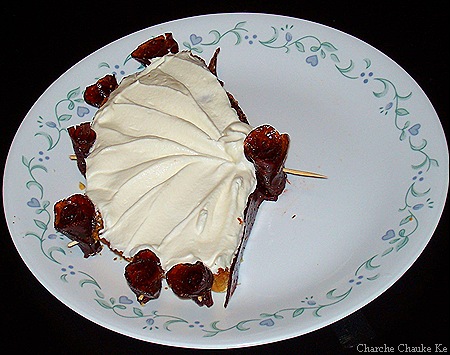
Here’s a slice…..The top layers are our favorite……:-))……you won’t like it if you do not like sticky, chewy….the sonny and I do :-))

aug2_155

My favorite picture : Just playing with caramel

Verdict :

The cake overall tasted pretty good. I am not sure if I will make it again.

Too many eggs 🙂 . The sponge layers were easy to work with but would not have tasted good without some liquor brushed on it.

The buttercream is quick and easy but again I found it less firm than other buttercreams I have worked with. I don’t think I would make it again.

A lot of daring bakers did not like the lemony sticky chewy caramel. I LOVED it. The son and I can’t get enough of it. Of course I let him eat it cause I should not ….right 😉 . I will make this a lot of times 🙂 .

I may have made better components of this cake but all assembled together and chilled well, we all really enjoyed the cake. Thanks a lot Angela and Lorraine.

Expenditure:

Bakers semisweet chocolate (8 oz.) …….from Walmart…………………$2.88

Butter (1 lb.)………………………….from Walmart………………….$1.98

——————————————————————————————————-

Total…………………………………………………………………….$4.86

Not bad at all for such a delicious end product. Do not forget to check out the other daring bakers on the blogroll. Outstanding cakes….you will be surprised.

Posted in - Confectioner's Sugar, -Butter, -Canola Oil, -Cashews, -lemon, -Pistachios, -Semisweet Chocolate, -Vanilla, Eggs, Sugar | Tagged: , , , , | 9 Comments »

Daring Cooks make Rice with mushrooms, Tofu, Potatoes and artichokes

Posted by vivnidhi on August 14, 2009

Vegetarians Win!! Yeah well, I should not rejoice so much. My expertise at preparing any non-vegetarian food is pretty bleak………and if I have to cook seafood, its worse. I (with the husband’s help 😉 , of course ) can handle salmon well now ….and we know when it is done, but the rest of the stuff leaves me shivering. I tried making scallops thrice and only once did I get it right, rest of the times the family could not eat leather. So, this time we attempted squid…..and I FAILED ……….and hence, everybody ate vegetarian…….YEAH!!

Before I say anything about what I made and what happened, I must mention the accompaniment. This month I learnt to make allioli (the traditional way) and it is just phenomenal. No garlic lover should not – not try it.  To me , it was like tasting sheer bliss. I LOVE garlic. I can eat allioli with bread, pasta, roti, parantha, of course rice , just about anything (OK, spare the desserts 😉 )

This month’s challenge was hosted by Olga of  Las Cosas de Olga and Olga’s Recipes . . She chose a delicious Spanish recipe, Rice with mushrooms, cuttlefish and artichokes by José Andrés, one of the most important Spanish Chefs at the moment. The recipe is from his US TV show Made in Spain.  (Please note Olga’s tips (2) and (3) at the bottom for alternative cooking).

Allioli is my favorite and so lets begin with that. I made it the traditional way and just loved it. This will be made a lot in my house. A lot of people find it strong, but for this spice accustomed tongue, it was just great!

aug1_01

Allioli…..the traditional way


Allioli (Traditional recipe)
Cooking time: 20 min aprox.
Ingredients:

  • 4 garlic cloves, peeled
  • Pinch of salt
  • Fresh lemon juice (some drops)
  • Extra-virgin olive oil (Spanish preferred but not essential)

Directions:

  1. Place the garlic in a mortar along with the salt.
  2. Using a pestle, smash the garlic cloves to a smooth paste. (The salt stops the garlic from slipping at the bottom of the mortar as you pound it down.)
  3. Add the lemon juice to the garlic.
  4. Drop by drop; pour the olive oil into the mortar slowly as you continue to crush the paste with your pestle.
  5. Keep turning your pestle in a slow, continuous circular motion in the mortar. The drip needs to be slow and steady. Make sure the paste soaks up the olive oil as you go.
  6. Keep adding the oil, drop by drop, until you have the consistency of a very thick mayonnaise. If your allioli gets too dense, add water to thin it out. This takes time—around 20 minutes of slow motion around the mortar—to create a dense, rich sauce.

José’s tips for traditional recipe: It’s hard to think that, when you start crushing the garlic, it will ever turn into something as dense and smooth as allioli. But don’t give up. It’s worth the extra time and effort to see the oil and garlic come together before your eyes. Just make sure you’re adding the olive oil slowly, drop by drop. Keep moving the pestle around the mortar in a circular motion and keep dreaming of the thick, creamy sauce at the end of it all.

Allioli a la moderna (Modern recipe)
Cooking time: 3-4 minutes
Ingredients:

  • 1 small egg
  • 1 cup extra-virgin olive oil (as above, Spanish oil is highly recommended)
  • 1 garlic clove, peeled
  • 1 Tbs. Spanish Sherry vinegar or lemon juice (if Sherry vinegar is not available, use can use cider or white vinegar)
  • Salt to taste

Directions:

  1. Break the egg into a mixing bowl.
  2. Add 2 tablespoons of the olive oil and the garlic cloves, along with the vinegar or lemon juice.
  3. Using a hand blender, start mixing at high speed until the garlic is fully pureed into a loose paste.
  4. Little by little, add what’s left of the olive oil as you continue blending.
  5. If the mixture appears too thick as you begin pouring the oil, add 1 teaspoon of water to loosen the sauce.
  6. Continue adding the oil and blending until you have a rich, creamy allioli.
  7. The sauce will be a lovely yellow color.
  8. Add salt to taste.

José’s tips for modern recipe:
(1) If you do not have access to a hand blender, you can use a hand mixer (the kind with the two beaters) or a food processor. If you use a food processor, you must double the recipe or the amount will be too little for the blades to catch and emulsify.
(2) What happens if the oil and egg separate? Don’t throw it out. You can do two things. One is to whisk it and use it as a side sauce for a fish or vegetable. But if you want to rescue the allioli, take 1 tablespoon of lukewarm water in another beaker and start adding to the mix little by little. Blend it again until you create the creamy sauce you wanted.

Why did I FAIL? OK, I am a bit of a purist when it comes to food. If a recipe calls for an ingredient and that ingredient is within my means, I try and go the extra mile. Well! in this case several extra miles around the town and just would not find the short grain Spanish rice. I went crazy and really could not believe that I could not find it. (I saw it at Kroger after I had finished all my experiments.) Anyway, I got short grain brown rice !!! Guess what I cooked sea food till the brown rice got tender. now who could eat what I had dished out? The husband, who could not believe his ears (and was really pleased) when I told him that I would be buying squid for him, asked me to never buy that stuff again :-)) . So all ate my vegetarian basmati version 🙂 . 

Here is the recipe:

Rice with mushrooms, cuttlefish and artichokes
Cooking time: 45 minutes
Equipment:

  • 1 Chopping Board
  • 1 knife
  • 1 medium saucepan
  • 1 Paella pan (30 cm/11” is enough for 4 people. If not available, you may use a simple pan that size)
  • 1 Saucepan

Ingredients (serves 4):

  • 4 Artichokes (you can use jarred or frozen if fresh are not available)
  • 12 Mushrooms (button or Portobello)
  • 1 or 2 Bay leaves (optional but highly recommended)
  • Tofu 1 block cubed and baked at 400 F for 15 minutes
  • 1 glass of white wine
  • 1 Potato  cubed
  • “Sofregit” (see recipe below) (pronounced so-frito)
  • 300 gr (2 cups) Basmati rice – about 75 gr per person ( ½ cup per person) Please read this for more info on suitable rices.
  • Water or Fish Stock (use 1 ½ cup of liquid per ½ cup of rice)
  • Saffron threads (if you can’t find it or afford to buy it, you can substitute it for turmeric or yellow coloring powder)
  • Allioli (olive oil and garlic sauce, similar to mayonnaise sauce) – optional

Directions:

  1. Add 1 or 2 tablespoon of olive oil in a frying pan and put the tofu cubes in the pan.
  2. If you use fresh artichokes, clean them as shown in the video in tip #7. Cut artichokes in eights.
  3. Clean the mushrooms and cut them in fourths.
  4. Add a bay leaf to the tofu and add also the artichokes,potatoes and the mushrooms.
  5. Sauté until we get a golden color in the artichokes.
  6. Put a touch of white wine so all the solids in the bottom of the get mixed, getting a more flavorful dish.
  7. Add a couple or three tablespoons of sofregit and mix to make sure everything gets impregnated with the sofregit.
  8. Add all the liquid and bring it to boil.
  9. Add all the rice. Let boil for about 5 minutes in heavy heat.
  10. Add some saffron thread to enrich the dish with its flavor and color. Stir a little bit so the rice and the other ingredients get the entire flavor. If you’re using turmeric or yellow coloring, use only 1/4 teaspoon.
  11. Turn to low heat and boil for another 8 minutes (or until rice is a little softer than “al dente”)
  12. Put the pan away from heat and let the rice stand a couple of minutes.

aug1

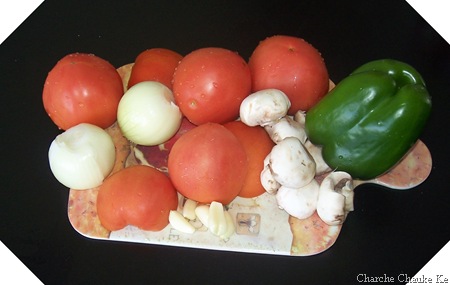
Sofregit ingredients: Onion, tomatoes, green pepper, garlic and mushrooms

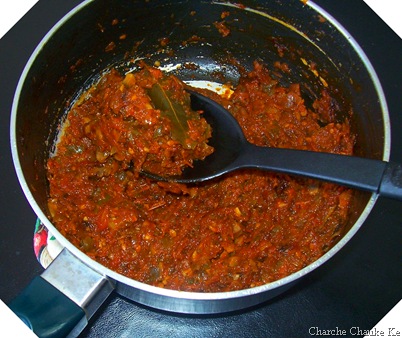
Sofregit (a well cooked and fragrant sauce made of olive oil, tomatoes, garlic and onions, and may at times
different vegetables such as peppers or mushrooms)-

Cooking time: aprox. 1 hour
Ingredients:

  • 2 tablespoons of olive oil
  • 5 big red ripe tomatoes, chopped
  • 2 small onions, chopped
  • 1 green pepper, chopped (optional)
  • 4 or 5 garlic cloves, chopped
  • 1 cup of button or Portobello mushrooms, chopped (optional)
  • 1 Bay leaf
  • Salt
  • Touch of ground cumin
  • Touch of dried oregano

Directions:

  1. Put all the ingredients together in a frying pan and sauté slowly until all vegetables are soft.
  2. Taste and salt if necessary (maybe it’s not!)

Sofregit tastes superb with just about anything.

aug1_00

Sofregit’s ready!

Olga’s Tips:
(1) In Spain, rice is not stired as often as it is when cooking Italian risotto. You must stir it once or twice maximum. This tip is valid for all Spanish rice dishes like paella, arròs negre, arròs a banda…
(2) When cooking the alternative style you can change the cuttlefish or squid for diced potato.
(3) If you can’t find cuttlefish or squid, or you’re not able to eat them because of allergies, you can try to substitute them for chicken or vegetables at your choice.
(4) Sofregit can be done in advance. You can keep it in the fridge or even freeze it.
(5) For more information on how to clean and remove the heart of artichokes, please watch this video
(6) To watch how Jose Andres cooks this dish click here.
(7) To tone down the taste when you do it by hand in a mortar, then add an egg yolk. If you want to tone it down in the alternative way use milk or soy milk. Anyway, the best alternative way is the original oil and garlic alone.
(9) Allioli must be consumed during the preparation day and preserved in the fridge before using it.
(10) For help on conversion on metric to imperial, visit this page.

My first attempt at cooking Spanish food apart from Sangria and we had a lot of fun in spite of the failure. The husband made  some sangria and I made flan. Thanks for a good meal Olga. Dinner’s ready!!

aug1_02

Rice with mushrooms, tofu,  potatoes and artichokes

aug1_06

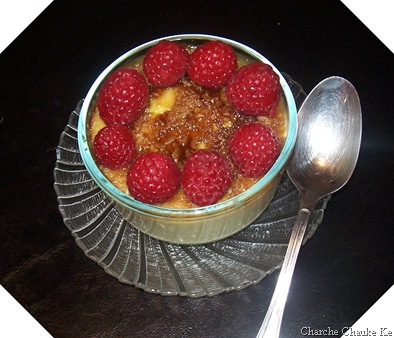
Some Crema Catalana too…. (Olga’s recipe)

Expenditure:

Artichokes 2………………………..from Meijer ……………..$ 3.34 (I had bought some from Randazzo for 59 c each…..ah supermarkets)

Mushrooms 1 lb……………………..from Kroger …………….$ 1.00 (deal, deal)

Short grain Brown rice 1 lb…………from Arbor farms market $ 1.69

———————————————————————————————————————————————–

Total……………………………………………………………..$ 6.03

Posted in - Bay Leaf, -Artichoke, -Cumin seeds, -Garlic, -Green Bell Pepper, -lemon, -mushrooms, -Olive Oil, -Onion, -Oregano, -Potatoes, -Saffron, -Tomato, -White Wine, Alcohol | Tagged: , , , | 13 Comments »

Last of the oldies: Daring Bakers June Challenge : Bakewell Tart….er…Pudding

Posted by vivnidhi on August 10, 2009

Perhaps the pictures I took were so bad that I never felt like posting. But, nevertheless, I must say that I made this delicious dessert in the month of June when I was supposed to, I don’t know why I did not post it. It was my first time making frangipane……..”it was lovely indeed” ……….as the English would say 😉

It’s easy and quite delicious. The June Daring Bakers’ challenge was hosted by Jasmine of Confessions of a Cardamom Addict and Annemarie of Ambrosia and Nectar. They chose a Traditional (UK) Bakewell Tart… er… pudding that was inspired by a rich baking history dating back to the 1800’s in England.  You can read all about the bakewell tart on these blogs and it is a very interesting read. I am just on one of my “too tired to write sessions” today.

The Mighty Flame at 180 x 180 (largest)presents:

July1_44

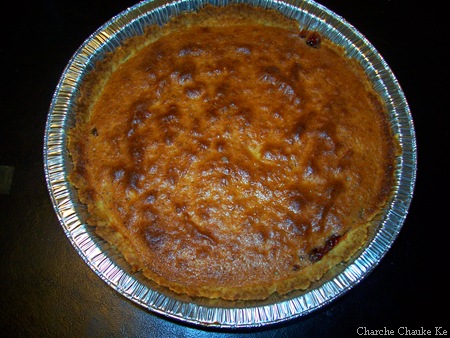
Bakewell Tart ….er pudding

Looks plain but trust me ….tastes delicious

The recipe:

Makes one 23cm (9” tart)
Prep time: less than 10 minutes (plus time for the individual elements)
Resting time: 15 minutes
Baking time: 30 minutes
Equipment needed: 23cm (9”) tart pan or pie tin (preferably with ridged edges), rolling pin

One quantity sweet shortcrust pastry (recipe follows)
Bench flour
250ml (1cup (8 US fl. oz)) jam or curd, warmed for spreadability
One quantity frangipane (recipe follows)
One handful blanched, flaked almonds

Assembling the tart
Place the chilled dough disc on a lightly floured surface. If it’s overly cold, you will need to let it become acclimatised for about 15 minutes before you roll it out. Flour the rolling pin and roll the pastry to 5mm (1/4”) thickness, by rolling in one direction only (start from the centre and roll away from you), and turning the disc a quarter turn after each roll. When the pastry is to the desired size and thickness, transfer it to the tart pan, press in and trim the excess dough. Patch any holes, fissures or tears with trimmed bits. Chill in the freezer for 15 minutes.

Preheat oven to 200C/400F.

Remove shell from freezer, spread as even a layer as you can of jam onto the pastry base. Top with frangipane, spreading to cover the entire surface of the tart. Smooth the top and pop into the oven for 30 minutes. Five minutes before the tart is done, the top will be poofy and brownish. Remove from oven and strew flaked almonds on top and return to the heat for the last five minutes of baking.

The finished tart will have a golden crust and the frangipane will be tanned, poofy and a bit spongy-looking. Remove from the oven and cool on the counter. Serve warm, with crème fraîche, whipped cream or custard sauce if you wish.

When you slice into the tart, the almond paste will be firm, but slightly squidgy and the crust should be crisp but not tough.

Jasmine’s notes:
• If you cannot have nuts, you can try substituting Victoria sponge for the frangipane. It’s a pretty popular popular cake, so you shouldn’t have any troubles finding one in one of your cookbooks or through a Google search.
• You can use whichever jam you wish, but if you choose something with a lot of seeds, such as raspberry or blackberry, you should sieve them out.
• The jam quantity can be anywhere from 60ml (1/4 cup) to 250ml (1cup), depending upon how “damp” and strongly flavored your preserves are. I made it with the lesser quantity of home made strawberry jam, while Annemarie made it with the greater quantity of cherry jam; we both had fabulous results. If in doubt, just split the difference and spread 150ml (2/3cup) on the crust.
Annemarie’s notes:
• The excess shortcrust can be rolled out and cut into cookie-shapes (heck, it’s pretty darned close to a shortbread dough).

Sweet shortcrust pastry

Prep time: 15-20 minutes
Resting time: 30 minutes (minimum)
Equipment needed: bowls, box grater, cling film

  • 225g (8oz) all purpose flour
    30g (1oz) sugar
    2.5ml (½ tsp) salt
    110g (4oz) unsalted butter, cold (frozen is better)
    2 (2) egg yolks
    2.5ml (½ tsp) almond extract (optional)
    15-30ml (1-2 Tbsp) cold water

Sift together flour, sugar and salt. Grate butter into the flour mixture, using the large hole-side of a box grater. Using your finger tips only, and working very quickly, rub the fat into the flour until the mixture resembles bread crumbs. Set aside.

Lightly beat the egg yolks with the almond extract (if using) and quickly mix into the flour mixture. Keep mixing while dribbling in the water, only adding enough to form a cohesive and slightly sticky dough.

Form the dough into a disc, wrap in cling and refrigerate for at least 30 minutes

Jasmine’s notes:
• I make this using vanilla salt and vanilla sugar.
• If you wish, you can substitute the seeds of one vanilla bean, one teaspoon of vanilla paste or one teaspoon of vanilla extract for the almond extract

Frangipane

Prep time: 10-15 minutes
Equipment needed: bowls, hand mixer, rubber spatula

  • 125g (4.5oz) unsalted butter, softened
    125g (4.5oz) icing sugar
    3 (3) eggs
    2.5ml (½ tsp) almond extract
    125g (4.5oz) ground almonds
    30g (1oz) all purpose flour

Cream butter and sugar together for about a minute or until the mixture is primrose in colour and very fluffy. Scrape down the side of the bowl and add the eggs, one at a time, beating well after each addition. The batter may appear to curdle. In the words of Douglas Adams: Don’t panic. Really. It’ll be fine. After all three are in, pour in the almond extract and mix for about another 30 seconds and scrape down the sides again. With the beaters on, spoon in the ground nuts and the flour. Mix well. The mixture will be soft, keep its slightly curdled look (mostly from the almonds) and retain its pallid yellow colour.

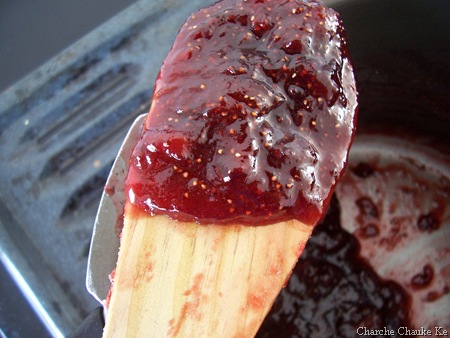
We had gone strawberry picking that weekend and so of course I prepared some quick strawberry jam. No pectin, nothing but strawberries, sugar and lemon juice….that’s it and folks at home could not have enough of it…..actually there wasn’t t enough of it as I used it up in the tart 🙂 .

Optional element: Home made jam or curd
We know several amongst us are rather jammy with making their own jams and preserves. Go ahead get wild and creative or simply showcase whatever’s local and in season. If you haven’t jammed before and want some hints or recipes, take a look at Bernardin’s homecanning.ca. If you want to just make some jam for this challenge and not go through sterilizing jars and snap lids, you can try a pan jam, similar to Jasmine’s Blackberry Pan Jam. If you do use homemade jam, please include your recipe or the link to the one you used in your post.

Quick Strawberry Pan Jam (similar to Jasmine‘s pan jam)

  • Strawberries 2 cups cleaned and quartered (measured after cutting)
  • sugar 1 1/2 cups
  • Lemon Juice 1 Tbsp.

On a heavy bottomed pan, heat the strawberries till they boil and add the sugar and lemon juice. Let this cook on medium heat till a  successful plate test can be done. For the plate test, place a plate in the freezer or chill it well. Pour a big drop of jam on this cold plate and give it 30 seconds. If the jam has reached the right consistency, it will very slowly spread a little. More about jam making here.

July1_39

Strawberry Pan Jam

I also made some strawberry leather ( I mentioned we went strawberry picking, so, yeah I had a bounty)  for “decoration” which looked good but bad pictures…. Anyway, the boy is nuts about this fruit leather and I prefer making it at home to avoid preservatives and less sugar compared to store bought. Very simple to make, patience is the only virtue required in making fruit leather. Most types of fruits can be used to prepare fruit leather. Please leave melons :-)). I have made fruit leather out of strawberries and kiwi fruit so far. It’s basically like aam papad that we would eat just with other fruits….kids love it. Unfortunately, I have no pictures…next time.

Strawberry Leather:

The Recipe:

  • Strawberries 2 cups cleaned, hulled and pureed
  • sugar  1/4 cup
  • Lemon juice 1 tsp.

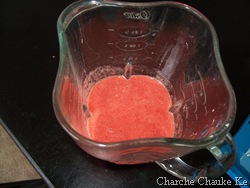
1. The same ingredients as jam but tastes quite different. Lemon juice is required both here and in jam to reduce crystallization of sugar. I remember jam bottles which would have rims covered in sugar. Anyway, so far I have only made in small quantities which lasts me about 3-4 weeks in the refrigerator and no sugar crystallization so far. Anyway, puree the strawberries and strain them. I just add the strawberry seeds to the jam….I like the crunch in it .

July1_31 July1_32

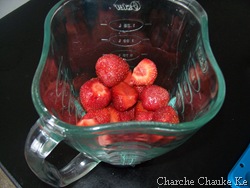
Strawberries for strawberry leather

2. In a heavy bottomed pan, add sugar, strained puree and lemon juice and heat on medium heat. Stop after about 20 minutes or until the mixture has thickened considerably yet should be of pouring and spreading consistency. Try your hand at it……..the result will be delicious anyway 🙂 .

3. Cover a baking sheet with parchment paper. Parchment paper is a necessity for making fruit leather. Spread the mix as thinly and uniformly as possible. We don’t want to spread very thin as it will get crisp or worse burn but too thick will take an eternity. About 1/4 inch is good enough.

4. Preheat the oven to 200 F. Keep the baking sheet in the oven and forget for at least an hour. After the first hour (for a small batch) I like to check every half hour. The mixture keeps drying and when it’s ready, there won’t be any soft portion left & will also not be very sticky.

5. Let it cool completely and store wrapped in parchment. Can be cut as desired. The result is worth the effort.

July2_07

Bad attempt really……bakewell tart was delicious with some whipped topping

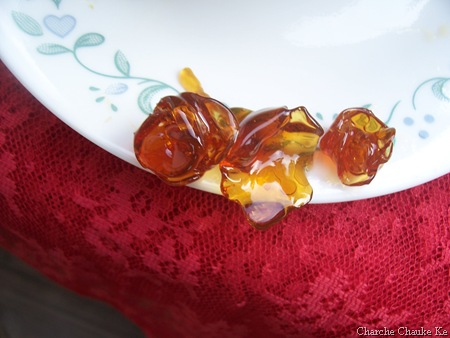
The red stuff is strawberry leather roses…..bet it didn’t look as bad as here 🙂

We all thoroughly enjoyed this bakewell tart…..er..pudding. It’s a great & easy make ahead dessert. We liked it better the next day. 

Did not cost me anything as I made half the quantity and had everything at home.

Posted in - Confectioner's Sugar, -All Purpose flour, -Almond extract, -Almonds, -Butter, -lemon, -Strawberry, Eggs, Sugar | Tagged: , , | 3 Comments »

Beirut Tahini Swirls…….Sukkar Bi Tahin

Posted by vivnidhi on July 29, 2009

Bread Baking Babes make Sukkar bi Tahin.

1100_3665

Sukkar bi Tahin

100_3678  100_3673

Here’s my savory …garbanzo filled swirls and sweet Tahini paranthas

As soon it was approaching the middle of the month, I was frantically searching for bread baking babes….what are they baking this month, I hope I don’t miss it……….I did not 😉 . I made 2 batches at least and mix and match here and there ;-). This month’s host babe was Natashya of Living in the Kitchen with Puppies.

The recipe she chose is for Beirut Tahini Swirls, Sukkar bi Tahin. It is a cross between a flatbread and a yeasted pastry, only mildly sweet. It is street food in Beirut, and very addictive!
“Beirut has a lot of good food at every level, from fancy restaurants to local eateries, from home cooking to quality market shopping. And for a curbside snacker like me, it’s paradise. There are sesame-covered flatbreads, grilled meats, and sweet and not so sweet cookies; there’s always something nearby to eat.” “These tahini swirls, called sukkar bi tahin in Arabic, are flattened flaky rounds flavored with tahini and sugar, not too sweet, not too strong tasting. Serve them warm or at room temperature-they’re just right either way.”
Alford and Duguid, Home Baking .

The recipe:

Sukkar bi Tahin – Beirut Tahini Swirls

Home Baking, The Artful Mix of Flour and Tradition Around the World

Jeffrey Alford and Naomi Duguid

Makes 6 golden brown, flaky textured coiled rounds, about 6 inches wide, filled with sesame paste and sugar.


Ingredients


Dough

  • 1/2 tsp. active dry yeast
  • 1 cup lukewarm water
  • 1 cup all purpose flour
  • 1 cup whole wheat flour
  • about 1/2 cup all purpose flour for dusting
  • 2 tsp sugar
  • 1 tbsp olive oil

Filling

  • 3/4 cup tahini
  • 3/4 cup sugar


Garbanzo Bean Filling

  • 1/2 cup Garbanzo beans soaked for at least 4 hours and boiled…mashed lightly
  • 4 sun dried tomatoes soaked in water and drained
  • 1/2 cup Tahini
  • 2 cloves garlic minced
  • 1/4 Cilantro chopped
  • 1 Tbsp. lemon juice
  • salt to taste


Directions

In a medium bowl, dissolve the yeast in the lukewarm water.

Stir in one cup of the flour, then add the sugar and oil and stir in.

Incorporate a second cup of flour, then turn the dough out onto a well floured surface and knead for 5 minutes, or until smooth.

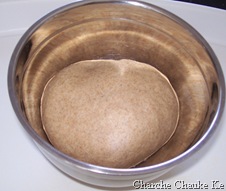
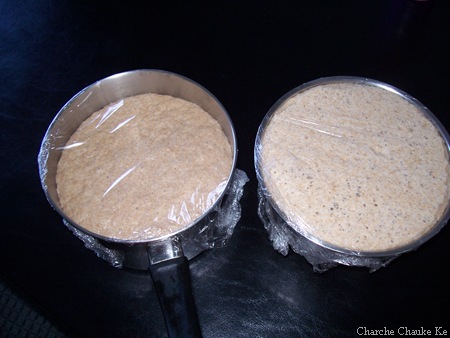
Cover the dough with plastic wrap and let rise for 2 to 3 hours, until doubled in volume.

Meanwhile, place a baking stone or unglazed quarry tiles, if you have them, (or a baking sheet) on the middle oven rack and preheat the oven to 375 F.

Mix together the tahini and sugar and stir until smooth. Set aside.
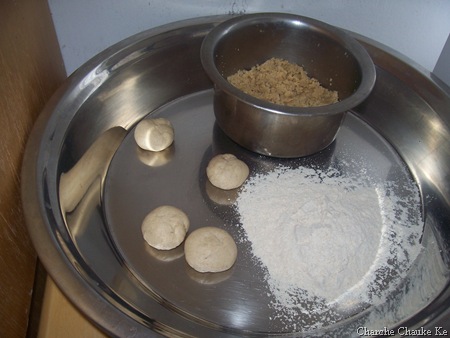
Cut the dough into 6 equal pieces.

Work with 3 at a time, keeping the others covered.

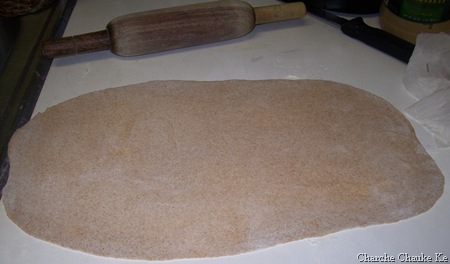
Flatten each out on a lightly floured surface, then roll each out to a rectangle about 5 inches by 10 inches.

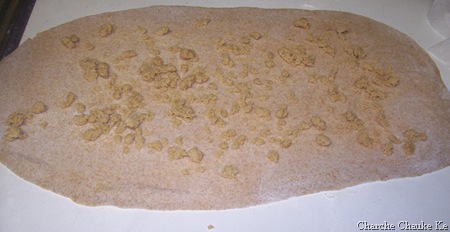
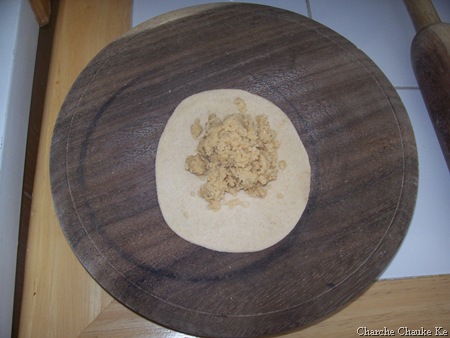
Spread the top surface with 2 1/2 tablespoons of the filling mixture, spreading it almost to the edges.

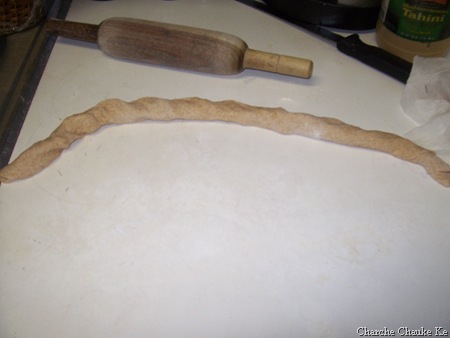
Roll up the rectangle from a long side into a cylinder, which will stretch as you roll to about 20 inches long.

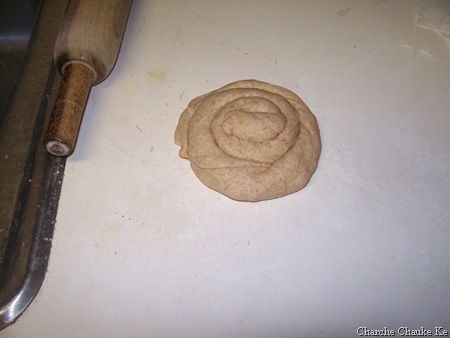
Anchor one end and coil the bread around itself, then tuck the end in.

Flatten with the palm of your hand, then set aside, covered, while you fill and shape the other 2 rectangles.

Return to the first coil and roll out gently with a rolling pin.

Roll the other 2 out a little and then return to the first one and roll it out a little more thinly, and so on, until you have rolled each to a round about 6 to 7 inches in diameter.

A little filling may leak out—don’t worry, just leave it.

I brushed the top with a wee bit of oil and sprinkled some sesame seeds before baking. (optional)

Place the breads on the hot baking stone or tiles (or baking sheet) and bake for 15 to 20 minutes, until golden brown and flaky.

Transfer to a rack to cool.

Shape and bake the remaining 3 pieces of dough.

Serve warm or at room temperature.


*Tahini is a paste of ground sesame seeds. It can be found in health food stores, Middle Eastern markets and some grocery stores. It is a common ingredient in hummus, and is gaining in popularity in most parts of the world. It must be refrigerated after opening.

Natashya says: “The swirls should end up like puffy pita. If they are very thin they will be crispy, if they are not rolled enough, they will puff up like cinnamon rolls. We are striving for a flatbread pastry that puffs a little. Try them a couple of times, experiment. They are fun to bake.”  You bet they are ……I had a ton of fun……as usual 😉 .

I used half whole wheat flour and half all purpose flour for sweet tahini filling ones and all whole wheat flour for the savory garbanzo beans ones. Original recipe uses all purpose flour only.

 100_3642 100_3650 

Left: 1/2 whole wheat with 1/2 all purpose flour dough Right: Whole wheat flour dough

100_3651 

We have risen..the 1/2-1/2 dough was a little behind, but it did catch on

 100_3652

Dough cut in 6 pieces ..sweet tahini filling behind

100_3653

1 piece rolled

100_3654

Filled up

100_3659 

Rolled up again

100_3663

Ready to be baked

100_3665

Sukkar bi Tahin

100_3666

Had some leftover sweet tahini filling…..what did I do with that

100_3667

Made sweet paranthas of course…..dough details here and here

100_3668

Filled up and closed

100_3669

rolled …

100_3671

On the griddle…ready to be turned and oiled

100_3670

The other side…..

100_3673

Quick , delicious sweet treat…….kids will thank you…..this tastes best warm, will harden as it cools cause the flour cover is thin….does not taste bad even then 😉

You bet I enjoy taking pictures and posting huge ones on the blog 😉 . I dare say I loved making these. Thank you Natashya and Bread Baking Babes.

Posted in -All Purpose flour, -Cilantro, -Garlic, -lemon, -Olive Oil, -Sesame seeds, -Sun dried tomatoes, -Tahini, -Whole wheat flour, Sugar, Yeast | Tagged: , , , | 2 Comments »

Daring Cooks # 3 Cod, traditional flavors powdered

Posted by vivnidhi on July 14, 2009

On time, first time………for the Daring Cooks. Oh well I had to be ….even tardiness has a limit and…….Sketchy from Sketchy’s Kitchen made all of us do something we never tried before. Really got us out of the comfort zone and try something absolutely new… 🙂 . He says ” If you’ve read my blog before -I have a minor obsession with molecular cuisine. I hopped between a MC dish and a classic rustic Italian dish (I know – two completely different worlds).

I opted to skip the 400 year old dish in favor of something that would be new and daring for most of you. ” This is a dish from Grant Achatz, found in the Alinea cookbook – page 230

So, here we are………

Definitely…Miss Measure….Miss Measure at 180 x 180 (largest)presents

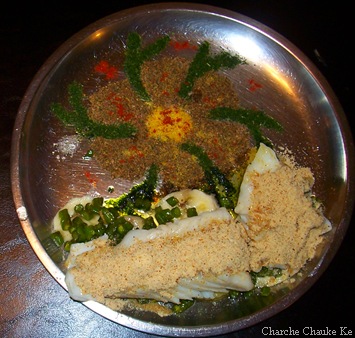
July2_38

Cod with Traditional Flavors Powdered……the red is paprika

Skate, Traditional Flavors Powderedwith changes
  • 8 oz. Cod
  • * Beurre monte
  • * 150g fresh green beans
  • sea salt/kosher salt
  • 1 banana
  • 225g smart balance (substitute for butter)
  • 150g lemons ……1 lemon
  • 2.5g citric acid/vitamin c tablet ……1/4 tsp.
  • 75g cilantro
  • 75g parsley
  • 50g dried banana chips
  • 150g spray dried cream powder (or powdered milk)
  • 50g cup minced red onion ….1 small red onion
  • 100g capers (brined, not oil)

* For green beans, slice each beans into very thin rounds (2 mm)
* Beurre Monte – 225 g smart balance cubed and cold, 30g water. In a small saucepan, bring the water to a boil, remove from heat and whisk in the butter 1 cube at a time. This should from an emulsion. Keep this heated, but under 195 degrees. The emulsion will not break – this is your poaching liquid.

Powders – prepare ahead of time
caper / onion
lemon powder
cilantro/parsley powder
‘brown butter’ powder

July2_30

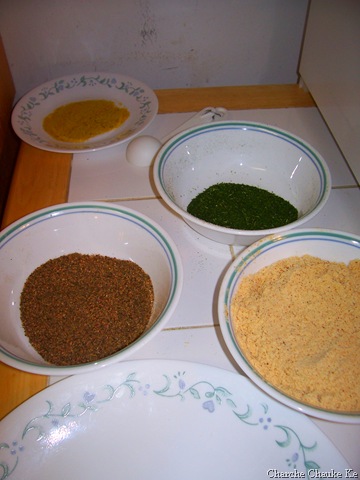
L to R from back……citrus, cilantro/parsley,capers/onion and brown butter powders

Powders
once dried, all powders should be pulsed in a coffee grinder/spice mill/mortar and pestle then passed through a chinois or fine mesh strainer.

citrus powder
150g lemons……1 lemon
500g simple syrup….I used 250 ml sugar and 250 ml water, seemed to work for me…..maybe wrong ratio but worked 😉
5g citric acid/vitamin c tablet

zest lemons , remove the pith from the zest and poach in the simple syrup three times. dry with paper towels and move to a dehydrating tray. 130 for 12 hours. pulse the zest in a coffee grinder, pass through chinois, and mix with citric acid/vitamin C powder.

If you do not have a dehydrator, place in microwave for 8 to 10 minutes at medium powder. Once dried, follow the other instructions.

cilantro/parsley powder
75g cilantro
75g parsley

blanch the parsley in boiling saltwater for 1 second, submerge the leaves in ice water for 3 minutes. Dry on paper towels and place on dehydrator tray. 130 for 12 hours. grind and pass through chinois.

If you do not have a dehydrator, place in microwave for 30 seconds, turn over leaves and microwave for another thirty seconds. They should be dry by now, pulse in coffee grinder, pass through chinois and reserve.

onion powder
50g cup minced red onions

dehydrator – 130 for 12 hours
microwave at medium power for 20 minutes.

pulse in grinder, pass through chinois

Caper powder
100g capers (get the ones packed in brine/vinegar)

run the capers under cold water for two minutes to remove some of the brine.
dry on paper towels and dehydrate for 12 hours at 130 degrees.
microwave instructions are unclear. Dry them as much a possible with paper towels, the microwave on medium for 1 minute. Check the moisture content and stir them. repeat for 30 second intervals until they are dry. If you use this method, pleas post the time needed to dry the capers.

Once dry, pulse and sift the powder. Mix it with the onion powder.

Brown Butter powder

50g Dried banana chips (unsweetened if possible – many are coated in honey – the freeze dried ones would be brilliant)
150g spray dried cream powder

If you cannot find the cream powder, you can substitute Bob’s red mill non fat dry milk powder, or even carnation instant milk powder. The substitutions will alter the flavor a little, but you will still get the general idea.

preheat the oven to 350 degrees, sift the cream powder into a fine layer on a silpat or on parchment. bake for 4 minutes, then remove for heat. If it bakes for too long, it will burn. Be very cautious with all powders in the oven. They all go from browned to burnt in a few seconds.

grind the banana chips in a coffee grinder and mix with the toasted cream powder. Pass this through a chinois and reserve.

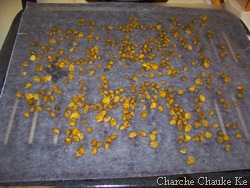
July2_21 July2_22

Red Onion and capers before going in the oven

July2_24

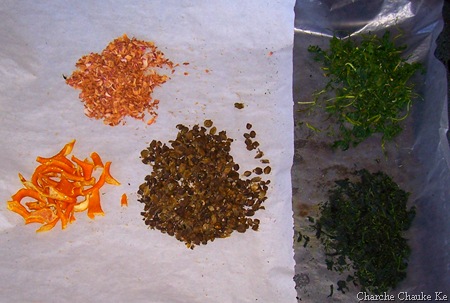
This is what became of it :-)…from back, L to R….onion, parsley, lemon zest, capers and cilantro……dried

I made half the recipe. Actual recipe calls for double the ingredients and skate wings instead of cod fish. I used the oven to dry the powder ingredients.

Onion/capers……3 hrs at 150 F

Cilantro /parsley…2 hrs at 150 F

lemon zest…….4 hrs at 150 F

And………those banana chips gave me a hard time. I got freeze dried whole banana(that’s what I got unsweetened)……which wouldn’t powder at all…all gluey. So,….I chopped it fine in my blender and spread as well as possible on baking tray……..2 hours at 200 F and finally it powdered well . Let me tell you it was a relief.


Cod

Prepare the cod – 50G v shaped cuts are recommended
Bring 50g water, 50g beurre monte, and green bean rounds to a boil over high heat. Cook until the water has evaporated (about 3 minutes), when the pan is almost dry, remove it from heat and season with 3g salt

bring 150g water and 150g beurre monte to simmer over medium heat, add skate wings and simmer for 2 minutes. Remove the pan from heat and flip the wing over and let rest in pan for two more minutes. Transfer to warming tray lined with parchment and season with 2.5 grams of fine sea salt.

Plating

Take the tip of a small spoon and make a small mound of the citrus powder, the onion-caper powder, and the cilantro parsley-powder. Swirl these around in a hurricane type pattern. I found that it is easier, and you get finer lines if you lightly shake the plate to flatten out the mounds, then swirl the spoon through it to get the pattern.

peel the remaining banana into very think slices (3mm) fan three slices on the plate, place green beans on top and place skate wing portion on top. On the tall edge, sprinkle the brown butter powder.

July2_31 July2_33

July2_35 July2_36

Sequence of plating…..banana , green beans, cod and finally brown butter powder


Substitutions
The Skate can be replaced with flounder or cod.
If you can get skate that is not ‘prepared’ IE – Skinned- get the fish monger to prepare it for you.

The powdered cream can be omitted completely, just replace it with more banana powder, or pineapple powder. Possibly non dairy creamer, but I have NO idea what would happen if you tried to brown it.

The poaching liquid is pretty much butter – it could be replaced with other poaching methods. Water, wine, bay leaf, garlic clove, pepper, etc. Try to go easy on the salt in the liquid if you use a replacement.

Disclaimer – the sample dish was made with cod because Skate was not available at the time in Richmond. Whole Foods usually carries it. Check your fish markets before you head out to buy some.

July2_42

The next day….:-)

Verdict: Husband (since I do not eat meat) found it very very interesting and liked the flavors but wondered if the effort is worth the result. But it’s quite easy to make if the powders are kept ready beforehand as we found out the next day. The dish was good ( I believe ) but pictures are all bleak because it was night by the time I finished…..and I rely solely on natural light :-). Shall try taking better pics next time.

Expenditure:

Cod…………….from Whole Foods……1/2 lb……….$ 6.48…….finished

Green Beans…..from Kroger…………..1/2 lb……….$ 0.69…….finished

Cilantro………..from Farmers Market…1 bunch……..$ 1.00…….some left

Banana freeze dried ..Peoples Food Co-op……………$ 2.00…….very little left (we ate some and burnt some;-) )

Powdered Milk….from Walmart………………………..$ 4.30…….lots left

Capers ………..from Meijer………….100 g…………..$ 3.69…..all gone


Total……………………………………………………..$ 18.16

My only grouse has been measuring everything on the scale…..that must have slowed me down by an hour or so ;-).

Posted in - Cod, - Milk Powder, - Red onion, - Smart Balance, -Banana, -Cilantro, -Green Beans, -lemon, -Parsley, Capers, Daring Cooks | Tagged: , , , , , | 6 Comments »