चर्चे चौके के Charche Chauke Ke

Hey! Join in the Kitchen Gossip!!

Archive for the ‘The staple’ Category

Rasse ki Ghuiyan aur Kheera (Taro & Cucumber Gravy)

Posted by vivnidhi on August 10, 2008

A_01

Cucumber and Taro root/Colocasia/Ghuiyan/Arbi

I am having a tough time describing ‘Rassa’ in English. I call it a gravy but rassa is not exactly a gravy.It is a thin watered down version of gravy.Another popular word for it in Hindi would be ‘jhol’.

As the title would suggest, this is not the sexiest of recipes.”Rasse ki Ghuiyan aur Kheera” is no competition to “Chhole” or “Rajma” or “Butter Chicken” & the spicy likes. But, on days when comfort food tops the list and one is tired of spicy food, this is what I make. The more I pay attention to what people are eating these days……I realize that simple, blandish food is not cooked in Indian homes anymore. I grew up eating the most bland and simple food in my house as I also previously mentioned……I used to be completely tired of bottle gourd, bitter gourd, cucumber, potato and hardly any spices…….. Spicy food was only made on weekends or if we had visitors. My parents have always been too careful of what they ate and the other reason was that my grandmother (who lived with us)did not even eat onions and garlic. So, it was plain food on the table every day. But nowadays I realize that I am done with enjoying the spicy food I missed and now I miss the simple dishes that my mother mostly served.

This recipe used to be a favorite of my grandmother who was quite a good cook. I didn’t see her cook too much but she was quite knowledgeable.

Colocasia or Ghuiyan in India can irritate the throat at times so it should be cooked well. In the USA though, I have not encountered the variety that causes the irritation. Though I think the taro I have mostly found here is much drier than the ones eaten in India. There are a lot of varieties of this starchy sticky root:). Cucumbers used for this can be the bigger ones too. Big cukes do not make flavorful salads but just fine in this recipe:) .  Please do not skip the carom seeds and dry mango powder in the recipe.

The recipe:

  • Cucumber 1 chopped
  • Taro root/Arbi/Ghuiyan 6-8 boiled, peeled and chopped
  • Vegetable Oil 1 tsp.
  • Carom seeds/Ajwain 1 tsp.
  • Asafoetida 1/4 tsp.
  • Cumin seeds/Jeera 1/4 tsp.
  • Turmeric /Haldi 1/2 tsp.
  • Red chilli powder 1/2 tsp.
  • Salt to taste
  • Dry mango powder/Amchur 1-2 Tbsp.

Boil the colocasia root in a pressure cooker till tender but not too mushy. One whistle would be enough. Peel it and chop.

Chop the cucumber. Discard the big seeds, if any.

A_05

Chopped Cucumber and Colocasia

Heat the pressure cooker and add oil to it. Add cumin seeds, asafoetida, carom seeds, turmeric and red chilli powder. When the mixture starts sizzling, add the chopped vegetables to it.

If you like a thicker gravy, saute the colocasia till you get a thin film at the bottom. Add 1 cup water. Traditionally, water is added right after the vegetables, cause the gravy is quite thin. Add salt and close the lid of the pressure. After 2 whistles, open the pressure cooker and add the amchur powder. Mix well. If you want a thicker gravy at this stage, a couple of pieces of colocasia can be mashed in the gravy. Adjust salt, chilli and amchur as per your taste.

Rasse ki Ghuiyan aur Kheera is ready. Hardly any fat and delicious. I must say that this is an acquired taste though. Its not spicy at all but quite tangy. My  son is fond of this vegetable precisely for this reason. Too easy to make and goes fabulously with paronthis/paranthas :). A side of greens or a salad with fresh paranthas would make a fabulous meal.

A_17

Rasse ki Ghuiyan aur Kheera

This is my contribution to  Cooking 4 all seasons, ‘Curry Mela’. Wonderful Srivalli is so great in hosting her melas that you just can’t miss it. So, here we come ‘Curry Mela’.

I would also like to contribute this recipe to ‘Eating with the Seasons- August’ hosted by Maninas: Food Matters. The seasonal item here is definitely the cucumber. If you have a bounty from your garden, this is the recipe:).

Posted in - Turmeric, -Asafoetida, -Carom seeds, -Colocasia, -Cucumber, -Cumin seeds, -Dry Mango Powder, -Red chili powder, The staple | Tagged: , | 6 Comments »

Daal ka Dulha

Posted by vivnidhi on April 23, 2008

Hi, Not that I have started looking for a dulha or groom for my daughter already. Daal ka dulha is the name of a favorite recipe of mine. After eating 3-4 types of pasta that I had been making for my mother, Mummy (with a smile) asked me if I had made daal ka dulha in the recent past? I had completely forgotten about daal ka dulha these years.

I mentioned pasta cause daal ka dulha comes closest to pasta in North Indian cuisine (of course leaving vermicelli aside). This recipe can also be called a very crude form of Daal bati……….but crude really:)).

100_1458

Daal ka Dulha

Recipe:

Initial tempering:

  • Oil 1/2 tsp
  • cumin seeds 1/2 tsp.
  • turmeric powder 1 tsp

For Daal:

  • Toor Daal 2 cups
  • Water 6 cups
  • sugar 1 tsp
  • salt to taste

For Dulha:(This is the ratio for making roti dough.About 1/10th is used to make the dulhas in the daal given)

  • Whole wheat flour 4 cups
  • water 1 3/4 cups
  • salt (optional)

Final tempering:

  • Oil (preferably ghee) 2 Tbsp
  • asafoetida 1 tsp
  • cumin seeds 1 Tbsp
  • red chilli powder 2 tsp

Ok, this is a quick, simple one. Begin by making plain simple toor daal as detailed in my everyday daal post Arhar daal.  That is : add the initial tempering, add daal ingredients and give two whistles in a pressure cooker.

Make the whole wheat dough (which is basically roti dough). The directions for making the dough is detailed  in  Beginning with the staple: The ROTI . The important part of this recipe is making the dulha. Take a small ball in the and thin it it out with fingers. One could use a rolling pin, but traditionally hands were used to flatten the dough ball. Once you have made it quite thin. Apply a dropful of ghee or oil in the center of the flattened disc. Bring  four ends of the disc together and pinch making a flower like shape.  The shape is very important as it allows the daal to seep in and soften the dulha. 6 to 8 dulhas can be made per person.

100_1452

When the cooker is safe to be opened, open the cooker cover. Add the dulhas  while the daal in the cooker is hot, otherwise the dulhas don’t soften properly. Close the pressure cooker and give two more whistles. When the pressure cooker is cool enough to be opened, add the final tempering. The plain daal also tastes more delicious than usual. One could try adding this in everyday daal to see if they like the taste of it before making a complete meal only of daal ka dulha.

And daal ka dulha is ready to be served. A drop of ghee in individual servings adds a lot of taste. Anybody fond of pasta should like this, though this is quite an old simple recipe concocted when women of the house would be in a hurry. There are other varieties of dulhas like stuffed about which I will post soon. This is the simplest form. This is also my entry in Lights Out, Knives Out event  hosted by Celine Asril. This is a great earth hour event in which no electricity is used in cooking. Well! in this recipe, no electricity is used (apart from using an electric stove) nor are any knives used:)

100_1458 .

Daal ka Dulha with pickle………..fabulous afternoon meal

Posted in -Arhar (Toor) Dal, -Whole wheat flour, Daal, The staple | Tagged: , | 13 Comments »

Moong Ki Daal

Posted by vivnidhi on January 9, 2008

Another addition to my staple meals. Washed Moong ki daal or Split green gram without skin was always sick peoples food for me as I was growing up. I wanted arhar/toor/pigeon pea lentils on my plate every afternoon. How boring can that be. Ah, but my Mother would make all varieties of lentils nevertheless and I had to eat or go hungry. Wonder when but I really started liking her version of moong daal by the time I was a teenager.

100-1157-thumb.jpg

Moong daal (washed), tomato and Coriander leaves

Very simple to make. This is my second entry to food during pregnancy hosted by simpeindianfood. Just hearsay maybe but after my son was born, I had eaten a lot of moong dal , just like soup to aid lactation. More than anything, it would help fill me up with something nutritious as I would be always hungry those days:).

The recipe:

  • Moong Daal 1 cup
  • Oil 1/2 tsp.
  • Cumin seeds/ Jeera 1/2 tsp.
  • Turmeric/Haldi 1/2 tsp.
  • Tomato 1 big chopped small
  • water 3 cups
  • Salt to taste

Tempering:

  • Asafoetida 1/4 tsp.
  • Cumin seeds 2 tsp.
  • Chilli powder 1/2 tsp.
  • Oil/Ghee 2 tsp.

Garnish:

  • Cilantro/Coriander/Dhaniya leaves 1/2 a bunch chopped fine

I always like to temper my daals before I put the daal in the pan. So first heat the 1/2  tsp. oil  in a pan and add cumin seeds and turmeric. Once they start to to brown a little, add the moong daal and 3 cups of water. Add the tomato and salt. Now cook the daal without covering for 30-40 min’s on medium flame. Keep stirring in between to avoid the daal from settling at the bottom and getting burnt. The idea is not to mush the daal too much and that is why its not covered. Daal when ready, is tender but not mashed and consistency is thin. In case the daal thickens, please add some water. This moong ki daal tastes great when it is of watery consistency.

The main thing is the final tempering. Heat oil or ghee (ah! if you can indulge;) ) and add 2 tsp. cumin seeds, chilli powder and asafoetida. Add it to the hot daal and cover the daal for a couple of minutes so that the vapors stay in the daal. Add coriander leaves and enjoy! Cilantro adds a lot of flavor to this daal.

100-1158-thumb.jpg

Moong ki Daal

Very simple to make but tastes really good. Moong ki daal goes best with hot fresh rotis and also with rice.

100-1163-thumb.jpg

Moong ki daal, mixed vegetables and roti……tasty, simple meal

This is the only way I enjoyed eating Moong ki daal until I came across Indira’s beerakayapesara-pappu-kootu. This is a very different taste of moong daal but delicious. So, go ahead and enjoy moong ki daal.

Posted in -Moong Daal, -Tomato, The staple | Tagged: , | 5 Comments »

New Year Shots and Rassedaar Lauki

Posted by vivnidhi on January 1, 2008

Its difficult to live in Michigan and not fall in love with nature. When we moved from the bay area in California to Michigan , it was scary. Most other students who were then leaving this beautiful University town would say that they are glad to leave the snow behind as they had grown tired of it. But three winters here and I still look forward to the ground turning pure white…….as if defining the color white for me. The trees still, frozen, laden with white. Let me not start poetry and prose here……..but its difficult you see……..

100_1173

100_1174

A lot of people can complain that so much snow isn’t really conducive to driving around and partying all night. But, we enjoyed a fantastic home made 6 course meal, good music and just being us in this lovely weather…..yay:)!!

Anyway…why am I digressing…………mine is a food blog! So, yesterday’s efforts at cooking left me a little exhausted today. Well! third trimester of pregnancy is certainly slowing me down a little now. So, this morning, I decided to indulge in easy, quick, pure comfort food for me………Rassedaar Lauki. The humble Opu (as called here in the USA) or bottle gourd does not get its due most often. We usually don’t make it for company……unless we make koftas out it and dress it in so much masala that lauki/ghiya gets lost somewhere. I have an unusual memory of Lauki, different from most people…….I think. My father has always been careful about what he ate and so rassedaar lauki would be made at least 2 times a week in my house. My mother would also find it very easy to cook when she would return from work. I would really get tired of eating it. Why is it that masala, onion, garlic is used so sparingly in my house……why is it like a Sunday treat. Today, I am grateful to my parents for helping me eat right. Now, I crave the same simple food after every heavy meal.

100_1175

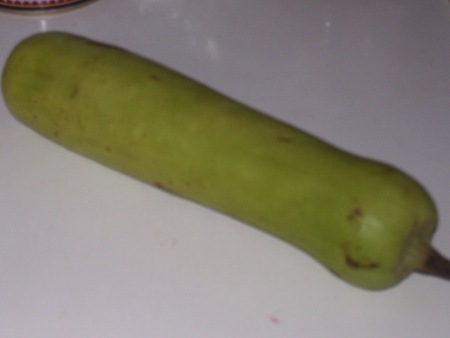
The humble Lauki/ Opu/Bottle Gourd

This is my first entry to food-during-pregnancy-event hosted by simpleindianfood. I think its quite an interesting concept……….specially for me, right. Everything I make should be included……..right:)) ? Bottle gourd is also good for pregnant women because of its high water and fiber content. It also helps in relieving constipation.

The Recipe:

  • Lauki/Bottle gourd/Opu 1 medium
  • Tomatoes 2 medium
  • Ginger root  1/2 tsp. minced (optional)
  • Oil 1/4 tsp.
  • Asafetida/Heeng 1/4 tsp.
  • Cumin seeds/Jeera 1/2 tsp.
  • Turmeric powder 1/2 tsp.
  • red chilli powder 1/4 tsp.
  • salt to taste.
  • Coriander/Cilantro leaves for garnish 1/2 bunch

Oh! What would I do without a pressure cooker? Ok, I can’t do much, I accept. This can be made in a wok/kadhai also but it would take a little longer to cook. In case, you have to use the wok, add tomatoes after the bottle gourd has softened.

Chop the opu and tomatoes. Heat the pressure cooker and add the oil to it. Add heeng, jeera, turmeric, red chilli powder and ginger. Let the cumin seeds pop a little and then add the chopped vegetables. Add salt to taste and two cups of water. Close the pressure cooker and let it work while you catch up on another food blog:). After two whistles, the bottle gourd is ready. Let the pressure cooker cool and then garnish the bottle gourd with lots of chopped cilantro leaves. You could adjust the amount of liquid in this stew to your liking but traditionally it has a fair amount of rassa (liquid). Its this easy to make it but the taste is really delicious. Traditionally, it goes best with hot paranthas but I like it with roti, rice or even plain.

100_1189

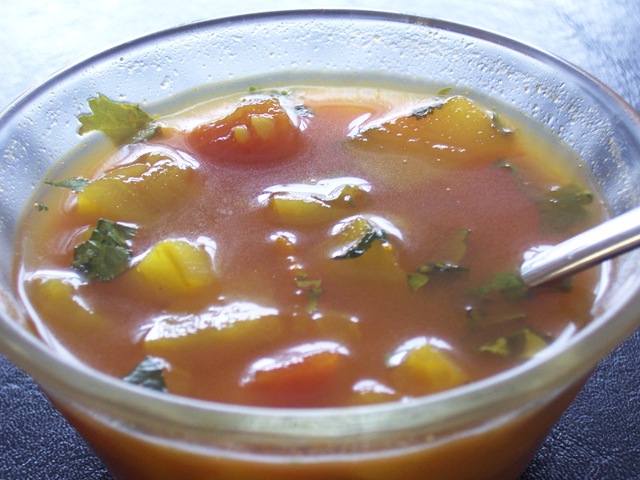
Rassedaar Lauki

Edit July 15 2008:
I tried but I could not get bottle gourd this month. I am submitting this posted recipe to Vegetable of the week-Bottle Gourd hosted by Pooja of My Creative Ideas. Thanks for the opportunity to resubmit Pooja.

Posted in -bottle gourd/Opu, -Tomato, Posted again, The staple | Tagged: , | 12 Comments »

The everyday Dal

Posted by vivnidhi on December 1, 2007

Presenting…..The everyday dal

Presenting……..the everyday dal

The first thing that comes to mind when I think of arhar (toor) dal is this everyday dal recipe. I have eaten it, in at least one meal for at least 60% of the days of my life………yeah that boring…………yet so intriguingly delicious that I still make it 4 days a week. So when I read about  Jihva for Toor dal , I thought I should muster courage  to post it for a fellow Michgander.

This recipe is of my favorite basic dal. Right from childhood, we are encouraged to eat the everyday dal in a big katora ( steel bowl) so that we vegetarians get our required amount of protein. I have read a lot of recipes of arhar dal on the internet but my version is the simplest,  emphasising the taste of the dal more than anything else. Even salt and red chilli are miserly used.  The most important thing is heeng (asafoetida), that is what imparts the most distinguishable taste to it.

Recipe:

Initial tempering:
oil 1/2 tsp
cumin seeds 1/2 tsp
turmeric powder 1 tsp

Toor dal 1 cup
water 3 cups
sugar 1/2 tsp
salt to taste

Final tempering
oil (preferably ghee)  2 tsp
asafoetida 1/4 tsp
cumin seeds 1 tsp
red chilli powder 1/2 tsp

The intial tempering ingredients are added directly to the pressure cooker. Once the cumin seeds start crackling, toor dal , water, salt and our secret ingredient: sugar is added.  The dal is then pressure cooked on low-medium heat for at least 45 mins or until 4 whistles, till the dal reaches the consistency of thick pumpkin soup. If the dal is too viscous, some water may be added to achieve the consisitency mentioned. Conversely, if the dal is thin, it can be heated further in an open cooker.

The most important step is the final tempering. In a separate small pan, ghee/ oil is heated. All the ingredients except red chilli powder are added to hot ghee/oil. The chilli powder is added at the end, after the cumin seeds have crackled. The tempering is then added to the dal in the pressure cooker and the lid is closed to retain the smell of the tempering.  And voila……our everyday dal is ready to be enjoyed with roti and rice.  Top it with good “danedaar ghee” and the day is made:)

100_1044.jpg

Our daily meal: Roti, dal, vegetables and yogurt

Posted in -Arhar (Toor) Dal, The staple | Tagged: , | 7 Comments »

Beginning with the staple: The ROTI

Posted by vivnidhi on November 19, 2007

My first post. Starting with the very basic……the staple in our house. Carb watching for me and cholesterol watching for my husband has already led to the roti being the only flour preparation made everyday. Paranthas, naans, all are enjoyed only rarely, when we like to treat ourselves.

100_10321.jpg

Hot Rotis stay fresh in aluminum foil

Rotis or phulkas need no introduction whatsoever. But the art of making them is really THE skill to know in the chauka (kitchen).  It used to be an accomplishment when my roti too would puff like my Mom’s. Her standards are still too high for me. If left on my own, I would make my family members eat all the rotis I made till they got to eat the properly puffed up one (which would be rare.)

That changed after marriage when I would quietly eat all the messed up ones or the ones which were charred and give only soft puffed up ones to my husband. So, even though I could make rotis in India, making them in the U.S. required another set of skills as we had an electric stove in our apartment. I can’t wait to see my mother struggle with her first couple of rotis when she comes here……..mean, I know, yet I am amused, even by that thought.

First, one needs whole wheat flour. Durum flour is a complete no no as far as I am concerned if one really wants soft which also stay soft until the next day. Sujata is the only brand I get here in Indian grocery stores although Pillsbury is as good.

Next you need a griddle, metal mesh (to prevent the roti from burning on electric coil) and a rolling pin.

Recipe:

4 cups flour

1 3/4 cups water

That’s it, yes. I don’t add salt cause I have always eaten roti this way. Enjoy the basic wheat taste. For the dough, I use a big plate with raised edges….called ‘paraat’ in India but I guess any vessel with high edges can be used. Spread the dry wheat flour in the plate and I sprinkle half the amount of water in the flour. Using circular motion of my hands, I try to wet all the flour. Then I start gathering the flour together and keep sprinkling more water as needed. After the dough gets together, hands’ knuckles and the small of the palm is used. 2-3 oz of extra water may be used during the process of kneading, if one finds it comfortable. A clean plate is a sign of just the right dough. If by chance, it gets very sticky, more dry flour needs to be added.  The softer the dough, the better, I just make sure that it can be rolled properly. Punching the dough well with hands and using the knuckles also helps.  A drop of oil is spread in the plate in the end and the dough is kneaded on it till it absorbs all oil. The dough is ready.I make a fair amount of dough  and keep it in the refrigerator and it lasts me for about 4 days. It does change color and become darker but the rotis come out just as good.

100_0997.jpgv

Roti dough with dry flour for dusting.

100_0999.jpg

Divide the dough into equal rounds. Here’s my 2 year old trying to help me out.

100_1000.jpg

Smaller rounds make thin phulkas ..closer to perfect. Dust the round with dry flour and begin rolling using a rolling pin on a flat surface.

100_1001.jpg

Uniform thickness of the rolled out roti is the key to it being puffed up later. Try to roll out away from the center of the ball.  Make sure that the edges are of the same thickness as the center after the roti is rolled out completely.

100_1002.jpg

I try making a thin round; one can suit one’s taste

100_1003.jpg

I keep the metal mesh under the griddle so that it heats up sufficiently as well. The griddle is heated before one starts rolling out the dough round. If the roti sticks on the griddle, then the griddle is too hot, reduce the heat. If the griddle is not hot enough, the surface visible will take longer to develop bubbles. Usually the burner stays on maximum heat when I make rotis, reducing it in between if the next roti is not rolled out already.

100_1006.jpg

Once some bubbles seem to develop on the underside of the roti on the griddle, it is turned over. Tongs can be used for this but hands work as well. This is the first turn.

100_1029.jpg

This is after the first turn. Its fine if you if it does not get this brown.

100_1009.jpg

Using the smaller burner helps. Next the griddle is removed and the roti is directly put on the wire mesh. Elevate the wire mesh after putting the roti on it. The heat has to be at the maximum when I put the roti directly on the coil.  Give the roti a jump and flip it over if it is not puffed up fully. Both sides need to get a few brown spots. 100_1030.jpg

The Phulka’s ready!!

Similar procedure can be used for making rotis on gas stoves. http://www.ifood.tv/recipe/roti is a good video through wikipedia.

Posted in -Whole wheat flour, The staple | Tagged: , , | 15 Comments »