


Yaay! I can make neat Potstickers too!
Those who have read my earlier post know that I am late in posting about practically all the posts for the past two months. OK, enough of apologizing. Lost time can’t be brought back again but I can try to learn (Oh yeah………. 😉 )
The reason these potstickers are late is that I experimented a lot with these. Since I first ate the vegetarian gyozas that Trader Joe’s sells, I have been hooked. I remember telling the husband very comfortably……I can make these as he was trying to pick up the last TJ’s one off my plate too. I generously handed the last gyoza to him and said to myself, “shouldn’t be a big deal really”. Before I could fully make a plan about these gyozas, Jen from use real butter announced that the Daring cook challenge as Potstickers. I was very excited (shows when I don’t post on time, right 😉 ).
Anyway, the bigger challenge these days is posting , not making.
Let me start with saying, I have made it four times now (very unusual for me, I hate repeating) and don’t think my stint with gyozas ends here. I only repeat recipes which I am trying to master…….say Idlis………and now potstickers :-). How do people write recipe books, how many times do they test?
Round 1: Stuffed whatever I had on hand, forgot soy sauce and cornstarch. You bet………..it tasted great…….I was the only one who ate 🙂 .
Round 2: A planned visit to the Asian store, bought garlic chives, tofu etc…….pantry equipped. Even though I baked the tofu and drained it well, I found the end stuffing mixture to be quite wet. This resulted in not well shaped gyozas. Anyway, tasted great, got a pat on the back 🙂
Round 3: Cooked the stuffing up, mixed it with some finely chopped veggie burgers (this was for something else) but ended up in potstickers. Husband said, I liked round 2 better.
Round 4: This time, I was dead sure of what I wanted to do………everything in place……….yet the husband said…….round 2 was better…………and boo hoo hoo ……..he is right.
Round 5: Got filled with coconut fudge and some also had chocolate ganache filling , and topped with powdered sugar…Yes, I was cleaning the freezer which is filled with small tit-bits.
Here’s the recipe with my vegetarian filling and the best proportions *(these matter….all I had wrong in round 4 was a little extra daikon radish ):
Jen says “It’s a basic concept: a filling inside a dough wrapper, sealed, and cooked. This delicious theme runs through many cultures and is among the more popular bites at Chinese restaurants – especially dim sum. “
The process goes a little like this:
You can (and should) reference instructional photos and discussion on Jen’s blog post here.
Wrappers: Well yes, you could purchase pre-made dumpling wrappers at the store (NO WONTON WRAPPERS – they have egg), but they are inferior compared to homemade. The whole point of this challenge is to make the dumpling wrappers by hand. So here is the one requirement: the dumpling wrappers must be made by hand. It isn’t all that hard, it just takes a little time and practice. People usually get the hang of it after making about a dozen.
Fillings: the beauty of the Chinese dumpling/potsticker is that the filling is very versatile. That’s why there are so many different kinds of dumplings when you go to dim sum. The two most common are pork and shrimp. You can make them with other ground meats (beef, chicken…) or vegetarian (tofu, mushrooms, bamboo shoots, water chestnuts, glass noodles, Chinese chives – oh yum!). The important thing to keep in mind is that the filling needs to “stick” to itself or else you will make your life incredibly miserable wrapping up filling that keeps falling apart. I think if I were to make vegetarian dumplings, I would sauté the cabbage and mash up the tofu for a better cohesiveness. It’s up to you how you want to fill your dumplings and I say – run with it! Just keep it cohesive and no big chunks of hard ingredients (they poke through the wrapper dough = disaster). I realize it may be tempting to dump all of the vegetables into a food processor and give it a whir, but I caution against it. You don’t want a slurry, you want a mince. Practice your knife skills and be careful.
Special Equipment: A rolling pin – preferably not tapered. (see blog pictures for the type I use).
Time: Prep for the filling takes me 30 minutes – longer if peeling and de-veining shrimp. It will depend on your proficiency with a good sharp knife. Rolling and wrapping several dozen dumplings takes me 1 hour by myself. My parents can crank through it in 30 minutes when one person is rolling wrappers and the other is wrapping dumplings. Might be fun to get a second person to help! Cooking: I have to cook mine in batches. When steaming, I can cook a dozen at a time in about 10 minutes. Potstickers: 15 minutes per 2 dozen determined by the size of your pan. Boiling – 6 minutes per dozen or so depending on size of pot. My own personal preference is for potstickers – mmmmm! But they are ALL good.
The Recipe:
Dough:
- 2 cups (250g) all-purpose flour
1/2 cup (113g) warm water
flour for worksurface
Make the dough, Method 1: Place the flour in the work bowl of a food processor with the dough blade. Run the processor and pour the warm water in until incorporated. Pour the contents into a sturdy bowl or onto a work surface and knead until uniform and smooth. The dough should be firm and silky to the touch and not sticky.[Note: it’s better to have a moist dough and have to incorporate more flour than to have a dry and pilling dough and have to incorporate more water).
Make the dough, Method 2 (my mom’s instructions): In a large bowl mix flour with 1/4 cup of water and stir until water is absorbed. Continue adding water one teaspoon at a time and mixing thoroughly until dough pulls away from sides of bowl. We want a firm dough that is barely sticky to the touch.
Both dough methods: Knead the dough about twenty strokes then cover with a damp towel for 15 minutes. Take the dough and form a flattened dome. Cut into strips about 1 1/2 to 2 inches wide. Shape the strips into rounded long cylinders. On a floured surface, cut the strips into 3/4 inch pieces. Press palm down on each piece to form a flat circle (you can shape the corners in with your fingers). With a rolling pin, roll out a circular wrapper from each flat disc. Take care not to roll out too thin or the dumplings will break during cooking – about 1/16th inch. Leave the centers slightly thicker than the edges. Place a tablespoon of filling in the center of each wrapper and fold the dough in half, pleating the edges along one side (see images in Jen’s post for how to fold pleats). Keep all unused dough under damp cloth.

The dough, even though feels very dry….just let it rest ;-)…..this is after the rest

Dough cut into 5 pieces

The cut portion of the dough is rolled into a thinner round and cut further. Good idea to cut it bigger than I am showing here. This was my first attempt.
- Vegetarian filling:
2 carrots minced - 4 large napa cabbage leaves, minced
3 stalks green onions, minced
6 cloves garlic - 1/4 bunch Chinese chives/garlic chives minced
- 1 medium red onion minced
1/2 cup Daikon radish peeled and minced (lesser than shown in picture below)
1/4 cup ginger root, minced - 1 cup tofu (baked in oven at 400F for 15 minutes) mashed (optional)
- 2 Tbsp. sugar
3 Tbsp (40g) soy sauce
2 Tbsp (28g) sesame oil
6 Tbsp (16g) corn starch
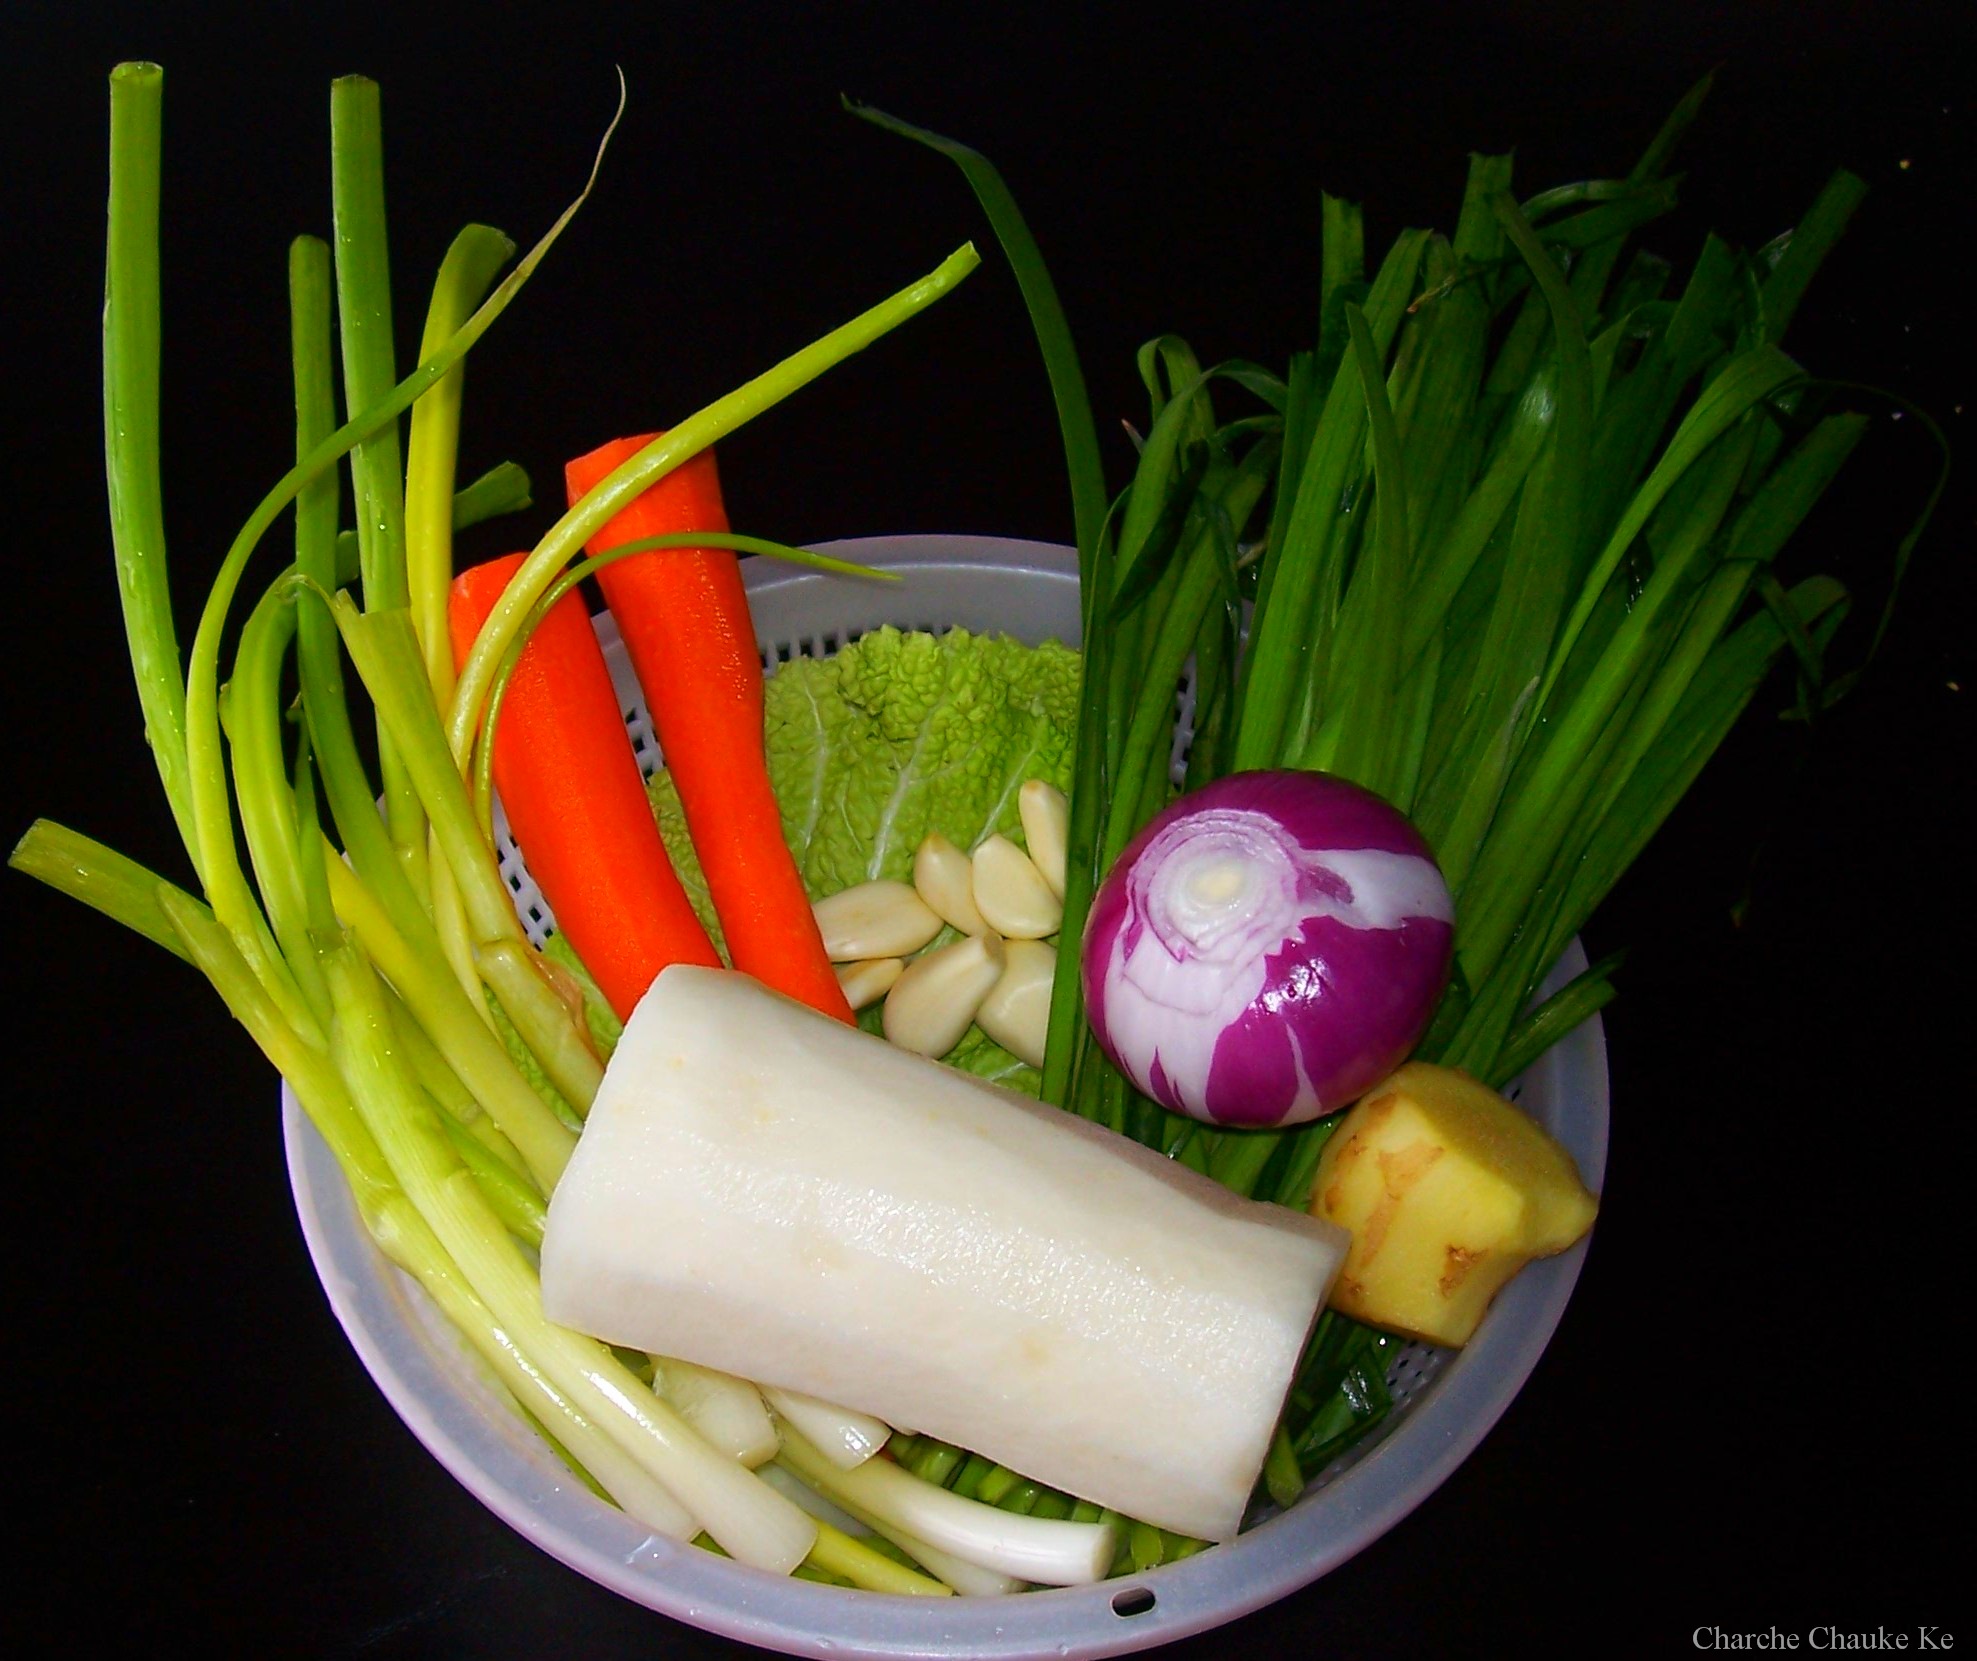
Finally some color……spring onion, carrots, napa cabbage, garlic, garlic chives, red onion,ginger and daikon radish
Even though Jen asks to mince the veggies by hand, I chose to use the food processor………and was I glad I did ;-). Mince these veggies and drain the water by pressing with hands. Add the sugar, soy sauce, sesame oil and corn starch.
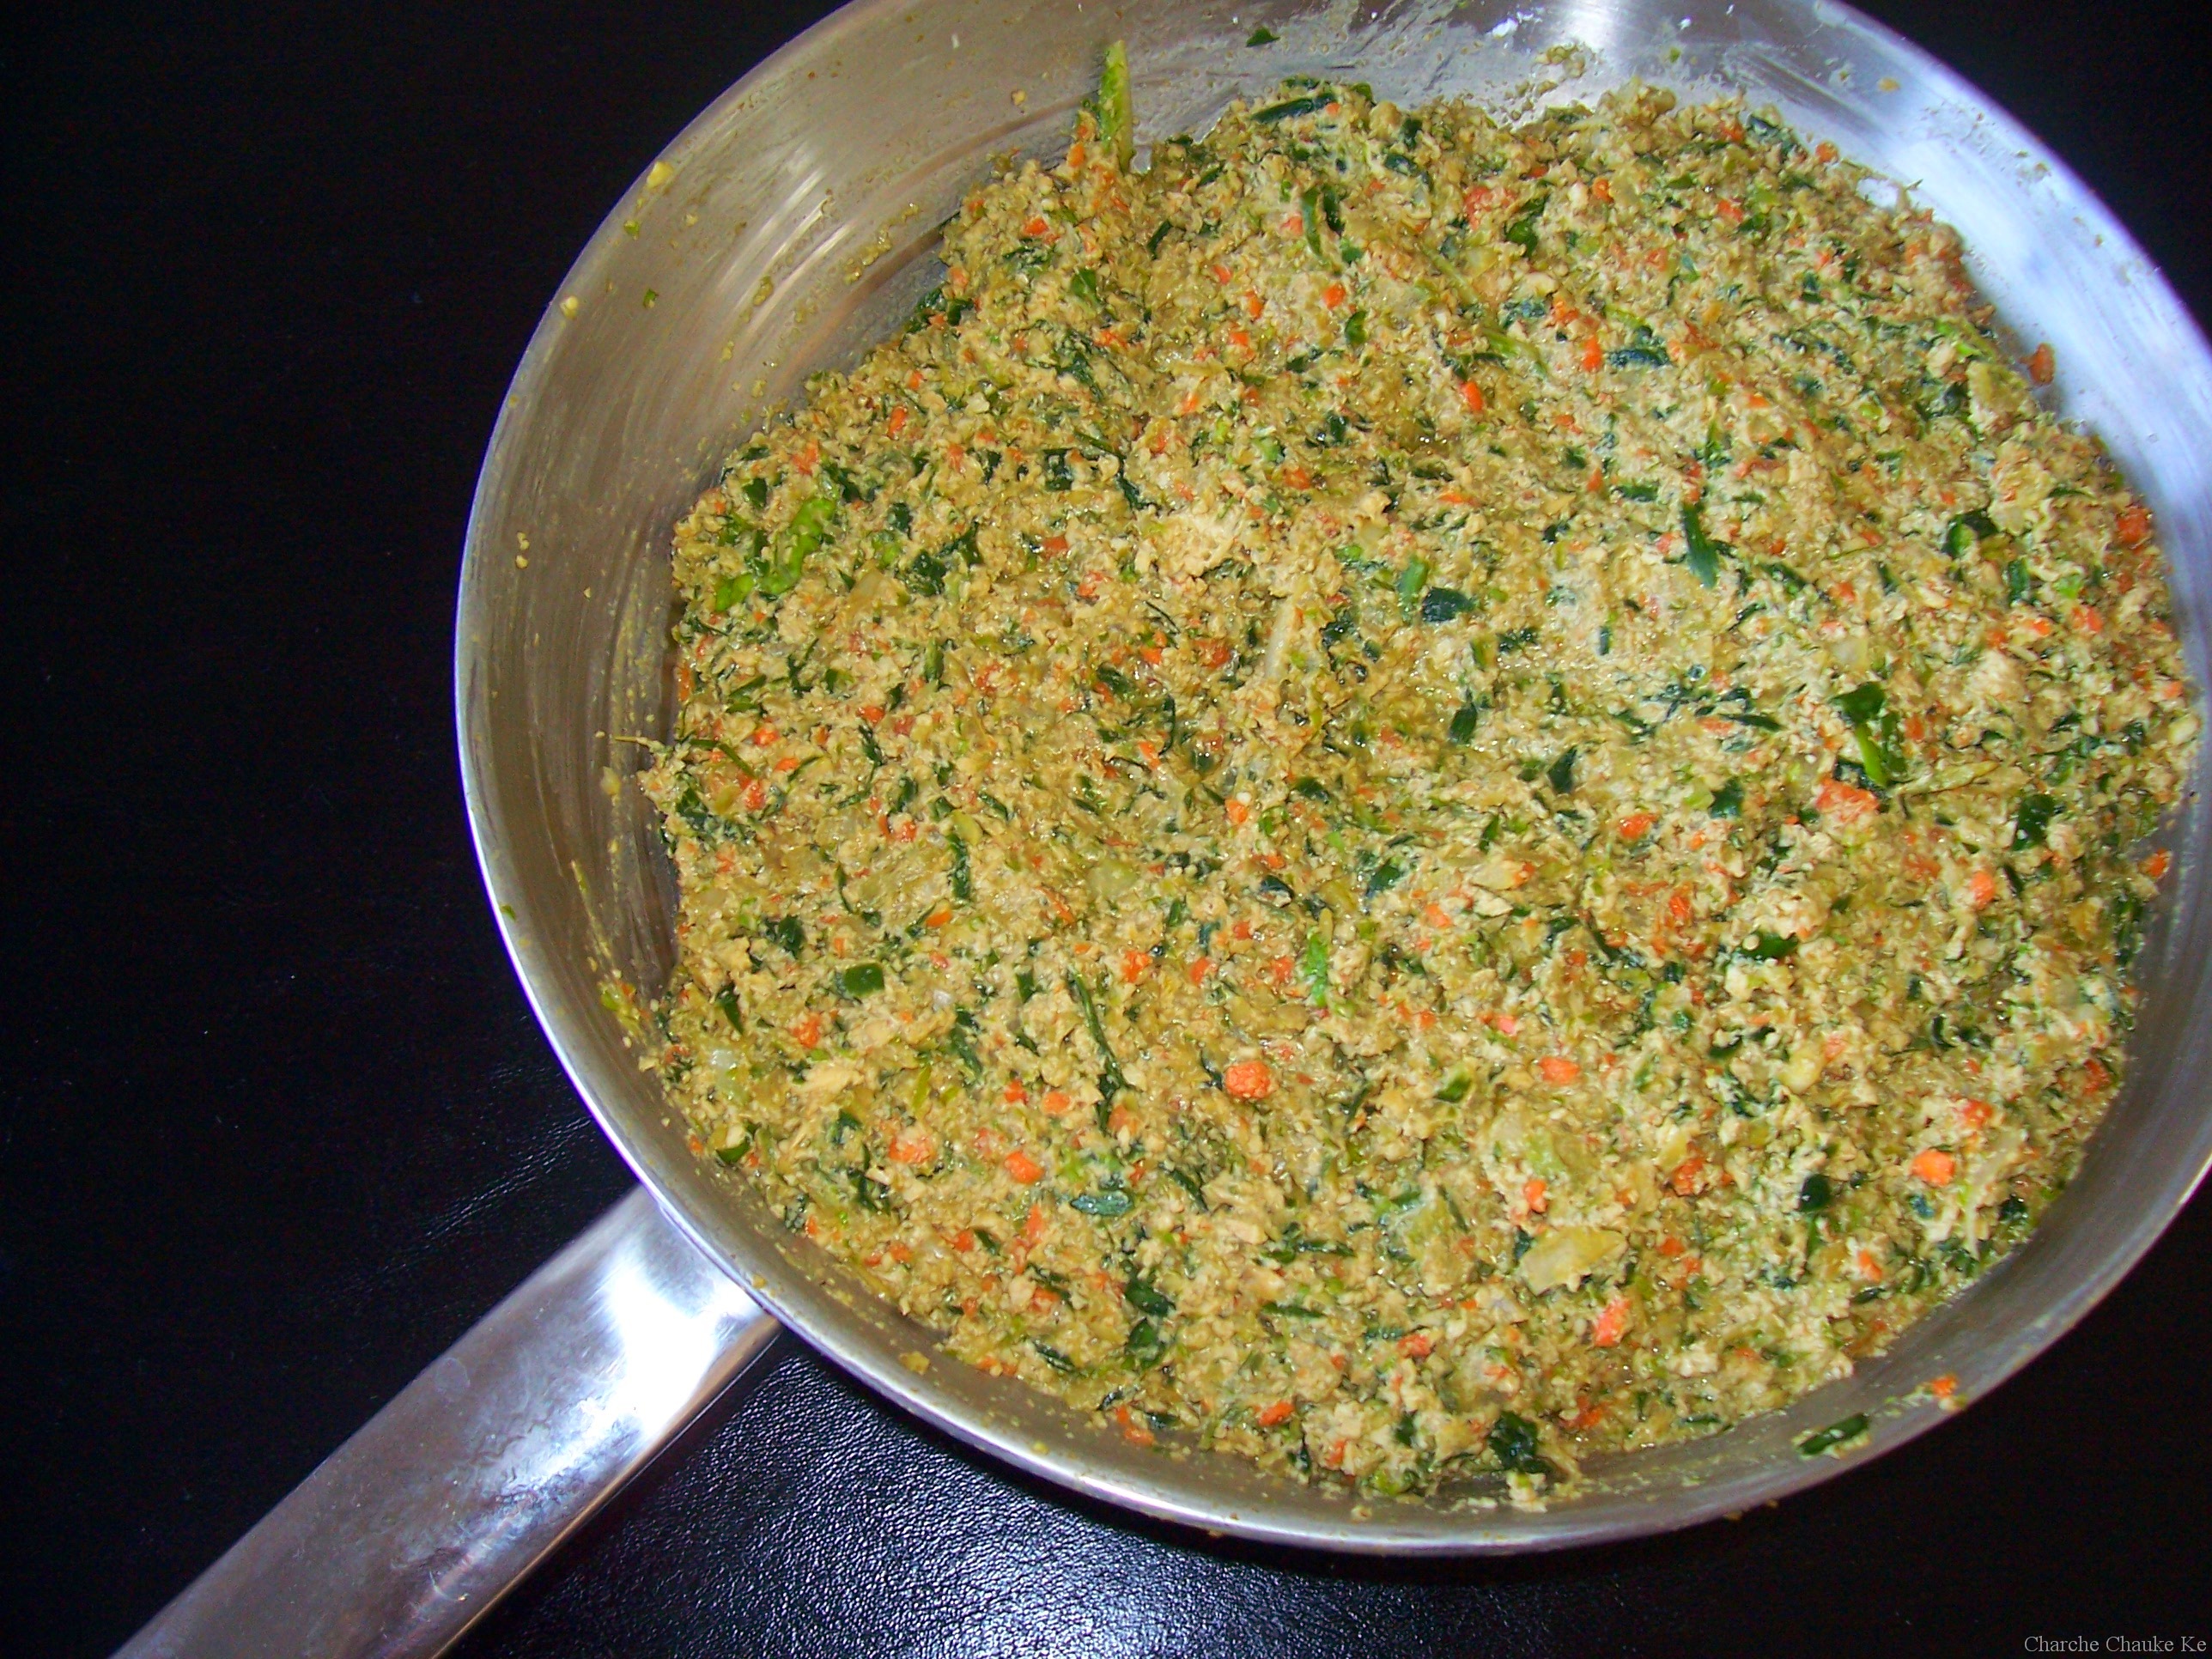
Vegetarian filling
- dipping sauce:
2 parts soy sauce
1 part vinegar (red wine or black)
a few drops of sesame oil
chili garlic paste (optional)
minced ginger (optional)
minced garlic (optional)
minced green onion (optional)
sugar (optional)
To boil: Bring a large pot of water to a boil and add dumplings to pot. Boil the dumplings until they float.
To steam: Place dumplings on a single layer of napa cabbage leaves or on a well-greased surface in a steamer basket with lid. Steam covered for about 6 minutes.
To pan fry (potstickers): Place dumplings in a frying pan with 2-3 tbsp of vegetable oil. Heat on high and fry for a few minutes until bottoms are golden. Add 1/2 cup water and cover. Cook until the water has boiled away and then uncover and reduce heat to medium or medium low. Let the dumplings cook for another 2 minutes then remove from heat and serve.
To freeze: Assemble dumplings on a baking sheet so they are not touching. It helps to rub the base of the dumpling in a little flour before setting on the baking sheet for ease of release. Freeze for 20-30 minutes until dumplings are no longer soft. Place in ziploc bag and freeze for up to a couple of months. Prepare per the above instructions, but allow extra time to ensure the filling is thoroughly cooked.
To serve: Serve dumplings or potstickers hot with your choice of dipping sauce combinations.
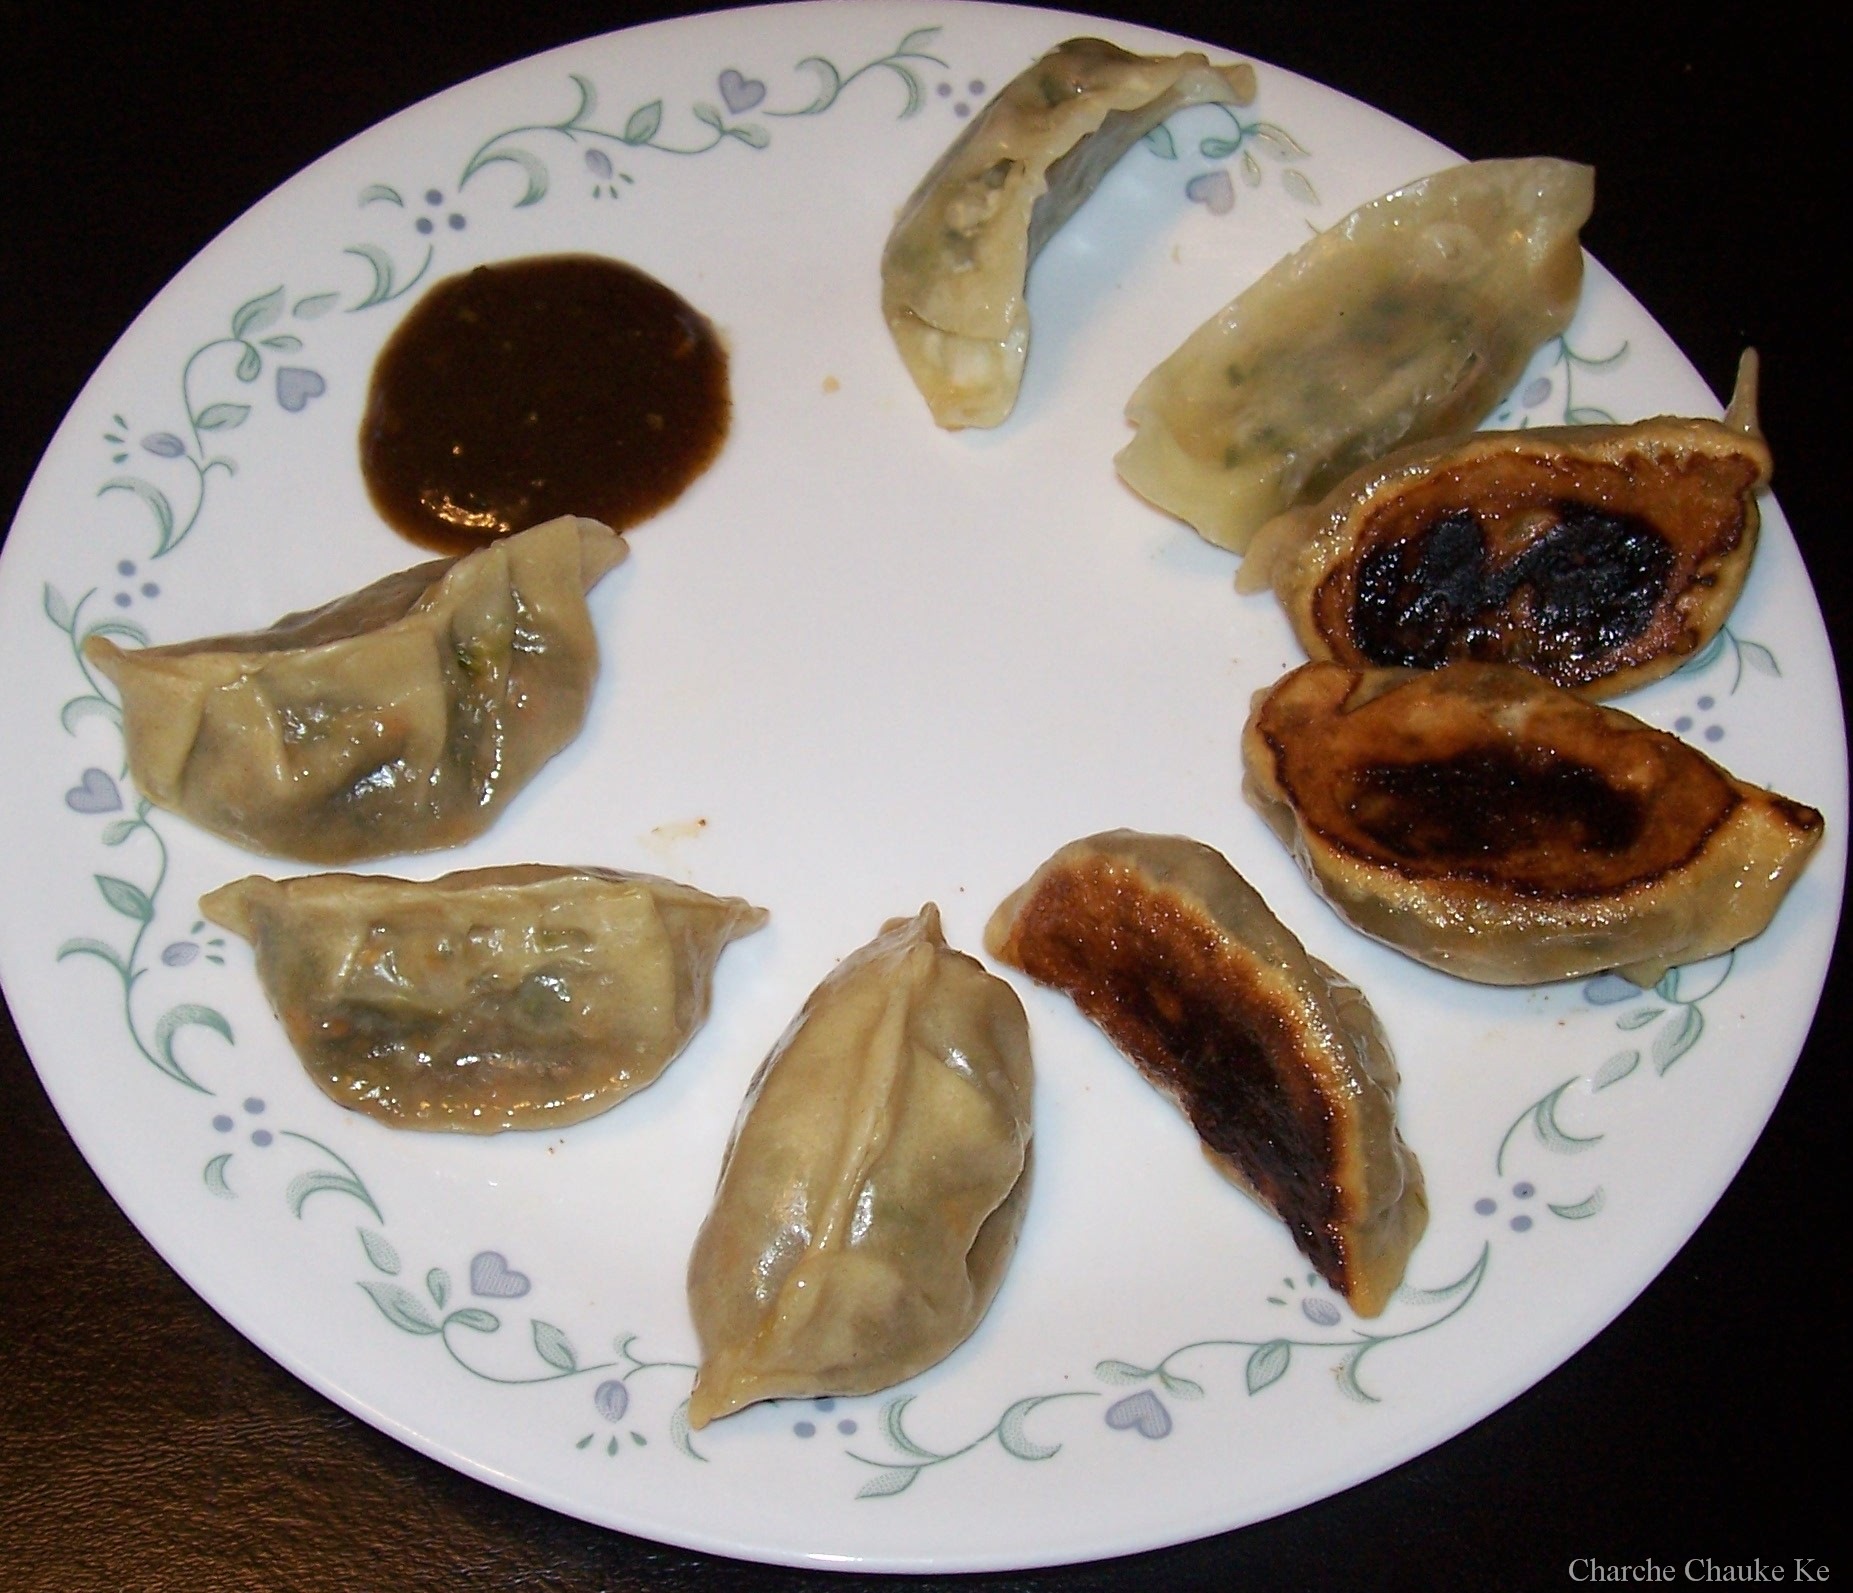

Pan fried is the way to go for us: these look darker than they actually were ….trust me, these are delicious

Ah…..my black background
One more pic and the one with the coconut fudge filling (tasted like modaks :-)) )


 hosted by