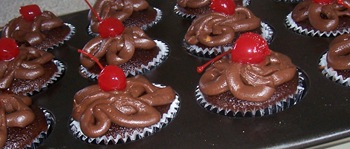
चर्चे चौके के Charche Chauke Ke

Hey! Join in the Kitchen Gossip!!

Archive for the ‘Chocolate’ Category

Daring Bakers 2010 : Nanaimo Bars

Posted by vivnidhi on January 27, 2010

jan_66

Nanaimo Bars

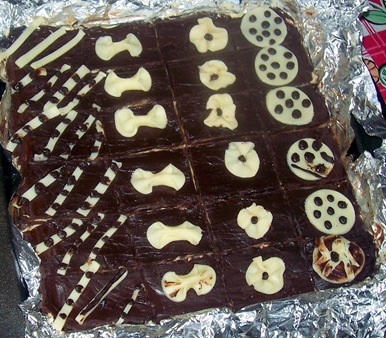
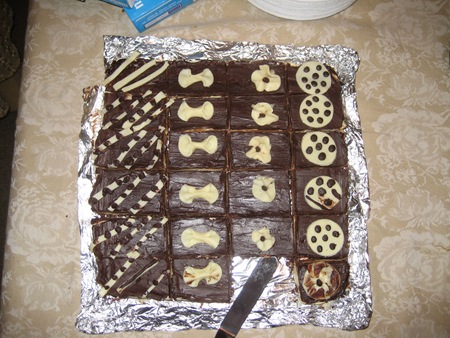
This is the only picture I was able to take…..took them to a friend’s potluck and forgot to take photos

All the Daring Bakers are headed to Canada for winter Olympics. Of course, I can’t fool you….no……we are not going….just celebrating 😉 by making nanaimo bars. OK, I also had never heard of these until………..”The January 2010 Daring Bakers’ challenge was hosted by Lauren of Celiac Teen. Lauren chose Gluten-Free Graham Wafers and Nanaimo Bars as the challenge for the month.”

Nanaimo Bars are a classic Canadian dessert created in none other than Nanaimo, British Colombia. In case you were wondering, it’s pronounced Nah-nye-Moh. These bars have 3 layers: a base containing graham crackers, cocoa, coconut and nuts, a middle custard layer, and a topping of chocolate. They are extremely rich and available almost everywhere across the country.

Lauren wanted us to bake the Graham Crackers gluten free. I used all  whole wheat pastry flour (atta) instead of the gluten free flours as I am too lazy. These are absolutely divine. You will not want to buy store bought after trying these out. Superlative praises for these graham crackers. I stopped buying Indian Glucose biscuits long long back because of Trans fats. These graham crackers will certainly fill that craving. Please visit Celiac Teen or the other daring bakers this month for some great gluten free versions.

Recipe Source: Graham Wafers — 101 Cookbooks (http://www.101cookbooks.com/archives/000126.html) I adapted it to be gluten-free. The adapted recipe is below.
Nanaimo Bars — City of Nanaimo (http://www.nanaimo.ca/EN/main/visitors/NanaimoBars.html)

The Recipe:

Preparation time:
• Graham Wafers: 30 to 45 minutes total active prep, 2 ½ hours to overnight and 45 minutes inactive prep.
• Nanaimo Bars: 30 minutes.

Equipment required:
• Food Processor
• Bowls
• Parchment paper or silpats
• Cookie sheets
• Double boiler or pot and heatproof bowl
• 8 by 8 inch square pan
• Hand mixer or stand mixer (You may use a wooden spoon, but this makes it much easier!)
• Saucepan

  • For  Graham Wafers
    Ingredients
    2 1/2 cups + 2 Tbsp. Whole wheat pastry flour (atta)
    1 cup (200 g) (7.1 ounces) Dark Brown Sugar, Lightly packed
    1 teaspoon (5 mL) Baking soda
    3/4 teaspoon (4 mL ) Kosher Salt
    7 tablespoons (100 g) (3 ½ ounces) Unsalted Butter (Cut into 1-inch cubes and frozen)
    2 Tbsp. Honey, Mild-flavored such as clover.
  • 3 Tbsp. Molasses
    5 tablespoons (75 mL) Whole Milk
    2 tablespoons (30 mL) Pure Vanilla Extract

Directions:
1. In the bowl of a food processor fitted with a steel blade, combine the flours, brown sugar, baking soda, and salt. Pulse on low to incorporate. Add the butter and pulse on and off, until the mixture is the consistency of a coarse meal. If making by hand, combine aforementioned dry ingredients with a whisk, then cut in butter until you have a coarse meal. No chunks of butter should be visible.
2. In a small bowl or liquid measuring cup, whisk together the honey, molasses, milk and vanilla. Add to the flour mixture until the dough barely comes together. It will be very soft and sticky.
3. Turn the dough onto a surface well-floured with atta and pat the dough into a rectangle about 1 inch thick. Wrap in plastic and chill until firm, about 2 hours, or overnight.
4. Divide the dough in half and return one half to the refrigerator. Sift an even layer of whole wheat pastry flour onto the work surface and roll the dough into a long rectangle, about 1/8 inch thick. The dough will be quite sticky, so flour as necessary. Cut into 4 by 4 inch squares. Gather the scraps together and set aside. Place wafers on one or two parchment-lined baking sheets. Chill until firm, about 30 to 45 minutes. Repeat with the second batch of dough.
5. Adjust the rack to the upper and lower positions and preheat oven to 350 degrees Fahrenheit (180 degrees Celsius).
6. Gather the scraps together into a ball, chill until firm, and reroll. Dust the surface with more flour and roll out the dough to get a couple more wafers.
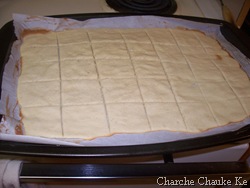
7. Prick the wafers with toothpick or fork, not all the way through, in two or more rows.
8. Bake for 25 minutes, until browned and slightly firm to the touch, rotating sheets halfway through to ensure even baking. Might take less, and the starting location of each sheet may determine its required time. The ones that started on the bottom browned faster.
9. When cooled completely, place enough wafers in food processor to make 1 ¼ cups (300 mL) of crumbs. Another way to do this is to place in a large ziplock bag, force all air out and smash with a rolling pin until wafers are crumbs.

jan_70

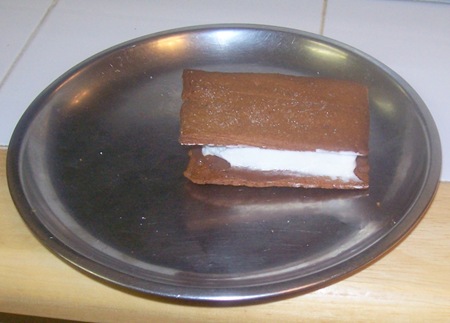
Graham Crackers

jan_74

We loved our graham crackers with some nutella and whipped topping……….Husband can’t have enough of it 🙂

Nanaimo Bars
Ingredients:

For Nanaimo Bars — Bottom Layer
1/2 cup (115 g) (4 ounces) Unsalted Butter
1/4 cup (50 g) (1.8 ounces) Granulated Sugar
5 tablespoons (75 mL) Unsweetened Cocoa
1 Large Egg, Beaten
1 1/4 cups (300 mL) (160 g) (5.6 ounces) Graham Wafer Crumbs (See previous recipe)
1/2 cup (55 g) (1.9 ounces) Almonds (Any type, Finely chopped)
1 cup (130 g) (4.5 ounces) Coconut  unsweetened

For Nanaimo Bars — Middle Layer
1/2 cup (115 g) (4 ounces) Unsalted Butter
2 tablespoons and 2 teaspoons (40 mL) Heavy Cream
2 tablespoons (30 mL) Vanilla Custard Powder (Such as Bird’s. Vanilla pudding mix may be substituted.)
2 cups (254 g) (8.9 ounces) Icing Sugar

For Nanaimo Bars — Top Layer
4 ounces (115 g) Semi-sweet chocolate
2 tablespoons (28 g) (1 ounce) Unsalted Butter

Directions:
1. For bottom Layer: Melt unsalted butter, sugar and cocoa in top of a double boiler. Add egg and stir to cook and thicken. Remove from heat. Stir in crumbs, nuts and coconut. Press firmly into an ungreased 8 by 8 inch pan.
2. For Middle Layer: Cream butter, cream, custard powder, and icing sugar together well. Beat until light in colour. Spread over bottom layer.
3. For Top Layer: Melt chocolate and unsalted butter over low heat. Cool. Once cool, pour over middle layer and chill.

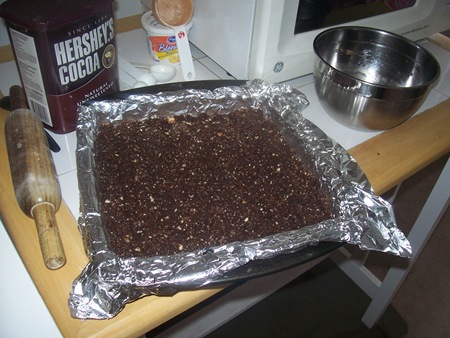
jan_64

Making of the Nanaimo Bar………bottom layer

(This is the only photograph I have :-)) )

——————————-

My Tweaks to the recipe:

  1. Used whole wheat pastry flour (atta) for the crackers.
  2. Substituted molasses for some  honey as I was out of honey.
  3. I made double the middle layer (mistake..) and double the chocolate (bring on more 🙂 )

Additional Information:

These bars freeze very well, so don’t be afraid to pop some into the freezer.

The graham wafers may be kept in an airtight container for up to 2 weeks. Mine lasted about that long.

If making the graham crackers with wheat, replace the gluten-free flours (tapioca starch, sweet rice flour, and sorghum flour) with 2 ½ cups plus 2 tbsp of all-purpose wheat flour, or wheat pastry flour. Watch the wheat-based graham wafers very closely in the oven, as they bake faster than the gluten-free ones, sometimes only 12 minutes OR even 10.

For the Nanaimo Bars, if making with wheat, replace the gluten-free graham wafer crumbs with equal parts wheat graham wafer crumbs!

Information on Celiac Disease: http://www.mayoclinic.com/health/celiac-disease/DS00319

Information on Vancouver 2010: http://www.vancouver2010.com/

City of Nanaimo: http://www.nanaimo.ca/EN/index.html

Gluten Free Flour Information: http://glutenfreemommy.com/gluten-free-grains-101-the-best-flour-blend/

Video on making Nanaimo bars: http://www.youtube.com/watch?v=x5aqa6R1jIM&feature=fvsr

Recipe and video for Vegan Nanaimo Bars (you didn’t think I’d leave you guys out?): http://www.everydaydish.tv/index.php?page=recipe&recipe=159

Recipe for gluten-free and vegan Graham Wafers: http://www.thesensitivepantry.com/the-sensitive-pantry/2009/8/3/grahams-…


Nanaimo bars disappointed me because of the middle layer. A bit too sweet. I will try other buttercreams or some custard as filling the next time. The husband was pretty impressed with the texture of the middle layer though and wanted me to just follow the recipe and make the amount of filling given.

For the funny attempts at decorating. I used plastic chocolate. I will post the plastic chocolate recipe separately later.

It’s after ages I am posting a daring baker challenge on time. I also hope that I shall continue to do so in the coming months and blog a little more….I have dozens of posts half written which have not yet made it to the blog.

Expenditure:

Heavy Whipping Cream 1/2 pint ……….$1.99………….from Meijer

———————————————————————————————

Total………………………………………$1.99

IMG_1344

I just received this photo…..it certainly looks better than the first

Posted in - Confectioner's Sugar, -Almonds, -Butter, -Coconut, -Cream, -Dark Brown sugar, -Honey, -Molasses, -Semisweet Chocolate, -Vanilla, -Whole Wheat Pastry flour, Baking Soda, Daring Bakers, Eggs, Milk, Sugar, Vanilla Pudding mix | Tagged: , , , | 4 Comments »

Chef Joey’s Cupcake Creations

Posted by vivnidhi on November 1, 2009

We all  try to involve the kids in the kitchen activities but all of us Moms and Dads who have been putting off baking with kids…get Chef Joey’s Cupcake Creations. Illustrations by Jason Hutton make for a great visual appeal. All the kids will want to turn into a chef as the book is about Joey who was born an amazing chef 🙂 .

This book is baked up by Brenda Tuttle who along with her husband Joe were chefs and have now transitioned to food sales. The book also comes with an audio book download but I could not access it since it is still unavailable.

I have a 4 year old son and a 1 1/2 year old daughter. The illustrations are so enticing that my daughter likes to carry the book everywhere she goes. I wish it was a board book cause I do not think that this book will be able to last long with my daughter’s use. The book is about a very young chef Joey who bakes up cupcakes. This book  is an activity book in which there is no real recipe. The recipe is from the back of a chocolate cake mix and the frosting’s recipe is the true sugary stuff that the kids thoroughly enjoy :-).

sep_07

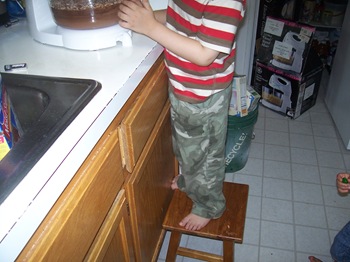
We completed this project when my son baked up cupcakes for a potluck with families at his preschool. I dare not use my own chocolate cake mix cause he made sure that he shop with me for the cake mix. We indeed had fun preparing the cupcakes. The sonny boy could not believe that he was allowed to stand so close to the mixer and feel like he is mixing 🙂 .

Everything was close to perfect (exactly matching what the book contained ) until the cupcakes came out of the oven. I showed them to him as they came out and then told him that they were really hot and he should stay away.  I placed them on the counter as I always do. My curious George could not contain his excitement and keep his eyes away from his creations. He got on a stool and got a neat burn on his chin which resembles a goatee !. Ouch! it hurt and…..one more (and probably most important) lesson learnt. I was quite upset with myself for undertaking this project in the first place and then being careless…….but I guess this is also a part of being a Mom. Ouch happens and soon it does not hurt that much 🙂 .

sep_10

I had been not sure of the frosting with 3 cups of powdered sugar yet it came out well. I then realized the power of sugar and how much kids adore it :-). Everybody at the preschool loved the cupcakes (although deep inside me, I thought of them as cardboard cupcakes ;-)….I know, I learnt my lessons too) and I also concurred that the cupcakes were indeed moist 🙂 .

crsep_30

The pride that the boy felt when his friends and their parents picked his cupcake was enormous. He felt really happy and proud. That warmed my heart.  I like to call this entire book a cupcake project and this was totally worth it when I saw my son beaming at the preschool potluck. What I found genuinely lacking was the absence of the word of caution. I know, I know ………not just because the boy got burnt but in general I have found that the written word has a greater effect on kids. When there is no real recipe as such and its all about kids and the book is more about an activity….I wonder why the regular warnings were not mentioned. All the book says is …….”Chef Joey encourages you to find an adult to help you to make these cupcakes”. The regular general notes about safety and precaution must always be mentioned in a book like this.

Initially I wondered why this book was written in the first place. Why could I not buy a chocolate cake mix and have my son help me out with it (rather I help him with it 😉 )…and decorate the cupcakes. The good point about the book is that it is visually appealing which drives the kids and their parents to get out of the comfortable chair (or drag  their tired bodies…..) and complete another project ……..an accomplishment for the child.

This review was written for The Daring Kitchen and it is available on the website right now. I received the book From Tate Publishing via The Daring Kitchen website.

Posted in - Confectioner's Sugar, -Canola Oil, -Chocolate Cake Mix, -Cocoa Powder, Chocolate, Eggs, Milk, Sugar | Tagged: , , , | 2 Comments »

Macarons………..

Posted by vivnidhi on October 27, 2009

Daring Bakers finally…..made MACARONS .

measure_w180x180 presents…..

100_4145

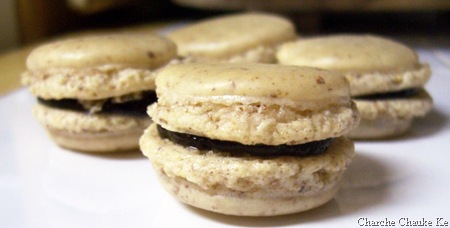
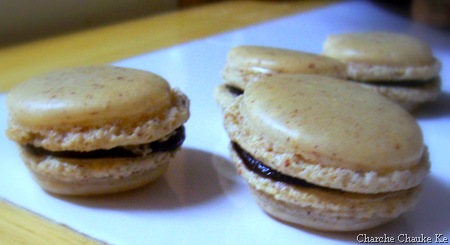
PLAIN but nevertheless ;-)…..Roasted almond macarons with chocolate ganache

If you have been reading even one food blog these days, you cannot escape macarons ( A good history lesson here 😉 ) I  can speak for the food blogosphere , Macarons are a rage these days. I had been dreaming of eating these and dreading baking these myself. I kept reminding the husband what is a must eat…..whenever we visit Paris 🙂 . Mon Paree is a soft spot with me (as anyone who knows me is aware 😉 ). It’s one place I never want to visit on a budget 🙂 . David Lebovitz’s 10 Insanely Delicious things you shouldn’t miss in Paris will be a starting point 🙂 .

Anyway , moving on, Ami finally chose macarons for this month’s daring Bakers challenge, finally giving the weak hearted like me an incentive to try it out. The 2009 October Daring Bakers’ challenge was brought to us by Ami S. She chose macarons from Claudia Fleming’s The Last Course: The Desserts of Gramercy Tavern as the challenge recipe.

In Ami’s words “French macaroons are notorious for being difficult to master. Type in “macaroon,” “French macaroon” or “macaron” in your search engine of choice, and you will be inundated not only with bakeries offering these tasty little cookies, but scores and even hundreds of blogs all attempting to find the perfect recipe, the perfect technique. Which one is right? Which captures the perfect essence of macaroons? The answer is all of them and none of them. Macaroons are highly subjective, the subject of passionate, almost Talmudic study and debate. Chewy? Crisp? Age your egg whites? Ground the nuts or use nut meal or nut flour? Cooked sugar syrup, or confectioners’ sugar? In the words of a therapist, what do you think is the ideal macaroon? The answer lies within you.

Will French macaroon supplant the cupcake as the next sweet trend? There’s no way to know. I couldn’t have predicted the resurgence of leggings, yet here they are.”

I am sorry Ami , I did not use the recipe given. I read each and every post on the daring bakers forum and everybody seemed to be getting more success with Helen‘s recipe and so…….I decided to tread carefully on my first experiment.

Oh..I have come to know that these are often called macaroons in United States though they also refer to another coconut cookie as well.

Ok ….now to my “Hurrah” moment. I got it right the first time. Reason: I have made it a 100 times in my head. It was completely different when I actually made it yet I knew what I was doing. What I should be doing and what can lead to what. Two people require special mention and thanks as without them, I would not have been able to complete the challenge: 1. Helen of Tartelette and 2. Audax Artifex of Audax Artifex.  The recipe and instructions I used to make my first macarons are Helen‘s. The explanations, clarifications, warnings and encouragement……..even conversions are from Audax. He provided so much information that I did not have to even use my brains for menial conversions.

Roasted Almond macarons: (Makes approx. 11 macarons and hence around 22 shells)

  • Egg White 1 (approx. 32 g …aged 4 days in the refrigerator) brought to room temperature before whipping
  • Icing Sugar 64 g
  • Granulated Sugar 16 g (3 1/2 tsp. )
  • Roasted almond meal 35 g

1. I measured these with my tipsy weighing scale (which my kids have fiddled with well) and the least count of which is 25 g …….so do not get deterred by the weighing scale (oh…only if you are like me ) and take the plunge. It was fun :-).

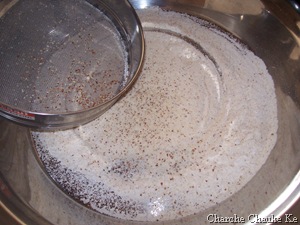
2. First I toasted the almonds under the broiler and kept checking every two minutes. When the almonds were browned uniformly, removed them for the oven and let them cool. Once the almonds were cool, I used my blender to grind them along with the icing sugar. This helps the almonds not clump up. Audax also mentions that the grinder should not get  hot. Well! mine did…..I was scared but after sifting, the mix seemed fine to me.

100_4121

Sifted Ground almonds and icing sugar

3. I whipped the egg white to a firm foam. Then added the granulated sugar till the egg whites were firm and glossy. I had heard that if the egg whites are whipped right, the bowl can be turned upside down and it won’t fall off. Well! I took  the plunge with confidence and here we are:

100_4123 100_4124

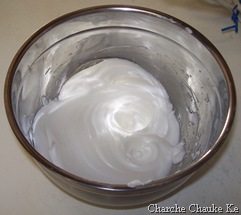
Whipped Egg Whites…..without sugar and after addition of sugar

100_4126

There is whipped egg in there….really……

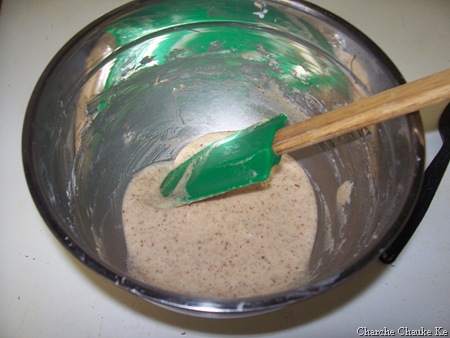
4. I then used this video to learn how to fold the almond mixture in the egg whites. I may have required 10-12 strokes to get it to magma like consistency. The key is that when the mix is dropped back in itself. It should mix with the mix soon and no trace should remain.

100_4127

My final macaron batter

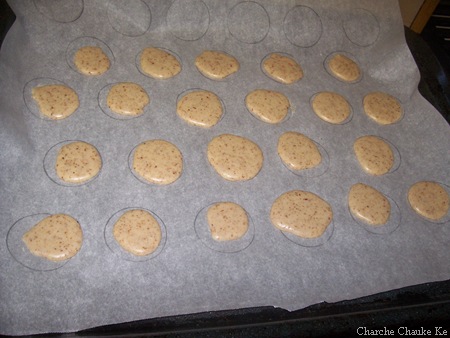
5. Then I piped it on marked parchment paper. Here was the problem. I did not have a big enough tip with my piping bag. Next time, I will just use a ziploc cut in a corner. 

6. Left the piped macaron shells to dry out for half an hour. Up to an hour is fine I believe. Meanwhile preheat the oven to 300 F . When the shells have formed a skin on top, I used another baking tray under the piped one (another Audax tip…..to ensure even heating) and slid them in the oven. In spite of the fact that I had all kinds of sizes, baking for 10 minutes was good.

100_4128

Please do not look at their amoebic shapes, they will be better next time……oh, this is after the skins have formed on top……….30 minutes after piping

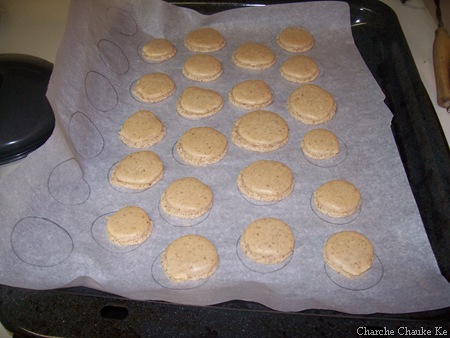
7. When warm, the macarons like to stick well to the parchment paper. I used Helen’s tip and sprinkled/sprayed a few droplets of water under the parchment on the tray while still warm. Then I used a plastic knife to slide the macaron shells off the parchment. Worked very well for me.

100_4129

Out of the oven… oh… what joy,

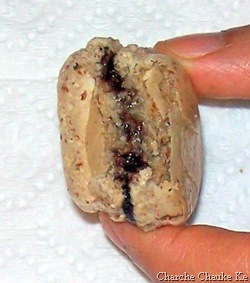
I was almost expecting flat grainy biscuits…..but I got this……..

and because I can do it………….U can too

Chocolate Ganache Recipe:

I used unsweetened chocolate cause I knew that the macaron shells are very sweet (yes I love licking all my cake batters 🙂 and by now know before hand , how the baked product will taste based on the batter)

  • Unsweetened chocolate 2 oz. grated or chopped fine
  • Sugar 1/4 cup
  • Butter 1 Tbsp.
  • Whipping Cream 1/4 cup
  • Vanilla extract 1/4 tsp.

1. Add chocolate , butter and whipping cream in a bowl.

2. Heat the whipping cream and sugar in a heavy bottomed pan on low heat. Do not let it boil or form a skin. Keep whisking to dissolve the sugar.

3. Add hot cream in the bowl with the chocolate and mix well. Whisk to achieve a smooth texture.

4. As it cools, the mixture thickens. Pipe it on top of half the shells. Cover the piped chocolate ones with plain shells and you are ready to munch.

100_4158

Please do try one …………(These are all that were left by the time I could take pictures)

Bottom line is : Macarons are quite do-able. As Helen says…..” if you find a recipe that works for you, stick to it, no matter whose it is, especially if you are new to macarons and don’t make them that often.” I will stick with hers…….. 🙂 . My opinion is that one must not get intimidated by macarons and do try them at home unless you can afford Laduree‘s all the time :-).  Some may find it too sweet but kids love it. Here we are in the sniffles season so kids taste buds are very difficult to please……macarons made my work easier as there were smiles all around. My son couldn’t say enough of “Thank you Mama” AND ‘I just want half more” . Well! if you have kids ….do make these………until we visit Paris ….that is……..I like to dream 🙂 .

100_4135

Bad light……..but great taste

Before I close, I really must thank Ami for the challenge, Helen for  such a foolproof recipe and Audax for the tremendous support. This has been a great challenge and I loved learning a great skill. I have 5 days aged 3 egg whites in he refrigerator. This time I will be playing as I am not that scared. Looking forward to the adventure. If I find the time, I will certainly update with better pictures.

Update Nov. 1 : I did forget the expenses; didn’t I ?

Expenditure :

Confectioner’s Sugar ……..$2.74 ……from Kroger (I am absolutely done with this store….too rude for me to handle)

Posted in - Confectioner's Sugar, -Almonds, -Butter, -Cream, -Egg Whites, -Unsweetened Chocolate, -Vanilla, Eggs, Sugar | Tagged: , , , , | 8 Comments »

Daring Bakers Bake Dobos Torte

Posted by vivnidhi on August 27, 2009

Whisk at 180 x 180 (largest)presents

 aug2_132

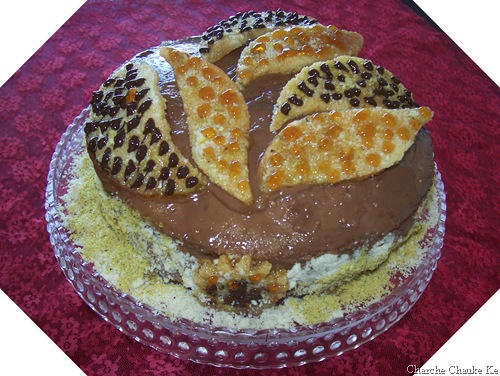
My bejeweled Dobos Torte

The August 2009 Daring Bakers’ challenge was hosted by Angela of A Spoonful of Sugar and Lorraine of Not Quite Nigella. They chose the spectacular Dobos Torte based on a recipe from Rick Rodgers’ cookbook Kaffeehaus:  Exquisite Desserts from the Classic Caffés of Vienna, Budapest, and Prague.

So, what is the Dobos Torta (or Torte)?

The Dobos Torta is a five-layer sponge cake, filled with a rich chocolate buttercream and topped with thin wedges of caramel. (You may come across recipes which have anywhere between six and 12 layers of cake; there are numerous family variations!) It was invented in 1885 by József C. Dobos, a Hungarian baker, and it rapidly became famous throughout Europe for both its extraordinary taste and its keeping properties. The recipe was a secret until Dobos retired in 1906 and gave the recipe to the Budapest Confectioners’ and Gingerbread Makers’ Chamber of Industry, providing that every member of the chamber can use it freely.

Equipment

  • 2 baking sheets
  • 9” (23cm) springform tin and 8” cake tin, for templates
  • mixing bowls (1 medium, 1 large)
  • a sieve
  • a double boiler (a large saucepan plus a large heat-proof mixing bowl which fits snugly over the top of the pan)
  • a small saucepan
  • a whisk (you could use a balloon whisk for the entire cake, but an electric hand whisk or stand mixer will make life much easier)
  • metal offset spatula
  • sharp knife
  • a 7 1/2” cardboard cake round, or just build cake on the base of a springform tin.
  • piping bag and tip, optional

Prep times

  • Sponge layers 20 mins prep, 40 mins cooking total if baking each layer individually.
  • Buttercream: 20 mins cooking. Cooling time for buttercream: about 1 hour plus 10 minutes after this to beat and divide.
  • Caramel layer: 10-15 minutes.
  • Assembly of whole cake: 20 minutes

Sponge cake layers

  • 6 large eggs, separated, at room temperature
  • 1 1/3 cups (162g) confectioner’s (icing) sugar, divided
  • 1 teaspoon (5ml) vanilla extract
  • 1 cup plus 2 tablespoons (112g) sifted cake flour (SUBSTITUTE 95g plain flour + 17g cornflour (cornstarch) sifted together)
  • pinch of salt

Chocolate Buttercream

  • 4 large eggs, at room temperature
  • 1 cup (200g) caster (ultrafine or superfine white) sugar
  • 4oz (110g) bakers chocolate or your favorite dark chocolate, finely chopped
  • 2 sticks plus 2 tablespoons (250g) unsalted butter, at room temperature.

Caramel topping

  • 1 cup (200g) caster (superfine or ultrafine white) sugar
  • 12 tablespoons (180 ml) water
  • 8 teaspoons (40 ml) lemon juice
  • 1 tablespoon neutral oil (e.g. grapeseed, rice bran, sunflower)

Finishing touches

  • a 7” cardboard round
  • 12 whole hazelnuts, peeled and toasted
  • ½ cup (50g) peeled and finely chopped hazelnuts

Directions for the sponge layers:

NB. The sponge layers can be prepared in advance and stored interleaved with parchment and well-wrapped in the fridge overnight.

1.Position the racks in the top and centre thirds of the oven and heat to 400F (200C).
2.Cut six pieces of parchment paper to fit the baking sheets. Using the bottom of a 9″ (23cm) springform tin as a template and a dark pencil or a pen, trace a circle on each of the papers, and turn them over (the circle should be visible from the other side, so that the graphite or ink doesn’t touch the cake batter.)
3.Beat the egg yolks, 2/3 cup (81g) of the confectioner’s (icing) sugar, and the vanilla in a medium bowl with a mixer on high speed until the mixture is thick, pale yellow and forms a thick ribbon when the beaters are lifted a few inches above the batter, about 3 minutes. (You can do this step with a balloon whisk if you don’t have a mixer.)

4.In another bowl, using clean beaters, beat the egg whites until soft peaks form. Gradually beat in the remaining 2/3 cup (81g) of confectioner’s (icing)sugar until the whites form stiff, shiny peaks. Using a large rubber spatula, stir about 1/4 of the beaten whites into the egg yolk mixture, then fold in the remainder, leaving a few wisps of white visible. Combine the flour and salt. Sift half the flour over the eggs, and fold in; repeat with the remaining flour.
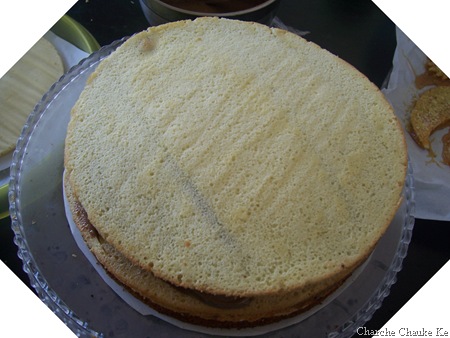
5.Line one of the baking sheets with a circle-marked paper. Using a small offset spatula, spread about 3/4cup of the batter in an even layer, filling in the traced circle on one baking sheet. Bake on the top rack for 5 minutes, until the cake springs back when pressed gently in the centre and the edges are lightly browned. While this cake bakes, repeat the process on the other baking sheet, placing it on the centre rack. When the first cake is done, move the second cake to the top rack. Invert the first cake onto a flat surface and carefully peel off the paper. Slide the cake layer back onto the paper and let stand until cool. Rinse the baking sheet under cold running water to cool, and dry it before lining with another parchment. Continue with the remaining papers and batter to make a total of six layers. Completely cool the layers. Using an 8″ springform pan bottom or plate as a template, trim each cake layer into a neat round. (A small serrated knife is best for this task.)

aug2_115 aug2_116

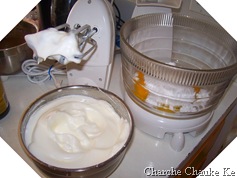
Whipped egg whites and yellows whipped with sugar

aug2_117 aug2_118

Divide the egg whites in 4 parts

First pic: first part of egg whites mixed in Second pic: Folding in of the last part of egg white

aug2_119 aug2_120

First pic : Folding in flour & second pic: 3/4 cup cake batter in a spring form pan


Directions for the chocolate buttercream:

NB. This can be prepared in advance and kept chilled until required.

1.Prepare a double-boiler: quarter-fill a large saucepan with water and bring it to a boil.
2.Meanwhile, whisk the eggs with the sugar until pale and thickened, about five minutes. You can use a balloon whisk or electric hand mixer for this.
3.Fit bowl over the boiling water in the saucepan (water should not touch bowl) and lower the heat to a brisk simmer. Cook the egg mixture, whisking constantly, for 2-3 minutes until you see it starting to thicken a bit. Whisk in the finely chopped chocolate and cook, stirring, for a further 2-3 minutes.
4.Scrape the chocolate mixture into a medium bowl and leave to cool to room temperature. It should be quite thick and sticky in consistency.
5.When cool, beat in the soft butter, a small piece (about 2 tablespoons/30g) at a time. An electric hand mixer is great here, but it is possible to beat the butter in with a spatula if it is soft enough. You should end up with a thick, velvety chocolate buttercream. Chill while you make the caramel topping.

aug2_97 aug2_104

Chopped chocolate and eggs with sugar

aug2_106 aug2_108

Whipped eggs and boiling water ready for cooking

aug2_110 aug2_121

Cooking buttercream on double boiler and the finished product


Directions for the caramel topping:

1.Choose the best-looking cake layer for the caramel top. To make the caramel topping: Line a jellyroll pan with parchment paper and butter the paper. Place the reserved cake layer on the paper. Score the cake into 12 equal wedges. Lightly oil a thin, sharp knife and an offset metal spatula.
2.Stir the sugar, water and lemon juice in a small saucepan. Bring to a boil over a medium heat, stirring often to dissolve the sugar. Once dissolved into a smooth syrup, turn the heat up to high and boil without stirring, swirling the pan by the handle occasionally and washing down any sugar crystals on the sides of the pan with a wet brush until the syrup has turned into an amber-colored caramel.
3.The top layer is perhaps the hardest part of the whole cake so make sure you have a oiled, hot offset spatula ready. I also find it helps if the cake layer hasn’t just been taken out of the refrigerator. I made mine ahead of time and the cake layer was cold and the toffee set very, very quickly—too quickly for me to spread it. Immediately pour all of the hot caramel over the cake layer. You will have some leftover most probably but more is better than less and you can always make nice toffee pattern using the extra to decorate. Using the offset spatula, quickly spread the caramel evenly to the edge of the cake layer. Let cool until beginning to set, about 30 seconds. Using the tip of the hot oiled knife (keep re-oiling this with a pastry brush between cutting), cut through the scored marks to divide the caramel layer into 12 equal wedges. Cool another minute or so, then use the edge of the knife to completely cut and separate the wedges using one firm slice movement (rather than rocking back and forth which may produce toffee strands). Cool completely.

aug2_124 aug2_128

Preparation for caramel layer

aug2_129

Assembling the cake

I brushed hazelnut coffee(unsweetened) on the layers as I found the buttercream a tad too sweet


Assembling the Dobos

1.Divide the buttercream into six equal parts.
2.Place a dab of chocolate buttercream on the middle of a 7 1/2” cardboard round and top with one cake layer. Spread the layer with one part of the chocolate icing. Repeat with 4 more cake layers. Spread the remaining icing on the sides of the cake.
3.Optional: press the finely chopped hazelnuts onto the sides of the cake.
4.Propping a hazelnut under each wedge so that it sits at an angle, arrange the wedges on top of the cake in a spoke pattern. If you have any leftover buttercream, you can pipe rosettes under each hazelnut or a large rosette in the centre of the cake. Refrigerate the cake under a cake dome until the icing is set, about 2 hours. Let slices come to room temperature for the best possible flavor.

I used ground cashews and pistachios for topping. I even topped the caramel layer with these nut powders and then caramel or chocolate on top.

aug2_140

Well! It’s been cut

aug2_156

Here’s a slice…..The top layers are our favorite……:-))……you won’t like it if you do not like sticky, chewy….the sonny and I do :-))

aug2_155

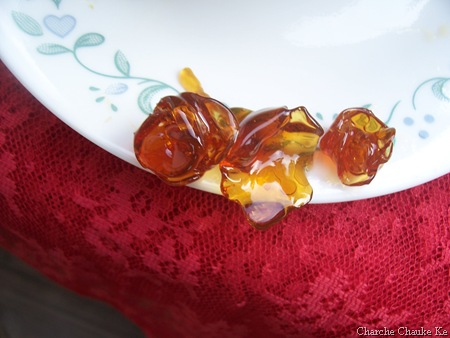
My favorite picture : Just playing with caramel

Verdict :

The cake overall tasted pretty good. I am not sure if I will make it again.

Too many eggs 🙂 . The sponge layers were easy to work with but would not have tasted good without some liquor brushed on it.

The buttercream is quick and easy but again I found it less firm than other buttercreams I have worked with. I don’t think I would make it again.

A lot of daring bakers did not like the lemony sticky chewy caramel. I LOVED it. The son and I can’t get enough of it. Of course I let him eat it cause I should not ….right 😉 . I will make this a lot of times 🙂 .

I may have made better components of this cake but all assembled together and chilled well, we all really enjoyed the cake. Thanks a lot Angela and Lorraine.

Expenditure:

Bakers semisweet chocolate (8 oz.) …….from Walmart…………………$2.88

Butter (1 lb.)………………………….from Walmart………………….$1.98

——————————————————————————————————-

Total…………………………………………………………………….$4.86

Not bad at all for such a delicious end product. Do not forget to check out the other daring bakers on the blogroll. Outstanding cakes….you will be surprised.

Posted in - Confectioner's Sugar, -Butter, -Canola Oil, -Cashews, -lemon, -Pistachios, -Semisweet Chocolate, -Vanilla, Eggs, Sugar | Tagged: , , , , | 9 Comments »

Daring Bakers July bring Cookies…….

Posted by vivnidhi on July 28, 2009

Vanilla at 180 x 180 (largest)brings…..

100_3688

The boy can’t stop himself 😉 Plum jam cookies and lots more…….

Jaana tha Japan , pahunch gaye Cheen…………Had to go to Japan , and I reached China…. You don’t get it……yeah…..oh well! the daring baker challenge this month was mallow cookies and milanos….long live Pepperidge Farm! I ended up making those and a fusion…..which we all absolutely loved.

These cookies pictured above are truly the best cookies I have ever made. If you liked and ate jam biscuits (called so in India) in your childhood, these cookies will bring those memories back. I surprised myself……..these tasted so good.

The July Daring Bakers’ challenge was hosted by Nicole at Sweet Tooth. She chose Chocolate Covered Marshmallow Cookies and Milan Cookies from pastry chef Gale Gand of the Food Network.

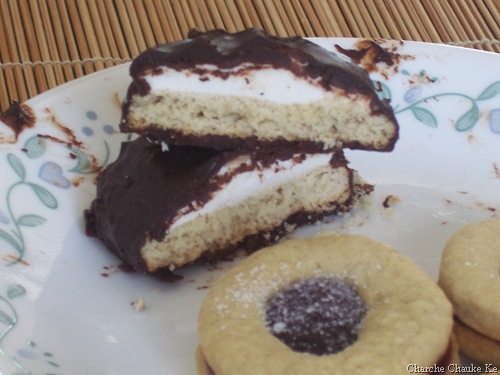
The mallow cookies were great, I would have never dreamt of making homemade marshmallows but homemade taste so………..good and you can flavor them just as you would want. Thanks a lot Nicole, for this challenge.The mallows biscuit was really delicious. The no. of cookies mentioned in the original recipe is all messed up….which actually worked in my favor 🙂 .  I loved it so much that I made some plum jam and filled them up and loved the result.

Milanos were quite a disappointment and I would certainly not want to make those again. The milanos dough was like tuiles batter yet not even that….I give up.

The husband was quite excited about Milano cookies and so I made them first, in fact packed a few for a friend, but it was a lot of effort in trying to make them the same size…..and the end result was not worth it… I just made about 2 dozen of them.After that I split the batter in half , spread on the parchment on the entire tray and baked for 5 minutes in the oven. Cut them with a pizza cutter in squares and back in oven for 5-7 minutes more. Same with the rest of the batter. Filled them up up with the chocolate ganache and anything with chocolate gets eaten here. I do not recommend this and will not be making them again 🙂 . I should mention the chocolate ganache tasted good and the husband even helped me zest the whole orange. What do you think…….I will need help again some other time too..I must not forget the dear husband 🙂

100_3679

Don’t they look cute…….

Milanos for friends…….hope they ate it up soon…..before they turned chewy…….oh no….boo hoo hoo

100_3682 100_3686

Rest of the Milanos……..:-)


Here come the mallows…..pretty good cookies , if one is fond of marshmallows. We are not too fond of them, yet no cookies left of the 28 I made.

The recipe:

Mallows(Chocolate Covered Marshmallow Cookies)
Recipe courtesy Gale Gand, from Food Network website

Prep Time: 10 min
Inactive Prep Time: 5 min
Cook Time: 10 min
Serves: about 2 dozen cookies

• 3 cups (375grams/13.23oz) all purpose flour
• 1/2 cup (112.5grams/3.97oz) white sugar
• 1/2 teaspoon salt
• 3/4 teaspoon baking powder
• 3/8 teaspoon baking soda
• 1/2 teaspoon ground cinnamon
• 12 tablespoons (170grams/ 6 oz) unsalted butter
• 3 eggs, whisked together
• Homemade marshmallows, recipe follows
• Chocolate glaze, recipe follows

1. In a mixer with the paddle attachment, blend the dry ingredients.
2. On low speed, add the butter and mix until sandy.
3. Add the eggs and mix until combine.
4. Form the dough into a disk, wrap with clingfilm or parchment and refrigerate at least 1 hour and up to 3 days.
5. When ready to bake, grease a cookie sheet or line it with parchment paper or a silicon mat.
6. Preheat the oven to 375 degrees F.
7. Roll out the dough to 1/8-inch thickness, on a lightly floured surface. Use a 1 to 1 1/2 inches cookie cutter to cut out small rounds of dough.
8. Transfer to the prepared pan and bake for 10 minutes or until light golden brown. Let cool to room temperature.
9. Pipe a “kiss” of marshmallow onto each cookie. Let set at room temperature for 2 hours.
10. Line a cookie sheet with parchment or silicon mat.
11. One at a time, gently drop the marshmallow-topped cookies into the hot chocolate glaze.
12. Lift out with a fork and let excess chocolate drip back into the bowl.
13. Place on the prepared pan and let set at room temperature until the coating is firm, about 1 to 2 hours.

Note: if you don’t want to make your own marshmallows, you can cut a large marshmallow in half and place on the cookie base. Heat in a preheated 350-degree oven to slump the marshmallow slightly, it will expand and brown a little. Let cool, then proceed with the chocolate dipping.

Homemade marshmallows:
• 1/4 cup water
• 1/4 cup light corn syrup
• 3/4 cup (168.76 grams/5.95oz) sugar
• 1 tablespoon powdered gelatin
• 2 tablespoons cold water
• 2 egg whites , room temperature
• 1/4 teaspoon pure vanilla extract

1. In a saucepan, combine the water, corn syrup, and sugar, bring to a boil until “soft-ball” stage, or 235 degrees on a candy thermometer.
2. Sprinkle the gelatin over the cold water and let dissolve.
3. Remove the syrup from the heat, add the gelatin, and mix.
4. Whip the whites until soft peaks form and pour the syrup into the whites.
5. Add the vanilla and continue whipping until stiff.
6. Transfer to a pastry bag.

Chocolate glaze:
• 12 ounces semisweet chocolate
• 2 ounces cocoa butter or vegetable oil

1. Melt the 2 ingredients together in the top of a double boiler or a bowl set over barely simmering water.

100_3674

Marshmallow cookies before the dip in chocolate

I got 28 cookies by using 1/4 of the cookie dough. Made 1/2 the amount of marshmallows and chocolate glaze. Since my glaze eventually bloomed, I covered them up in Milanos ganache…….the Milano cookie filling :-)………yeah that’s me!! Tasted good, nevertheless 😉

Chocolate Ganache:

• 1/2 cup heavy cream
• 8 ounces semisweet chocolate, chopped
• 1 orange, zested

I also prepared some plum jam….just because I had some plums I had to use. Filled them up in the mallows crust, sprinkled with sugar and loved , loved it! Please do try if you are in the mood to make cookies, true labor of love , forming so many small bites but totally worth it ……..as you will see in pictures below 🙂

Plum Jam Recipe:

  • Plums 2 1/2 cups …..pitted, and chopped fine
  • Sugar 1 1/2 cups
  • Lemon juice  1 Tbsp

That’s it….I added all of this in a heavy bottomed saucepan with 2 Tbsp. water. Cooked it down till I could do the plate test. For the plate test, place a plate in the freezer or chill it well. Pour a big drop of jam on this cold plate and give it 30 seconds. If the jam has reached the right consistency, it will very slowly spread a little. More about jam making here. I made a small quantity, hence it went directly to the refrigerator.

100_3693

Pick one up……these are ready for a sprinkling of sugar

100_3709

Here are the mallows…..this is how they looked

100_3700

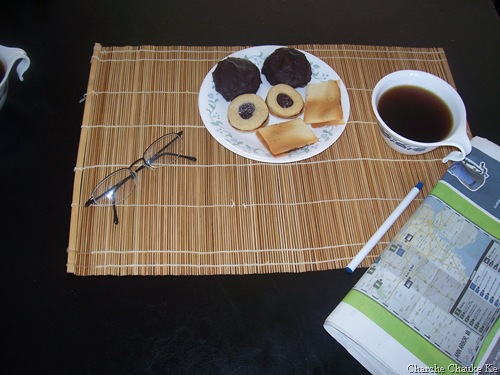
Perfect with coffee….for some great mornings………

I just took a picture as the husband had set the table

100_3711

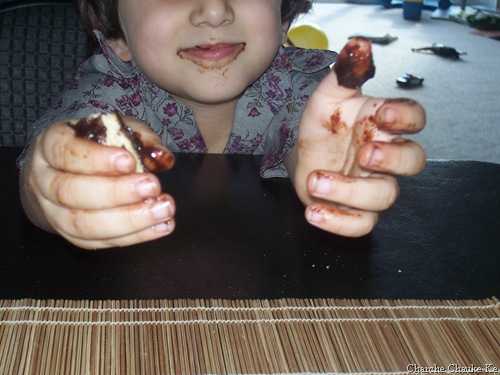
Somebody else had a great time too……….

It’s been one whole year being a part of the Daring Bakers for me. I have come a long way…..I remember my first challenge Filbert Gateau….I remember my delight. Now I dare to experiment on my own…..Thank you Lis and Ivonne and the whole Daring Baker community which is the best resource of all.

Expenditure:

Unsalted Butter: ………………….$2.17……….from Walmart, some left

Corn syrup(16 oz.)…………………$1.67……….from Kroger, lots left

Heavy cream(1/2 pint)…………….$2.89…………from Kroger, lots left

Powdered sugar……………………$1.99…………from Kroger, lots left

Bakers Chocolate semisweet(8 oz):$ 3.29………….from Kroger, none left

Orange 1 :-)…………………………$0.64………….from Kroger, ate it up….

————————————————————————————————–

Total………………………………..$12.65

Posted in -All Purpose flour, -Butter, -Canola Oil, -Cinnamon, -Corn Syrup, -Cream, -Orange, -Plums, -Semisweet Chocolate, -Vanilla, Baking Powder, Baking Soda, Daring Bakers, Eggs, Gelatin, Sugar | Tagged: , , , , , | 14 Comments »

Daring Bakers Layered Chocolate Amaretto Cheesecake

Posted by vivnidhi on April 27, 2009

Spatulla at 180 x 180 (largest)Oh Yeah, it was the E L Spatulla’s magic this month!

Apr_84

Perfectly layered Chocolate Amaretto Cheesecake

I must admit here that cheesecake is the ultimate dessert for me. Yes, I am extremely fond of custards and the like…..and if you bake it………I can eat it all the time. This is my all time favorite cake. And I had never eaten it all these years when I was in India! Ah! what a waste………I wish I could have eaten it without the guilt ……..calories…….look at yourself……..you still have 10 lbs to lose………look at all the plain sugars you are putting in your body!! UFF!!!  So, when now I baked it and placed it on the table……..in spite of the fact that I was pleased no end that the cake did not crack one bit and was layered exactly as I wanted………the husband’s look said something else.

“This is a calorie bomb…..fat, sugar, cheese………what kind of life will you have……. if you eat more of these”

“Well! when temptation rules, the mirror breaks, and I asked the husband to look the other way ….pleeeeeeeease….”

Ah! I so wish we did not have to fight this constant war against cholesterol and high blood sugar. As, I have so often admitted, the husband has to keep a check on his cholesterol and I have to worry about an eventual high blood sugar. And since I am still 10 lbs more than I was pre-second pregnancy, the threat is real for me. I am not overweight, just that I’d do my health and myself a favor if I lost these pounds.

Well! this blog is not about health rants (it so often becomes) ! I absolutely loved this cheesecake. I have baked cheesecakes before (coffee caramel remains the husband’s fav…….he can’t get over coffee and I chocolate)  but this is the best recipe. I had never tried layering the cheesecakes and since I got all daring ……….I tired it out!

Love you Jenny and your famous friend Abbey for sharing a great, easy recipe. The April 2009 challenge is hosted by Jenny from Jenny Bakes. She has chosen Abbey’s Infamous Cheesecake as the challenge.

This is truly an easy recipe and I know this will be made again!

Abbey’s Infamous Cheesecake:

crust:
1 3/4  cups / 240 g chocolate wafers

7 Tbsp. / 3 1/2 oz butter, melted
1/4 almonds ground

cheesecake:
3 sticks of cream cheese, 8 oz each (total of 24 oz) room temperature
1 cup / 210 g sugar
3 large eggs
1 cup / 8 oz heavy cream
3 tbsp. Amaretto

7 oz. semi sweet chocolate

The recipe calls for 1 Tbsp of lemon juice, 1 Tbsp. of vanilla extract and 1 Tbsp. of booze. I replace all with amaretto.

DIRECTIONS:
1. Preheat oven to 350 degrees F (Gas Mark 4 = 180C = Moderate heat). Begin to boil a large pot of water for the water bath.

2. Mix together the crust ingredients and press into your preferred pan. You can press the crust just into the bottom, or up the sides of the pan too – baker’s choice. Set crust aside.

Apr_39 Apr_40

Crushed Chocolate Wafers, almonds and butter

Apr_43

Chocolate wafer crust

My crust definitely had too much butter. I need to reduce it the next time. This did not compromise the taste but it would be better with lesser butter.

3. Combine cream cheese and sugar in the bowl of a stand-mixer (or in a large bowl if using a hand-mixer) and cream together until smooth. Add eggs, one at a time, fully incorporating each before adding the next. Make sure to scrape down the bowl in between each egg. Add heavy cream, amaretto and blend until smooth and creamy.

4. Pour batter into prepared crust and tap the pan on the counter a few times to bring all air bubbles to the surface. Place pan into a larger pan and pour boiling water into the larger pan until halfway up the side of the cheesecake pan. If cheesecake pan is not airtight, cover bottom securely with foil before adding water.

Apr_44 Apr_47

Cream cheese on the left and creamed ingredients on the right

Apr_49

3 cups plain Amaretto batter is removed and rest mixed with melted chocolate

I chopped the chocolate well and then melted it in the microwave for 1 minute. Stir the chocolate and check for lumps. Melt further in 15 sec or 30 sec intervals only if there are lumps. Keep stirring after every heating. Removed 3 cups of the batter separately and then added the melted chocolate to the rest of the batter. Mixed with a light hand so as to not overmix.

Apr_54 Apr_55

On top of chocolate wafer crust goes chocolate layer and then sieved very finely ground almonds on top of it.

Apr_57

Ready for the oven

5. Bake 45 to 55 minutes, until it is almost done – this can be hard to judge, but you’re looking for the cake to hold together, but still have a lot of jiggle to it in the center. You don’t want it to be completely firm at this stage. Close the oven door, turn the heat off, and let rest in the cooling oven for one hour. This lets the cake finish cooking and cool down gently enough so that it won’t crack on the top. After one hour, remove cheesecake from oven and lift carefully out of water bath. Let it finish cooling on the counter, and then cover and put in the fridge to chill. Once fully chilled, it is ready to serve.

Pan note: The creator of this recipe used to use a springform pan, but no matter how well she wrapped the thing in tin foil, water would always seep in and make the crust soggy. Now she uses one of those 1-use foil “casserole” shaped pans from the grocery store. They’re 8 or 9 inches wide and really deep, and best of all, water-tight. When it comes time to serve, just cut the foil away.

Prep notes: While the actual making of this cheesecake is a minimal time commitment, it does need to bake for almost an hour, cool in the oven for an hour, and chill overnight before it is served. Please plan accordingly!

Apr_60

The end result! Perfect layers! Hurrah!!

Things I learnt: As I read more on the Daring Baker forum, I realized that my cake top got brown and it should not have browned at all for a perfect cheesecake.

Next My crust indeed got soggy , so I should have either used more foil or used a normal cake pan instead of spring form. Jacque of Daisy lane cakes has very beautifully demonstrated how to use regular pan for cheesecake in her post Sweet Potato Cheesecake.

Some variations from the recipe creator:

** Lavender-scented cheesecake w/ blueberries – heat the cup of heavy cream in the microwave or a saucepan until hot but not boiling. Add 2 tbsp of lavender flowers and stir. Let lavender steep in the cream for about 10-15 minutes, then strain the flowers out. Add strained cream to cheesecake batter as normal. Top with fresh blueberries, or make a quick stovetop blueberry sauce (splash of orange juice, blueberries, a little bit of sugar, and a dash of cinnamon – cook until berries burst, then cool)

** Cafe au lait cheesecake with caramel – take 1/4 cup of the heavy cream and heat it in the microwave for a short amount of time until very hot. Add 1-2 tbsp. instant espresso or instant coffee; stir to dissolve. Add this to the remainder of cream and use as normal. Top cheesecake with homemade caramel sauce (I usually find one on the food network website – just make sure it has heavy cream in it. You can use store-bought in a pinch, but the flavor is just not the same since its usually just sugar and corn syrup with no dairy).

** Tropical – add about a half cup of chopped macadamias to the crust, then top the cake with a mango-raspberry-mandarin orange puree.

** Mexican Turtle – add a bar of melted dark chocolate (between 3 and 5 oz., to taste) to the batter, along with a teaspoon of cinnamon and a dash of cayenne pepper (about 1/8 tsp.). Top it with pecan halves and a homemade caramel sauce.

** Honey-cinnamon with port-pomegranate poached pears – replace 1/2 cup of the sugar with 1/2 cup of honey, add about a teaspoon or more (to taste) of cinnamon. Take 2 pears (any variety you like or whatever is in season), peeled and cored, and poach them in a boiling poaching liquid of port wine, pomegranate juice/seeds, a couple of “coins” of fresh ginger, a cinnamon stick, and about a 1/4 cup of sugar. Poach them until tender, then let cool. Strain the poaching liquid and simmer until reduced to a syrupy-glaze consistency, then cool. Thinly slice the cooled pears and fan them out atop the cooled cheesecake. Pour the cooled poaching syrup over the pears, then sprinkle the top with chopped walnuts and fresh pomegranate seeds.

Some variations from Jenny (from JennyBakes):

**Key lime – add zest from one lime to sugar before mixing with cream cheese. Substitute lemon juice, alcohol, and vanilla with key lime juice.

**Cheesecakelets – put in muffin tins, ramekins, or custard cups. Try baking 20-35 minutes, or until still a little jiggly, and cool as before.

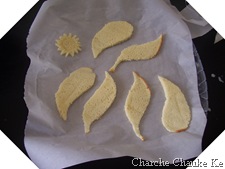
I just melted some more chocolate and piped it lines on top. As I was in a rush, I did not paint the actual leaves with melted chocolate, instead just piped them freehand in leaf shape on wax paper. In the freezer for a quick 15 minutes and the leaves were ready. Remove from wax paper and decorate 😉 .

In spite of the mistakes, this cake was a hit. Loved it a lot and will make again. And guess what the husband visited New York for work and got me a Junior’s cheesecake. Now, I could compare mine against the best. And, I tell you mine was not far from the best. The junior’s cake crust absolutely bowled me over though. I have the junior’s cheesecake cookbook (borrowed from the library) and so I will note down their crust recipe and post when I try it.

If you want to have a look at what all can be done with a cheesecake , please visit the Daring Bakers Blogroll. See imagination and creativity at it best!

r100_3304

Here’s a bite…….enjoy!

Oh, I forgot to list my expenditure:

Cream Cheese 3 (8 oz.) packs ..........$6.18.........from Meijer.......none left
Chocolate wafers ......................$2.50.........from Meijer......all eaten up
Semisweet chocolate....................$2.50..........from Meijer......all eaten up
----------------------------------------------------------------------
Total ................................$11.18

Posted in -Almonds, -Butter, -Chocolate wafer, -Cream, -Semisweet Chocolate, Amaretto, Cream Cheese, Eggs, Sugar | Tagged: , , , , | 31 Comments »

Daring Baker’s February Challenge : Chocolate Valentino cake

Posted by vivnidhi on February 28, 2009

Feb_44

Chocolate Valentino Cake

Here is a flourless cake that is a breeze to make. Surprise Surprise! this month’s Daring Bakers’ Challenge was the easiest I have seen. Ready in 45 minutes total. This is one cake anyone can make ……..easy and sinfully rich and delicious. Just pair it with an ice cream, and you are done. Yes, this definitely needs some ice cream or whipped cream to cut some of the richness of the cake. My cake did not sink in the middle at all because I was careful while beating the eggs.

It was my first time making Ice cream, I have been to lazy to make ice cream at home before. Since the husband loved it, I now have reason to try some more this summer. I made it without any ice cream maker. I would make a lot of ice creams in India in my summer vacations. I wanted to try one of my old recipes but decided to just try David Lebovitz’s plain vanilla ice cream made with vanilla extract. I made a cherry caramel sauce to pair with the cake and ice cream. Result: This cake’s a fabulous dessert!

The February 2009 challenge is hosted by Wendy of WMPE’s blog and Dharm of Dad ~ Baker & Chef.
We have chosen a Chocolate Valentino cake by Chef Wan; a Vanilla Ice Cream recipe from Dharm and a Vanilla Ice Cream recipe from Wendy as the challenge.

February’s challenge is a Flourless Chocolate Cake, Chocolate Valentino, inspired by Malaysia’s “most flamboyant food ambassador”, Chef Wan. Recipe comes from Sweet Treats by Chef Wan.

Serve with – The original recipe calls for the cake to be served with whipping cream.  BUT we decided to make this more of a challenge and ask you to make your own Ice Cream – a first for the DBrs. You can choose any flavor you want and any recipe although we provided two vanilla ice cream recipes. But we are giving you a little freedom here and will allow whipped cream as a topping as well or of course non-dairy whip. Be as creative as you want with your topping. Any fruit puree or sauce would be lovely with this cake.
– Use your favorite chocolate – the finished cake will taste exactly like the chocolate you use. Be creative with your chocolate, if you like a sweeter cake use milk chocolate or a combination of the semisweet and milk chocolate. If you like bittersweet chocolate use that and add sweetness by mixing the semi sweet with bittersweet. If you are daring, try white chocolate. (Dharm used all bittersweet and Wendy used a half bitter/half semi sweet chocolate).
– A higher cocoa percentage increases the bitterness of the chocolate.
-Equipment – it is optional to use a heart shaped pan. For a real Valentino, bake it in a heart shaped pan or cut it out into a heart shape. You may use any shape pan that gives you an area of 50” – 6×8 or 7×7.  An 8” spring form pan works with great results as do smaller pans or ramekins.
-An instant read thermometer highly recommended.
Note on recipeThe recipe consists of 3 simple ingredients and how you interpret them is part of the challenge.

Chocolate Valentino
Preparation Time:  20 minutes

 
16 ounces (1 pound) (454 grams) of semisweet chocolate, roughly chopped
½ cup (1 stick) plus 2 tablespoons (146 grams total) of unsalted butter
5 large eggs separated

1. Put chocolate and butter in a heatproof bowl and set over a pan of simmering water (the bottom of the bowl should not touch the water) and melt, stirring often.
2. While your chocolate butter mixture is cooling. Butter your pan and line with a parchment circle then butter the parchment.
3. Separate the egg yolks from the egg whites and put into two medium/large bowls.
4. Whip the egg whites in a medium/large grease free bowl until stiff peaks are formed (do not over-whip or the cake will be dry).
5. With the same beater beat the egg yolks together.
6. Add the egg yolks to the cooled chocolate.
7. Fold in 1/3 of the egg whites into the chocolate mixture and follow with remaining 2/3rds. Fold until no white remains without deflating the batter. {link of folding demonstration}
8. Pour batter into prepared pan, the batter should fill the pan 3/4 of the way full, and bake at 375F/190C
9. Bake for 25 minutes until an instant read thermometer reads 140F/60C.
Note – If you do not have an instant read thermometer, the top of the cake will look similar to a brownie and a cake tester will appear wet.
10. Cool cake on a rack for 10 minutes then unmold.

Feb_39Feb_38

Microwave melted Chocolate & 8″ spring form pan

Feb_40

Ready for the oven

I used all semisweet chocolate and that was absolutely right for us. We couldn’t have liked it a bit more bitter than that. Milk chocolate would be good too cause the chocolate taste gets a little more intense in the cake.

David Lebovitz link for making ice cream if you do not have an ice cream freezer.
Links to helpful tips:
Folding video demonstration.
Egg Whipping video demonstration.

I used David Lebovitz’ vanilla ice cream recipe.

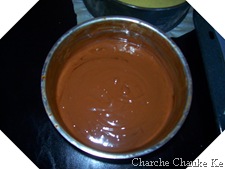
For the cherry caramel sauce, I heated up a cup of cherries with 1/2 a tsp. of sugar till they got tender. Then they went in a blender and pureed. I mixed it up with caramel sauce made from the earlier daring baker challenge and Voila…..Cherry Caramel sauce is ready.

Feb_37 Feb_74

Pitted fresh cherries and the making of cherry caramel sauce

Finally……

Feb_78

My chocolate cake sunflower with Tuiles

This is a cake that everyone (who is a fan of chocolate) should definitely try.

Expenditure:

Chocolate 1 lb ………$ 5.00 ………from Kroger……none left

Heavy cream 1 pint….$ 3.25……….from Kroger……none left

————————————————————————–

Total………………..$ 8.25


Posted in - Cherry, -Butter, -Cream, -Golden Syrup, -Semisweet Chocolate, -Vanilla, Chocolate, Eggs, Milk, Sugar | Tagged: , , | 12 Comments »

Sailing the Pink Seas

Posted by vivnidhi on January 29, 2009

j_97

Tuile Boats with whipped cream and strawberry cream

This month’s Daring Bakers challenge was French Tuiles. Light and fragile as can be. I can definitely not call this month a success cause we were a part of several mishaps as we waded our way in making these fragile bits. First my one year old chanced upon the chocolate sauce bottle as I was playing with refrigerating tuile dough and baking tray. Next thing we had a delicious choco-baby and chocolate floor (right when I was using the tuile stencils). Thank God for my 3 year old(who loves to keep an eye on such situations and raises the alarm only when the deed is done;-) )………otherwise I would not even have noticed and continued my play. Next, when I thought I had learnt how to roll these exactly as I wanted to……….kept the last batch in the oven ………………………………….and ………….forgot to take it out ………until it turned into crisp , dark brown ………..yes, burnt.

Anyway, in spite of all this , as usual with daring bakers, the tuiles were delicious and very fragile. They paired beautifully with the strawberry cream I made. I learnt a fabulous way to garnish in future. I will certainly use these in my desserts.

I paired these with Light and easy strawberry Cream. The strawberries were courtesy of Locavorious. I must say that they were better than store bought frozen ones and my son just loves to snack on them plain. A very big thank you to Rena Basch who gave these to us free of cost. I joined a fabulous group of Michigan Lady Food Bloggers and through them I came to know of locavores. I will try and join them next season.

j_81

Local Strawberries

Light & Easy Strawberry Cream

The Recipe:

  • Strawberries 1 cup (fresh /frozen)
  • Sugar 1 tsp.
  • Sugar Free Strawberry gelatin 6 oz (1 pack)
  • Water 1/2 cup
  • Fat free Whipped Topping 2 cups thawed

This is an extremely simple recipe. Dissolve the gelatin in 1/2 cup hot water. Puree the strawberries in the blender with 1 tsp. sugar. No need to thaw the strawberries. Add the strawberry puree to the gelatin and mix well. Put  this in the refrigerator for half an hour. When it has started to set a little, add the whipped topping and fold it in the gelatin mixture carefully. Back it goes in the refrigerator for at least 4-6 hours. Ready!! Pair it with tuiles and a sprinkle of best aged balsamic vinegar and we have a classic dessert ready.

j_91

Light & Easy Strawberry Cream

For a little shaping up after the holidays, we’re adapting an air of lightness, adding a touch of crisp and maybe even go nuts. A challenge that’s more about technique than about baking a recipe. With the choices given, we think you’ve got plenty of options to chose something that’s individually challenging. You are allowed every flavor in the universe, you may go round or square, roll or fold but you need to shape up!
So here we go; January – something light… Tuiles – what could be lighter?? big_smile
Traditionally, tuiles are thin, crisp almond cookies that are gently molded over a rolling pin or arched form while they are still warm. Once set, their shape resembles the curved French roofing tiles for which they’re named. The Dutch angle: traditionally this batter was used to bake flat round cookies on 31st December, representing the year unfold. On New Years day however, the same batter was used but this day they were presented to well-wishers shaped as cigars and filled with whipped cream, symbolizing the New Year that’s about to roll on. And of course the batter is sometimes called tulip-paste….

This month’s challenge is brought to us by Karen of Bake My Day and Zorra of 1x umruehren bitte aka Kochtopf. They have chosen Tuiles from The Chocolate Book by Angélique Schmeink and Nougatine and Chocolate Tuiles from Michel Roux.

About the shaping: you don’t need to buy anything especially for this challenge, I made the stencils I used for the butterflies myself out of thick plastic sheet and cut out the desired shape. You can use anything you have handy in your kitchen/house like broomsticks, knitting needles, cups, cones.. use your imagination.

Following is a recipe taken from a book called “The Chocolate Book”, written by female Dutch Master chef Angélique Schmeinck.
Recipe:

Yields: 20 small butterflies/6 large (butterflies are just an example)

Preparation time batter 10 minutes, waiting time 30 minutes, baking time: 5-10 minutes per batch

65 grams / ¼ cup / 2.3 ounces softened butter (not melted but soft)
60 grams / ½ cup / 2.1 ounces sifted confectioner’s sugar
1 sachet vanilla sugar (7 grams or substitute with a dash of vanilla extract)
2 large egg whites (slightly whisked with a fork)
65 grams / 1/2 cup / 2.3 ounces sifted all purpose flour
1 table spoon cocoa powder/or food coloring of choice
Butter/spray to grease baking sheet

Oven: 180 C / 350F
Using a hand whisk or a stand mixer fitted with the paddle (low speed) and cream butter, sugar and vanilla to a paste. Keep stirring while you gradually add the egg whites. Continue to add the flour in small batches and stir to achieve a homogeneous and smooth batter/paste. Be careful to not overmix.
Cover the bowl with plastic wrap and chill in the fridge for at least 30 minutes to firm up. (This batter will keep in the fridge for up to a week, take it out 30 minutes before you plan to use it).
Line a baking sheet with parchment paper or grease with either butter/spray and chill in the fridge for at least 15 minutes. This will help spread the batter more easily if using a stencil/cardboard template such as the butterfly. Press the stencil on the bakingsheet and use an off sided spatula to spread batter. Leave some room in between your shapes. Mix a small part of the batter with the cocoa and a few drops of warm water until evenly colored. Use this colored batter in a paper piping bag and proceed to pipe decorations on the wings and body of the butterfly.
Bake butterflies in a preheated oven (180 C/350F) for about 5-10 minutes or until the edges turn golden brown. Immediately release from bakingsheet and proceed to shape/bend the cookies in the desired shape. These cookies have to be shaped when still warm, you might want to bake a small amount at a time or maybe put them in the oven to warm them up again. (Haven’t tried that). Or: place a bakingsheet toward the front of the warm oven, leaving the door half open. The warmth will keep the cookies malleable.
If you don’t want to do stencil shapes, you might want to transfer the batter into a piping bag fitted with a small plain tip. Pipe the desired shapes and bake. Shape immediately after baking using for instance a rolling pin, a broom handle, cups, cones….

Anything you’d like to know and more: http://www.pastrysampler.com/Questions_ … /tuile.htm

There are more alternative recipes too  Nougatine, Chocolate Tuiles, Savory tuile/cornet recipe. These recipes can be found at host’s blogs here. To check out who has made what , check out the Daring Bakers’ blogroll.

Wish I had done the savory…..the husband wanted me to but I couldn’t some other time:-) Not a great start to 2009 but then there’s hope………I see it just behind the snow 🙂

Expenditure:

Parchment paper : $ 2.84 from Walmart lots left

And a huge big thank you to Rena for the strawberries!

Posted in - Bread Flour, - Confectioner's Sugar, -Balsamic Vinegar, -Butter, -Cocoa Powder, -Cream, -Strawberry, Eggs, Gelatin, Sugar | Tagged: , , | 14 Comments »

Daring Bakers French Yule Log

Posted by vivnidhi on December 30, 2008

I would have never known of this and certainly not attempted to make a FRENCH YULE LOG had I not joined Daring Bakers. December has been a wacky month with my mind just unable to concentrate on anything at all. And here was a challenge which required immense amount of planning and precision.

So, here’s the result ………shoddy work, but a sincere effort nevertheless. It was a delicious dessert undoubtedly (even with the kind of work I have done.) The next time it will definitely be better looking than this;)……….I only have to figure out an occasion that deserves such a lot of work:))

100_2836

Here’s my Log!

This month’s challenge is brought to us by the adventurous Hilda from Saffron and Blueberry and Marion from Il en Faut Peu Pour Etre Heureux.
They have chosen a French Yule Log by Flore from Florilege Gourmand

A French Yule Log!!!
SO, what is a French Yule Log you say and how is it different from the cake roll Yule Log made last December by Daring Bakers.

In France you can buy two kinds of Yule log, either the Genoise and Buttercream type that we made last December, or what is more commonly purchased which is a frozen Yule Log very reminiscent of an ice cream cake, only often it’s not made of ice cream but rather frozen mousse of some sort. In French this is called an entremets which is sometimes loosely translated in English as simply a cream dessert. This also means that this recipe is not holiday-specific, it is also just a scrumptious dessert recipe.
This recipe comes almost entirely, except for one small labeled portion and some of the variations courtesy of our dear Daring Baker Fairy Tartelette, from the website: Florilège Gourmand (address above) which belongs to Flore (who has not disclosed her last name to me in my exchanges with her) and is unreal. Her website is in French and different portions of the recipe have been pulled from the recipes in the entremets section.
So, to the business of our Yule log:

THE CHALLENGE RULE is that you MUST MAKE ALL 6 of these elements for the log:
1)  Dacquoise Biscuit-               Almond
2)  Mousse-                                   Dark Chocolate with Orange Curacao
3)  Ganache Insert-                   White Chocolate with orange undertones
4)  Praline (Crisp) Insert-      Milk Chocolate & almond praline
5)  Creme Brulee Insert-        Vanilla with orange undertones
6)  Icing-                                       DARK chocolate
The assembly will essentially be a Dacquoise Biscuit at the bottom, and the inserts inter-layered with mousse, with an icing finish.
That’s about it for rules. Oh yeah, please have fun!

FRENCH YULE LOG OR ENTREMETS RECIPE by Flore of Florilège Gourmand

Element #1 Dacquoise Biscuit (Almond Cake)
Preparation time: 10 mn + 15 mn for baking
Equipment: 2 mixing bowls, hand or stand mixer with whisk attachment, spatula, baking pan such as a 10”x15” jelly-roll pan, parchment paper
Note: You can use the Dacquoise for the bottom of your Yule Log only, or as bottom and top layers, or if using a Yule log mold (half-pipe) to line your entire mold with the biscuit. Take care to spread the Dacquoise accordingly. Try to bake the Dacquoise the same day you assemble the log to keep it as moist as possible.
Ingredients:
2.8 oz (3/4cup + 1Tbsp / 80g) almond meal
1.75 oz (1/2 cup / 50g) confectioner’s sugar
2Tbsp (15g) all-purpose flour
3.5oz (100g / ~100ml) about 3 medium egg whites
1.75 oz (4 Tbsp / 50g) granulated sugar
1.    Finely mix the almond meal and the confectioner’s sugar. (If you have a mixer, you can use it by pulsing the ingredients together for no longer than 30 seconds).
2.    Sift the flour into the mix.
3.    Beat the eggs whites, gradually adding the granulated sugar until stiff.
4.    Pour the almond meal mixture into the egg whites and blend delicately with a spatula.
5.    Grease a piece of parchment paper and line your baking pan with it.
6.    Spread the batter on a piece of parchment paper to an area slightly larger than your desired shape (circle, long strip etc…) and to a height of 1/3 inches (8mm).
7.    Bake at 350°F (180°C) for approximately 15 minutes (depends on your oven), until golden.
8.    Let cool and cut to the desired shape.

This was really really delicious! I could eat the whole thing alone. I made a normal almond dacquoise with almond meal made at home. Yes, I had the skins on the almonds. You think I’d not eat that fiber 😉

Element #2 Dark Chocolate Mousse
Preparation time: 20mn
Equipment: stand or hand mixer with whisk attachment, thermometer, double boiler or equivalent, spatula
Note: You will see that a Pate a Bombe is mentioned in this recipe. A Pate a Bombe is a term used for egg yolks beaten with a sugar syrup, then aerated. It is the base used for many mousse and buttercream recipes. It makes mousses and buttercreams more stable, particularly if they are to be frozen, so that they do not melt as quickly or collapse under the weight of heavier items such as the crème brulee insert.
Gelatin is the gelifying agent in all of the following recipes, but if you would like to use agar-agar, here are the equivalencies: 8g powdered gelatin = 1 (0.25 oz) envelope powdered gelatin = 1 Tbsp powdered gelatin = 1 Tbsp Agar-Agar.
1 Tbsp. of agar-agar flakes is equal to 1 tsp. of agar-agar powder.
Ingredients:
2.5 sheets gelatin or 5g / 1 + 1/4 tsp powdered gelatin
1.5 oz (3 Tbsp / 40g) granulated sugar
1 ½ tsp (10g) glucose or thick corn syrup
0.5 oz (15g) water
50g egg yolks (about 3 medium)
6.2 oz (175g) dark chocolate, coarsely chopped
1.5 cups (350g) heavy cream (35% fat content)
1.    Soften the gelatin in cold water. (If using powdered gelatin, follow the directions on the package.)
2.    Make a Pate a Bombe: Beat the egg yolks until very light in colour (approximately 5 minutes until almost white).
2a.  Cook the sugar, glucose syrup and water on medium heat for approximately 3 minutes (if you have a candy thermometer, the mixture should reach 244°F (118°C). If you do not have a candy thermometer, test the sugar temperature by dipping the tip of a knife into the syrup then into a bowl of ice water, if it forms a soft ball in the water then you have reached the correct temperature.
2b.  Add the sugar syrup to the beaten yolks carefully by pouring it into the mixture in a thin stream while continuing to beat the yolks. You can do this by hand but it’s easier to do this with an electric mixer.
2c.  Continue beating until cool (approximately 5 minutes). The batter should become thick and foamy.
3.    In a double boiler or equivalent, heat 2 tablespoons (30g) of cream to boiling. Add the chopped chocolate and stir until melted and smooth.
4. Whip the remainder of the cream until stiff.
5.    Pour the melted chocolate over the softened gelatin, mixing well. Let the gelatin and chocolate cool slightly and then stir in ½ cup (100g) of WHIPPED cream to temper. Add the Pate a Bombe.
6.    Add in the rest of the WHIPPED cream (220g) mixing gently with a spatula.

I added 1/2 tsp. of orange extract and 1 Tbsp. Orange Curacao………..to please the hubby and he loved it;) I cannot rave enough about this, it is among the most delicious mousse I have ever made. The alcohol just makes it perfect!!

Element #3 Dark Chocolate Ganache Insert (I made a white chocolate ganache)
Preparation time: 10mn
Equipment: pan, whisk. If you have plunging mixer (a vertical hand mixer used to make soups and other liquids), it comes in handy.
Note: Because the ganache hardens as it cools, you should make it right before you intend to use it to facilitate piping it onto the log during assembly. Please be careful when caramelizing the sugar and then adding the cream. It may splatter and boil.

Variations on the Dark Chocolate Ganache Insert listed above:
White Chocolate Ganache Insert
1.75 oz (4 Tbsp / 50g) granulated sugar
5 oz (135g) white chocolate, finely chopped
4.5 oz (2/3 cup – 1 Tbsp / 135g) heavy cream (35% fat content)
1.    Make a caramel: Using the dry method, melt the sugar by spreading it in an even layer in a small sauce pan with high sides. Heat over medium-high heat, watching it carefully as the sugar begins to melt. Never stir the mixture. As the sugar starts to melt, swirl the pan occasionally to allow the sugar to melt evenly. Cook to dark amber color (for most of you that means darker than last month’s challenge).
2.    While the sugar is melting, heat the cream until boiling.  Pour cream into the caramel and stir thoroughly. Be very careful as it may splatter and boil.
3.    Pour the hot caramel-milk mixture over the dark chocolate. Wait 30 seconds and stir until smooth.

OK, here I just did not realize that I had to reduce the cream by a Tbsp. My weighing scale is messed up, thanks to the Sonny Boy and so my ganache just never set. BUT, do you know, I loved the caramely gooey ganache, you can’t see a layer of that, but I could taste it:)). Failure in some sense, but I do not mind it one bit.

Element #4 Praline Feuillete (Crisp) Insert
Preparation time: 10 mn (+ optional 15mn if you make lace crepes)
Equipment: Small saucepan, baking sheet (if you make lace crepes).
Double boiler (or one small saucepan in another), wax paper, rolling pin (or I use an empty bottle of olive oil).
Note: Feuillete means layered (as in with leaves) so a Praline Feuillete is a Praline version of a delicate crisp. There are non-praline variations below. The crunch in this crisp comes from an ingredient which is called gavottes in French. Gavottes are lace-thin crepes. To our knowledge they are not available outside of France, so you have the option of making your own using the recipe below or you can simply substitute rice krispies or corn flakes or Special K for them. Special note: If you use one of the substitutes for the gavottes, you should halve the quantity stated, as in use 1oz of any of these cereals instead of 2.1oz.
If you want to make your own praline, please refer back to the Daring Baker Challenge Recipe from July 2008.

Ingredients for the Praline Feuillete:
3.5 oz (100g) milk chocolate
1 2/3 Tbsp (25g) butter
2 Tbsp (1 oz / 30g) praline
2.1oz (60g) lace crepes(gavottes) or rice krispies or corn flakes or Special K
1.    Melt the chocolate and butter in a double boiler.
2.    Add the praline and the coarsely crushed lace crepes. Mix quickly to thoroughly coat with the chocolate.
3.    Spread between two sheets of wax paper to a size slightly larger than your desired shape. Refrigerate until hard.

I did make my own praline, with almonds (skinned) this time but could not achieve a paste with it. It was more like a fine powder, again tasty nevertheless;) I used Special K for the feuillete as I did not have time to make gavottes. BUT my feuillete never really set. I made it twice and both times it was a crumbly mass and it fell both times. Anyway, I refrigerated it well the second time and I could get like big set pieces of it! This makes the final result so very delicious!

Element #5 Vanilla Crème Brulée Insert
Preparation time: 15mn + 1h infusing + 1h baking
Equipment: Small saucepan, mixing bowl, baking mold, wax paper
Note: The vanilla crème brulée can be flavored differently by simply replacing the vanilla with something else e.g. cardamom, lavender, etc…
Ingredients:
1/2 cup (115g) heavy cream (35% fat content)
½ cup (115g) whole milk
4 medium-sized (72g) egg yolks
0.75 oz (2 Tbsp / 25g) granulated sugar
1 vanilla bean
1.    Heat the milk, cream, and scraped vanilla bean to just boiling. Remove from the stove and let the vanilla infuse for about 1 hour.
2.    Whisk together the sugar and egg yolks (but do not beat until white).
3.    Pour the vanilla-infused milk over the sugar/yolk mixture. Mix well.
4.    Wipe with a very wet cloth and then cover your baking mold (whatever shape is going to fit on the inside of your Yule log/cake) with parchment paper. Pour the cream into the mold and bake at 210°F (100°C) for about 1 hour or until firm on the edges and slightly wobbly in the center.
Tartelette says: You can bake it without a water bath since it is going to go inside the log (the aesthetics of it won’t matter as much since it will be covered with other things)….BUT I would recommend a water bath for the following reasons:
– you will get a much nicer mouth feel when it is done
– you will be able to control its baking point and desired consistency much better
– it bakes for such a long time that I fear it will get overdone without a water bath
Now…since it is baked in a pan and it is sometimes difficult to find another large pan to set it in for a water bath, even a small amount of water in your water bath will help the heat be distributed evenly in the baking process. Even as little as 1 inch will help.
5.    Let cool and put in the freezer for at least 1 hour to firm up and facilitate the final assembly.

I again added 1/2 tsp. of orange extract. Lovely. Mine cooked as per the directions and tastes very good.

Element #6 Dark Chocolate Icing
Preparation time: 25 minutes (10mn if you don’t count softening the gelatin)
Equipment: Small bowl, small saucepan
Note: Because the icing gelifies quickly, you should make it at the last minute.
For other gelatin equivalencies or gelatin to agar-agar equivalencies, look at the notes for the mousse component.
Ingredients:
4g / ½ Tbsp powdered gelatin or 2 sheets gelatin
¼ cup (60g) heavy cream (35 % fat content)
2.1 oz (5 Tbsp / 60g) granulated sugar
¼ cup (50g) water
1/3 cup (30g) unsweetened cocoa powder
1.    Soften the gelatin in cold water for 15 minutes.
2.    Boil the rest of the ingredients and cook an additional 3 minutes after boiling.
3.    Add gelatin to the chocolate mixture. Mix well.
4.    Let cool while checking the texture regularly. As soon as the mixture is smooth and coats a spoon well (it is starting to gelify), use immediately.

This is a great icing recipe. Changed nothing but did make 1.5 times the quantity specified. Had leftovers:)

How To Assemble your French Yule Log
Depending on whether your mold is going to hold the assembly upside down until you unmold it or right side up, this order will be different.
THIS IS FOR UNMOLDING FROM UPSIDE DOWN TO RIGHT SIDE UP.
You will want to tap your mold gently on the countertop after each time you pipe mousse in to get rid of any air bubbles.

1)    Line your mold or pan, whatever its shape, with rhodoid (clear hard plastic, I usually use transparencies cut to the desired shape, it’s easier to find than cellulose acetate which is what rhodoid translates to in English) OR plastic film. Rhodoid will give you a smoother shape but you may have a hard time using it depending on the kind of mold you’re using.
You have two choices for Step 2, you can either have Dacquoise on the top and bottom of your log as in version A or you can have Dacquoise simply on the bottom of your log as in version B:
2A)  Cut the Dacquoise into a shape fitting your mold and set it in there. If you are using an actual Yule mold which is in the shape of a half-pipe, you want the Dacquoise to cover the entire half-pipe portion of the mold.
3A)  Pipe one third of the Mousse component on the Dacquoise.
4A)  Take the Creme Brulee Insert out of the freezer at the last minute and set on top of the mousse. Press down gently to slightly ensconce it in the mousse.
5A)  Pipe second third of the Mousse component around and on top of the Creme Brulee Insert.
6A)  Cut the Praline/Crisp Insert to a size slightly smaller than your mold so that it can be surrounded by mousse. Lay it on top of the mousse you just piped into the mold.
7A)  Pipe the last third of the Mousse component on top of the Praline Insert.
8A)  Freeze for a few hours to set. Take out of the freezer.
9A)  Pipe the Ganache Insert onto the frozen mousse leaving a slight eidge so that ganache doesn’t seep out when you set the Dacquoise on top.
10A)  Close with the last strip of Dacquoise.
Freeze until the next day.
OR
2B)  Pipe one third of the Mousse component into the mold.
3B)  Take the Creme Brulee Insert out of the freezer at the last minute and set on top of the mousse. Press down gently to slightly ensconce it in the mousse.
4B)  Pipe second third of the Mousse component around and on top of the Creme Brulee Insert.
5B)  Cut the Praline/Crisp Insert to a size slightly smaller than your mold so that it can be surrounded by mousse. Lay it on top of the mousse you just piped into the mold.
6B)  Pipe the last third of the Mousse component on top of the Praline Insert.
7B)  Freeze for a few hours to set. Take out of the freezer.
8B)  Pipe the Ganache Insert onto the frozen mousse leaving a slight edge so that ganache doesn’t seep out when you set the Dacquoise on top.
9B)  Close with the Dacquoise.
Freeze until the next day.
If you are doing the assembly UPSIDE DOWN with TWO pieces of Dacquoise the order is:
1)  Dacquoise
2)  Mousse
3)  Creme Brulee Insert
4)  Mousse
5)  Praline/Crisp Insert
6)  Mousse
7)  Ganache Insert
8)  Dacquoise
If you are doing the assembly UPSIDE DOWN with ONE piece of Dacquoise on the BOTTOM ONLY the order is:
1)  Mousse
2)  Creme Brulee Insert
3)  Mousse
4)  Praline/Crisp Insert
5)  Mousse
6)  Ganache Insert
7)  Dacquoise
If you are doing the assembly RIGHT SIDE UP in a springform pan the order is:
1)  Dacquoise
2)  Ganache Insert
3)  Mousse
4)  Praline/Crisp Insert
5)  Mousse
6)  Creme Brulee Insert
7)  Mousse
8 OPTIONAL) Dacquoise
THE NEXT DAY…
Unmold the cake/log/whatever and set on a wire rack over a shallow pan.
Cover the cake with the icing.
Let set. Return to the freezer.
You may decorate your cake however you wish. The decorations can be set in the icing after it sets but before you return the cake to the freezer or you may attach them on top using extra ganache or leftover mousse, etc…
Transfer to the refrigerator no longer than ½ hour before serving as it may start to melt quickly depending on the elements you chose.

100-2845.jpg

That’s for December………..2009 will be beautiful!

Mine has dacquoise on top and bottom and one crisp insert. Overall, the almond, chocolate and orange flavors merged so well that this cake tasted absolute top rate. IN SPITE of my mistakes. This should be tried (even by the faint of heart) cause it will be delicious! A big thank you to the hosts! Wanna see more of these…….check it out here Daring Bakers Blogroll

Expenditure:

  • Confectioner’s Sugar 2 lb. ……………$2.19 from Kroger……..tons left
  • Sugar 4 lb………………………….                    $2.25 from Kroger………..yes left but we will eat it up!
  • Dark Chocolate 8 oz. (Bakers)…..    $2.50 from Kroger……..couple of oz. left
  • Heavy cream 1 Quart………………        $5.99 from Kroger …………hardly any left:(

——————————————————————————————

That’s it…………………………                                                $12.73……….ah,I know how much I spent!

Posted in - Confectioner's Sugar, -All Purpose flour, -Almonds, -Butter, -Cocoa Powder, -Corn Syrup, -Cream, -Dark Chocolate, -Milk Chocolate, -Vanilla, -White Chocolate, Cereal, Chocolate, Eggs, Gelatin, Sugar, Uncategorized | Tagged: , , | 24 Comments »

Chocolate Eclairs………….and the likes:)

Posted by vivnidhi on August 31, 2008

This month’s Daring Bakers challenge was the chocolate eclairs. Thanks to Meeta of What’s For Lunch, Honey? and Tony Tahhan of Olive Juice, who were hosting this month’s challenge.

100_2474

Mini Eclairs basking in the sun……….not for long though;)

Many many years ago, I had bought a French eclair (it looked so good) at a bakery in India…….cause I was celebrating something. It was a celebration, cause I was using my first hard-earned paycheck to pay for it. One bite into it and I was like “OK, this ain’t my typpa dessert” ………so I kept away from eclairs from  that day on until August 13th. Meeta and Tony had challenged me to make it and I had to……….. The recipe was from Chocolate Desserts by Pierre Herme .

I thought maybe the bakery in India really didn’t do a good job of making the eclair! I would certainly do better;). Ha , the innate optimism one has!! I think I did a fair job of it and I don’t think the Indian bakery I ate the eclair at……did a bad job either. Conclusion on 31st August…….its a great dessert, some people should like it……BUT “it ain’t my typpa dessert:)) ”

Anyway, it was truly a fabulous experience to learn about Pâte à Choux. As you will read ahead you will realize that I played too much!! A big thank you to the DB’s for yet another fabulous lesson:).

I prepared for the eclairs when the husband was away and the eclairs were kept ready for him when he returned:). He loved it!! My job’s done , right;). Here’s the detailed recipe with my experiences in black:).

The Recipe:

(makes 20-24 Éclairs)

Chocolate Éclairs by Pierre Hermé

Éclairs consist of 3 elements:

Pâte à Choux, also known as Choux Pastry or Cream Puff Dough
– Pastry Cream
– Chocolate glaze

• Cream Puff Dough (see below for recipe), fresh and still warm
1) Preheat your oven to 375 degrees F (190 degrees C). Divide the oven into thirds by
positioning the racks in the upper and lower half of the oven. Line two baking sheets with
waxed or parchment paper.
2) Fill a large pastry bag fitted with a 2/3 (2cm) plain tip nozzle with the warm cream puff dough.
Pipe the dough onto the baking sheets in long, 4 to 41/2 inches (about 11 cm) chubby fingers.
Leave about 2 inches (5 cm) space in between each dough strip to allow them room to puff.
The dough should give you enough to pipe 20-24 éclairs.
3) Slide both the baking sheets into the oven and bake for 7 minutes. After the 7 minutes, slip the
handle of a wooden spoon into the door to keep in ajar. When the éclairs have been in the
oven for a total of 12 minutes, rotate the sheets top to bottom and front to back. Continue
baking for a further 8 minutes or until the éclairs are puffed, golden and firm. The total baking
time should be approximately 20 minutes.
Notes:
1) The éclairs can be kept in a cool, dry place for several hours before filling.

For my first batch, I used my pastry bag without the tip. Felt that the eclairs were too fat and turned up really huge after baking. Baking times are not really perfect in this recipe, would certainly need tweaking. My fat eclairs needed a lot of time to bake otherwise they would be under baked and would deflate. I did not use the wooden spoon in the oven door method. I always baked one tray only at one time.

I also made some gougeres and for that I used a normal ziploc bag, the dough just started oozing out from all places as I was piping it.

For my last batch in which I made mini eclairs …….I used a heavy duty bag……and it worked beautifully. Who said “Third time’s the charm” ?

Ok, if anybody tries to bake these babies, heed my advice. Use a baking tray filled with water at the bottom rack to aid baking the eclairs. Begin with 400F temperature. Bake for 18 minutes. Rotate the pans and lower the temperature to 375F. Poke each eclair with a skewer for moisture to escape and bake for another 5 minutes till it is crisp and brown. Leave them in the oven only to cool with the oven door fully open. Learnt from the fabulous Vera of Baking Obsession!

Assembling the éclairs:
• Chocolate glaze (see below for recipe)
• Chocolate pastry cream (see below for recipe)
1) Slice the éclairs horizontally, using a serrated knife and a gently sawing motion. Set aside the
bottoms and place the tops on a rack over a piece of parchment paper.
2) The glaze should be barely warm to the touch (between 95 – 104 degrees F or 35 – 40
degrees C, as measured on an instant read thermometer). Spread the glaze over the tops of
the éclairs using a metal icing spatula. Allow the tops to set and in the meantime fill the
bottoms with the pastry cream.
3) Pipe or spoon the pastry cream into the bottoms of the éclairs. Make sure you fill the bottoms
with enough cream to mound above the pastry. Place the glazed tops onto the pastry cream
and wriggle gently to settle them.
Notes:
1) If you have chilled your chocolate glaze, reheat by placing it in a bowl over simmering water,
stirring it gently with a wooden spoon. Do not stir too vigorously as you do not want to create
bubbles.
2) The éclairs should be served as soon as they have been filled.

Pierre Hermé’s Cream Puff Dough
Recipe from Chocolate Desserts by Pierre Hermé
(makes 20-24 Éclairs)
• ½ cup (125g) whole milk
• ½ cup (125g) water
• 1 stick (4 ounces; 115g) unsalted butter, cut into 8 pieces
• ¼ teaspoon sugar
• ¼ teaspoon salt
• 1 cup (140g) all-purpose flour
• 5 large eggs, at room temperature
1) In a heavy bottomed medium saucepan, bring the milk, water, butter, sugar and salt to the
boil.
2) Once the mixture is at a rolling boil, add all of the flour at once, reduce the heat to medium
and start to stir the mixture vigorously with a wooden spoon. The dough comes together very
quickly. Do not worry if a slight crust forms at the bottom of the pan, it’s supposed to. You
need to carry on stirring for a further 2-3 minutes to dry the dough. After this time the dough
will be very soft and smooth.
3) Transfer the dough into a bowl of a mixer fitted with the paddle attachment, or using your
handmixer or if you still have the energy, continue by hand. Add the eggs one at a time,
beating after each egg has been added to incorporate it into the dough.
You will notice that after you have added the first egg, the dough will separate, once again do
not worry. As you keep working the dough, it will come back all together again by the time you
have added the third egg. In the end the dough should be thick and shiny and when lifted it
should fall back into the bowl in a ribbon.
4) The dough should be still warm. It is now ready to be used for the éclairs as directed above.
Notes:
1) Once the dough is made you need to shape it immediately.
2) You can pipe the dough and the freeze it. Simply pipe the dough onto parchment-lined baking
sheets and slide the sheets into the freezer. Once the dough is completely frozen, transfer the
piped shapes into freezer bags. They can be kept in the freezer for up to a month.

This was certainly eggy in taste. Since I did not have any idea about the choux pastry, I stuck with the recipe and used as specified. With chocolate pastry cream and chocolate glaze , one doesn’t notice the egg one bit though!

Chocolate Pastry Cream
Recipe from Chocolate Desserts by PierreHermé
• 2 cups (500g) whole milk
• 4 large egg yolks
• 6 tbsp (75g) sugar
• 3 tablespoons cornstarch, sifted
• 7 oz (200g) bittersweet chocolate, preferably Velrhona Guanaja, melted
• 2½ tbsp (1¼ oz: 40g) unsalted butter, at room temperature
1) In a small saucepan, bring the milk to a boil.  In the meantime, combine the yolks, sugar and cornstarch together and whisk in a heavy‐bottomed saucepan.
2) Once the milk has reached a boil, temper the yolks by whisking a couple spoonfuls of the hot milk into the yolk mixture.Continue whisking and slowly pour the rest of the milk into the tempered yolk mixture.
3) Strain the mixture back into the saucepan to remove any egg that may have scrambled.  Place the pan over medium heat and whisk vigorously (without stop) until the mixture returns to a boil. Keep whisking vigorously for 1 to 2 more minutes (still over medium heat).Stir in the melted chocolate and then remove the pan from the heat.
4) Scrape the pastry cream into a small bowl and set it in an ice‐water bath to stop the cooking process. Make sure to continue stirring the mixture at this point so that it  remains smooth.
5) Once the cream has reached a temperature of 140 F remove from the ice‐water bath and stir in the butter in three or four installments. Return the cream to the ice‐water bath to continue cooling, stirring occasionally, until it has completely cooled. The cream is now ready to use or store in the fridge.
Notes:
1) The pastry cream can be made 2‐3 days in advance and stored in the refrigerator.
2) In order to avoid a skin forming on the pastry cream, cover with plastic wrap pressed onto the cream.
3) Tempering the eggs raises the temperature of the eggs slowly so that they do not scramble.

100_2373 100_2379 100_2382

100_2383 100_2385 100_2387

100_2388

Chocolate Pastry Cream’s ready!!

This is the best! No doubt about it, if anyone wants to try the Chocolate Pastry cream for anything, this is the recipe and so easy too!! Don’t change a thing.

Chocolate Glaze
Recipe from Chocolate Desserts by Pierre Hermé
(makes 1 cup or 300g)
• 1/3 cup (80g) heavy cream
• 3½ oz (100g) bittersweet chocolate, finely chopped
• 4 tsp (20 g) unsalted butter, cut into 4 pieces, at room temperature
• 7 tbsp (110 g) Chocolate Sauce (recipe below), warm or at room temperature
1)In a small saucepan, bring the heavy cream to a boil. Remove from the heat and slowly begin to add the chocolate, stirring with a wooden spoon or spatula.
2) Stirring gently, stir in the butter, piece by piece followed by the chocolate sauce.
Notes:
1) If the chocolate glaze is too cool (i.e. not liquid enough) you may heat it briefly
 in the microwave or over a double boiler. A double boiler is basically a bowl sitting over (not touching) simmering water.
2) It is best to glaze the eclairs after the glaze is made, but if you are pressed for time, you can make the glaze a couple days ahead of time, store it in the fridge and bring it up to the proper temperature (95 to 104  F) when ready to glaze.


Chocolate Sauce
Recipe from Chocolate Desserts by Pierre Hermé
(makes 1½ cups or 525 g)
• 4½ oz (130 g) bittersweet chocolate, finely chopped
• 1 cup (250 g) water
• ½ cup (125 g) crème fraîche, or heavy cream
• 1/3 cup (70 g) sugar
1) Place all the ingredients into a heavy‐bottomed saucepan and bring to a boil, making sure to stir constantly.  Then reduce the heat  to low and continue stirring with a wooden spoon until the sauce thickens.
2) It may take 10‐15 minutes for the sauce to thicken, but you will know when it is done when it coats the back of your spoon.
Notes:
1) You can make this sauce ahead of time and store it in the refrigerator for two weeks. Reheat the sauce in a microwave oven or  a double boiler before using.
2) This sauce is also great for cakes, ice-cream and tarts.

100_2369 100_2370 100_2372

The making of the chocolate sauce

I did not like the chocolate sauce much and even  the chocolate glaze was ok. Too much effort for the result. The ganache used in the filbert gateau here is a better glaze and tastes great too!

I made some gougeres too……….with the choux pastry and fine gruyere cheese. In ultimate fusion food………had the gougeres with cilantro chutney:)).

100_2397 100_2401

Individual paris brests with chopped hazelnuts……….I found these the best!

100_2412

Some Ugly ducklings here sitting on kiwi paper and sweetened creme fraiche filling……

The son had a blast assembling these!!

100_2416 100_2418

100_2421

Ultimate fusion food……..Gougères with Chutney!!

With the gougeres recipe, I did not add garlic, wanted the original cheese taste. Thankfully, I did not attempt anymore pastry types or glazes otherwise this post would be longer:)).I had coffee in mind but decided to stick with the original at the last minute. Now, you really need to thank me:) .

Expenditure:

  • Unsalted butter : $ 2.74 from Walmart…. 1 stick left
  • Semisweet Chocolate: $ 8.30 from Kroger 1 oz. left
  • Heavy cream: $ 2.50 from Kroger some left
  • Sour Cream : $ 1.19 from Kroger some left
  • Gruyere cheese: $ 4.83 200 g.  from Morgan & York very little left

Total: $ 19.76…………..somehow I make it to the amount of $ 20. The expenditure would have been less had I not made 3 attempts. Justification: I did not exceed my budget:) Hope I am better in September.

Now check out the Daring Bakers’ blogroll !

Posted in -All Purpose flour, -Butter, -Cream, -Hazelnuts, Chocolate, Eggs, Sugar | Tagged: , , | 13 Comments »

I am a Daring Baker too!

Posted by vivnidhi on July 30, 2008

This post is long.

c100_2114

Filbert Gateau with Praline Buttercream

You bet, I am a Daring Baker too! Otherwise why would anybody with such limited skills and equipment attempt this…………:). I am so glad I am a part of Daring Bakers now……..because I learnt a lot from one challenge itself and learning  is a lot of fun. So, this month’s challenge was hosted by  Chris of Melle Cotte and the challenge was : Filbert Gateau with Praline Buttercream. I was really glad that my first challenge turned out to be a cake. I love cakes, so I was really excited about making it.

Even though a little expensive, I wanted to try the recipe as is with hazelnuts. The husband remarked ” Didn’t we stop buying mixed nuts cause they have hazelnuts in them” Yeah! but nutella has plenty of hazelnuts. I had made my mind so we bought a pound:). Thankfully, the husband had dark rum and orange Curacao in his bar otherwise that would have added to my expenditure too……

Filbert Gateau with Praline Buttercream
From Great Cakes by Carol Walter

  1. 1 Hazelnut Filbert Genoise
  2. 1 recipe sugar syrup, flavored with dark rum
  3. 1 recipe Praline Buttercream, flavored with dark rum and Orange Curacao
  4. ½ cup heavy cream, whipped to soft peaks
  5. 1 recipe Strawberry Glaze
  6. 1 recipe Ganache Glaze, prepared just before using, flavored with Orange Curacao
  7. 3 tablespoons filberts (hazelnuts), toasted and coarsely chopped

The 1st day I prepared the sugar syrup, toasted and tried to skin the hazelnuts as much as I could and coarsely chopped the few I could. So item no. 2 & 7 were done. I toasted the hazelnuts in a preheated oven at 350 degrees F for 15 minutes. Removed and immediately put them in a wet towel and rubbed to remove as much as I could. Not a lot of success there. Earned a blister too trying to take the hazelnuts skins off. What is with cakes and my blisters?

Day 2  Tried to skin more hazelnuts and I succeeded!! Thanks to a fellow Daring Baker who wrote about boiling them with Baking soda, skinning and toasting again. That worked, Phew!! So prepared the praline. Mine got darker than it should but it was so…….. good with the buttercream. Guess the praline flavor came out well because of the darkness.  Prepared the strawberry glaze.

Day 3 : The genoise day. Everything was fine until I dropped the butter I was trying to clarify. Not a lot fell but some did. So 2 Tbsp was the clarified butter and 2 Tbsp. was ghee I had at home. The cake took longer to come off the pan but thankfully it did, without breaking. Made the buttercream. Chilled the bowl in which I made the Swiss buttercream. This is the star!! The best buttercream I have ever made. Mixed with praline, its heavenly.

Day 4 : Finally, assembled the cake. Could not slice the layers uniformly. Used floss to cut the cake.  Whipped heavy cream, prepared the ganache. And yes, I got to pipe anything seriously for the first time. Not impressive but good for me:) . All is fun, that is fun when done, right ??

Here goes the detailed recipe with my comments in black:

Filbert Genoise
Because of the amount of nuts in the recipe, this preparation is different from a classic genoise.
1 ½ cups hazelnuts, toasted/skinned
2/3 cup cake flour, unsifted
2 Tbsp. cornstarch
7 large egg yolks
1 cup sugar, divided ¼ & ¾ cups
1 tsp. vanilla extract
½ tsp. grated lemon rind
5 large egg whites
¼ cup warm, clarified butter (100 – 110 degrees)

Position rack in the lower 3rd of the oven and preheat to 350 degrees.  Grease and flour a 10” X 2” inch round cake pan.
Using a food processor, process nuts, cake flour, and cornstarch for about 30 seconds.  Then, pulse the mixture about 10 times to get a fine, powdery mixture.  You’ll know the nuts are ready when they begin to gather together around the sides of the bowl. While you want to make sure there aren’t any large pieces, don’t over-process.  Set aside.
Put the yolks in the bowl of an electric mixer, with the whisk attachment, and beat until thick and light in color, about 3-4 minutes on med-high speed. Slowly, add ¾ cup of sugar.  It is best to do so by adding a tablespoon at a time, taking about 3 minutes for this step.  When finished, the mixture should be ribbony.  Blend in the vanilla and grated lemon rind.  Remove and set aside.
Place egg whites in a large, clean bowl of the electric mixer with the whisk attachment and beat on medium speed, until soft peaks. Increase to med-high speed and slowly add the remaining ¼ cup of sugar, over 15-20 seconds or so.  Continue to beat for another ½ minute.
Add the yolk mixture to the whites and whisk for 1 minute.
Pour the warm butter in a liquid measure cup (or a spouted container). * It must be a deep bottom bowl and work must be fast.*  Put the nut meal in a mesh strainer (or use your hand – working quickly) and sprinkle it in about 2 tablespoons at a time – folding it carefully for about 40 folds.   Be sure to exclude any large chunks/pieces of nuts. Again, work quickly and carefully as to not deflate the mixture. When all but about 2 Tbsp. of nut meal remain, quickly and steadily pour the warm butter over the batter.  Then, with the remaining nut meal, fold the batter to incorporate, about 13 or so folds.
With a rubber spatula, transfer the batter into the prepared pan, smoothing the surface with the spatula or back of a spoon.  **If collected butter remains at the bottom of the bowl, do not add it to the batter!  It will impede the cake rising while baking.
Tap the pan on the counter to remove air bubbles and bake in the preheated oven for 30-35 minutes. You’ll know the cake is done when it is springy to the touch and it separates itself from the side of the pan.  Remove from oven and allow to stand for 5 minutes.  Invert onto a cake rack sprayed with nonstick coating, removing the pan.  Cool the cake completely.
*If not using the cake right away, wrap thoroughly in plastic wrap, then in a plastic bag, then in the refrigerator for up to 3 days. If freezing, wrap in foil, then the bag and use within 2-3 months.

100_2112

Genoise:Straight out of the oven: surface becomes uniform as it cools

This Recipetips link is a very good help in understanding how eggs should be beaten for the cake. It would be a good idea to use parchment paper under the cake as it was difficult to take it out. I used a 9″ pan to bake the genoise.

Sugar Syrup
Makes 1 cup, good for one 10-inch cake – split into 3 layers
1 cup water
¼ cup sugar
2 Tbsp. dark rum or orange flavored liqueur

In a small, yet heavy saucepan, bring the water and sugar to a boil and simmer for 5 minutes. Remove from heat, add the liqueur. Cool slightly before using on the cake.  *Can be made in advance.

Praline Buttercream
1 recipe Swiss Buttercream
1/3 cup praline paste
1 ½ – 2 Tbsp. Jamaican rum (optional)

Blend ½ cup buttercream into the paste, then add to the remaining buttercream.  Whip briefly on med-low speed to combine.  Blend in rum.

Swiss Buttercream
4 large. egg whites
¾ cup sugar
1 ½ cups (3 sticks) unsalted butter, slightly firm
1 ½ -2 Tbsp. Grand Marnier or liqueur of your choice
1 tsp. vanilla

Place the egg whites in a large/ bowl of a electric mixer and beat with the whisk attachment until the whites are foamy and they begin to thicken (just before the soft peak stage). Set the bowl over a saucepan filled with about 2 inches of simmering water, making sure the bowl is not touching the water. Then, whisk in the sugar by adding 1-2 tablespoon of sugar at a time over a minutes time. Continue beating 2-3 minutes or until the whites are warm (about 120 degrees) and the sugar is dissolved.  The mixture should look thick and like whipped marshmallows.
Remove from pan and with either the paddle or whisk attachment, beat the egg whites and sugar on med-high until its a thick, cool meringue – about 5-7 minutes. *Do not overbeat*. Set aside.
Place the butter in a separate clean mixing bowl and, using the paddle attachment, cream the butter at medium speed for 40-60 seconds, or until smooth and creamy. *Do not overbeat or the butter will become toooooo soft.*
On med-low speed, blend the meringue into the butter, about 1-2 Tbsp. at a time, over 1 minute.  Add the liqueur and vanilla and mix for 30-45 seconds longer, until thick and creamy.
Refrigerate 10-15 minutes before using.
Wait! My  buttercream won’t come together! Reheat the buttercream briefly over simmering water for about 5 seconds, stirring with a wooden spoon. Be careful and do not overbeat. The mixture will look broken with some liquid at the bottom of the bowl. Return the bowl to the mixer and whip on medium speed just until the cream comes back together.
Wait! My buttercream is too soft! Chill the buttercream in the refrigerator for about 10 minutes and rewhip. If that doesn’t work, cream an additional 2-4 Tbsp. of butter in a small bowl– making sure the butter is not as soft as the original amount, so make sure is cool and smooth. On low speed, quickly add the creamed  butter to the buttercream, 1 Tbsp. at a time.
Refrigerate in an airtight container for up to 5 days, or can be frozen for up to 6 months. If freezing, store in 2 16-oz. plastic containers and thaw in the refrigerator overnight or at room temperature for several hours.

It helps to have the bowl chilled in which you make the buttercream.
Praline Paste
1 cup (4 ½ oz.) Hazelnuts, toasted/skinless
2/3 cup Sugar

Line a jelly roll pan with parchment and lightly butter.
Put the sugar in a heavy 10-inch skillet.  Heat on low flame for about 10-20 min until the sugar melts around the edges. Do not stir the sugar. Swirl the pan if necessary to prevent the melted sugar from burning. Brush the sides of the pan with water to remove sugar crystals.  If the sugar in the center does not melt, stir briefly. When the sugar is completely melted and caramel in color, remove from heat. Stir in the nuts with a wooden spoon and separate the clusters. Return to low heat and stir to coat the nuts on all sides.  Cook until the mixture starts to bubble.  **Remember – extremely hot mixture.** Then onto the parchment lined sheet and spread as evenly as possible. As it cools, it will harden into brittle. Break the candied nuts into pieces and place them in the food processor.  Pulse into a medium-fine crunch or process until the brittle turns into a powder. To make paste, process for several minutes. Store in an airtight container and store in a cook dry place.  Do not refrigerate.

Praline is easy to make, as long as you are patient. It gets burnt easily, thankfully mine didn’t even though it got darker than it should. The consistency of the praline paste becomes like peanut butter when processed. This is necessary so that there are no pieces in the buttercream and it is smooth enough to pipe with.

Strawberry Glaze
Good for one 10-inch cake
2/3 cup thick strawberry preserves
1 Tbsp. water

In a small, yet heavy saucepan, bring the water and preserves to a slow boil and simmer for 2-3 minutes. If the mixture begins to stick to the bottom of the saucepan, add water as needed.
Remove from heat and, using a strainer, press the mixture through the mesh and discard any remnants. With a pastry brush, apply the glaze onto the cake while the cake is still warm.  If the glaze is too thick, thin to a preferred consistency with drops of water.

Ganache Glaze
Makes about 1 cup, enough to cover the top and sides of a 9 or 10 inch layer or tube cake
**Ganache can take on many forms.  While warm – great fudge sauce.  While cool or lukewarm – semisweet glaze. Slightly chilled – can be whipped into a filling/frosting. Cold & solid – the base of candied chocolate truffles.
6 oz. (good) semisweet or bittersweet chocolate, like Lindt
6 oz. (¾ cup heavy cream
1 Tbsp. light corn syrup
1 Tbsp. Grand Marnier, Cointreay, or dark Jamaican rum (optional)
¾ tsp. vanilla
½ – 1 tsp. hot water, if needed

Blend vanilla and liqueur/rum together and set aside.
Break the chocolate into 1-inch pieces and place in the basket of a food processor and pulse until finely chopped.  Transfer into a medium sized bowl and set aside.
Heat the cream and corn syrup in a saucepan, on low, until it reached a gentle boil.  Once to the gently boil, immediately and carefully pour over the chocolate.  Leave it alone for one minute, then slowly stir and mix the chocolate and cream together until the chocolate is melted and incorporated into the cream. Carefully blend in vanilla mixture. If the surface seems oily, add ½ – 1 tsp hot water. The glaze will thicken, but should still be pourable. If it doesn’t thicken, refrigerate for about 5 minutes, but make sure it doesn’t get too cold!

Assembling Cake

Cut a cardboard disk slightly smaller than the cake.  Divide the cake into 3 layers and place the first layer top-side down on the disk. Using a pastry brush, moisten the layer with 3-4 Tbsp. of warm sugar syrup. Measure out 1 cup of praline buttercream and set aside.
Spread the bottom layer with a ¼-inch thickness of the remaining buttercream.  Cover with ½ of the whipped cream, leaving ¼-inch border around the edge of the cake.  Place the middle layer over the first, brush with sugar syrup, spreading with buttercream. Cover with the remaining whipped cream.
Moisten the cut side of the third layer with additional sugar syrup and place cut side down on the cake.  Gently, press the sides of the cake to align the layers. Refrigerate to chill for at least 30 minutes.
Lift the cake by sliding your palm under the cardboard. Holding a serrated or very sharp night with an 8-inch blade held parallel to the sides of the cake, trim the sides so that they are perfectly straight. Cut a slight bevel at the top to help the glaze drip over the edge. Brush the top and sides of the cake with warm apricot glaze, sealing the cut areas completely.  Chill while you prepare the ganache.
Place a rack over a large shallow pan to catch the ganache drippings.  Remove the gateau from the refrigerator and put it the rack. With a metal spatula in hand, and holding the saucepan about 10 inches above the cake, pour the ganache onto the cake’s center.  Move the spatula over the top of the ganache about 4 times to get a smooth and mirror-like appearance.  The ganache should cover the top and run down the sides of the cake. When the ganache has been poured and is coating the cake, lift one side of the rack and bang it once on the counter to help spread the ganache evenly and break any air bubbles. (Work fast before setting starts.) Patch any bare spots on the sides with a smaller spatula, but do not touch the top after the “bang”.  Let the cake stand at least 15 minutes to set after glazing.
To garnish the cake, fit a 12 – 14-inch pastry bag with a #114 large leaf tip. Fill the bag with the reserved praline cream.  Stating ½ inch from the outer edge of the cake, position the pastry tube at a 90 degree angle with the top almost touching the top of the cake. Apply pressure to the pastry bag, moving it slightly toward the center of the cake.  As the buttercream flows on the cake, reverse the movement backward toward the edge of the cake and finish by pulling the bag again to the center. Stop applying pressure and press the bag downward, then quickly pull the tip up to break the flow of frosting.  Repeat, making 12 leaves evenly spaced around the surface of the cake.
Make a second row of leaves on the top of the first row, moving the pastry bag about ¾ inch closer to the center.  The leaves should overlap.  Make a 3rd row, moving closer and closer to the center. Add a 4th row if you have the room. But, leave a 2-inch space in the center for a chopped filbert garnish. Refrigerate uncovered for 3-4 hours to allow the cake to set. Remove the cake from the refrigerator at least 3 hours before serving.
Leftover cake can be covered with foil and kept in the refrigerator for up to 5 days.

100_2118 100_2117

The last layer : Thinning out in the middle:)

100_2115

One last look, not too bad, eh!

Expenditure:

  • Hazelnuts- 1 lb $6.69 from Trader Joe’s (about 1/2 a cup left)
  • Cake Flour – $3.19 from Kroger Lots left
  • Unsalted Butter-$3.09 from Kroger half a stick left
  • Semisweet Chocolate 8 oz  $3.30 from Kroger 2 oz. left
  • Heavy Cream-$1.50 from Kroger
  • Lite Corn Syrup-$1.99 from Kroger lots left

Total: 19.76……not too bad.

Before I forget , this cake is dedicated to my mother whose birthday was on  the 18th and who loves cakes flavored with Rum. It just incidentally so happened that this cake had rum in it.

Even though I didn’t like the nutty texture of the cake initially, it matured on us and we liked it more after a day. It took us 11 days to finish the cake between the 3 of us and it was great till the last day. I know, sounds weird but it took us that long to eat it. I am glad I tried it.

Check out Daring Bakers’ blogroll for much more beautiful pictures and cakes.

Posted in -Butter, -Cake Flour, -Cream, -Hazelnuts, -Strawberry, Alcohol, Chocolate, Daring Bakers, Eggs | Tagged: , , , | 27 Comments »

Masala Coffee Cake

Posted by vivnidhi on April 25, 2008

100_1569

Masala Coffee Cake

Flour, Eggs, Sugar and Spice……….a tasty cake that’s low on cholesterol too………..isn’t that nice.

Ok, lame attempt at rhyming. I baked a cake that can be called as my recipe for the first time. I have baked several cakes following other recipes ( and following them to a ‘T’) but this time, I tried to bake a cake as I please……………and succeeded:).   Hurray  !! Ok, let me not brag too much………..I admit the idea was my Mom’s but …………..Mummy had baked a cake with strong clove flavor which was in turn inspired by masala coffee. To me, Mummy’s masala coffee was a revelation too :))

I made a smaller cake (I was experimenting;), not sure, it would turn out this good! )

The recipe: Ideal for 9″ round pan or even a 9″x 5″ loaf pan

  • cloves ground 1 Tbsp/ 10 cloves of cloves ground fine
  • nutmeg  ground 1/2 Tbsp.
  • ginger ground 1 tsp./fresh grated ginger 1/2 tsp.
  • instant coffee 2 Tbsp.
  • sugar 6 Tbsp.
  • milk 1 Tbsp.
  • water 1 Tbsp.
  • egg whites 4
  • margarine/ butter 1/3 cup
  • sugar 2/3 cup
  • vanilla extract 1/2 tsp.
  • all purpose flour 2/3 cup
  • whole wheat flour 1/3 cup
  • baking powder 1 Tbsp.
  • baking soda 1/2 tsp.
  • cashews, raisins and chocolate chips for garnish

100_1557

Instant coffee, ground nutmeg, ground ginger and cloves ready to be ground in my shining mortar and pestle

Preheat the oven to 325 degrees Fahrenheit. Prepare the pan by greasing the pan and coating it with flour.

Mix the cloves, nutmeg and ginger with water and heat in the microwave. Add milk, sugar and coffee to the hot spices. I whipped the coffee really well to make it quite foamy. It changed its color from very dark brown to very pale brown. I even earned myself a blister in trying too hard:).

100_1558

Spice mix with water and coffee

100_1565

Coffee well beaten up!!

Beat the egg whites till soft peaks form. Set it aside. Beat margarine and sugar well. Add vanilla extract and beat again. In a large bowl, mix the flours, baking powder and baking soda. To the flour mixture, add the beaten margarine, sugar mix. Next, fold in the egg whites and the beaten coffee. Pour into prepared pan and bake for 22-25 minutes.One could add the dry fruits in this batter as well, but I added the garnish after the cake was kept in the oven for 20 minutes.

100_1568

Here’s my cake batter………..

And, voila……….spicy masala coffee cake is ready!!

100_1569

…………And here’s my delicious masala coffee cake……….Enjoy!!

This is my entry to Sunita’s Think spice…Think cloves event hosted by  Canela & Comino ……….author of wonderful Peruvian food blog.

Posted in -All Purpose flour, -Cashews, -cloves, -Ginger, -Nutmeg, -Raisins, -Whole wheat flour, Chocolate, Coffee, Eggs, Flours, Nuts, Spices, Sweets | Tagged: , | 9 Comments »

Choco-Makhana for Jihva for Chocolate

Posted by vivnidhi on January 4, 2008

100_1200

Choco-Makhana

I was determined that I will not participate in jihva this time around. No more indulging in sweets….and that too just because I want to blog about it. Yes, I can’t come up with a recipe with chocolate that does not have sugar in it. But blogging is too tempting……..wonder what the motivation is …….No, my idea is not to impress and wow. I just want to participate. It just tingles the creative nerve and forces me to think out of the box. That’s where all the satisfaction comes from. So, here I am, finally with a recipe for Jihva for Chocolate hosted by Deepz. Jihva for ingredients was started by Indira of Mahanandi fame and since I am a big fan of hers, that is another reason to participate;).

Makhanas are a big favorite of mine. Specially since my Mother in Law brought some really huge, puffed up ones from India. You can get them in Indian grocery stores here in the US but the ones from India are really bigger and without blemish. Makhana/Phool Makhana /(Euryale ferox)/Gordon nut is relished in Bihar and also in Uttar Pradesh. I always remember my Mother getting these packed from her mother’s place to enjoy year round. Some really informative sites on makhanas is nifindia.org and makhanawet.com. After reading these, did I realize what a difficult job it is to get makhanas on our plate and so the high price is justified.

100_1199

Makhanas

So, let me tell you of  this heavenly choco-makhana recipe I came up with which needs 2-3 basic ingredients and 10 minutes maximum to make. My favorite baking chocolate is Ghiradelli semisweet chocolate baking bar. It really is smooth and rich. If one really is indulging, ghiradelli is quite a favorite. Please do not use chocolate morsels for this as they do melt well because of lesser fat content.

The Recipe:

  • Makhana 1 cup
  • Baking Chocolate 1 oz.
  • Golden raisins 1/4 cup

Makhanas need to be made crisp. The traditional method is to fry it in pure ghee or stir fry in a little ghee. I have found that microwaving it makes it quite crisp without any added fat. I like to microwave it 1 minute at a time and then check. Wouldn’t want them burnt in any way. These choco-makhanas would taste good only if the makhanas are quite crisp.

Spread a parchment paper sheet or even aluminum foil works fine for this on a baking sheet.

Melt the chocolate squares in a microwave proof bowl. I do it 30 seconds at a time and then stir cause it melts quite quickly.  That’s it, we are done:). Add the makhanas to the melted chocolate, mix well and spread on the prepared baking sheet. Try to separate the makhanas after they get coated well with the chocolate. I like to clean the melted chocolate with raisins and spread it as well in the plate. Leave them for an hour or so and then choco-makhanas can be scraped off and filled in an airtight container. This way, these should stay crisp for at least a week. Makes a great gift as well. The picture does not do justice but the taste is superb!

100_1200

Enjoy: Choco-Makhana

Posted in -Raisins, Chocolate, Lotus seeds | Tagged: , , | 6 Comments »